How to Create a Website using Divi in 10 Minutes (or less)
Posted on
July 23, 2021
by

in
Web Development
Are you looking to create a WordPress Website for your business?
Do you think you need a separate WordPress theme?
And then another website builder plugin to build the website?
Well, we don’t think so!
How about using a WordPress theme that also has its own website builder along with many other features?
Yes, that’s Divi for you.
A WordPress theme that comes with its own visual website builder. Sounds interesting, right?
To know more about this powerful theme and how to create websites with it, in this article, we’ll look at,
However, if you really want to start with creating websites using Divi, here is how you can do that,
Divi is one of the most widely used WordPress Themes, that also provides services to be an amazing Website builder for beginners. It has a powerful visual editor that replaces the traditional WordPress editor to build websites.

In short, Divi is a powerhouse that seamlessly blends the traditional theme functionalities with a powerful drag-and-drop visual builder.
We will create a website using the Divi Theme in just three steps,
Before we get into the Divi theme and start creating our WordPress websites, we first need to launch our WordPress website.
And we can easily do that by following these two steps,
We believe speed is crucial for all kinds of websites. And that is why we have chosen WebSpaceKit as the hosting provider to get Hosting and Domain for the website.
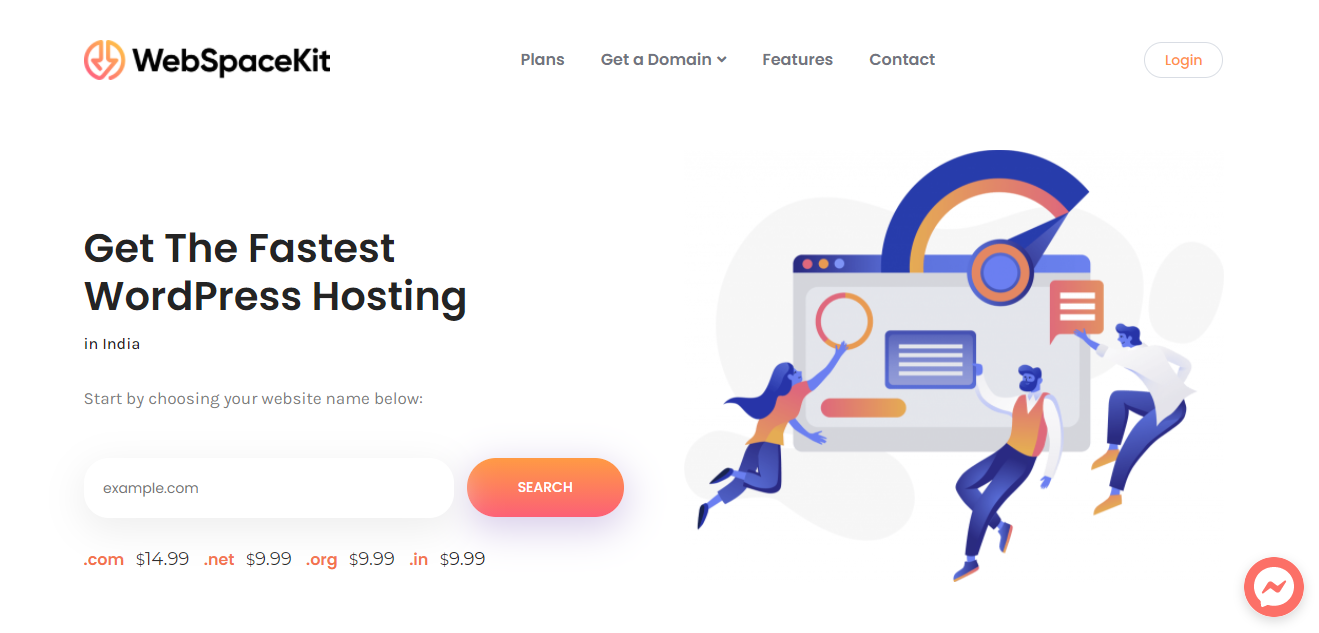
WebSpaceKit is one of the fastest WordPress hosting providers in India providing affordable hosting plans that rightly fit the budget. To be specific, WebSpaceKit provides four different hosting plans, namely Starter, Pro, Business, and Geek, starting at ₹199/month.
So, let’s first go to WebSpaceKit and choose the hosting plan.
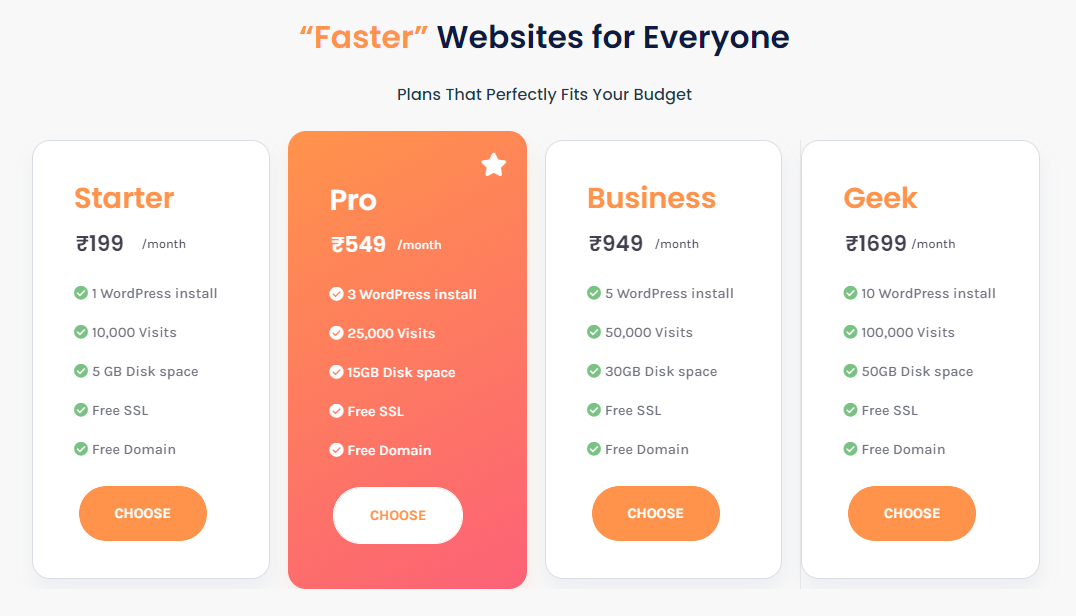
With 5 GB disk space and 1 WordPress install, the tarter plan is ideal for beginners to start with website creation. So we are going with the Starter plan.
You can select the hosting plan of your choice and click Choose to proceed further.
On the next page, we will have the option to either,
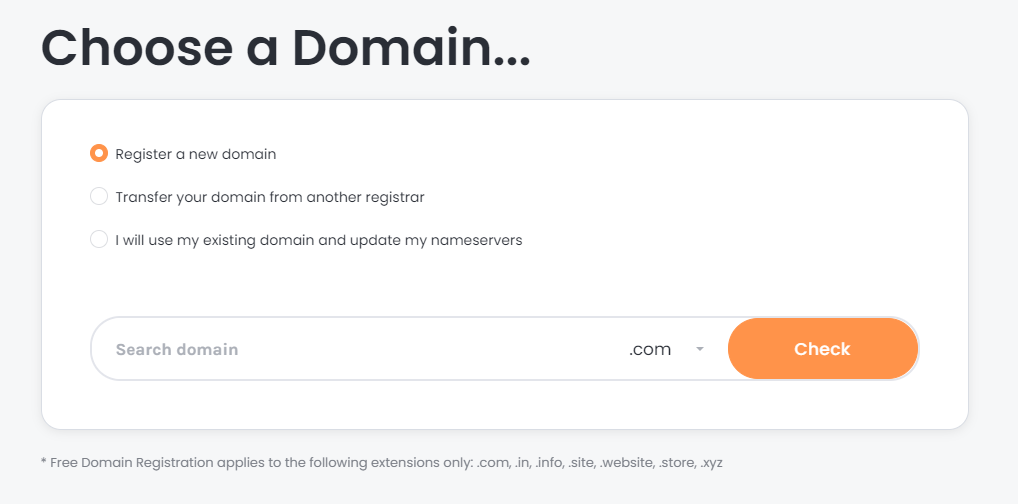
As we are going to register a new domain, enter the domain name and click Check.
This will check whether the entered domain name is available or not.

Luckily, the domain name we entered, ‘webinvents.com’ is available for grabs.
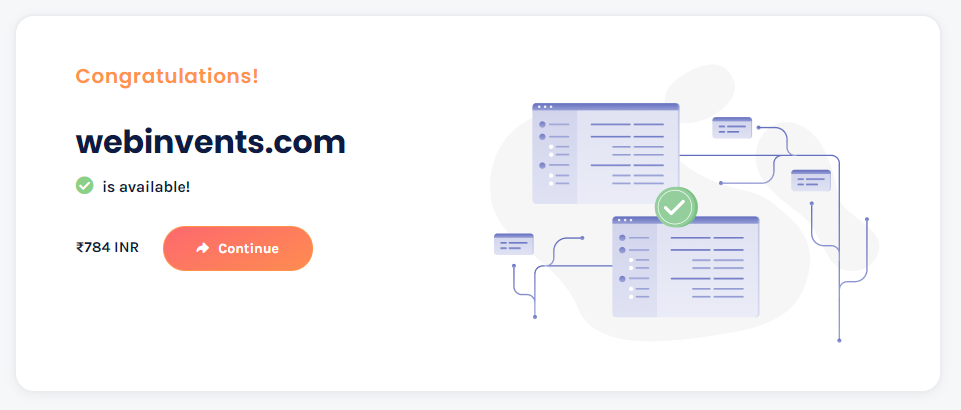
If the domain name you entered is available, click Continue to proceed to the cart.
Now we need to choose the Billing period that determines how long you wish to subscribe to the hosting plan, either 12 Months or 24 Months or 36 Months.
You can choose one of the three plans and click Continue to proceed further.

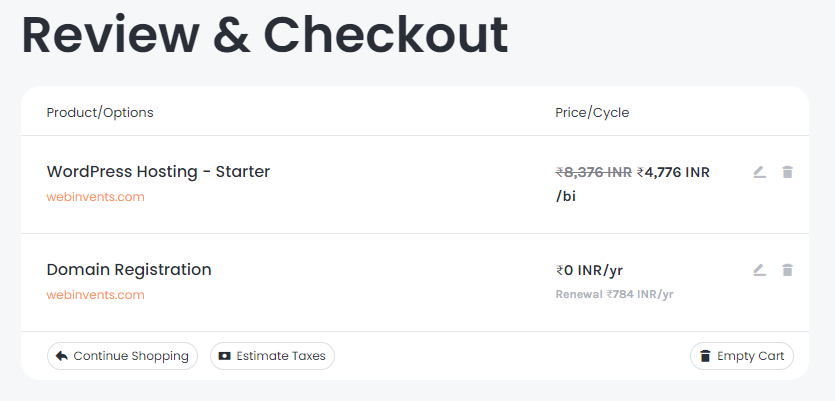
Once you have chosen the billing cycle of the hosting plan, it’s time to review the hosting and domain before purchase.
Check once whether the domain name is entered correctly, and whether the right hosting plan is chosen.
After reviewing the Hosting and Domain in the cart, it’s time to create a new WebSpaceKit account.
To create an account, first, scroll down and enter the Billing Details including Personal information and Billing Address.
After entering the billing details, scroll down to choose the Payment method and also enter the Payment details.
After entering the payment details, click Order Now to complete the purchase. By doing so, we are well on our way to create a website using Divi.
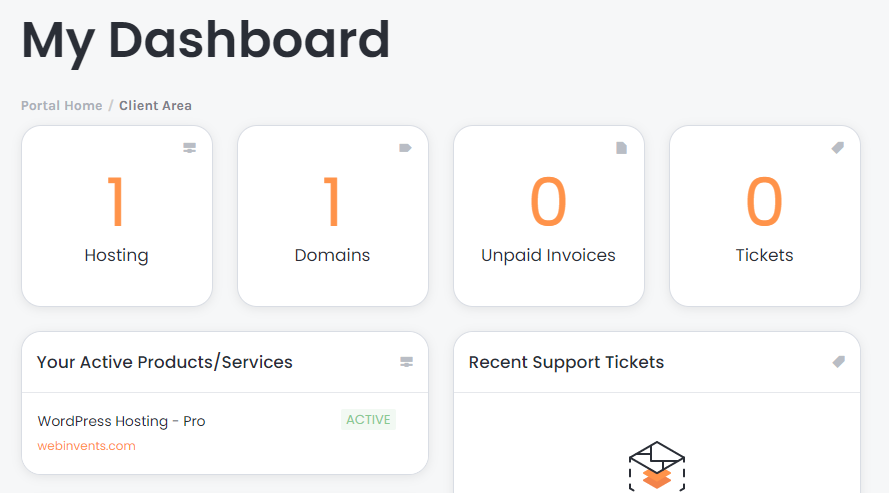
Once the order is confirmed, click Continue To Client Area.
Yay! We have now successfully purchased Domain and Hosting to create a website using Divi.
And with WebSpaceKit, WordPress will be automatically installed, as you can see the Active status in the dashboard.
Now the website will be live for everyone on the Internet.
So, let’s see how it looks, shall we?
To check it, let’s enter our website address in the search bar to access the website.
There we have it! An empty website with the domain name we have chosen.
We have now successfully launched our WordPress website. Now, let’s transform this empty website into a visually appealing website using Divi.
In this step, we will activate the Divi theme on the website we just launched. We’ll do that in four steps,
Be it Divi or setting up anything on the website, we first need to log in to our WordPress website.
To log in and access the WordPress dashboard, include ‘/login’ at the end of the website address, like ‘webinvents.com/login.’
This will open the WordPress login page.
Enter the Username and Password to access the WordPress dashboard.
After successfully entering the WordPress dashboard that serves as a centre for managing and designing everything about the website,
Now it’s time to get the Divi theme on board.
To get the Divi Theme, click here.
This will open the Elegant Themes website from where we will download the Divi theme.
Elegant Themes is a popular Themes marketplace that holds key to several popular themes including Divi. So, one needs to purchase the Elegant Themes subscription to access Divi, Monarch and many such popular themes and plugins.
So, click on Pricing to purchase the Elegant Themes subscription.
This will open up the two Elegant Themes plans available for purchase.
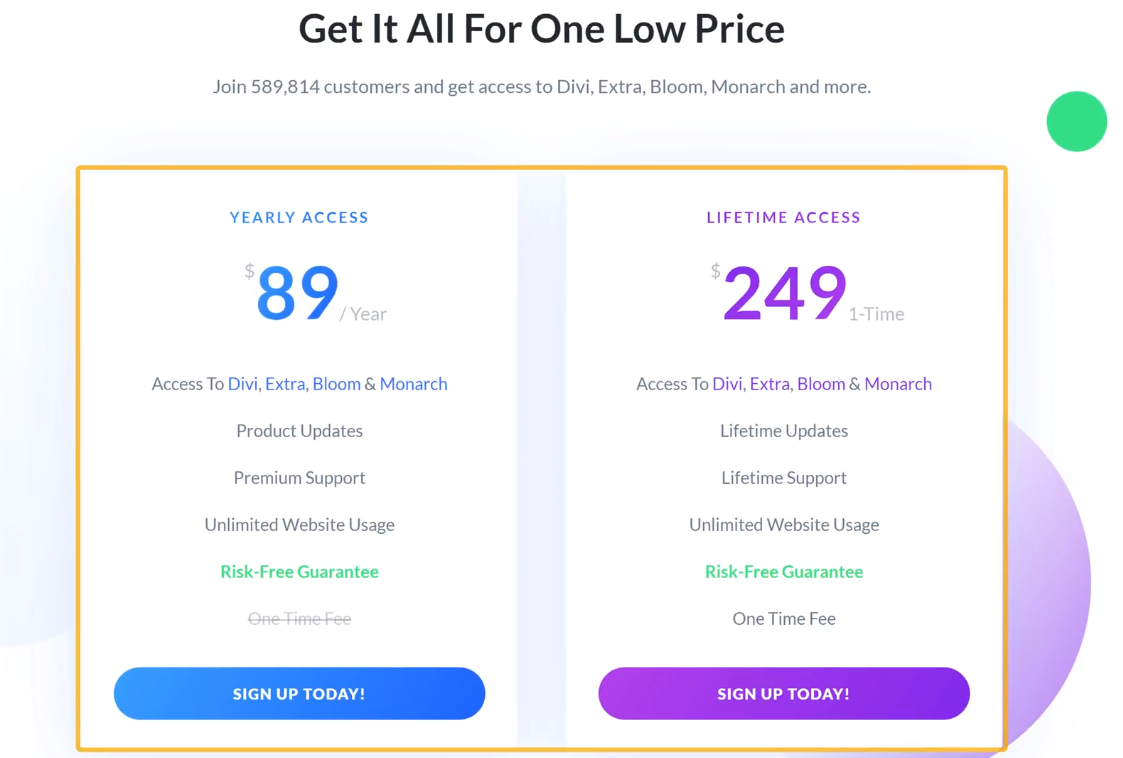
You can purchase the Elegant Themes subscription in two ways, either a yearly subscription that costs $89/year or a one-time payment for lifetime access at $249.
If you are planning long term, then it is advised to prefer a one-time purchase. Because that way you don’t have to renew the subscription every year.
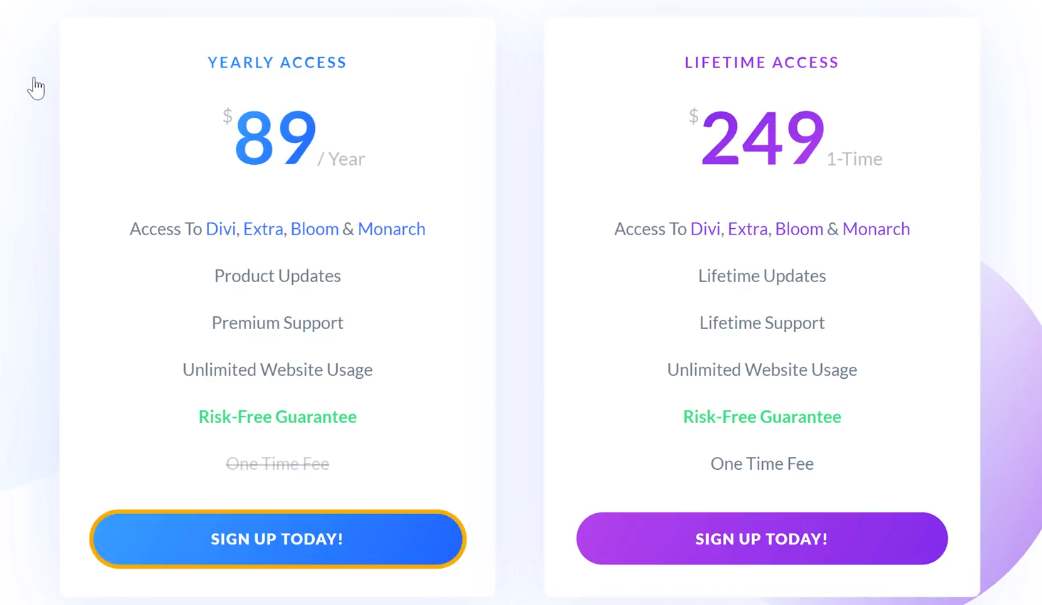
However, as we are just starting, we will go ahead and purchase a yearly subscription for Elegant Themes at $89/year.
Click Sign Up Today to select the plan.
Now create your own Elegant Themes account to install the Divi theme.
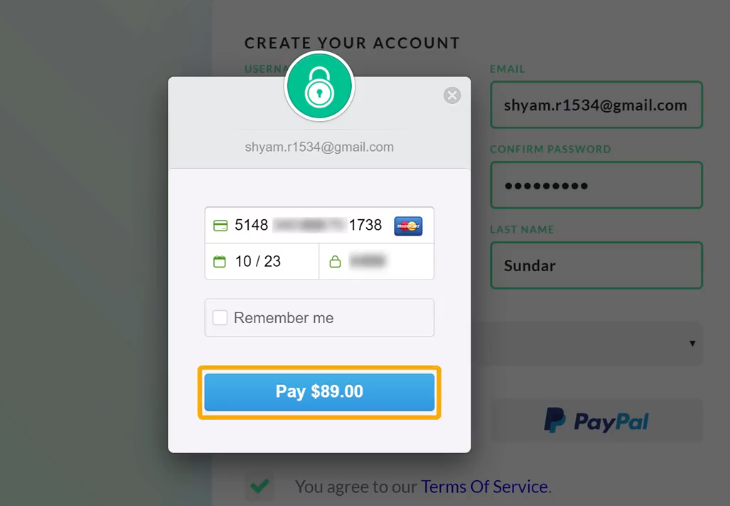
Enter the account details including a Username and Password.
Then click Complete Registration.
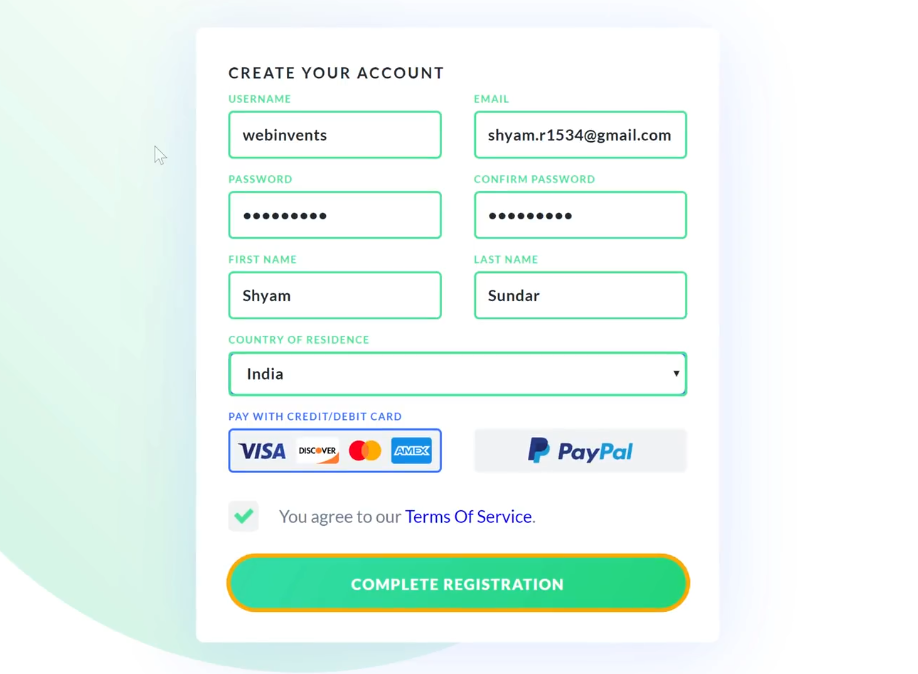
Then Enter the Card details to complete the purchase. Click on Pay $89 to complete the payment.
With that, we have successfully purchased the Elegant Themes subscription required to access the Divi theme.
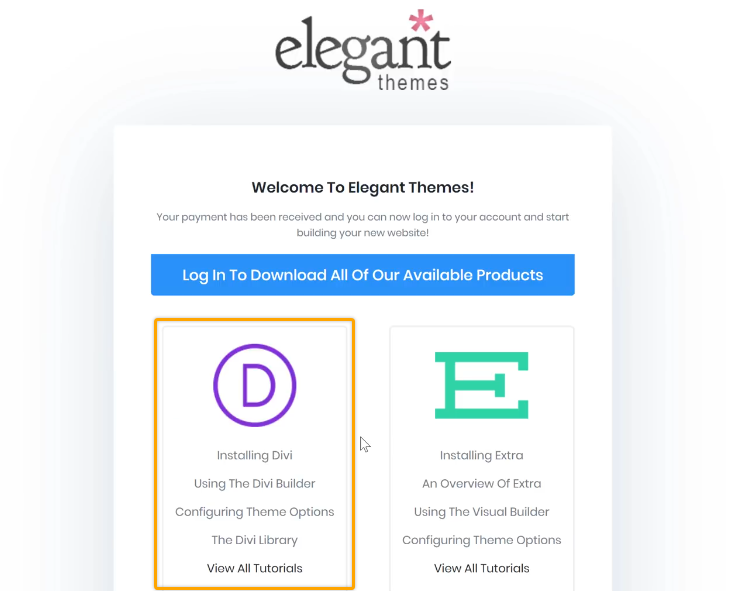
Now, to download the Divi theme and access all the other products that come with the Elegant Themes subscription, click Log In To Download All of Our Available Products.
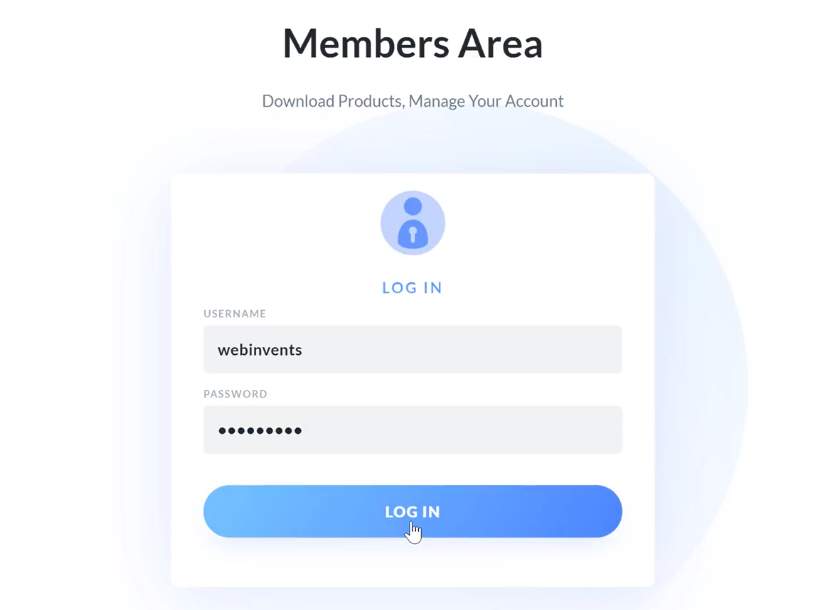
This will open the login page for Elegant Themes. Enter the Username and Password and click Log In.
Now you will find the Divi theme that’s available for download.
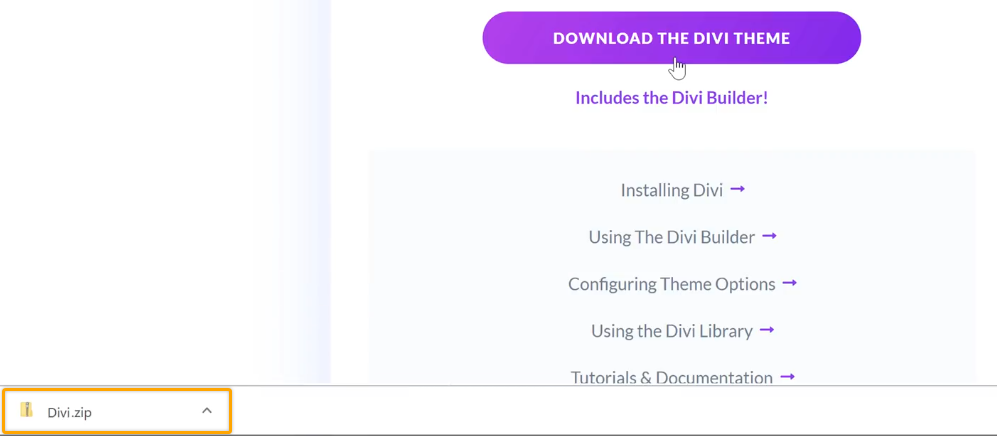
Click Download the Divi Theme.
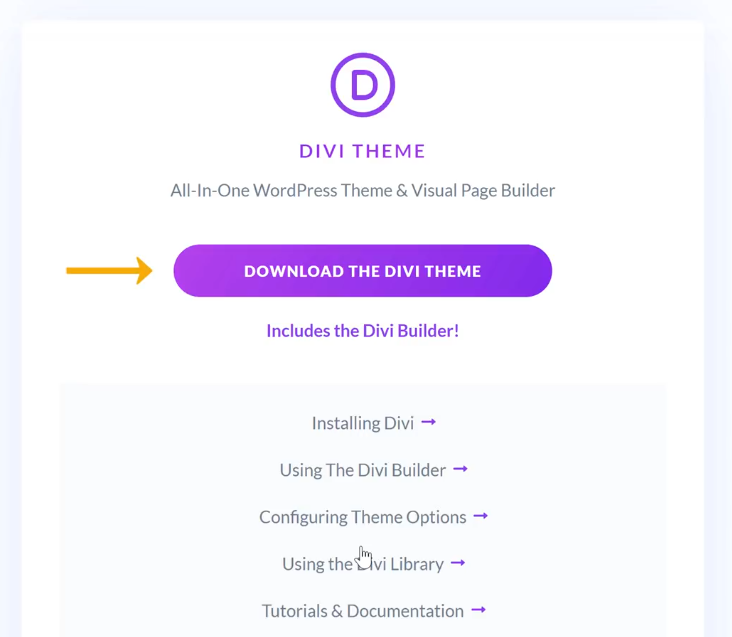
Once you download, a zip file containing the Divi theme will be downloaded to the system.
We have successfully downloaded the Divi theme. But we still need to install and activate it on our WordPress website.
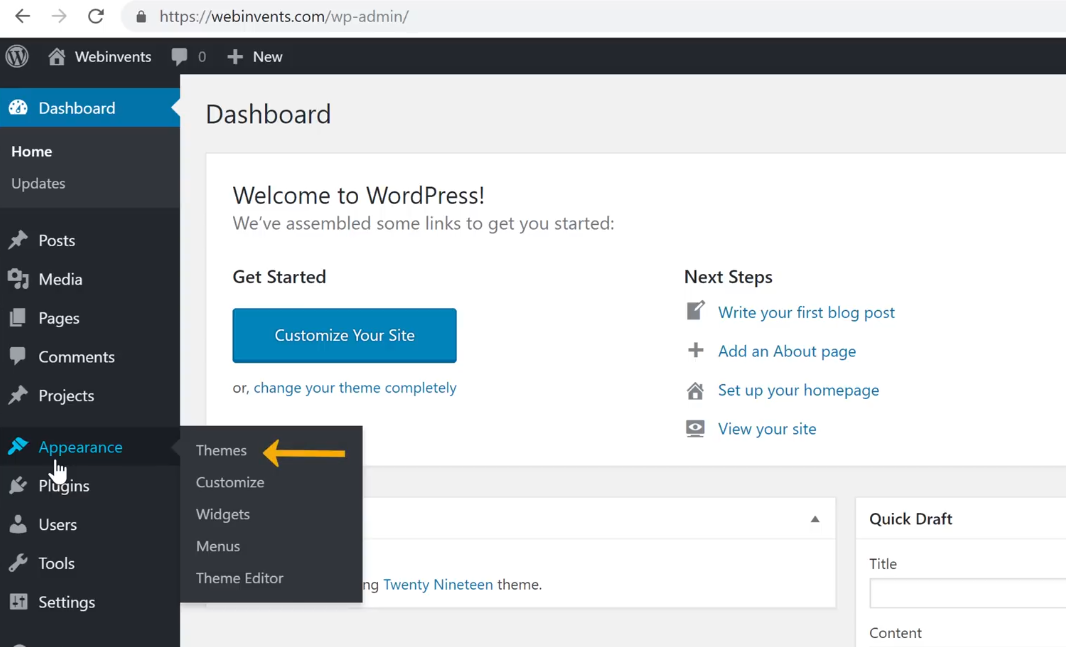
To Install the Divi theme, go to the WordPress dashboard.
Select Appearance and click Themes.
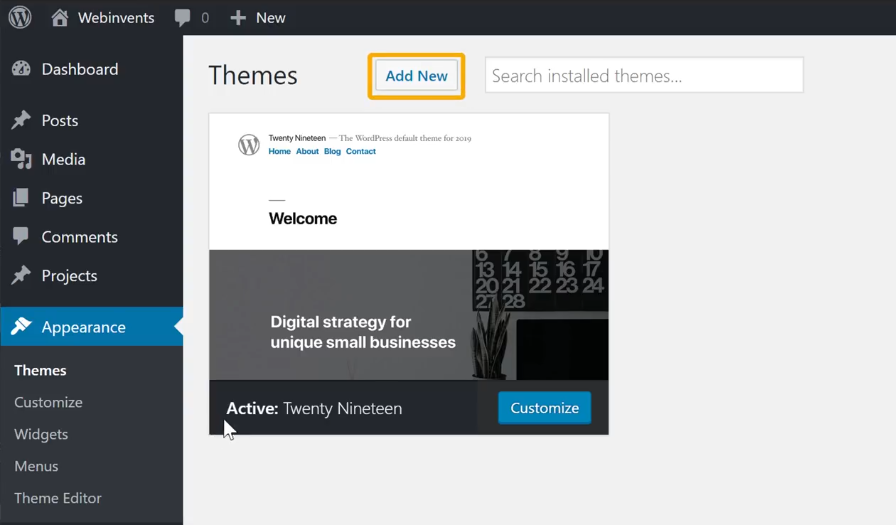
In the Themes section, click Add New.
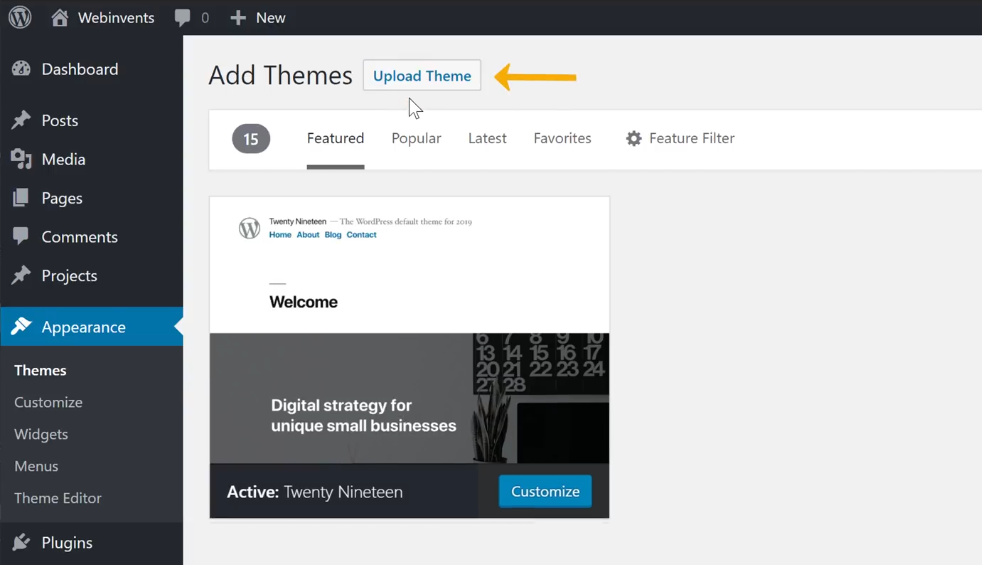
As we already have the Divi theme downloaded on the system, we just need to upload it to our website.
So, click Upload Theme in the Add Themes section.
To upload the theme, click Choose File. And then select the downloaded file on the system.
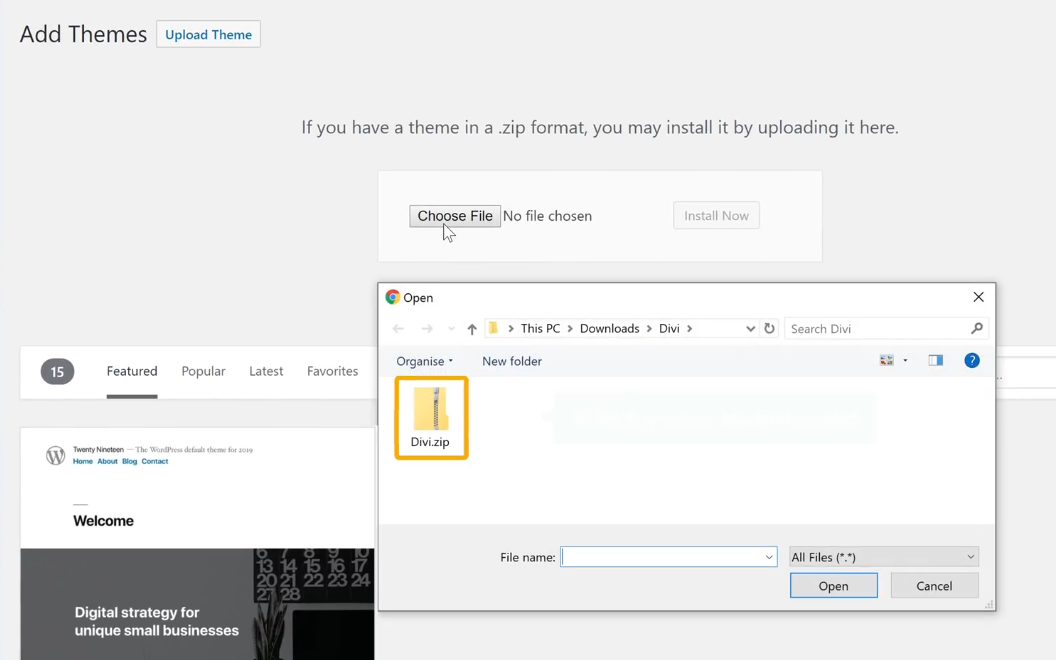
Now we have successfully uploaded the theme onto the website.
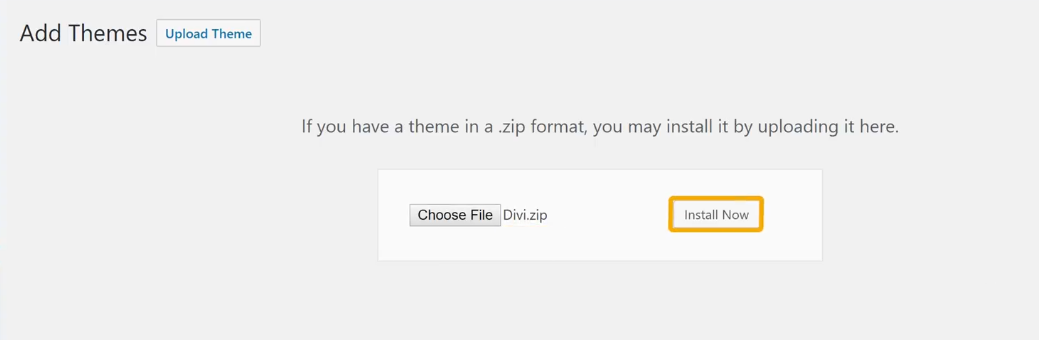
To install the uploaded Divi theme, click Install Now.
And once the theme is installed successfully, click Activate.
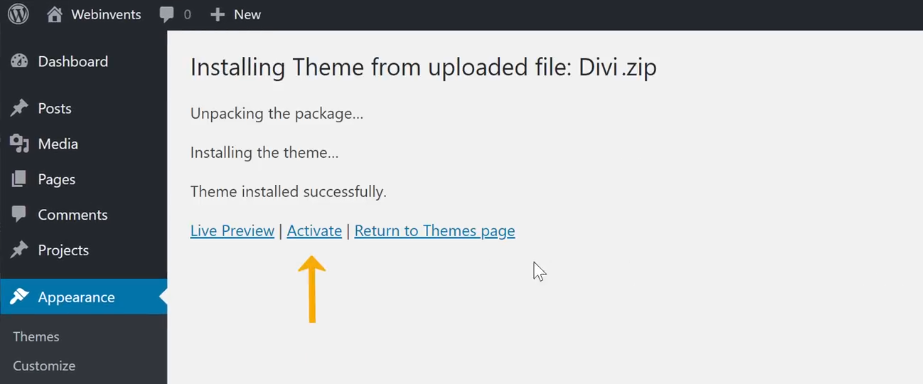
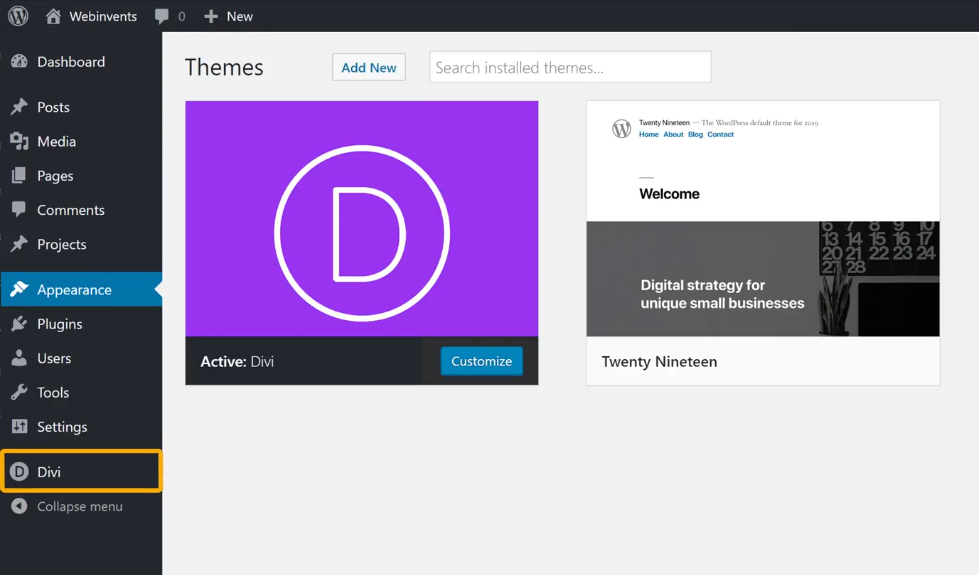
Now the Divi Theme will be Active on the Themes section of the WordPress website.
This means that the Divi theme will be applied to our website.
Let’s check that, shall we?
Go to the website and refresh it to see the changes, if any.
And as you can see, the Divi theme has been applied and is active on the website.
Though the Divi theme is active, we still need to activate it to explore all of its features.
To make use of Divi’s truest potential, we need to activate the theme.
To activate the Divi theme, select Divi from the left side menu of the WordPress dashboard.
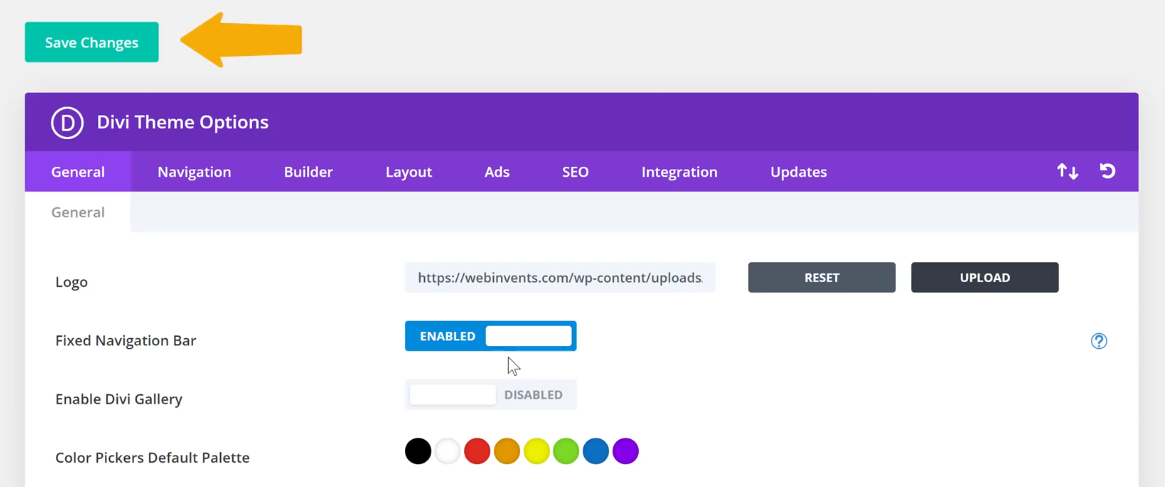
In the Divi Theme Options, select Updates.
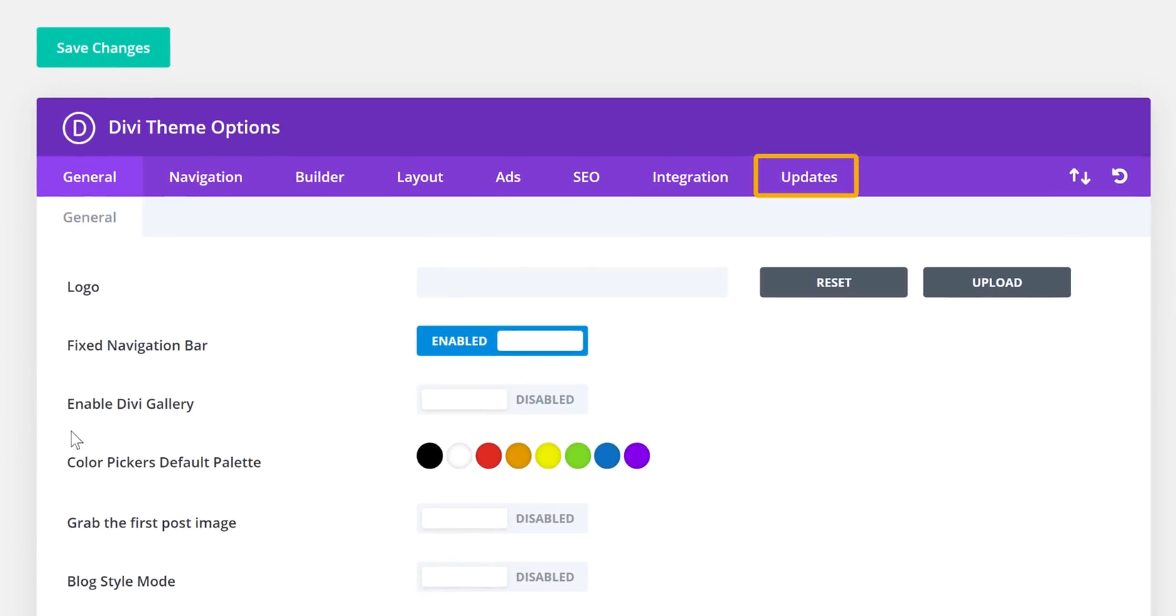
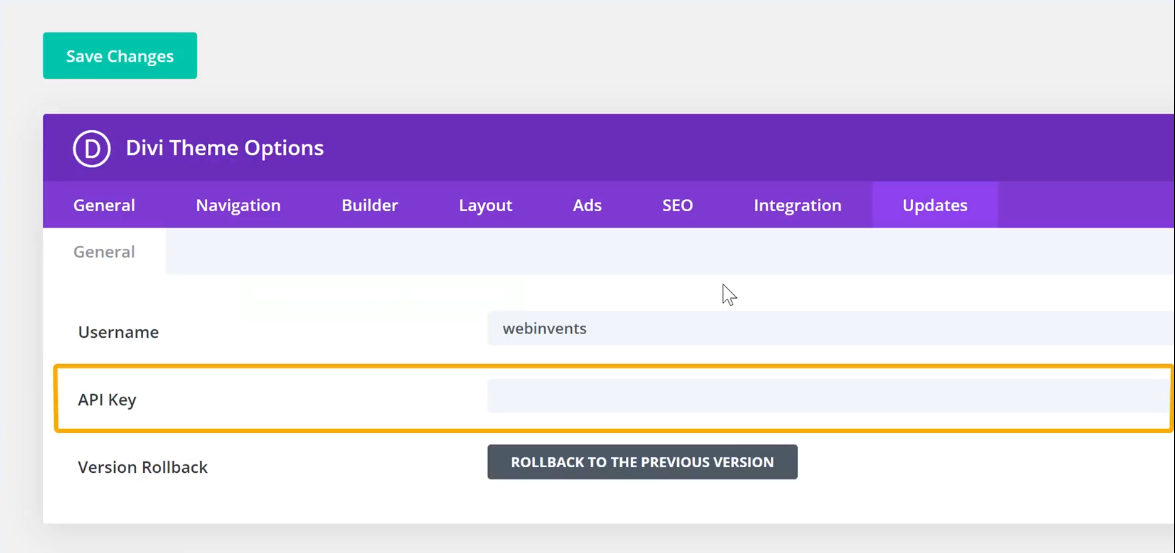
In the Updates section, we need to enter the Username and API key to activate the Divi Theme.
An API key is a unique key that is used to authenticate a user that has made a purchase.
To obtain the API key, go back to the Elegant Themes Members Area and click My Account.
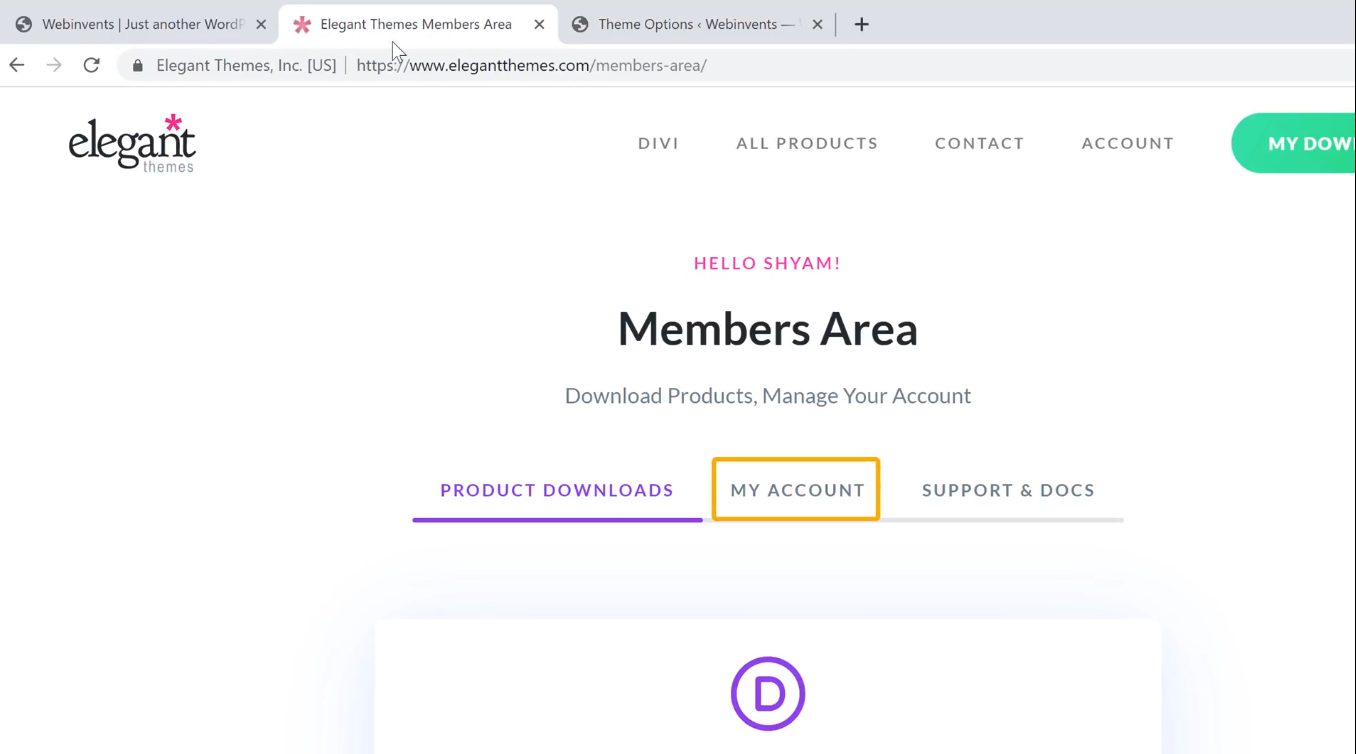
In My Account, you can find a section named API Keys.

API Keys section contains the API key required to activate the Divi theme.
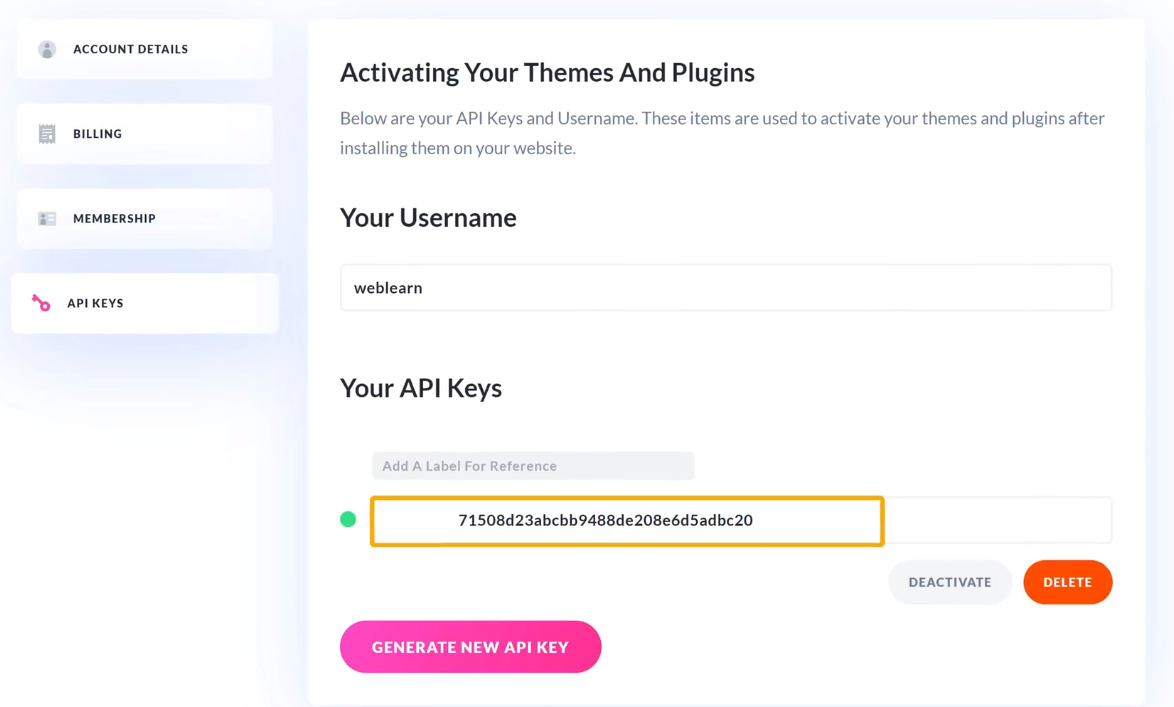
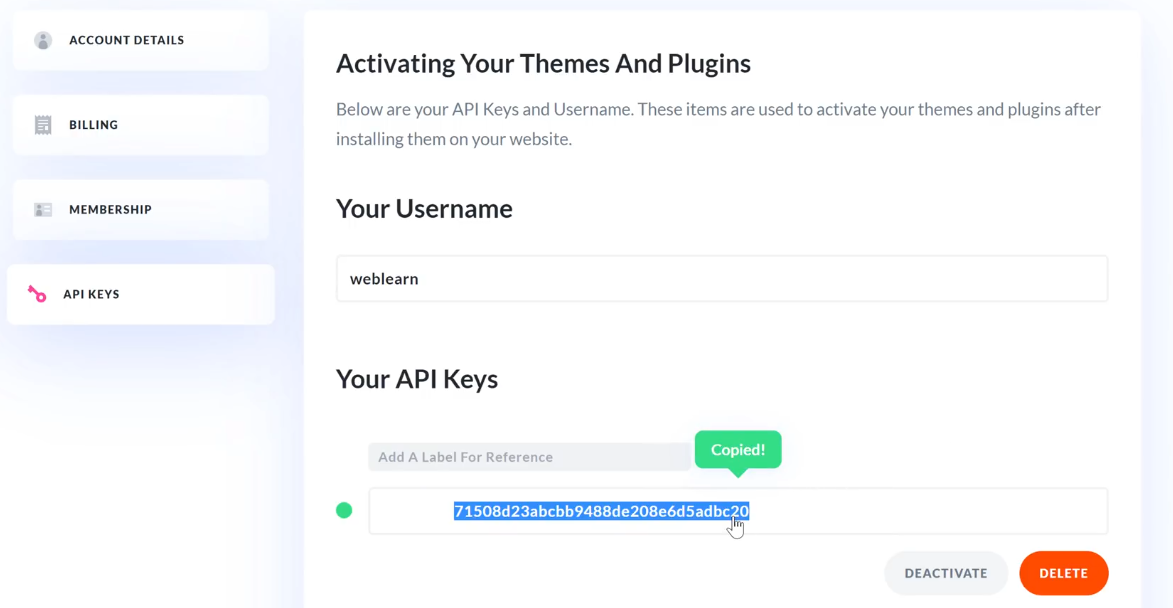
So, copy the API key displayed in the Your API Keys section.
Now Paste the copied API key in the API key box of the Divi Theme Options.
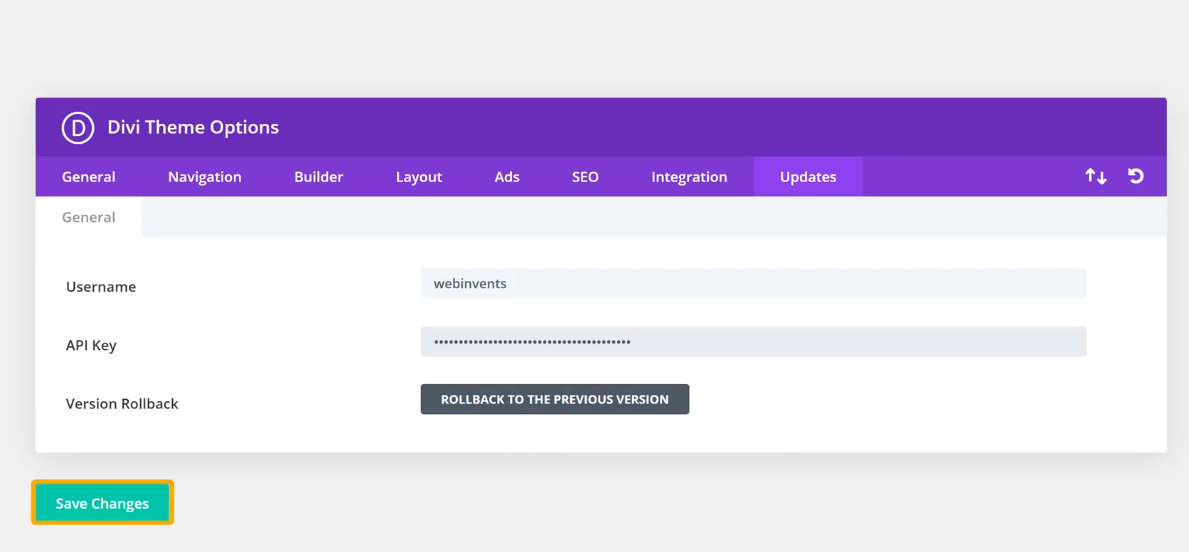
Once you click on Save Changes, the Divi theme will be activated.
With that, we have successfully set up the Divi theme on the WordPress website.
Now that we have got the Divi theme activated on the website, it’s time to start building our website using the powerful theme and visual builder.
The Divi theme provides several opportunities to build the dream website. So it’s time we get started.
Let’s build our website in four steps,
The homepage is the first thing that any visitor who visits the website notices. In fact, the homepage is where the visitors will land when they access the website.
So it’s time we changed the not-so-appealing default homepage that comes with the Theme.
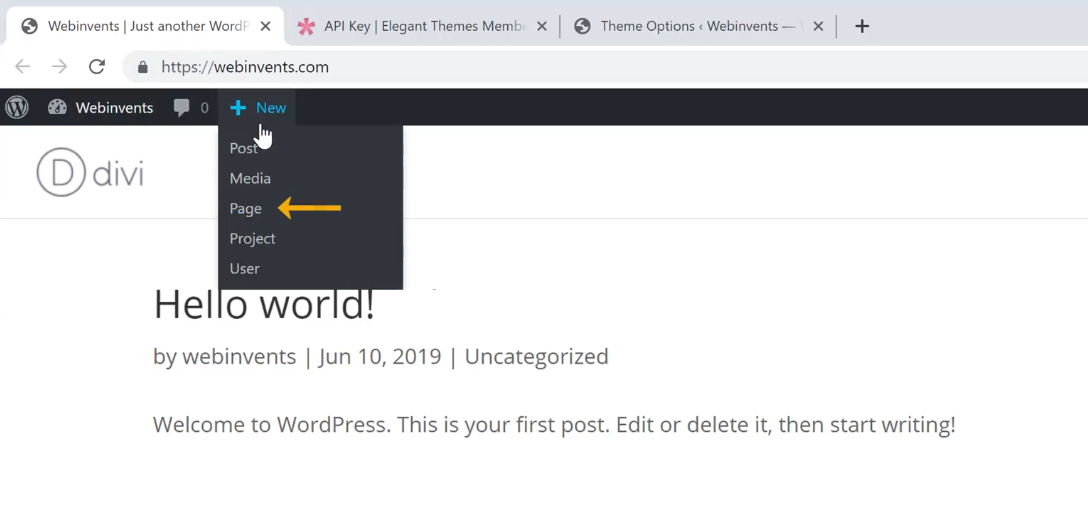
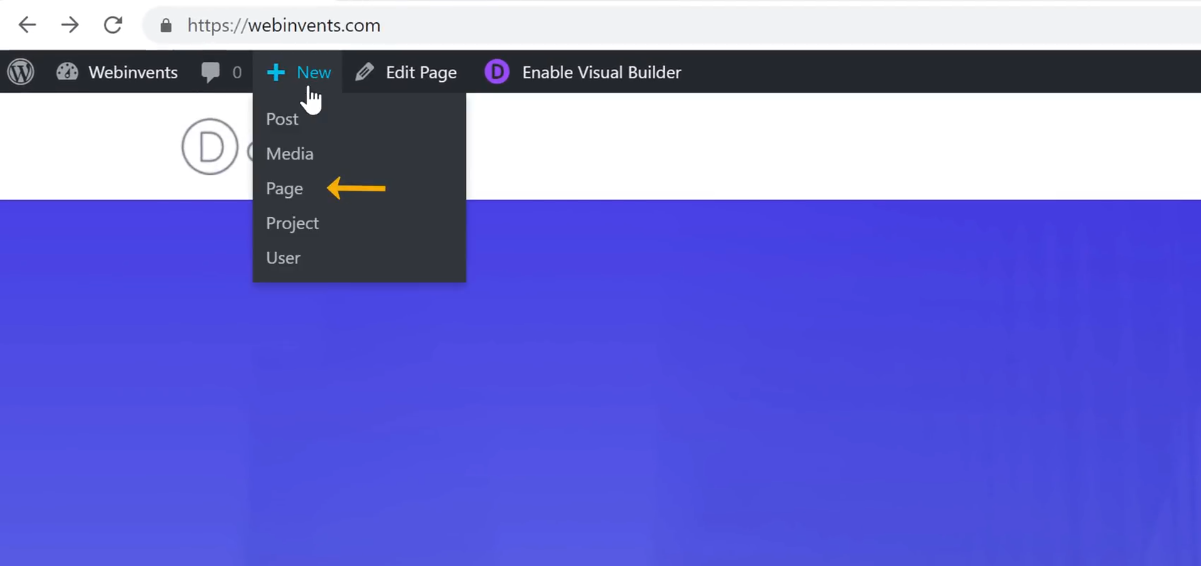
To create a homepage, click on + New at the top of the website and select Page.
We will create a page using Divi Builder, the visual website builder that comes with the Divi theme.
But before we start building the page using the Divi builder, first enter the title of the page.
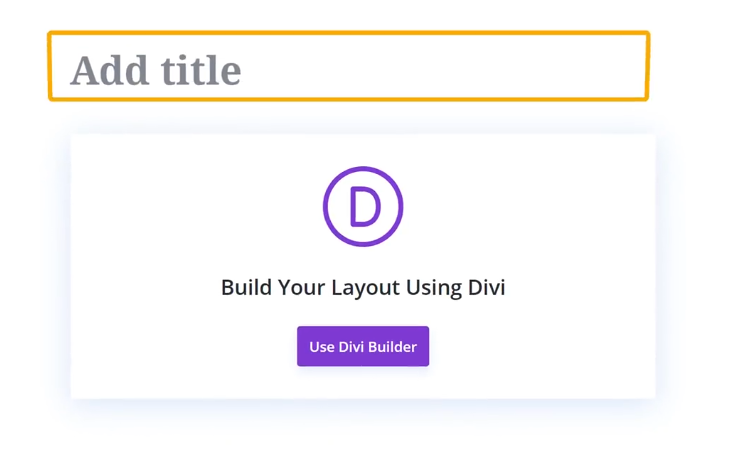
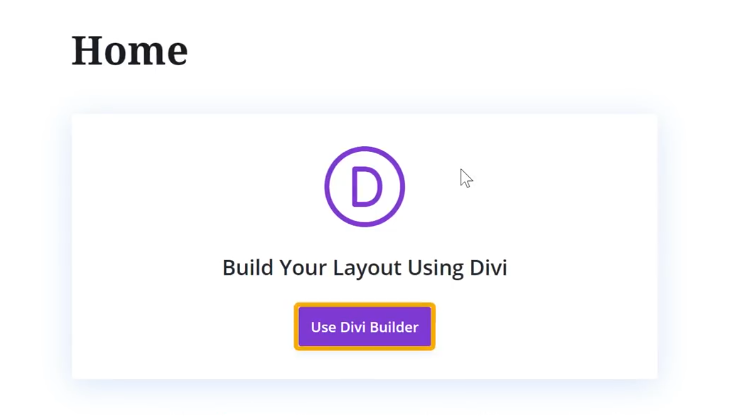
Since we are creating a homepage, let’s call it Home.
And click Use Divi Builder.
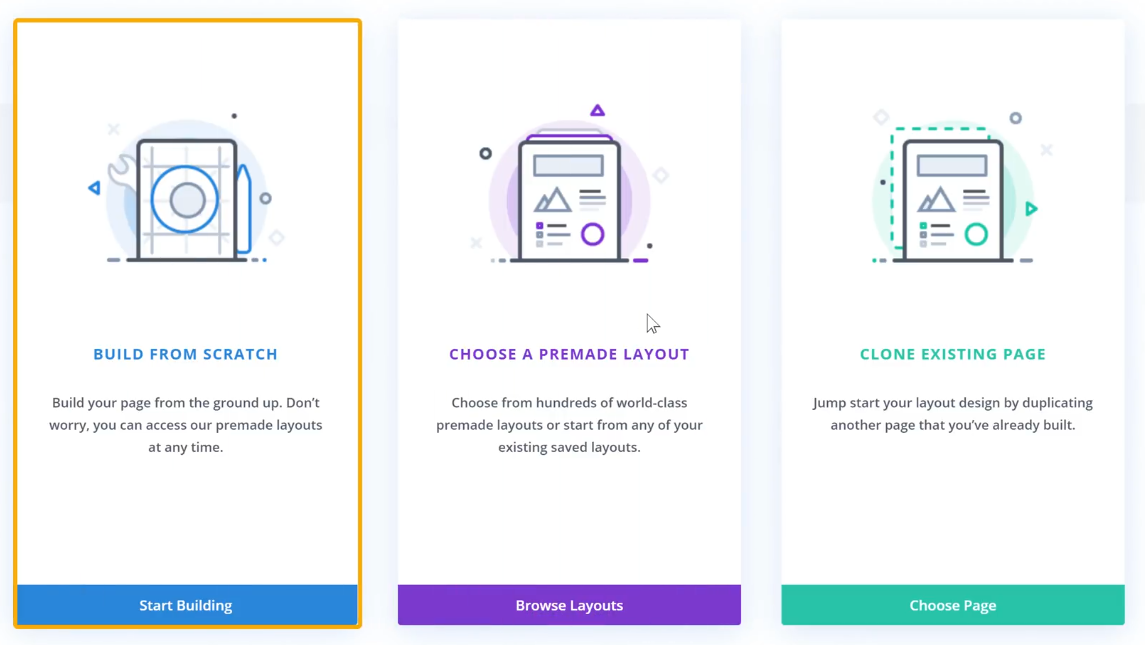
Now this will open up the three options by which we can create a page using Divi Builder,
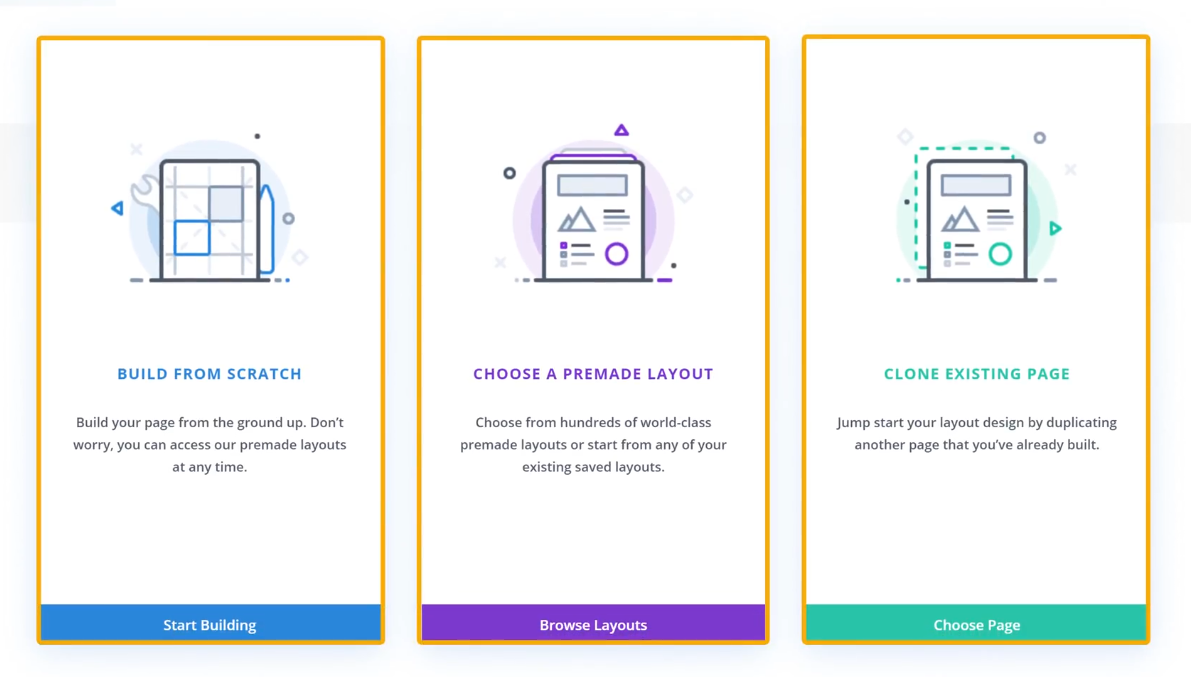
First, let’s see how to create a page using the Premade Layouts.
Layouts are ready-made page designs that make the job of creating a new page much easier. All one needs to do is import the layout and customize it.
To start, let’s click Browse Layouts in the Choose a Premade Layout section.
This opens up the wide range of premade layouts that’s available within Divi.

Choose a layout of your choice to know more about it and even preview it as it would appear on the website.
If you wish to import this layout onto the website, click Use This Layout.

Now the entire layout will be imported to the homepage.

While the design looks appealing on the website, we still have the default content that comes with the readymade layout.
To change the existing text, just select the text and enter your own text.
Any text on the page can be changed in the same way.
And to change the text on the button, just double click it.
This will open up the Text floating box where you can change the Button text in the Button text box.

In the same way, we can also change the default images that are displayed on the page.
Just double-click on the image you want to change.
And click on the image in the dialog box.
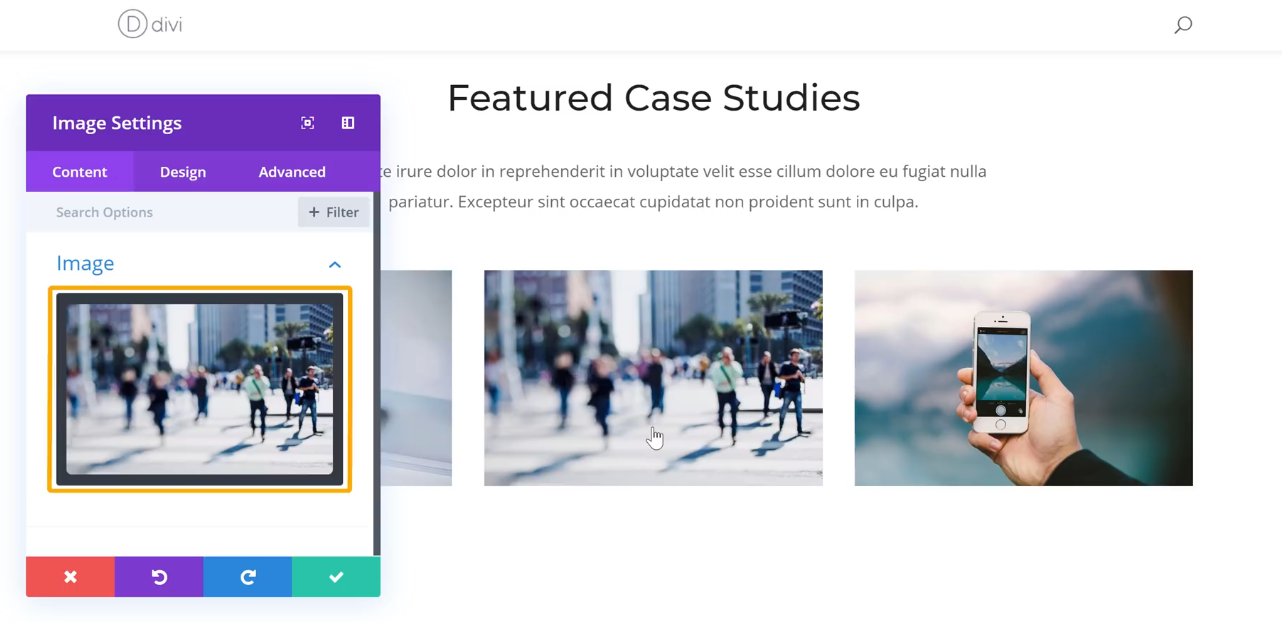
Here, drag and drop an image from the system.
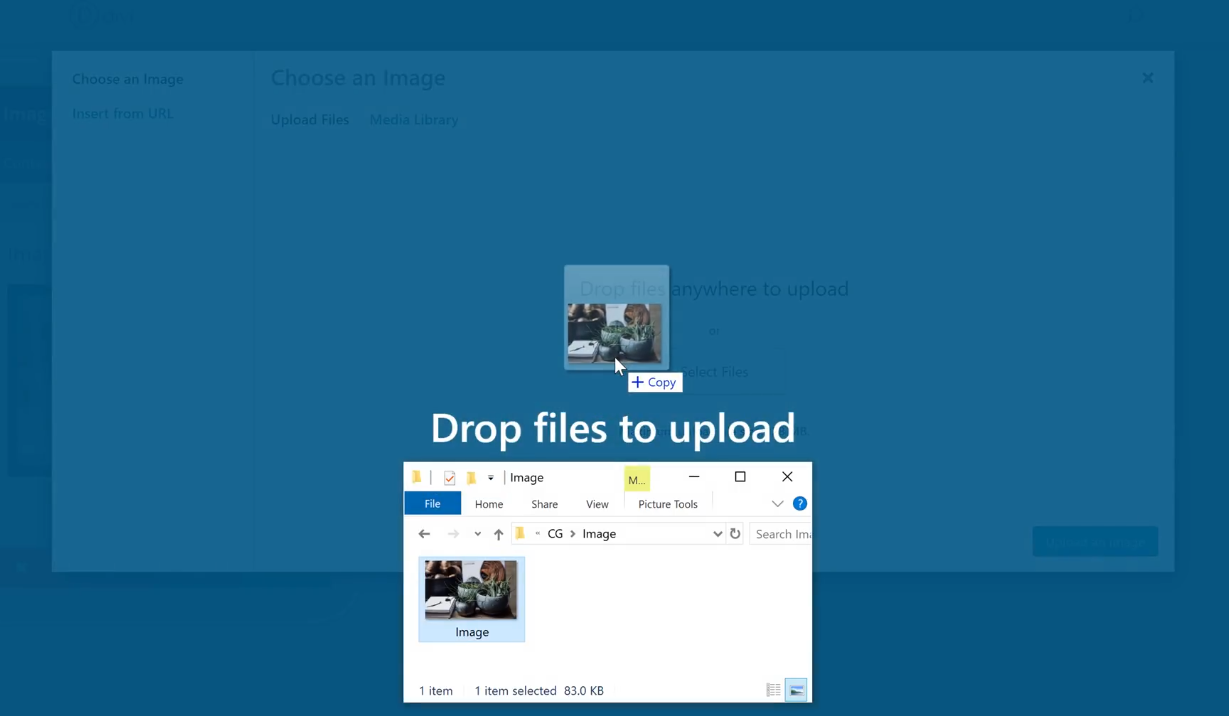
Yes, it is that easy to replace an image on the website.
In the same way, we can change any text or image that appears on any page of the website.
Once all the necessary changes are done, click Publish at the end of the page.
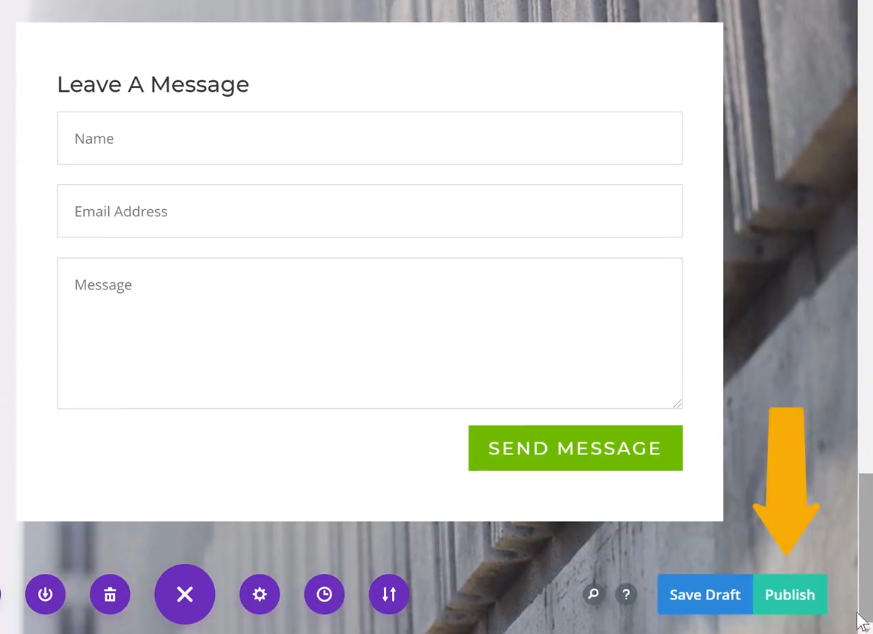
And then click Exit Visual Builder at the top of the website.
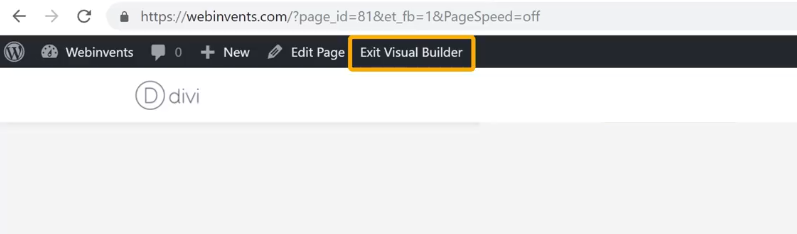
As you can see, we have the new design applied on the homepage.
This way, we can create any number of pages using the readymade layouts available within the Divi library.
But we have a problem!
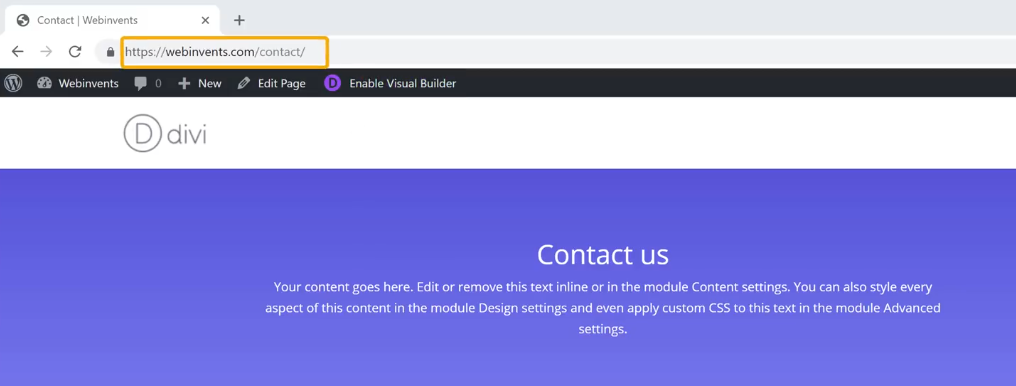
If you access the website from a new window, you can find that we still have the empty page that comes by default with Divi.
And the page we created using Divi builder is under the address ‘webinvents.com/home.’
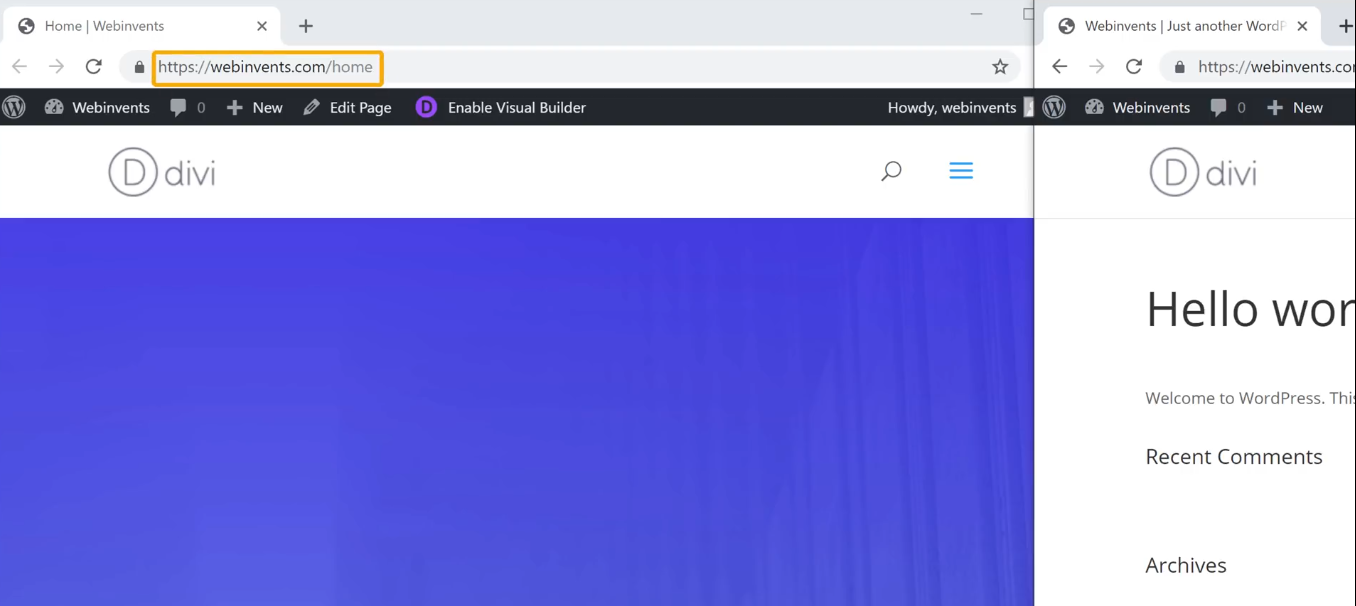
How can we make the page appear under ‘webinvents.com.’?
To do that, we will go to the WordPress dashboard by clicking on Dashboard.
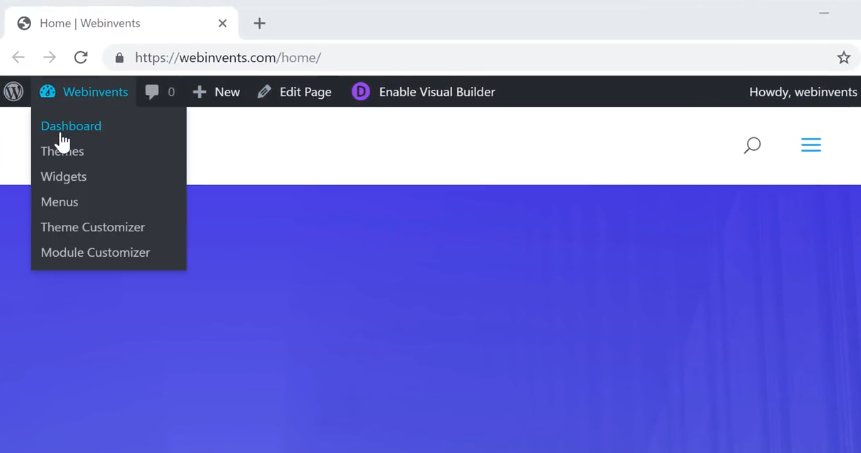
From the WordPress dashboard, click Settings and select Reading.

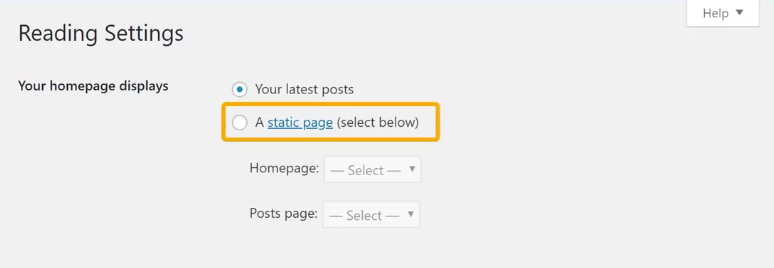
In the Reading Settings, we have an option Your homepage displays, that determines what gets displayed on the homepage.
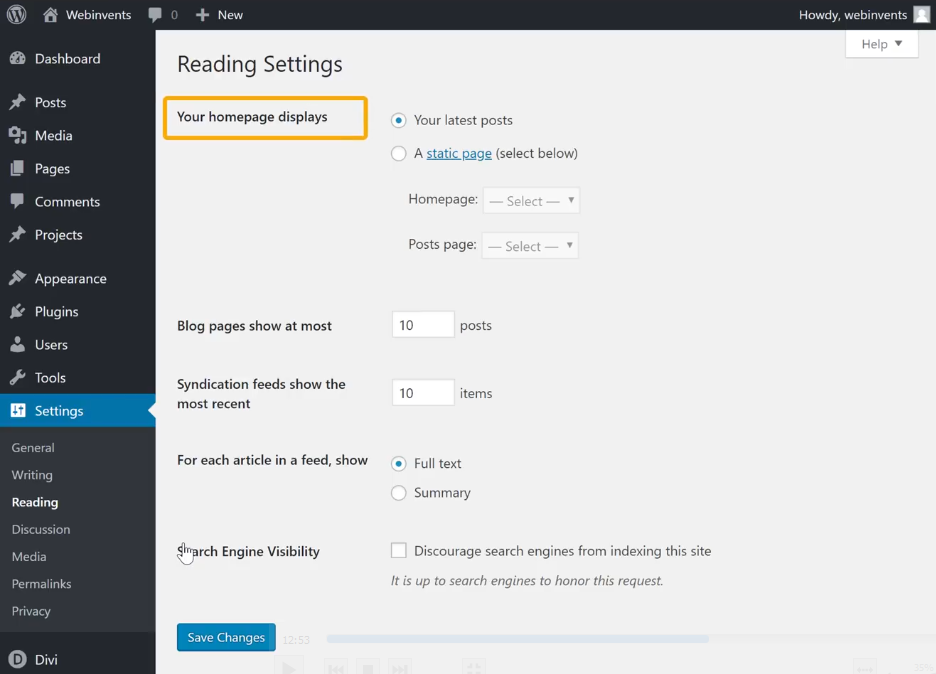
Since we are going to have a static homepage, we will select A static page.
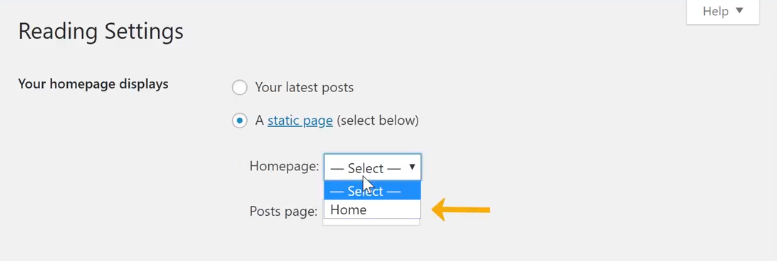
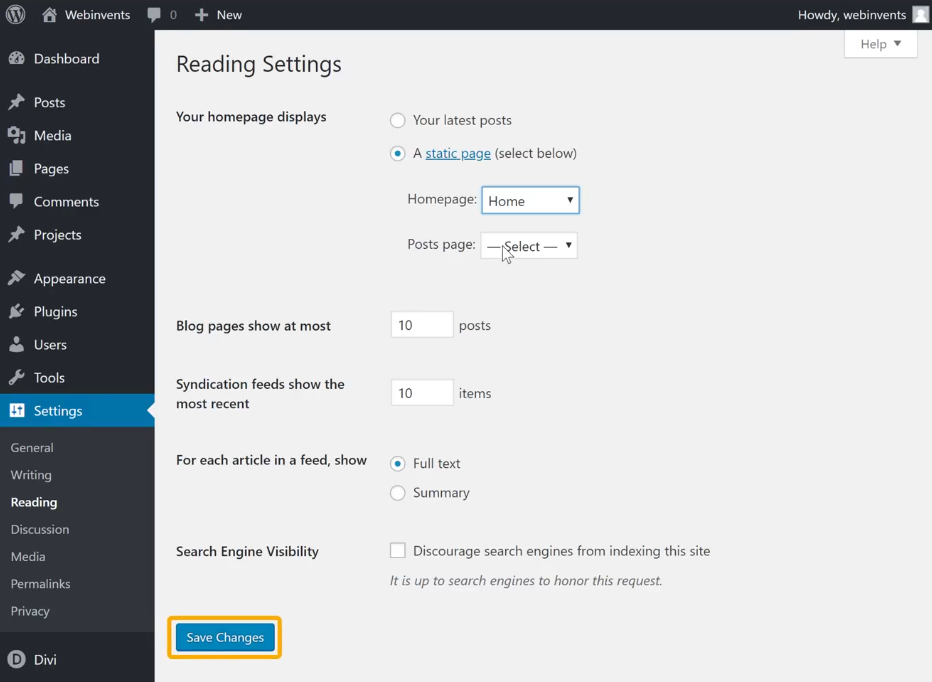
And select the page we just created, Home under Homepage.
And then click Save Changes.
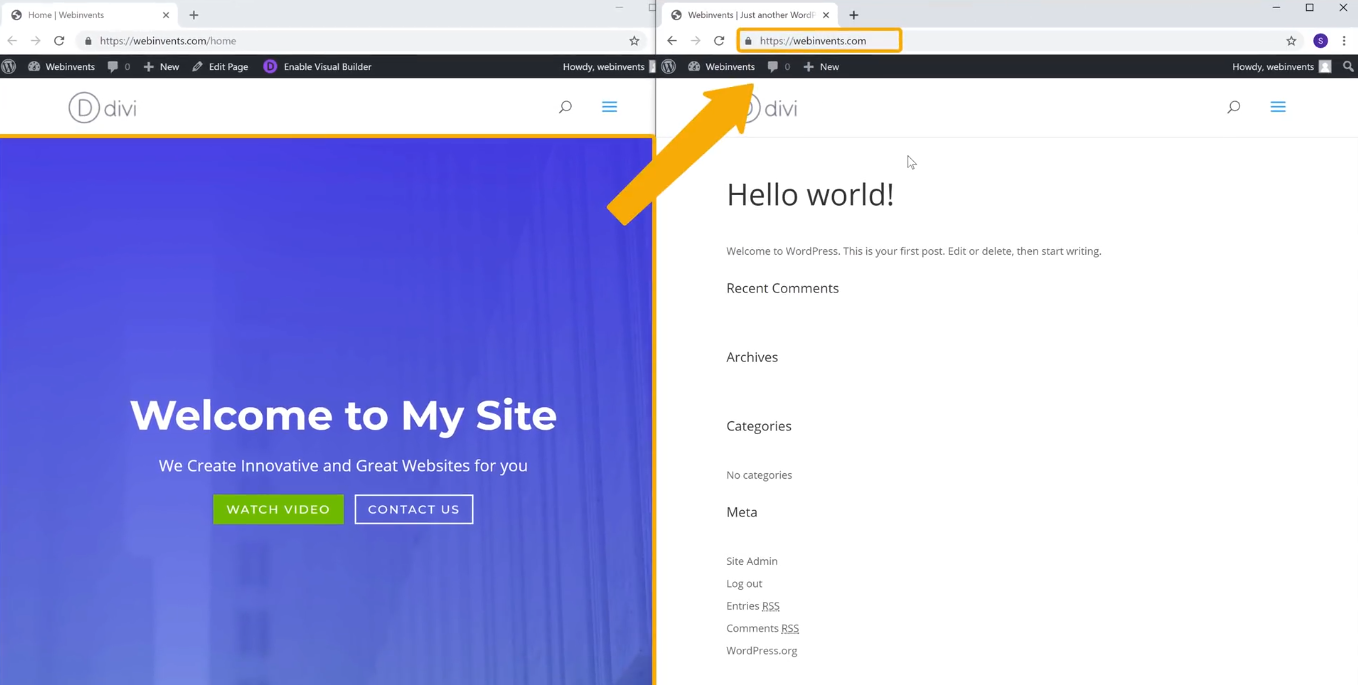
Now if you go to the new window and refresh the website,
We have got the homepage we created!
And that is how you can create a homepage using the premade layouts.
But what if you want to create a page from scratch?
Without using any of the premade layouts?
To create a page from scratch, let’s go to + New and select Page.
Just like we did for the homepage, enter the title for the page we are going to create, and click Use Divi Builder.
Say we want to create a Contact page for the website, then enter the title as ‘Contact’.

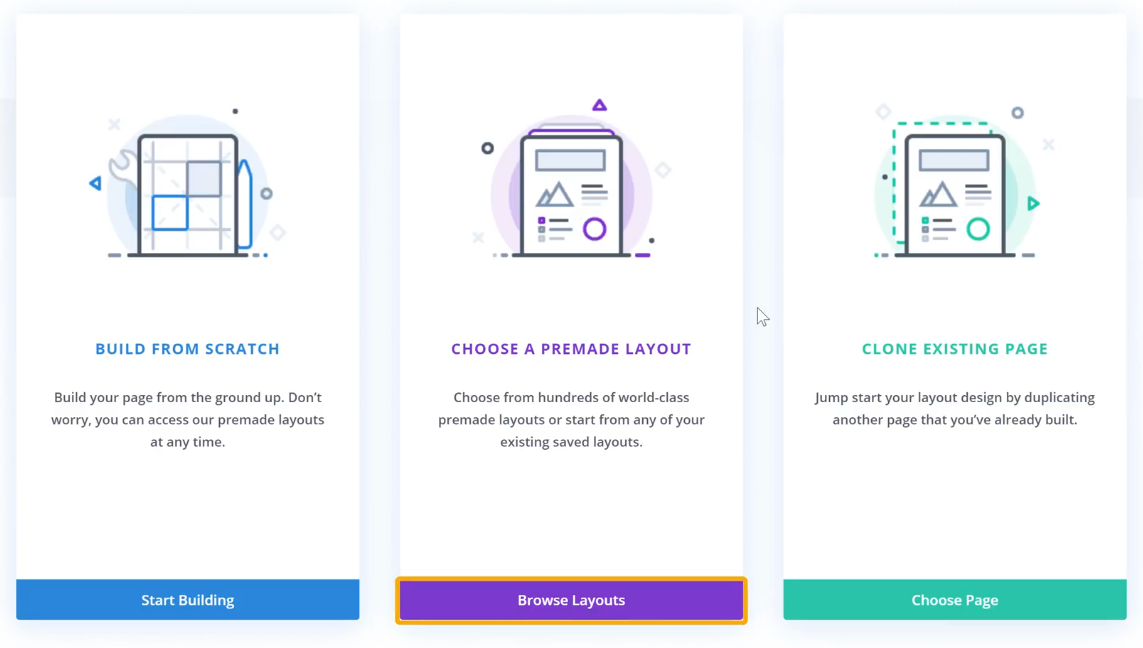
Now we are back in three options by which we can create a page for the website.
This time, instead of premade layouts, we will choose to Build from Scratch.
So click Start Building to start creating a page from scratch.
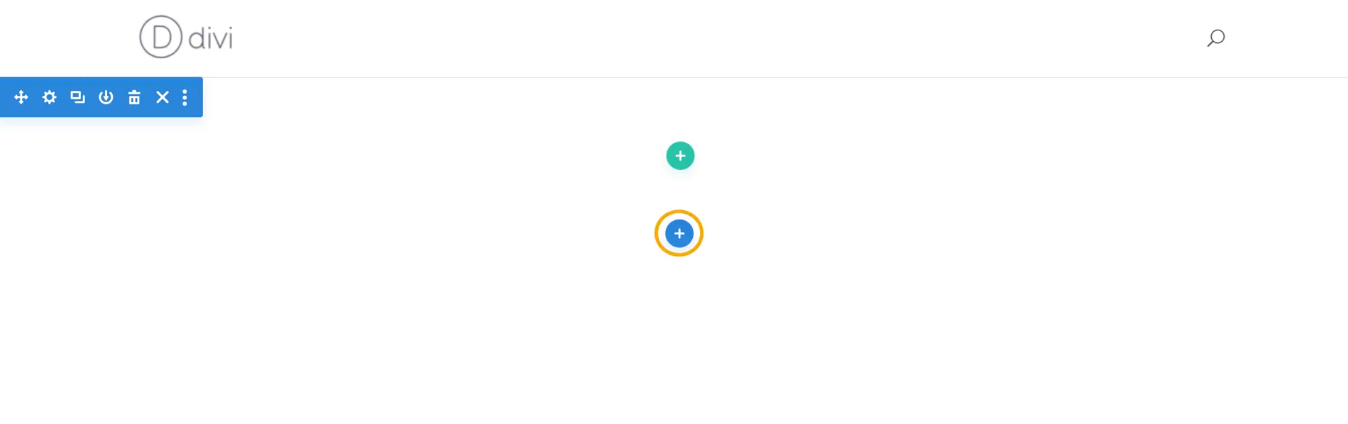
Now we will have a blank page where we can build our contact page from scratch.
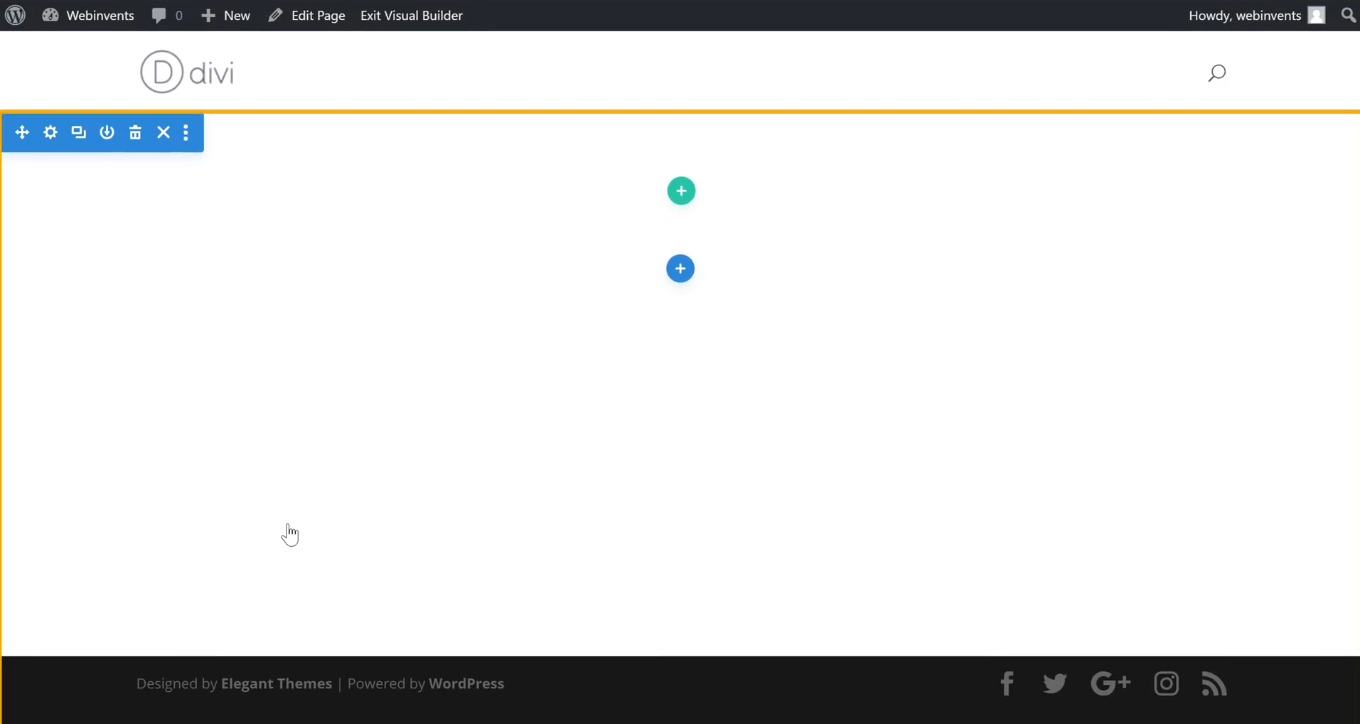
To start creating on this blank canvas, click the + icon in the middle of the page.
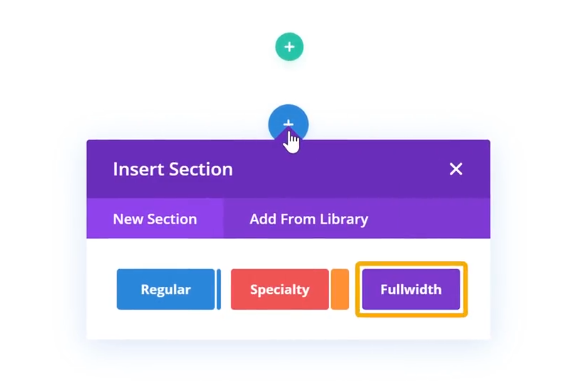
This will open up three options, namely Regular, Specialty, and Fullwidth.
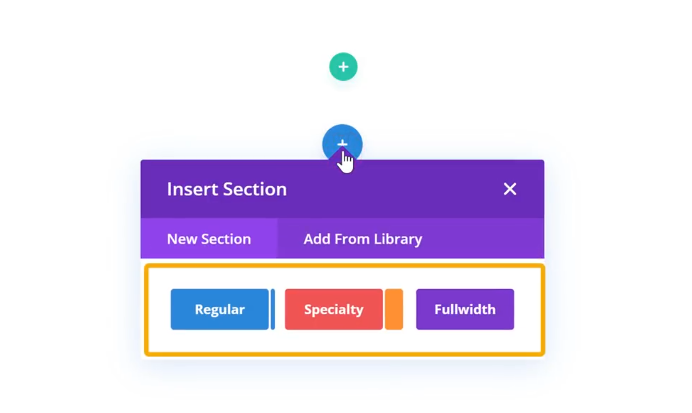
These determine the column structure of the particular section.
Since we want a full-width section, let’s go with Fullwidth.
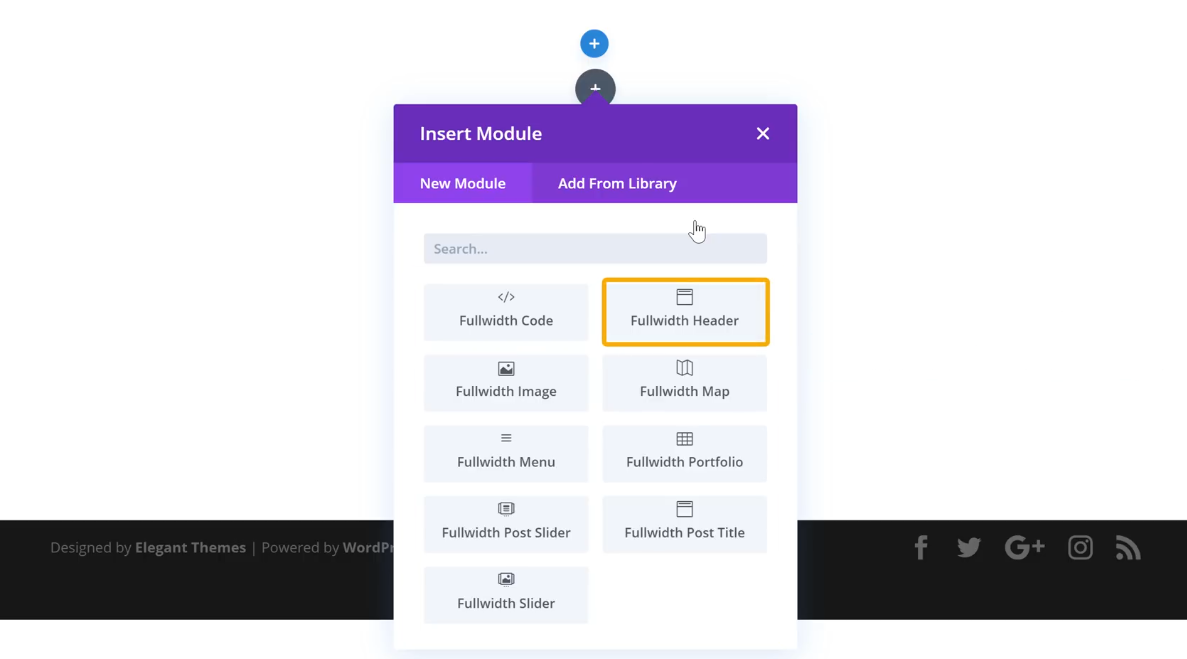
Now we will get a list of Fullwidth items that can be added to the page.
As we want to create a header for the page, we will select Fullwidth Header.
Now, a header section will be inserted into the website.
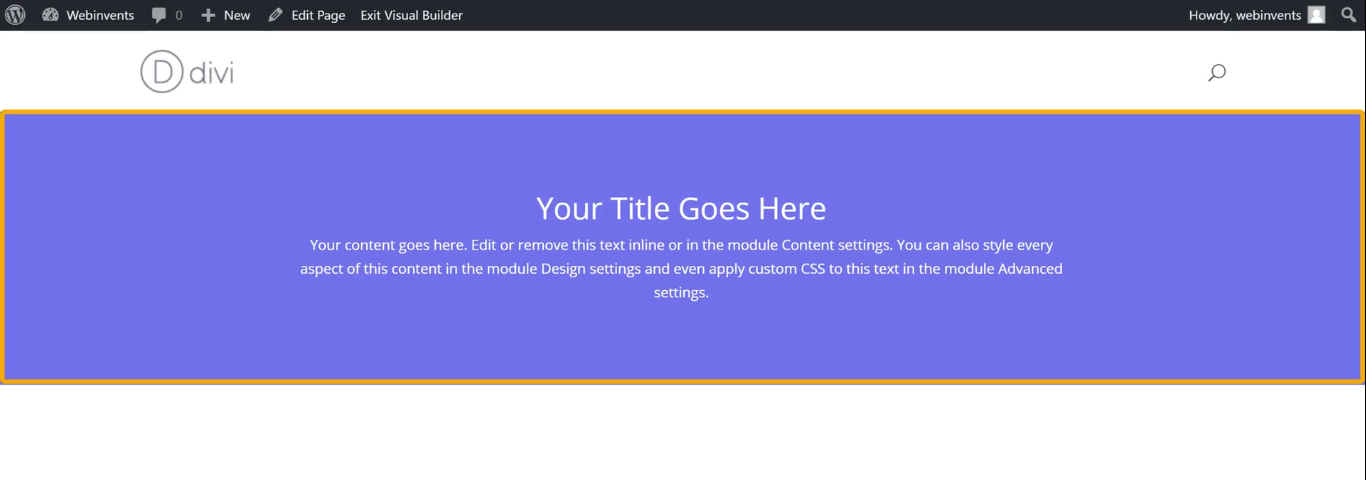
And just like we did before, we can easily change the text on the header by selecting and writing the new text.
With the header section of the contact page in place, let’s go to create the next section.
To create the next section, let’s select the + icon again.
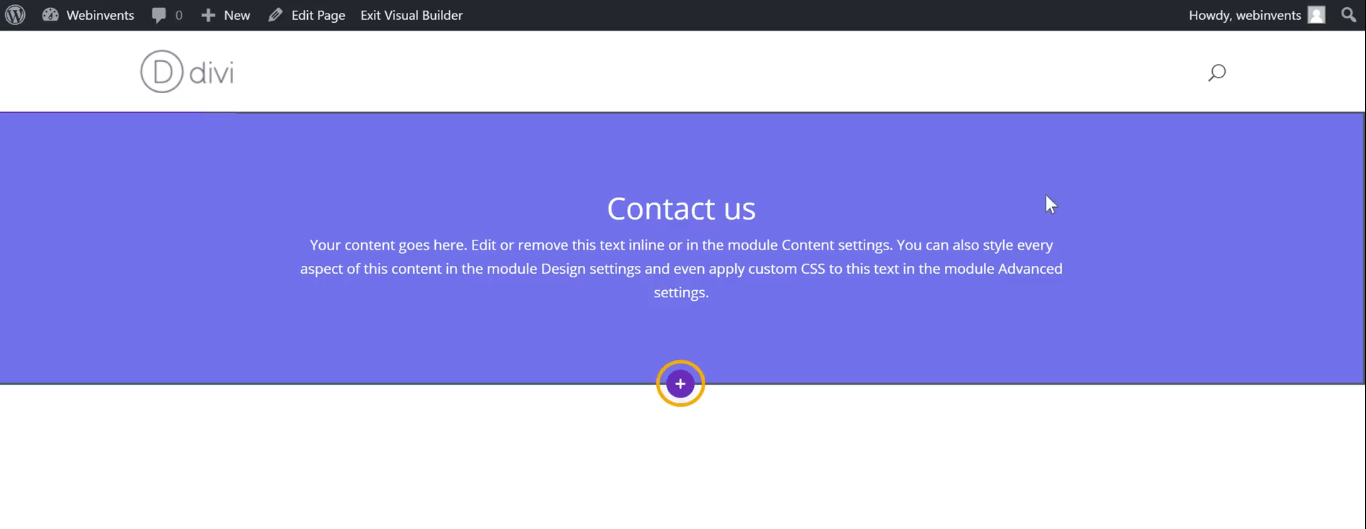
And let’s select Regular this time since we don’t want a full-width section.

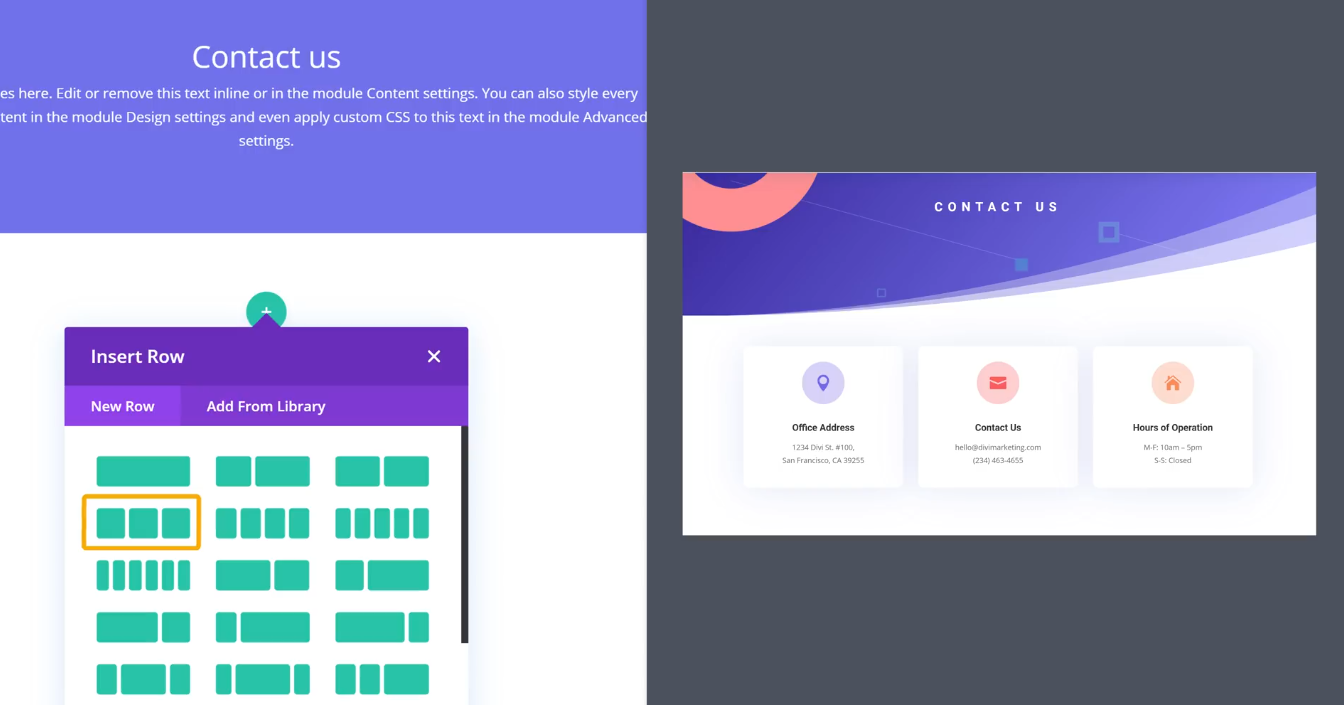
This will open up the different types of sections with a variable number of rows that can be inserted into the website.
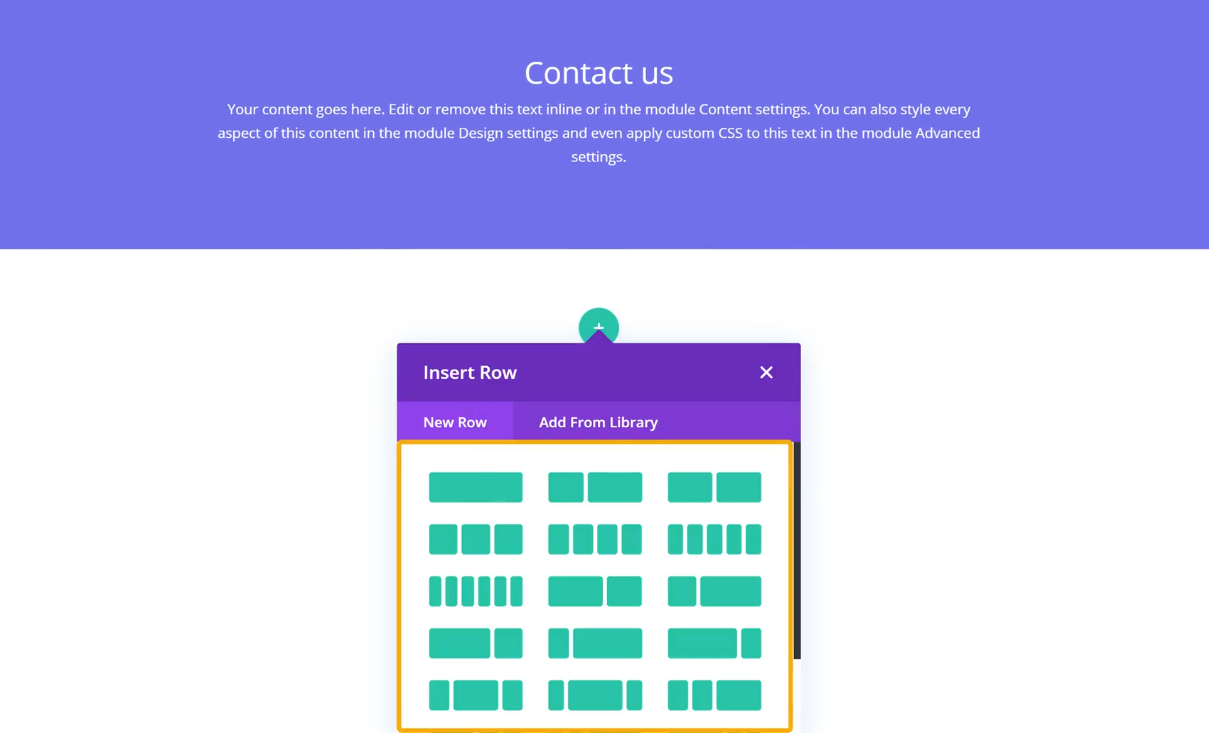
Say you want to create a contact section with three columns, then you can choose a similar three-row design from the types of sections.
Or say you want a different kind of contact section, you can choose something like this,
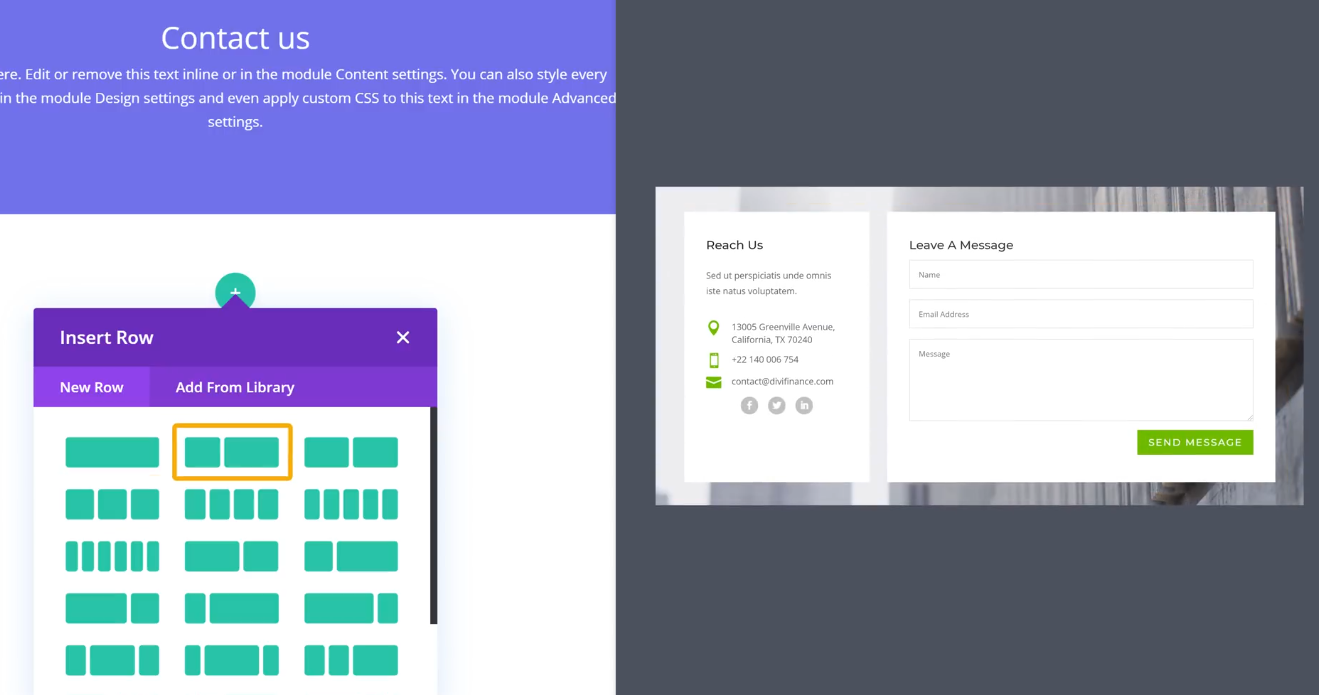
Now the section will be created with two rows.
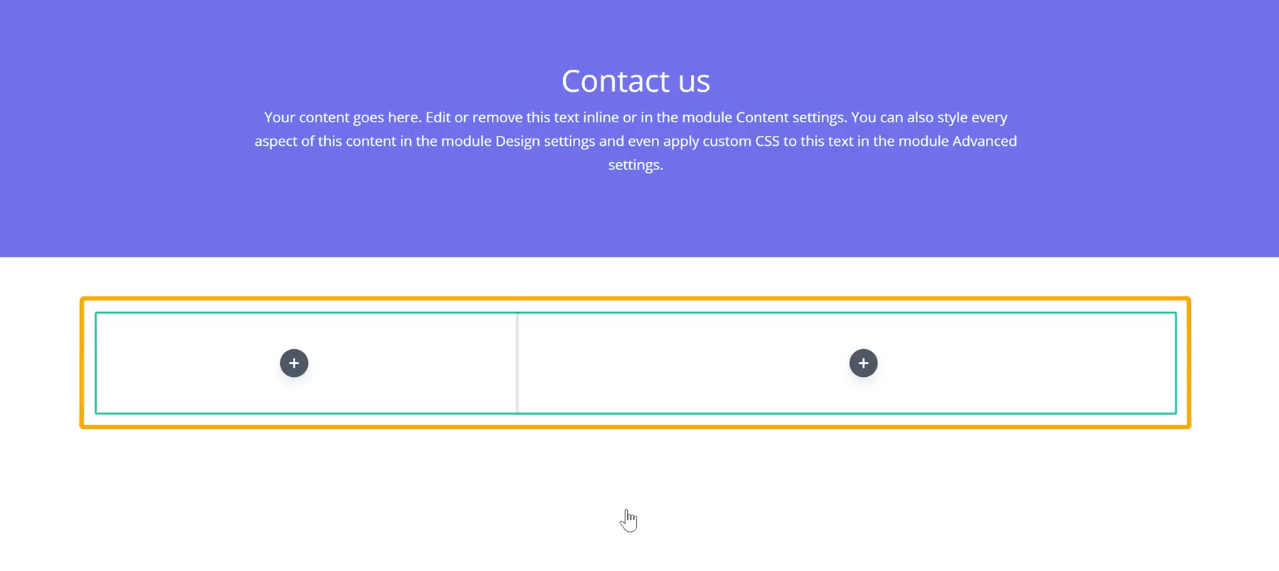
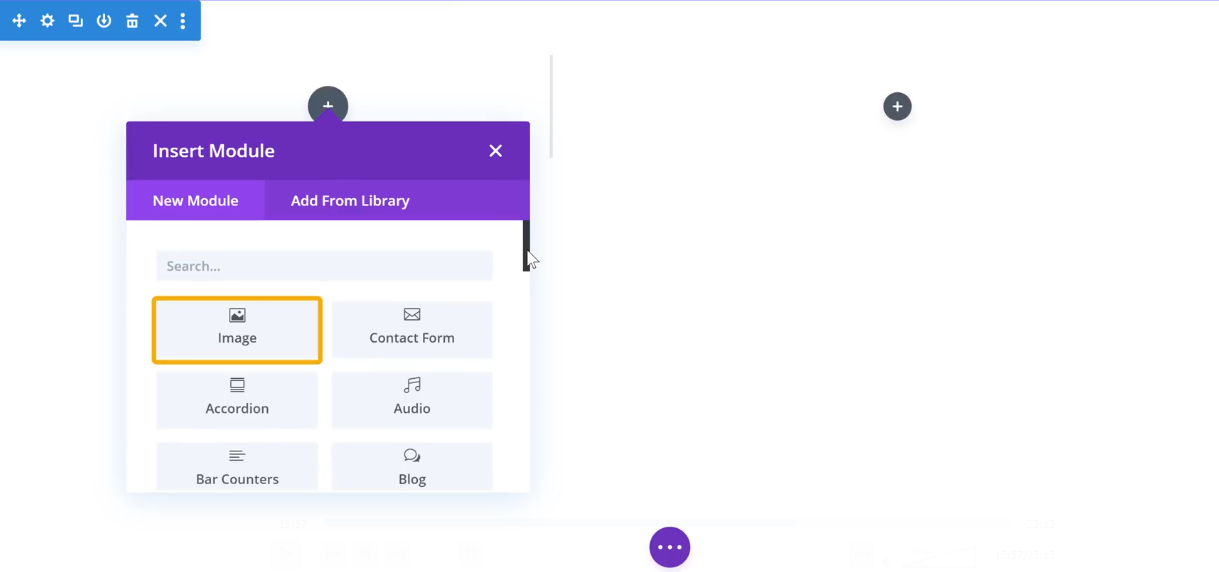
Again we can include modules within this particular section by clicking on the + icon.
The different modules available, such as Image, Contact form, etc. will be displayed.
Say you want to add an image to the particular section, click on Image.
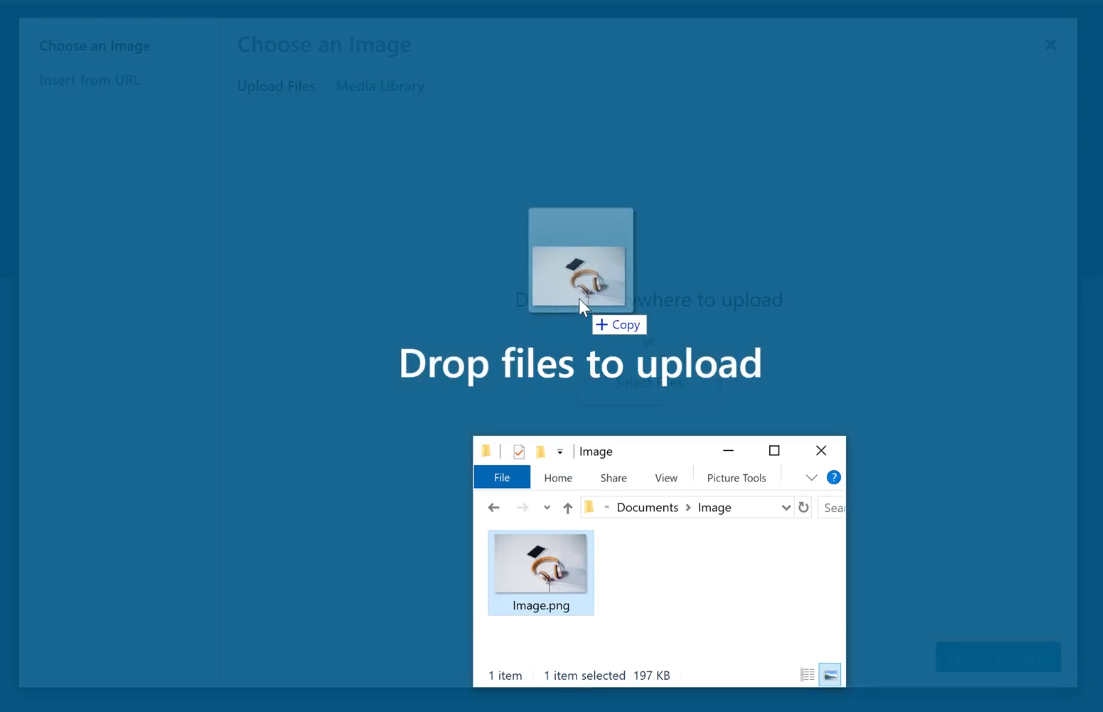
And to add an image, click Image in the pop-up,
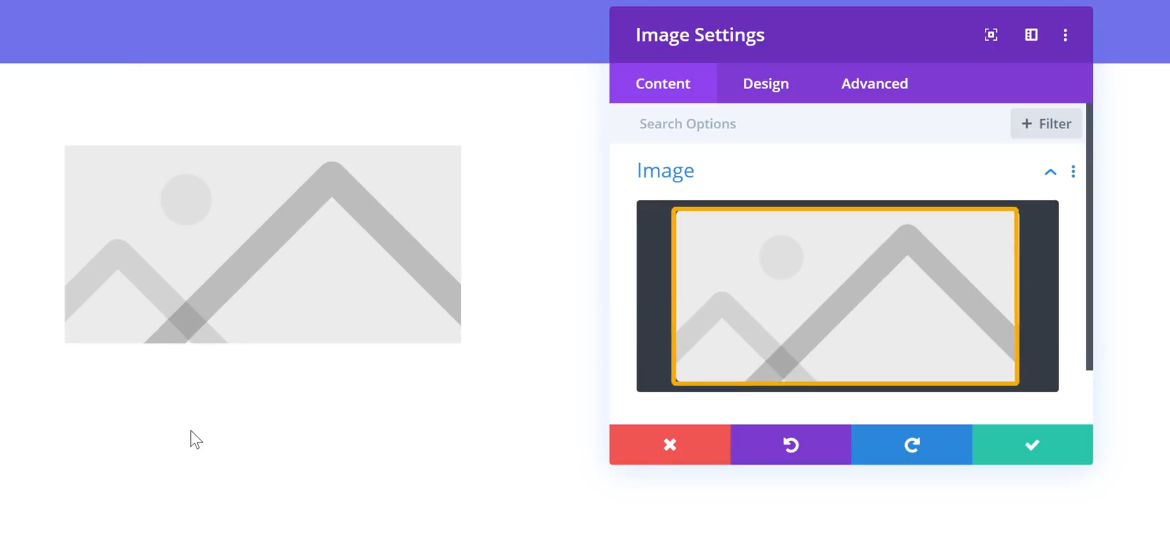
And drag and drop an image from the system.
Now if you feel like the image is either too big or too small for your preference, you can easily change its size.
All you need to do is go to the corner of the image and drag to resize the image as necessary.
In the same way, we can add a module to the adjacent row in the section.
Click on the + icon and choose the necessary module to add to the section.
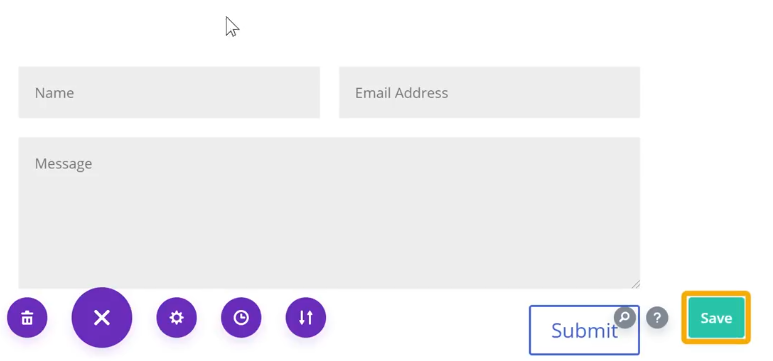
Since we are creating a contact page, we can add a contact form to the page.
And once you have created the other necessary sections, head to the bottom of the page and click Publish.
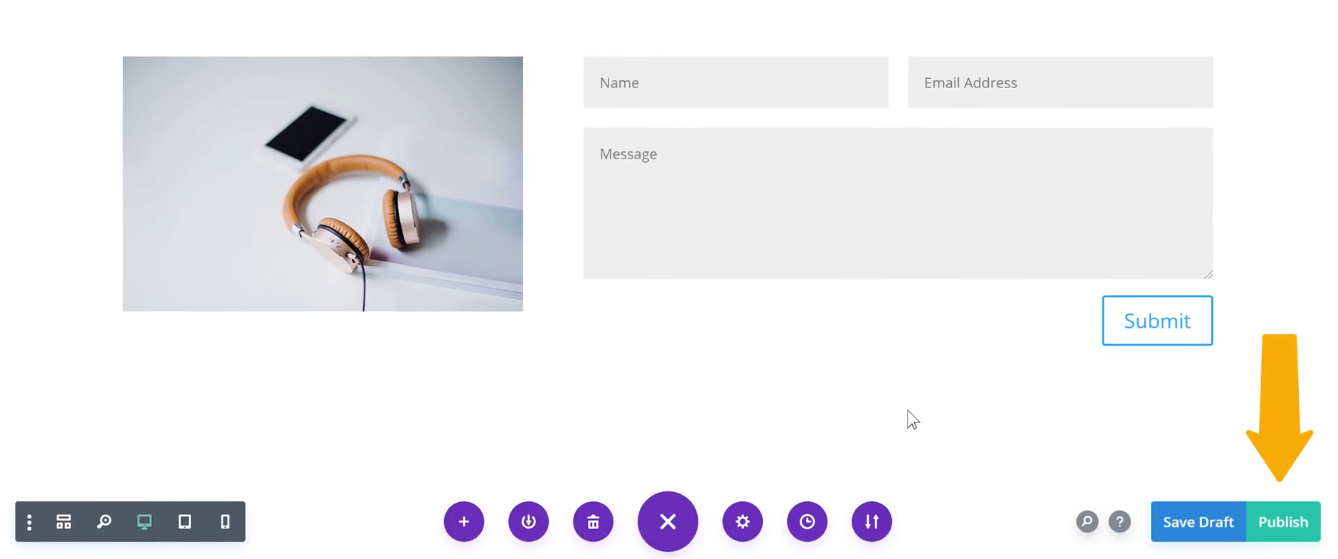
With that, the new page will be published on the website.
Click Exit Visual Builder.
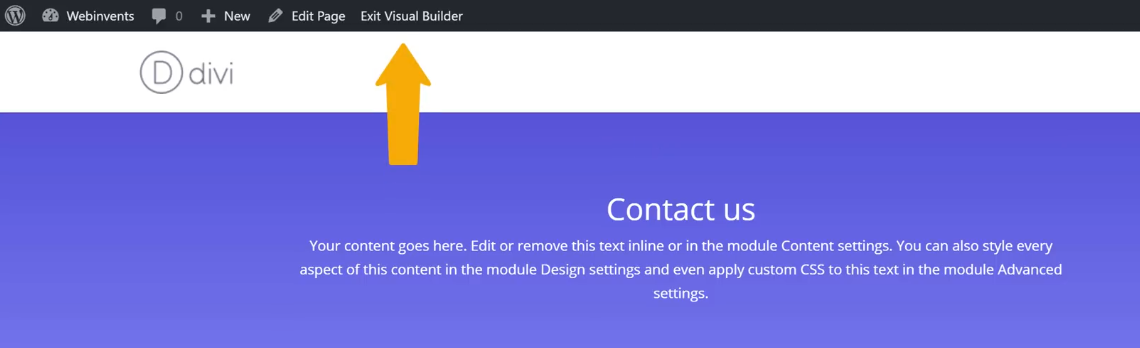
As you can see, we have a new page created under the name Contacts.
Likewise, we can create any number of pages from scratch and publish them on the website.
Though we can create pages using this way, we still don’t have a menu on the website for easy navigation.
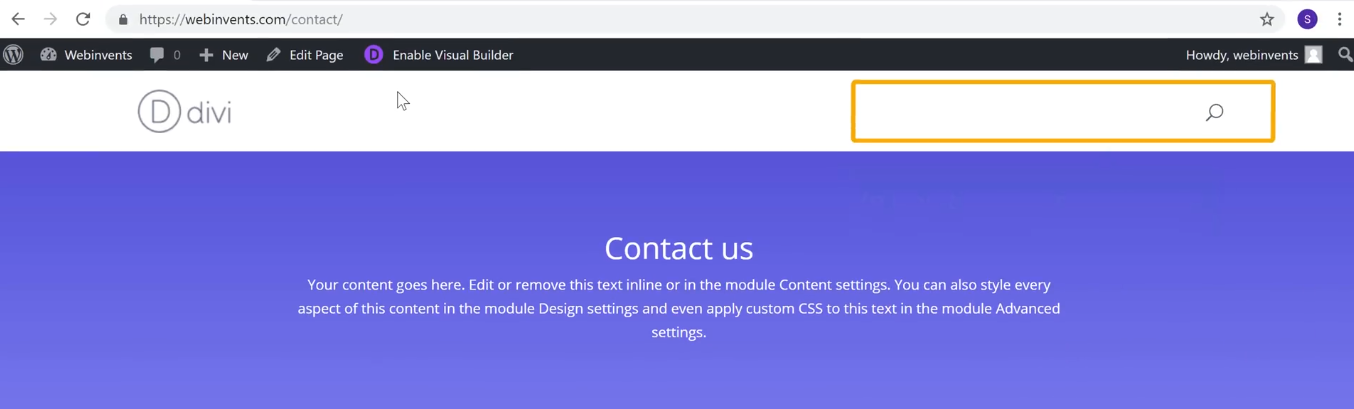
So, it’s time for us to create a menu on the website.
To create a menu, click the website name and select Theme Customizer from the top menu.
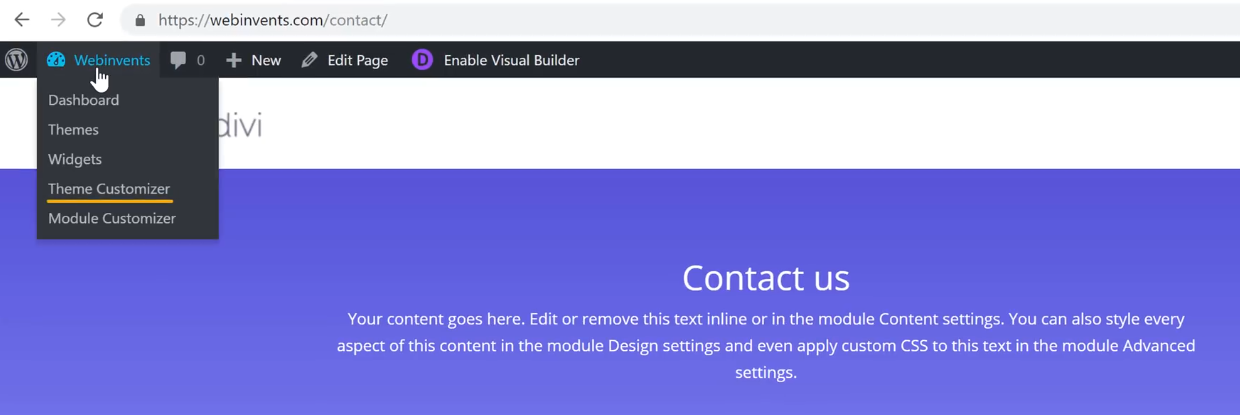
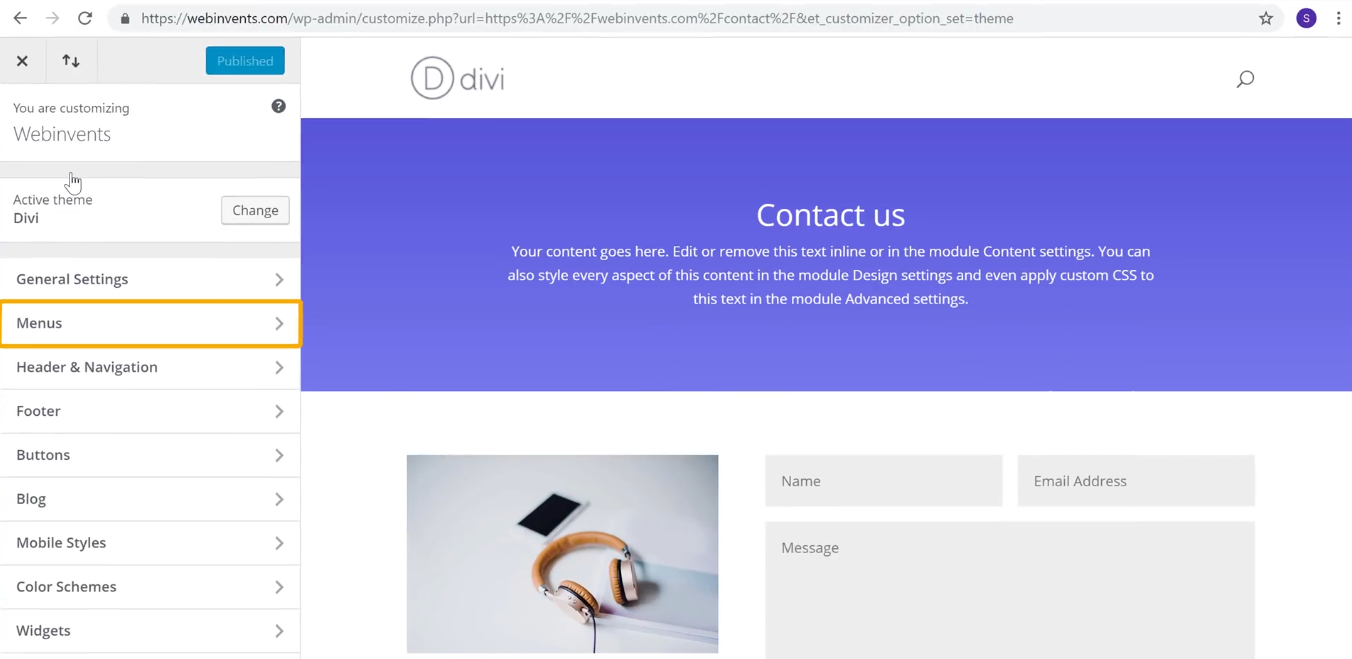
This will open the WordPress Customization area.
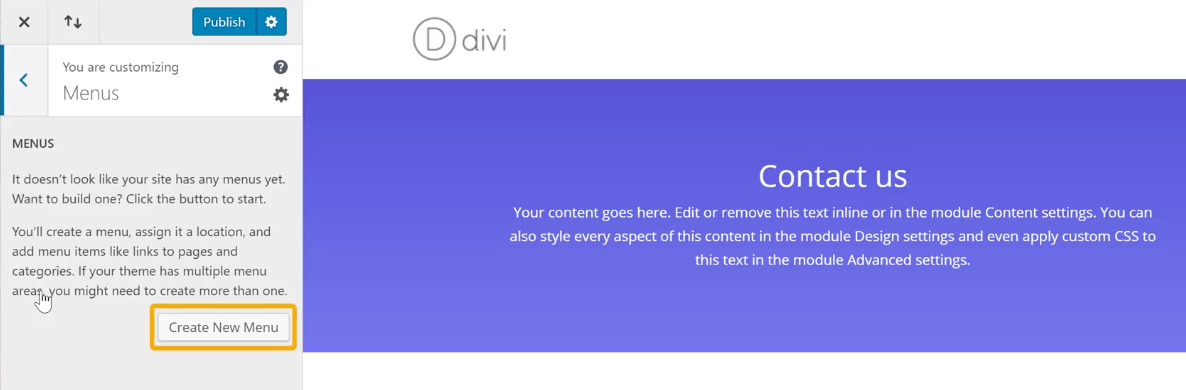
As we want to create a menu, click Menus.
And click Create New Menu.
First, let’s enter a name for the menu,
And select the location where the menu needs to be displayed, either Primary, Secondary, or Footer Menu.
Since we want the menu to appear at the top of the website, let’s choose Primary Menu,
And click Next.
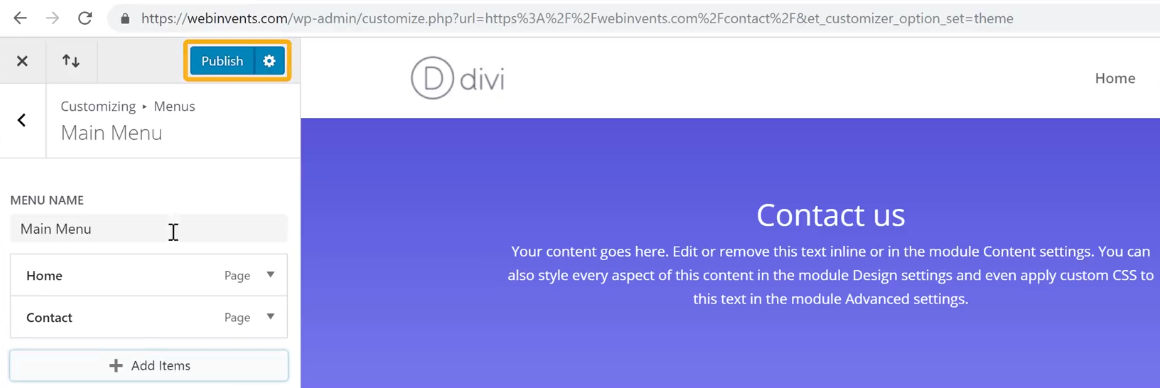
Now we can start adding items to the menu. So click + Add Items button to add the necessary items on the menu.
This opens up a list of the available pages that are available to be added as menu items.
To add a particular page as a menu item, click on the + icon next to the page name.
The page will then be added as a menu item.
Once you are done choosing the menu items, click on Add Items again.
Now the selected pages will be displayed as menu items at the top of the website.
And click Publish to save the changes.
As you can see, we have a menu on the website with two menu items, namely Home and Contact.
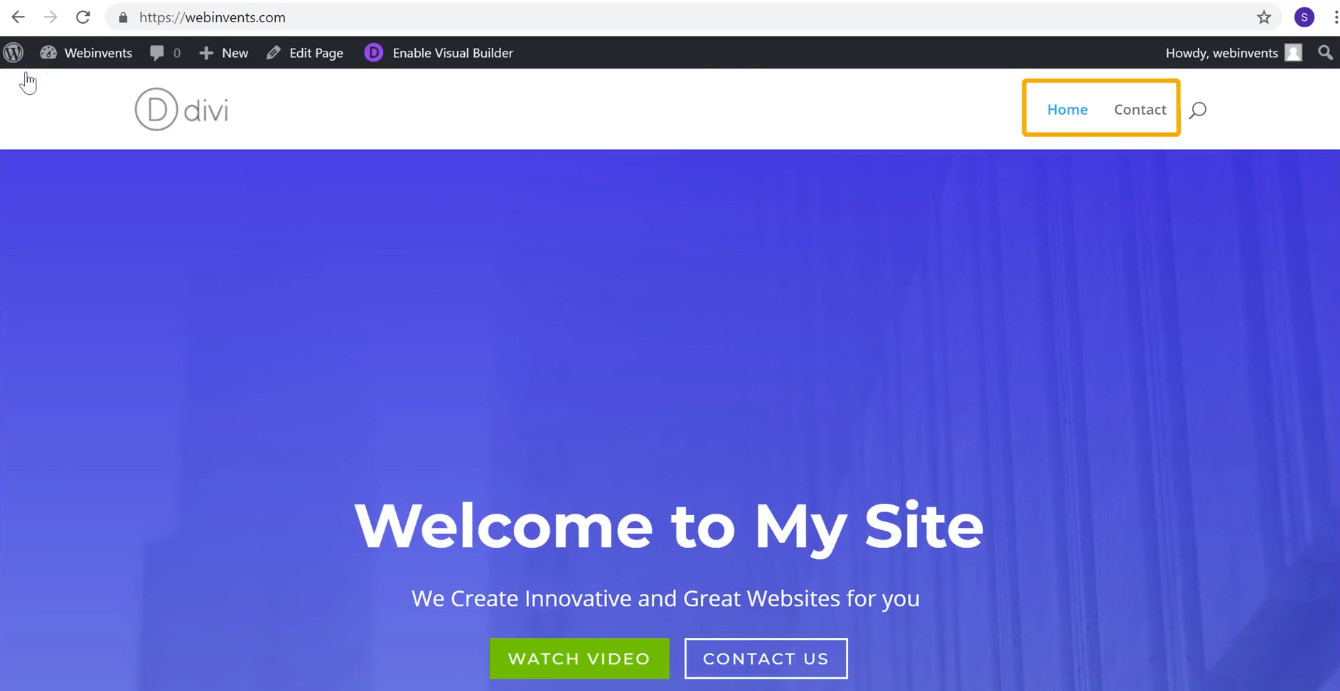
And if you click on a menu item, we can head to the respective page.
And that is how we can create a menu on the website for easy navigation.
Though everything looks in place on the website, we still have the default Divi logo at the top of the website.
Now, how can we change that?
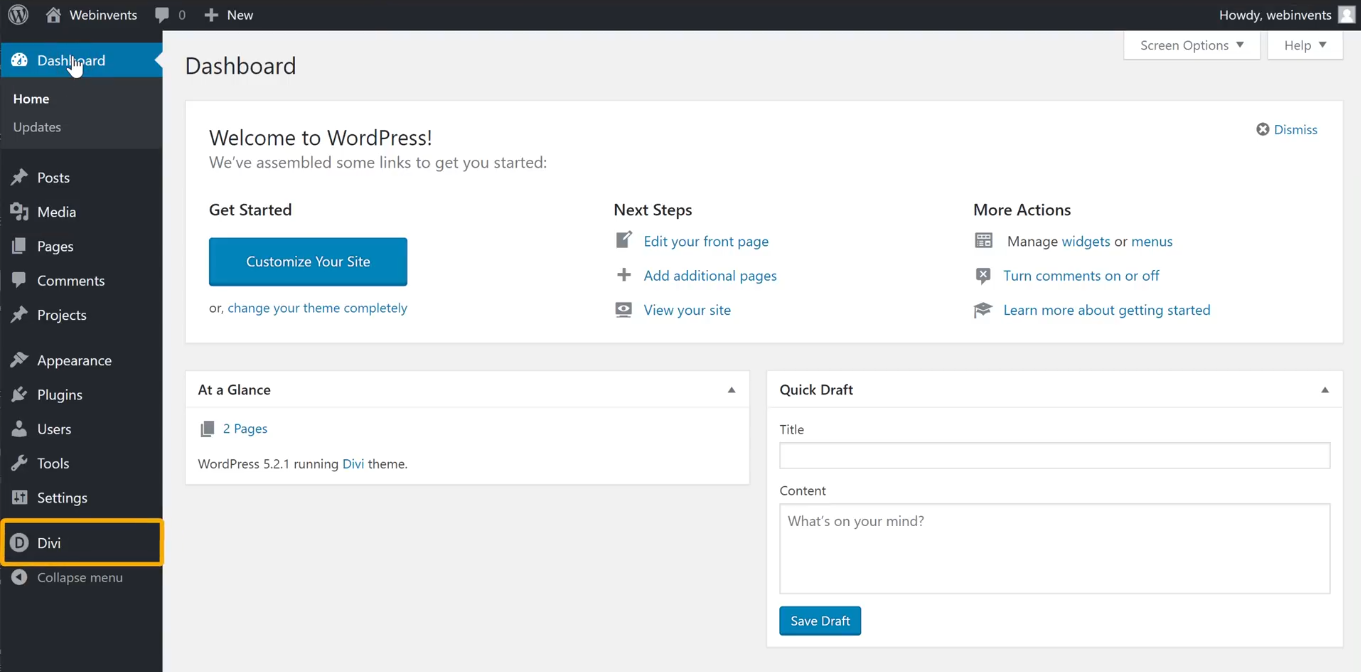
To change the logo, let’s go to the WordPress dashboard.
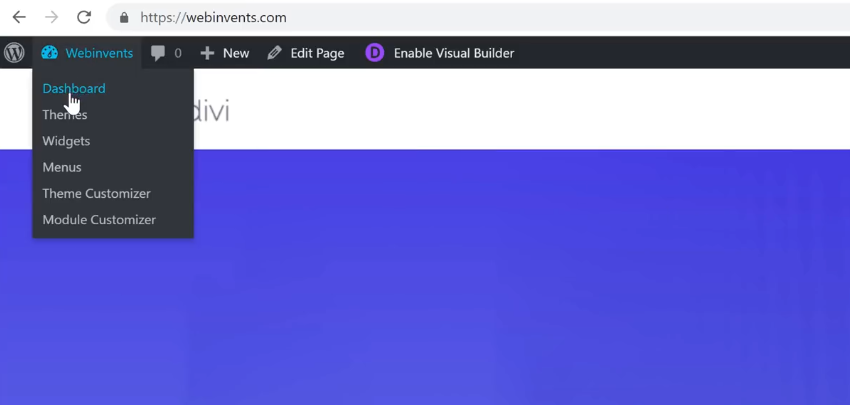
And click Divi from the side menu.
In Divi Theme Options, under the General tab, we will have the Logo options.
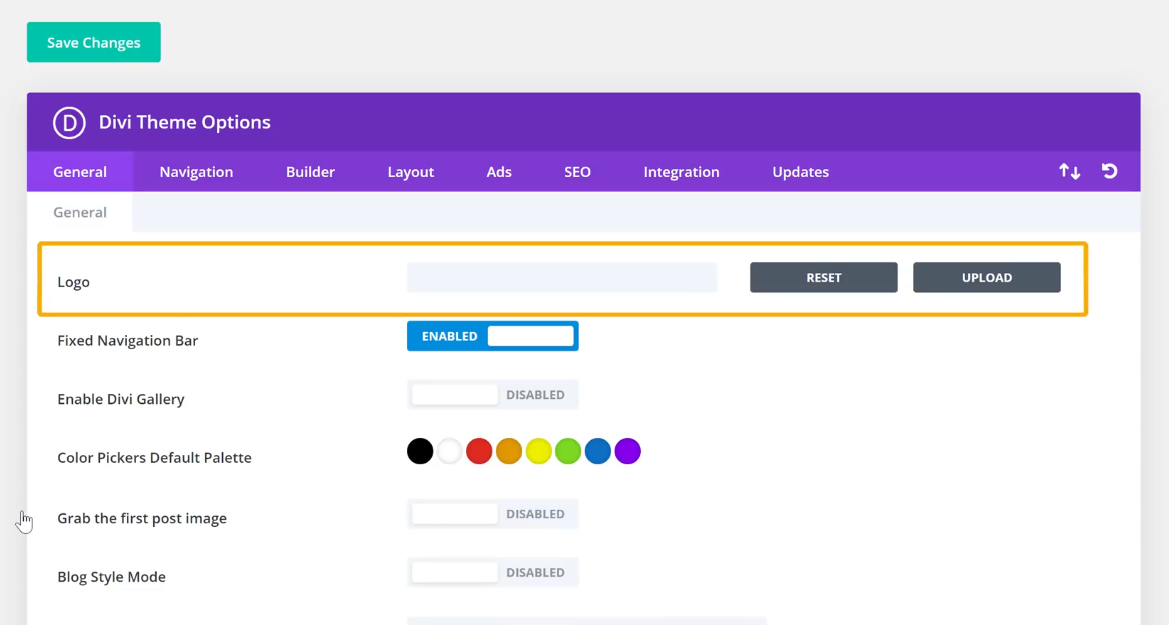
Click Upload and drag and drop your logo that’s going to replace the default logo.
Click Save Changes.
Now if you refresh the website, you can find that the default Divi logo has been changed with the new one we uploaded.
And with that, we have successfully managed to create a menu for the website as well as change the Logo.
And that is how we can create a website using the Divi theme.
But wait, we have more!
As a bonus part of this article, we will look at How to Design a Page using Divi.
Though we just created a page from scratch, we can still customize and change the look of the page using the Divi Builder.
To do so, select the page you want to design and click Enable Visual Builder.
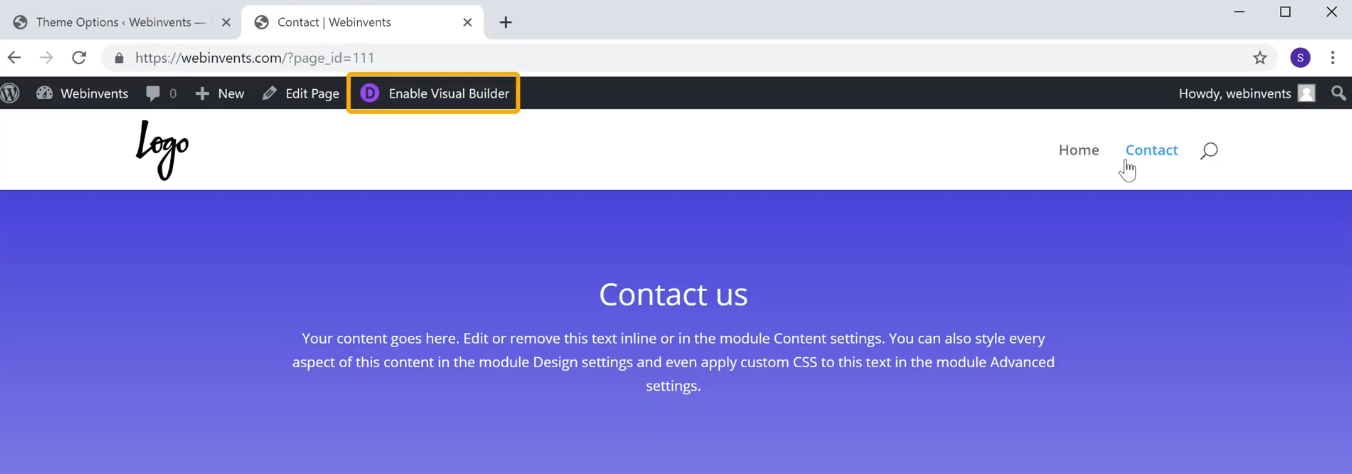
On doing so, the page will open in Editing mode.

Now on the page, say you want to change the design of the text, click on the Settings icon on top of that.
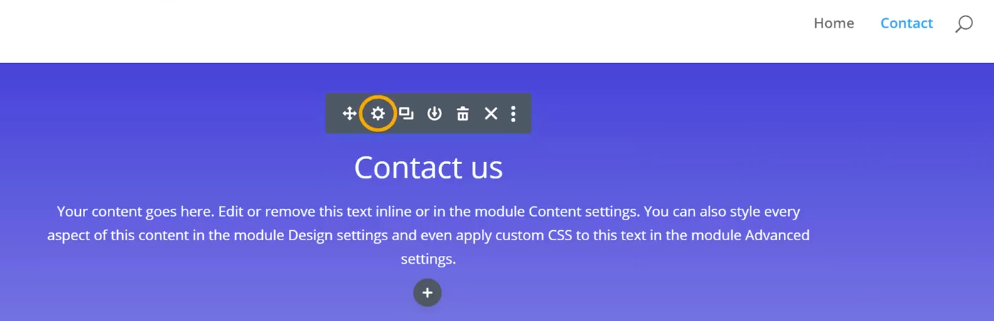
In the floating dialog box that opens up, select Design.
Here you will find different options to design the text including the text size, colour, and even the font.
Now say you want to change the text size, you can easily do that under the Title text tab.

In the same way, you can also change the font, spacing, etc. of the text. And you can also design any text on your website using the same design tab.
Now let’s say you want to add some space in one of the sections on the page.
All you need to do is go to the top part of the section and drag as much as you want the space to be.
It’s as easy as it gets!
Now instead of the particular text, what if you want to change the design of the entire section?
To do that, let’s click on Settings and go to Design.
In the Design section, select Dividers, which determine how two sections are divided on the website.
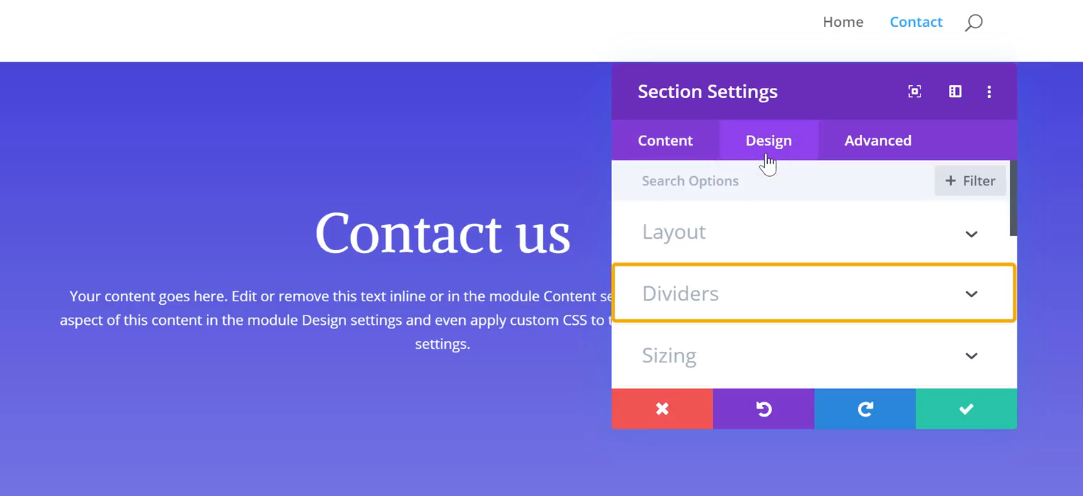
To change the default line that separates the two sections, choose Divider Style to select any of the designs from the list.
And we also have the option to change the height of the divider using Divider Height.
Once you are done with all the changes, click Save at the bottom of the page.
Now refresh your website to find that all the changes have been reflected on the website.
While we just made amazing designs using the Divi Builder, if our website is not optimized for mobile, then we are losing half of the traffic our website deserves.
Divi Theme and Divi Builder are two different things though they share the same name. And it is quite natural for beginners to get confused in understanding the difference between the two.
So, let’s understand them in simple words.
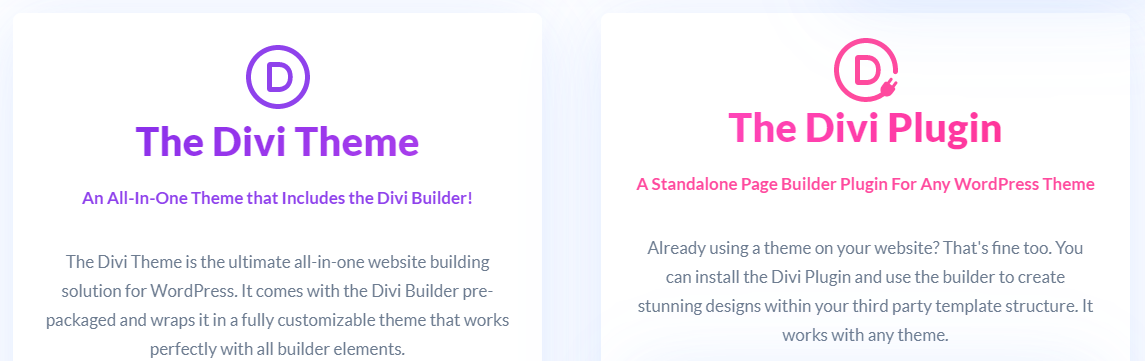
Divi Theme
Divi Builder
To summarise,
Divi Theme comes with several built-in features including the Divi Builder, meaning that Divi Builder is part of the Divi Theme. (And it doesn’t require separate installation when using the Divi Theme.)
However, Divi Builder acts as a separate plugin when used with the other themes in the WordPress directory.
Yes! While Divi’s subscription may seem a bit expensive for a WordPress theme, you need to keep in mind that it isn’t just another Theme. Divi Theme incorporates several features that also includes a complete website builder (Divi Builder).
Here are a couple of reasons why Divi is totally worth the price,
With Divi’s Visual Builder, one can design any and every part of their website without any limitations. Imagine creating your dream website by simple drag and drop, without having to write a single line of code.
All one needs to do is import a built-in page template and start customizing it to build the dream website.
To another one of the most common questions regarding Divi, is it suitable to create eCommerce websites?
Yes. The flexibility and versatility of the Divi theme make it the ideal choice to build eCommerce websites. It has several eCommerce layouts in its library, including Shop pages, product pages and much more related to business on the Internet.

In fact, Divi has been designed to be compatible with the powerful eCommerce tool, WooCommerce. WooCommerce is a widely used WordPress plugin that’s specifically designed to create eCommerce websites.
So, the Divi Visual Builder combined with the WooCommerce modules is nothing but a dream come true for beginners to build their eCommerce websites.
If you have ever heard of WordPress website builders, then you are probably familiar with the Elementor Website Builder. With more than 5 million installations, Elementor is one of the most popular website builders available in the WordPress directory.
This definitely brings up the question,
Is the Divi Builder better than that? Which one should you use for your website?
Well, let’s first look at the differences that set them apart.
What makes Divi different from Elementor?
To start off, the major difference between the two is that Elementor is just a stand-alone plugin that makes website building easy. Whereas, Divi is a powerhouse that has a built-in Divi Builder within the Divi Theme package.
Well, one can even use the Elementor website builder with the Divi theme. But that’s not so efficient because both Elementor and Divi Builders will be active and this will impact the performance of the website.
If you want a one-stop solution for website creation including a powerful theme and website builder plugin, then Divi from Elegant Themes is the right choice for you. Because Divi theme has several design capabilities starting from an appealing theme to a powerful visual Builder with unlimited design capabilities.
However, if you are already set on a particular theme, and only want a website builder to create pages for the website, then Elementor can be the right website builder.
Elementor doesn’t offer theme options that dictate the look of the website, but it has several design blocks that will help build a dream website. So, if you need a plugin that makes website creation easier, you should prefer Elementor.
And just like Divi, it is quite easy to create a WordPress website using Elementor.
No. Divi is a premium theme that’s available for purchase from Elegant Themes. It can be purchased at a yearly subscription for $89/year, or a one-time lifetime access for $249/year.
Divi is not just a theme, but also Divi Builder that’s included with the plan.
Divi makes the process of website creation quite easy even for absolute beginners. One can create a website using Divi in three simple steps,
Website speed doesn’t entirely depend on the theme you use on the website. However, Divi, with its premium features and flexible nature, is an amazing choice to create fast websites.
Also, an important factor regarding the website speed is in choosing the right hosting provider. You need to choose a fast hosting provider like WebSpaceKit to build your WordPress website.
Divi, at its core, is a powerful theme that comes with a visual Builder, whereas Elementor is just a drag and drop builder with no Theme options.
If you want a one-stop solution to create your website from theme to visual builder, then Divi is a better choice. But, if you are already set on a theme and only want to build the website, then Elementor may be a better choice over Divi.
Absolutely. Though Divi may seem expensive at first, one needs to remember that it’s a package of theme and visual builder and not just another ordinary theme.
Divi Builder is that powerful visual builder that makes website creation easy, even for absolute beginners. Also, with several built-in templates to start with, the Divi Library is a dream place to design pages on the website.
Do you want to learn WordPress to build any kind of website you want? Then this is the only course you need to take.
View CourseSEO isn't as difficult as you might think. Learn how to start growing organic traffic to your website with our easy to follow video .
Watch VideoSign up for our WordPress Course today!
Add a Comment
Leave a Comment