How to Easily Create a WordPress Staging Site for Testing
Posted on
June 9, 2023
by

in
Guides
If you have a WordPress website, you need to add new features, plugins, and themes to keep it fresh. But doing this on your real website can cause problems or mistakes. A WordPress staging site is a safe place to try out changes without affecting your real website. In this easy-to-understand guide, we’ll show you how to create a WordPress staging site and use it to test and improve your website.
A staging site is a helpful tool for people who make frequent changes to their websites. It has many advantages, like:
So to create the new staging site, we’re going to do three steps:
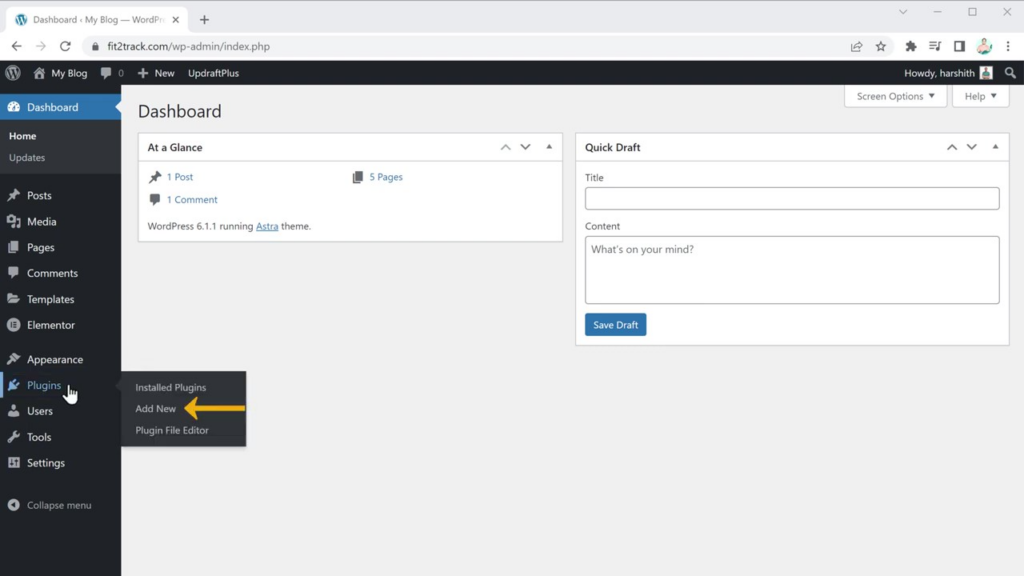
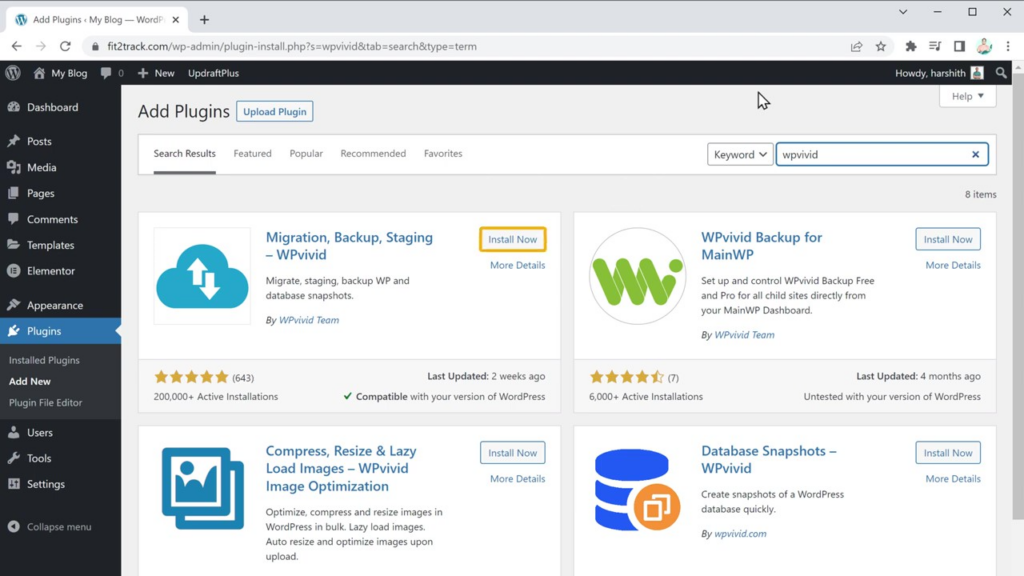
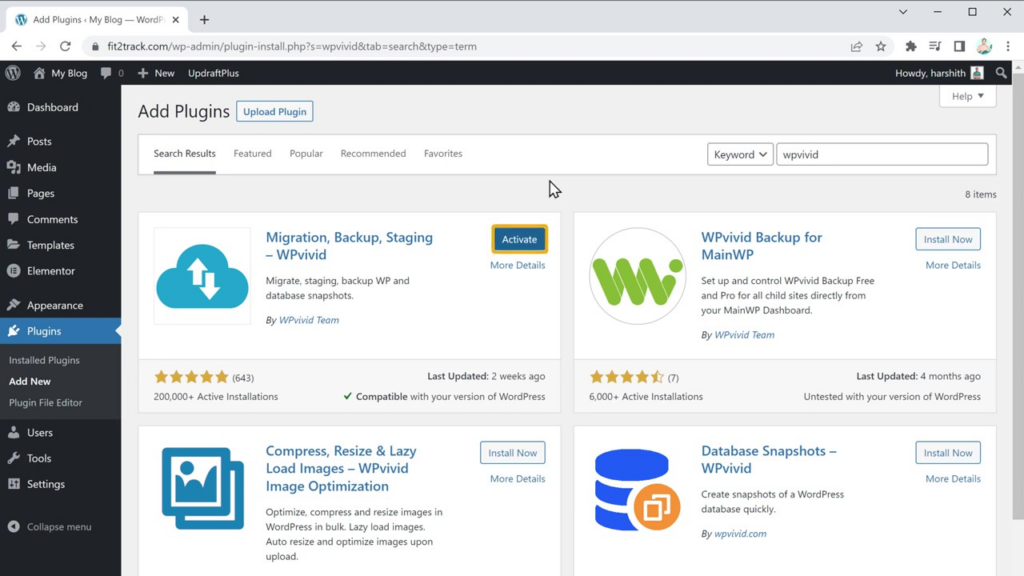
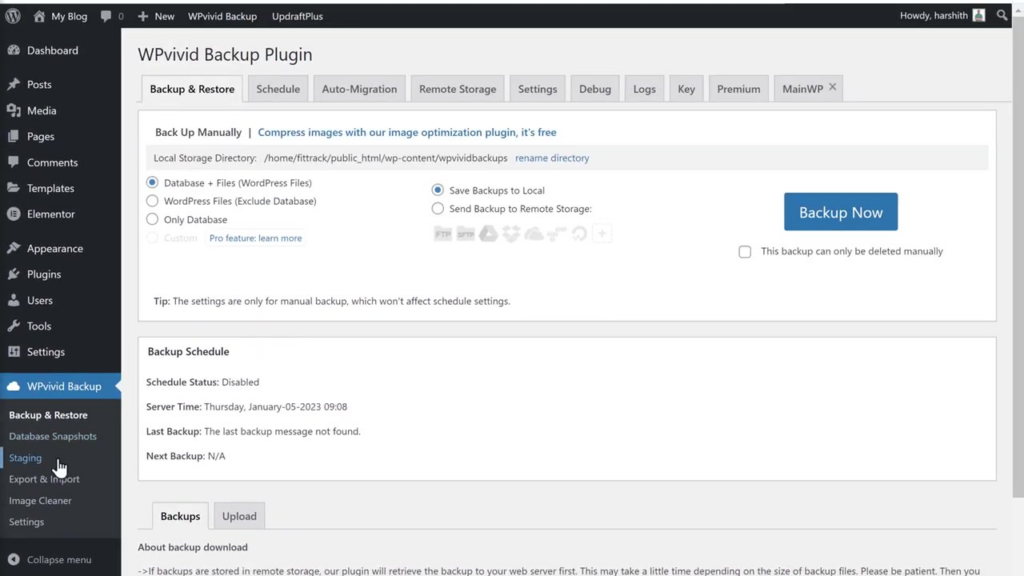
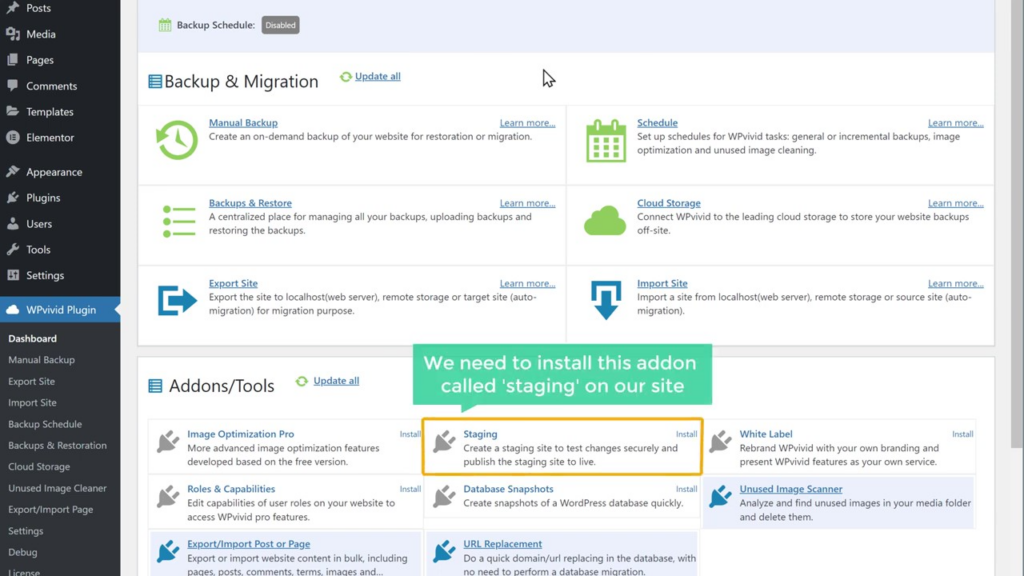
Step 1: Install WP Vivid Plugin
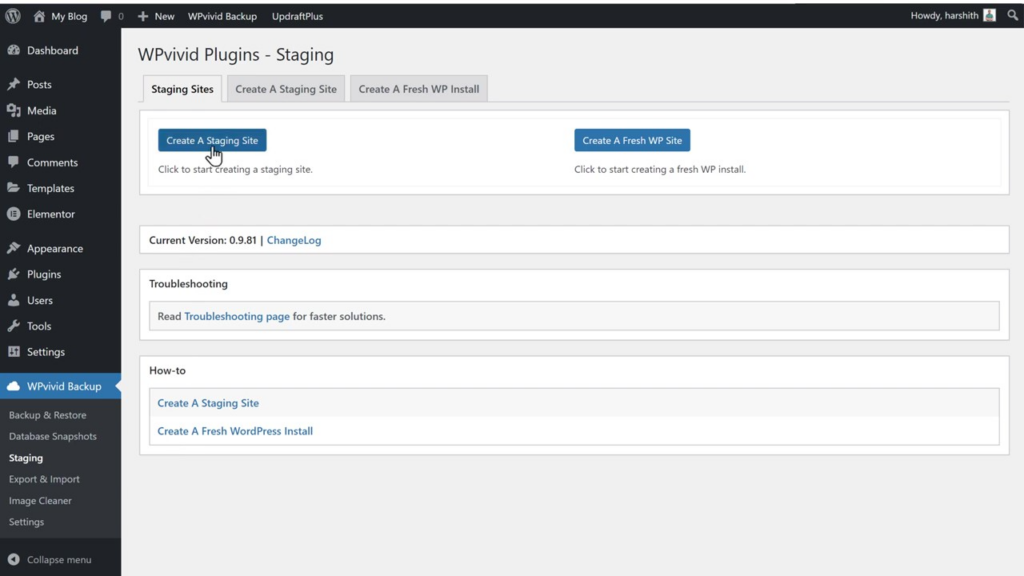
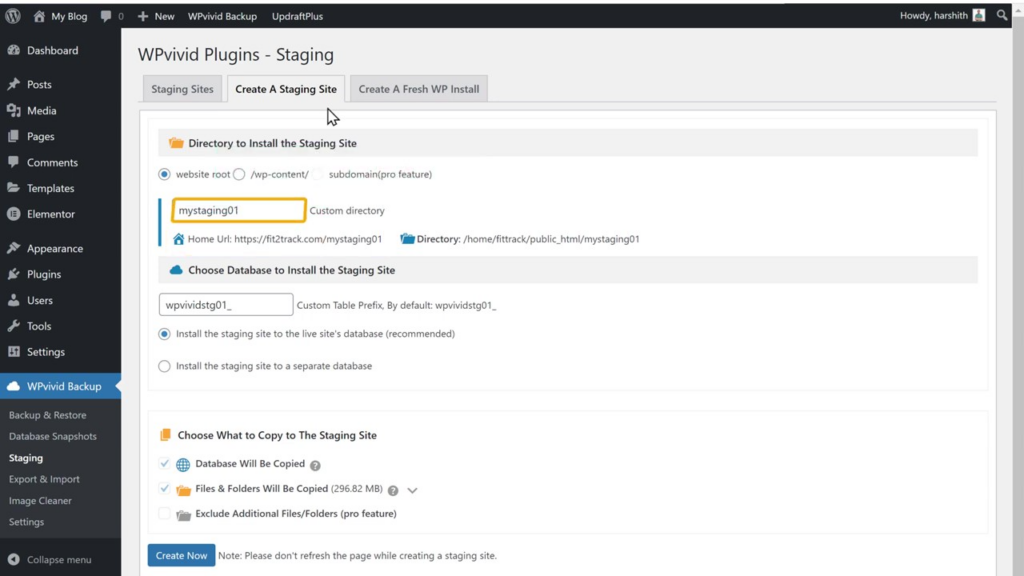
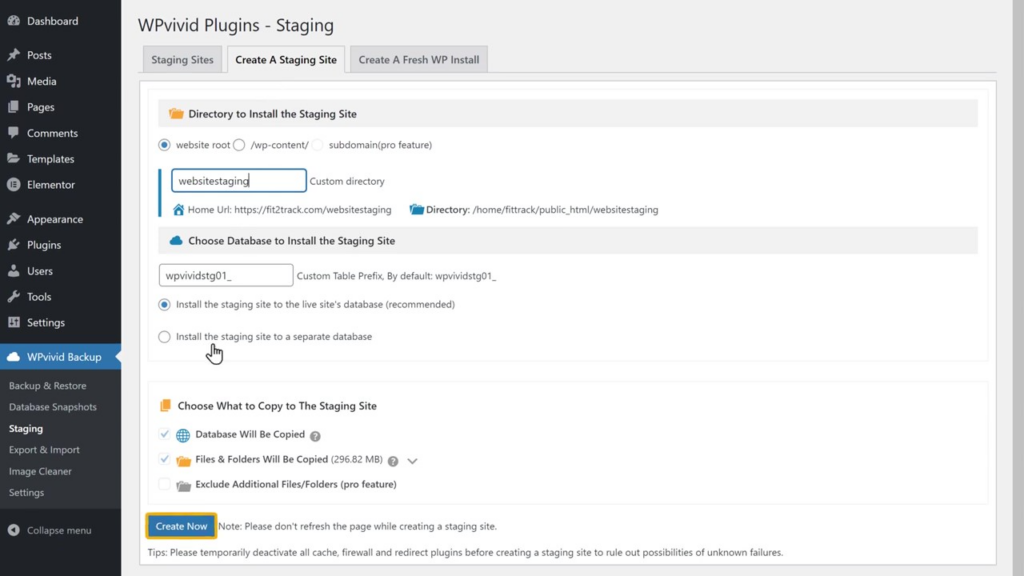
Step 2: Create a Staging Site
Step 3: Edit Staging Site Contents
So first, let’s see how you can install the WP vivid plugin on your website.
The WP Vivid plugin is a powerful tool that allows you to create and manage a WordPress staging site for your website. Installing the plugin is a straightforward process. Here’s what you need to do:
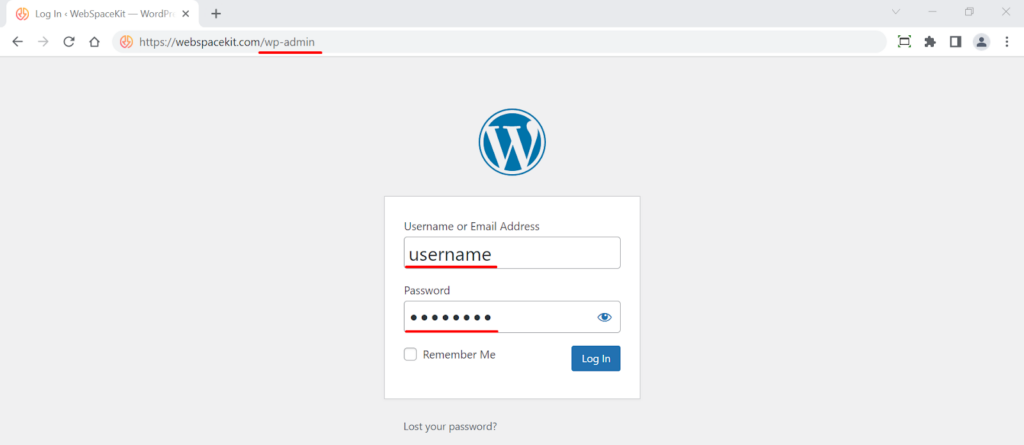
To do this just go to your website and type ‘/wp-admin’ in your URL, and then enter your username and password.

With the WP Vivid plugin installed and activated, you can now proceed to create your new staging site or staging environment. Follow these steps:
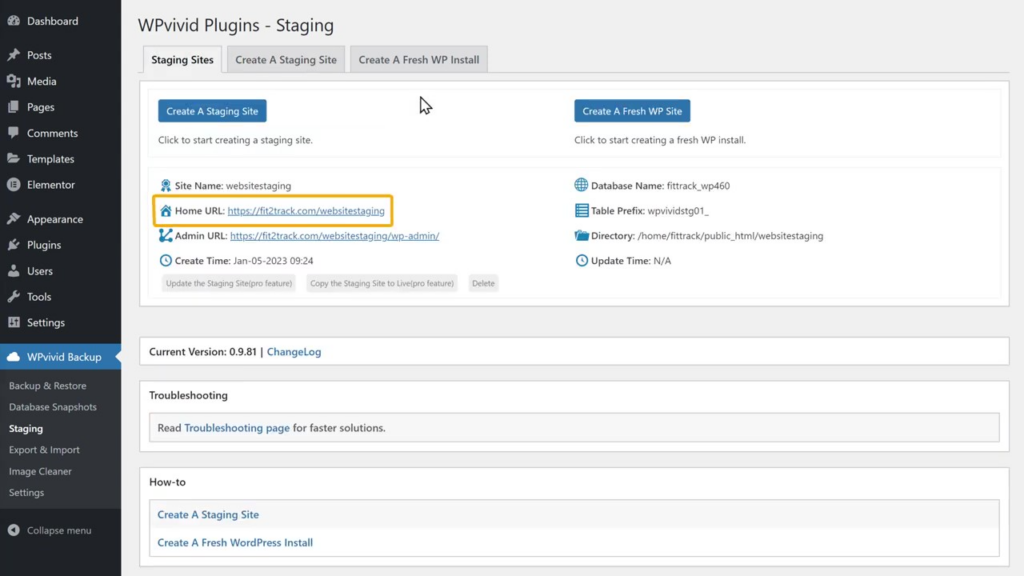
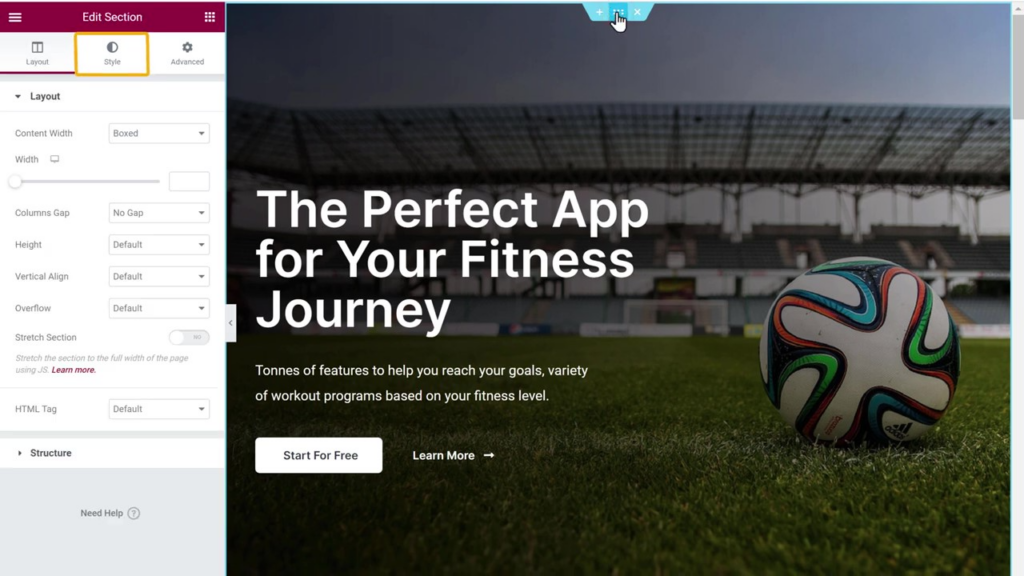
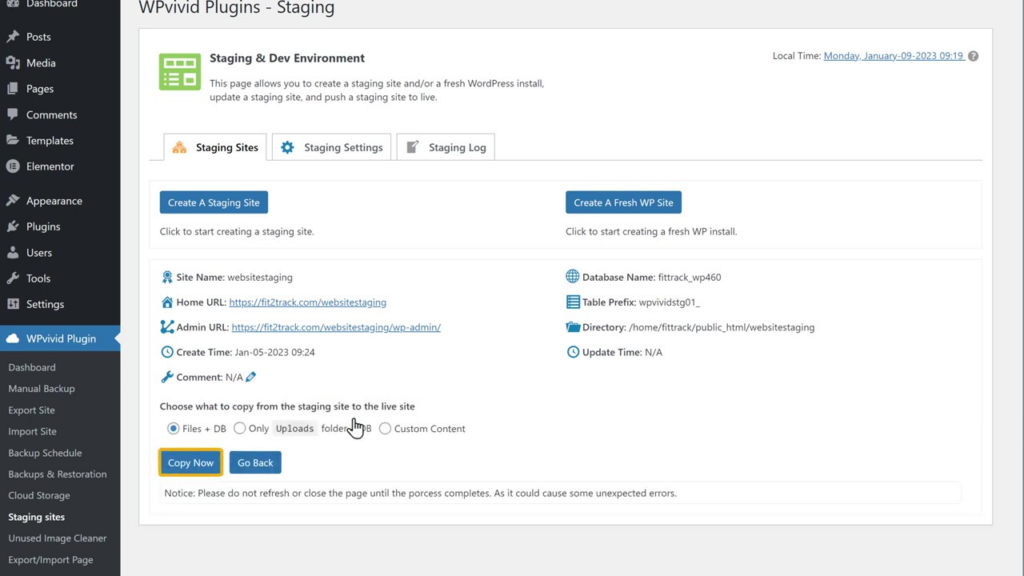
Now that your wordpress staging environment is set up so we’ve got our new staging site, you can start making changes to its contents without impacting your live wordpress website. To edit your wordpress staging site, follow these steps:


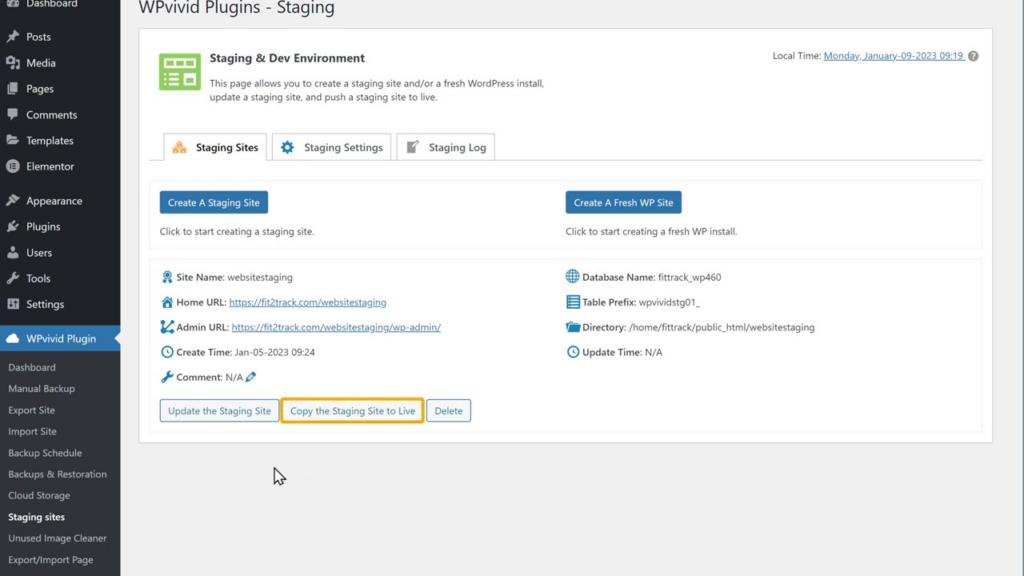
By following these steps, you can safely experiment with changes to your website without affecting the live version. Once you’re satisfied with the updates, you can apply them to your live website either by using the pro version of the WP Vivid plugin or by manually implementing the changes.
So if you want to make all the changes manually, then you can do that; otherwise, if you make changes to your website very frequently and you want to apply all the changes that you make on the staging site to show up on the live site automatically, then you can use the pro plugin.
To apply changes from your staging site to your live website, you’ll need the pro version of the WP Vivid wordpress plugin:

WebSpaceKit offers a free staging feature with its hosting plans. This feature can save you time and effort when creating and managing staging sites. To use this feature, purchase a hosting plan from Webspace Kit’s website. The free WordPress staging Site feature is included in their plans, making it a cost-effective option for those looking to test and update their WordPress sites without hassle.
To make the most of your staging site and ensure a smooth update process, follow these best practices:
A WordPress staging site is an invaluable tool for website owners looking to test and update their wordpress sites without risking errors or disruptions. By following this detailed guide, you can create and manage a WordPress staging site with ease, ensuring a safe and efficient update process for your WordPress site.
Don’t forget to subscribe to our blog for more helpful tips and tricks on managing and optimizing your WordPress site. Happy testing!
A staging site is a clone of your live wordpress website used to test changes, updates, and new features before implementing them on your live wordpress website. This prevents errors and issues from affecting your live wordpress website and allows you to test updates safely.
Yes, you can use a staging site to test any WordPress theme or plugin. By testing them on a staging site, you can ensure their compatibility and functionality before deploying them on your live wordpress website.
The pro version of the WP Vivid wordpress plugin is required if you want to automatically apply the changes made on your staging site to your live site. The free version allows you to create a staging site, but applying changes to your live wordpress website would have to be done manually.
Yes, there are other wordpress plugins and tools available for creating staging sites, such as WP Staging, Duplicator, and All-in-One WP Migration. Some web hosting providers also offer built-in staging site features.
You should update your staging site regularly, ideally before making any changes to your live site. This ensures that you have an up-to-date environment to test new features, plugins, and themes before applying them to your live site.
No, your live website will not be affected when you make changes to your staging site. The staging site is a separate environment, and any changes made there will not impact your live website until you choose to apply them.
Do you want to learn WordPress to build any kind of website you want? Then this is the only course you need to take.
View CourseSEO isn't as difficult as you might think. Learn how to start growing organic traffic to your website with our easy to follow video .
Watch VideoSign up for our WordPress Course today!
Add a Comment
Leave a Comment