How To Add Coupons To Your E-commerce Website
Posted on
July 16, 2020
by

in
Guides
Are you wondering how to give discounts to your customers on your eCommerce website?
Well, you can easily offer discounts by using coupons.
Coupons are unique codes that you can create on your website, to offer discounts to customers.
Let us see, how to add coupons to your E-commerce website in a step-by-step process.
The coupon codes are entered by customers to avail a discount when checking out as shown in the example below.

Before we get started with this tutorial, you will need to have a WordPress website with WooCommerce installed. If you don’t have an eCommerce website yet, you can watch our video here to get started.
Now that you have your own website, let’s add coupons to your e-commerce website. This article will be split into three parts,
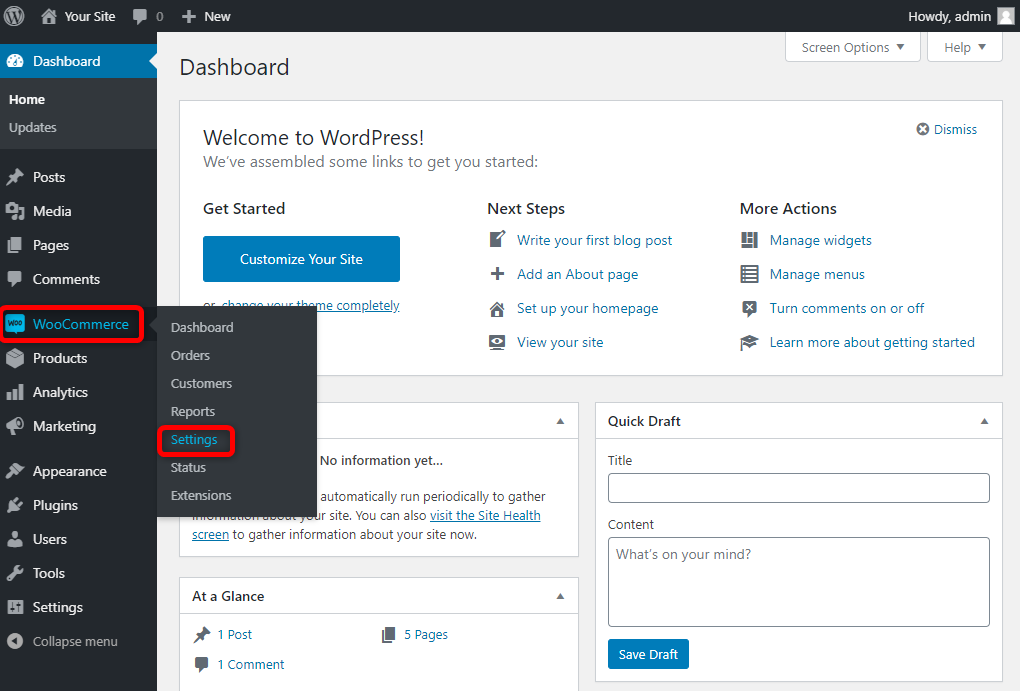
In your WordPress dashboard under the WooCommerce menu click on Settings.
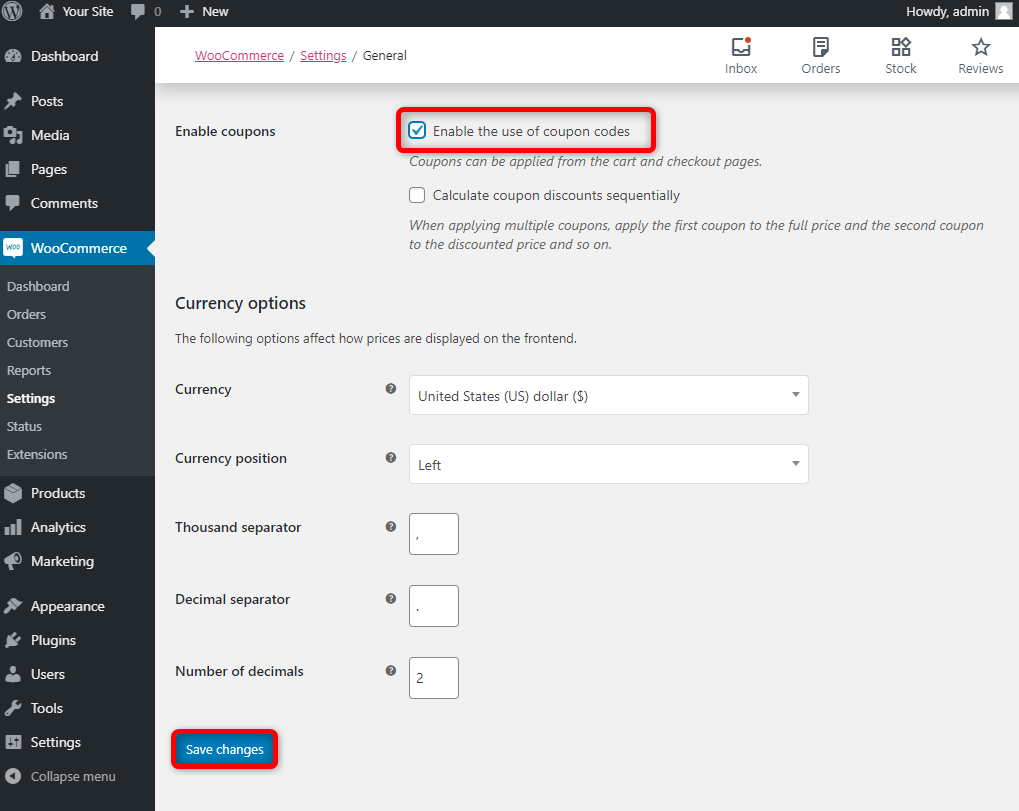
In the WooCommerce settings page scroll down and check “Enable the use of coupon codes” then click on Save Changes.
Notice the changes in your cart page after enabling the coupons option.
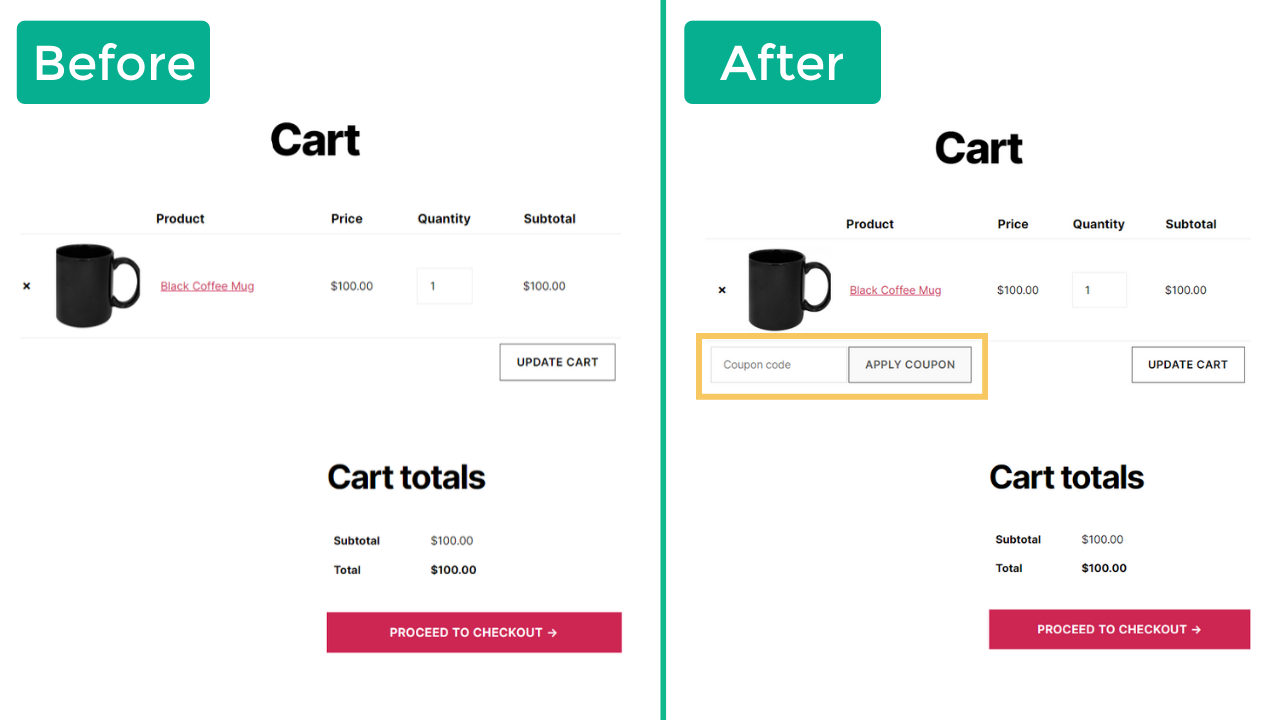
Preview of cart page without coupons option enabled
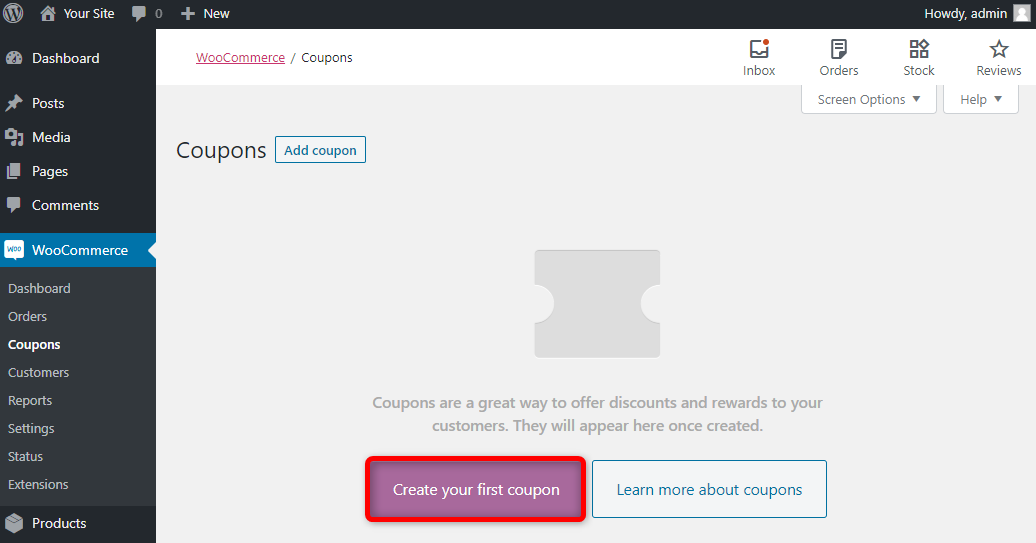
In your WordPress dashboard under the WooCommerce menu click on Coupons.

On the coupons page click on Create your first coupon
On the Add new coupon page, there are a few options you will need to configure.
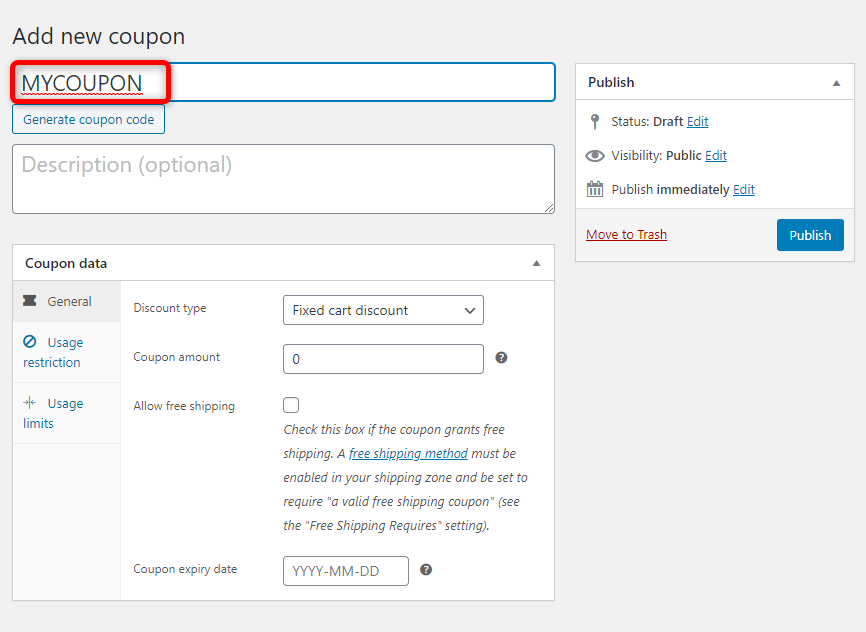
First, you will need to enter the code that you want to use for your coupon. We are going to use ‘MYCOUPON’.
This will be the coupon code your customers will have to enter to get the discount.
Under the discount type dropdown, you will find 3 options Percentage discount, Fixed cart discount and a Fixed product discount.
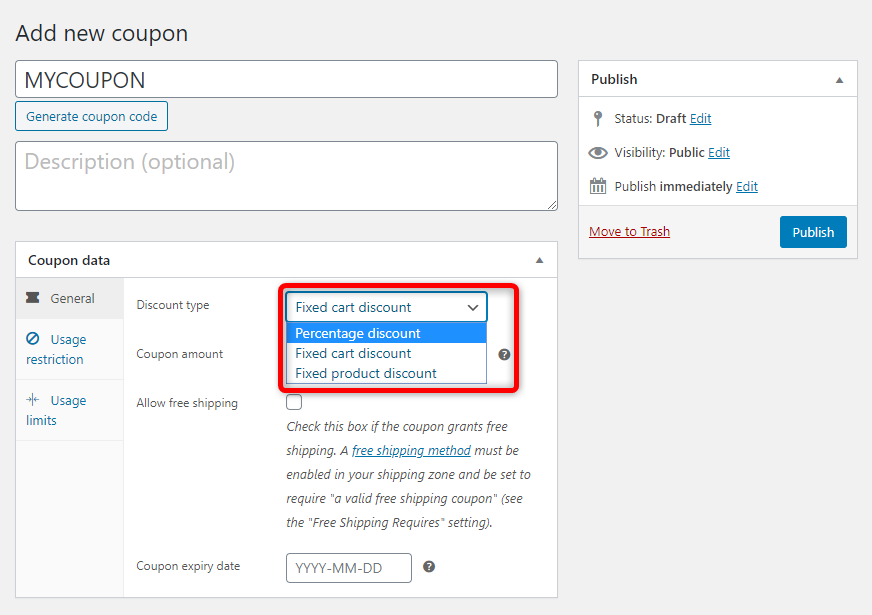
We will look at how you can set up each discount type and how it works in the front-end.
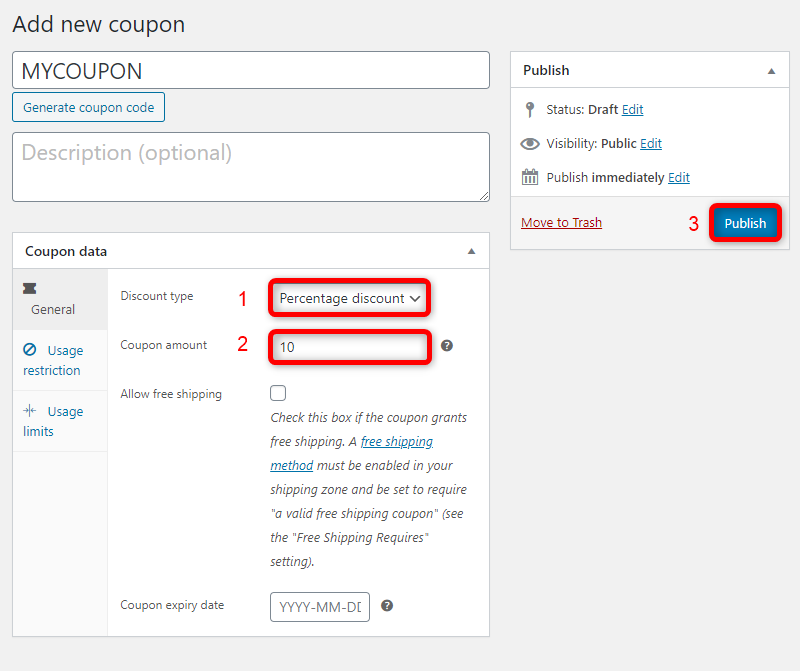
If you choose this option, your customers will get a fixed percentage discount based on their bills. For example, if you set a 10% discount, and your customer’s bill is $100 they will get a $10 discount.
From the discount type drop-down, choose Percent discount.
Then in the coupon amount field enter the percentage of discount that you want to give. For example, if you want to give a 10% discount enter 10.
Click on Publish once done.
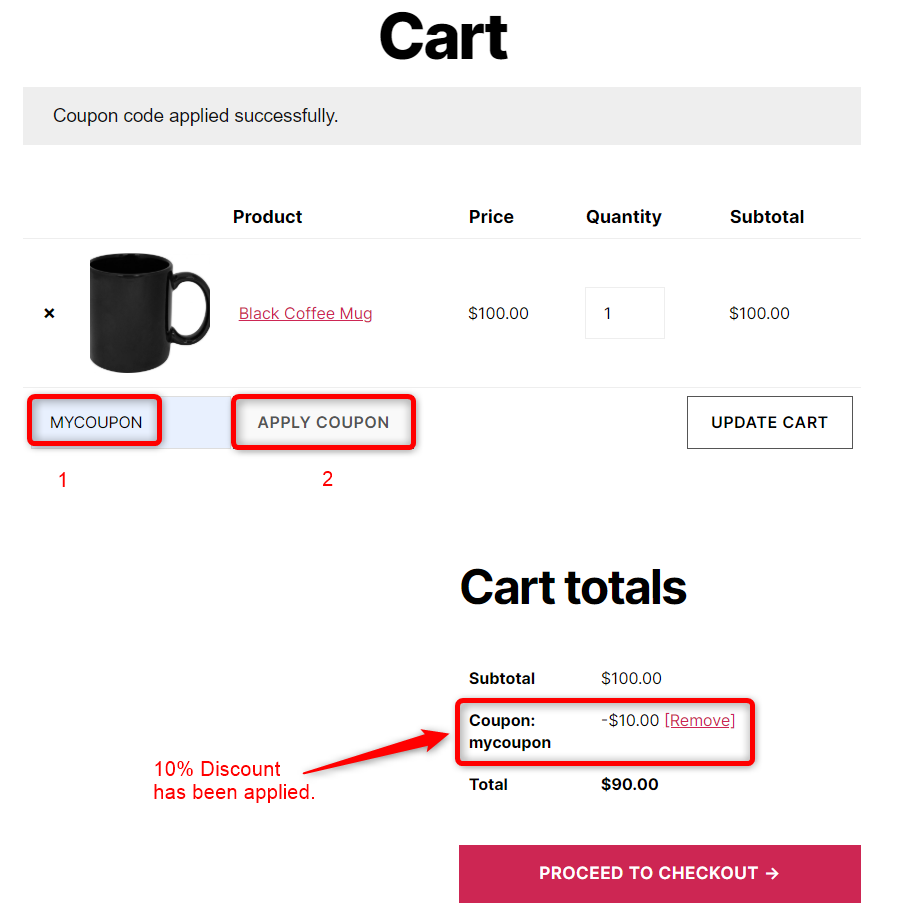
Now in the front-end of the website, on the cart page enter the coupon code ‘MYCOUPON’ and click on Apply Coupon.
Here is a preview of our cart in the front end. You can see that the discount has been applied.
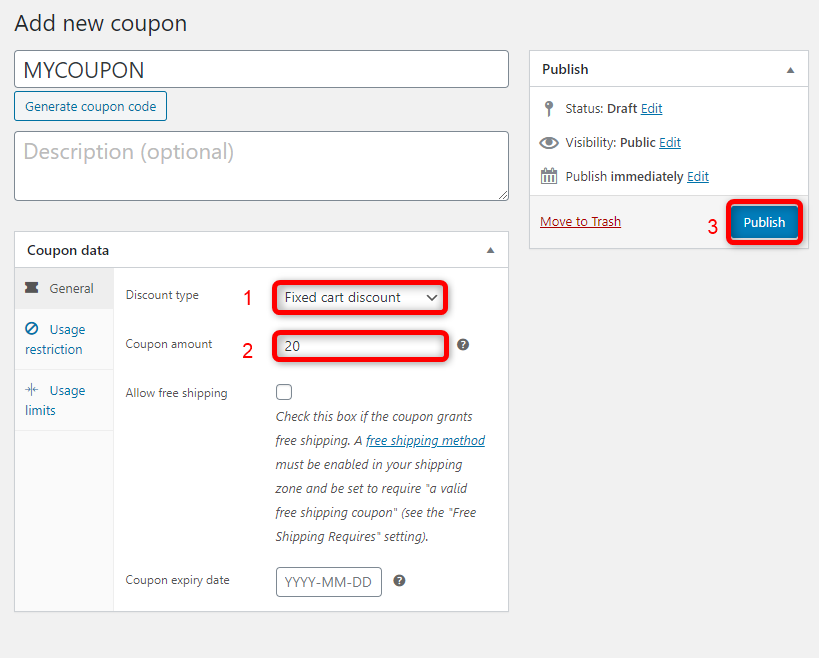
In this case, your customers will get a fixed amount discount. For example, if you set a $20-dollar discount, and your customer’s bill is $100 they will only pay $80.
The discount will always be the amount you set, no matter the cart value.
From the discount type drop-down, select Fixed cart discount.
In the coupon amount, enter the amount of discount you would like to offer. For example, if you would like customers to get $20 off their cart, enter 20.
Then click on Publish.
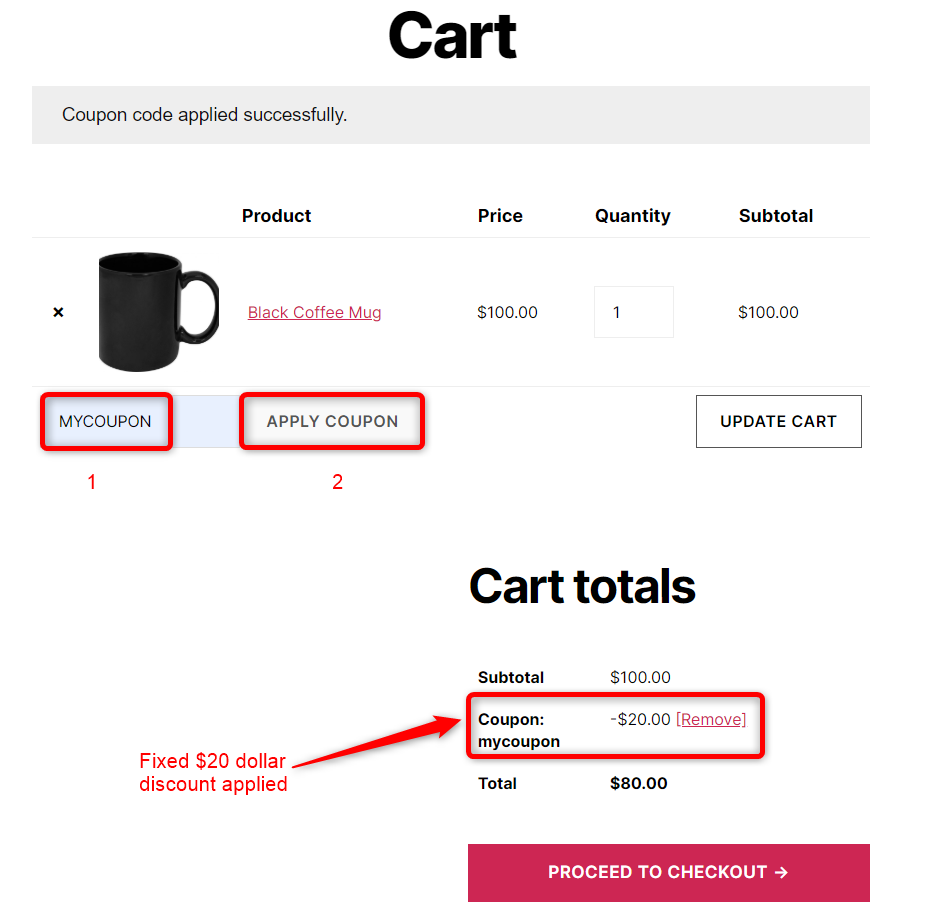
Now in the front-end of the website, on the cart page enter the coupon code ‘MYCOUPON’ and click on Apply Coupon.
Here is a preview of our cart in the front end. You can see that the $20 discount has been applied.
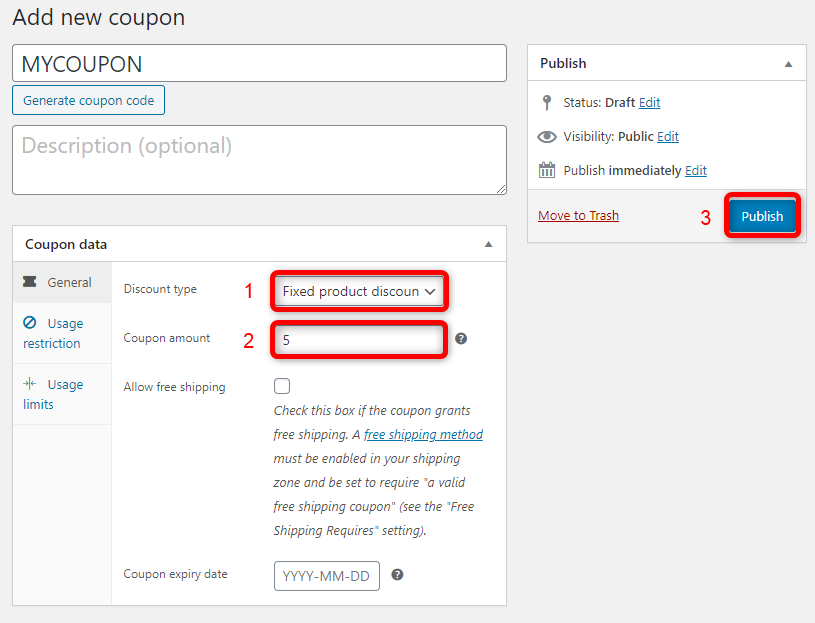
In this case your customers will get a fixed discount amount for each product. For example, if you set the product discount at $5 per product, and your customer buys 2 products they will get a $10 discount, if they buy 3 products, they will get a $15 discount and so on.
From the discount type dropdown select Fixed product discount.
In the coupon amount enter the amount of discount you would like to offer. For example, if you would like customers to get a $5 discount for every product purchased enter 5.
Then click on Publish.
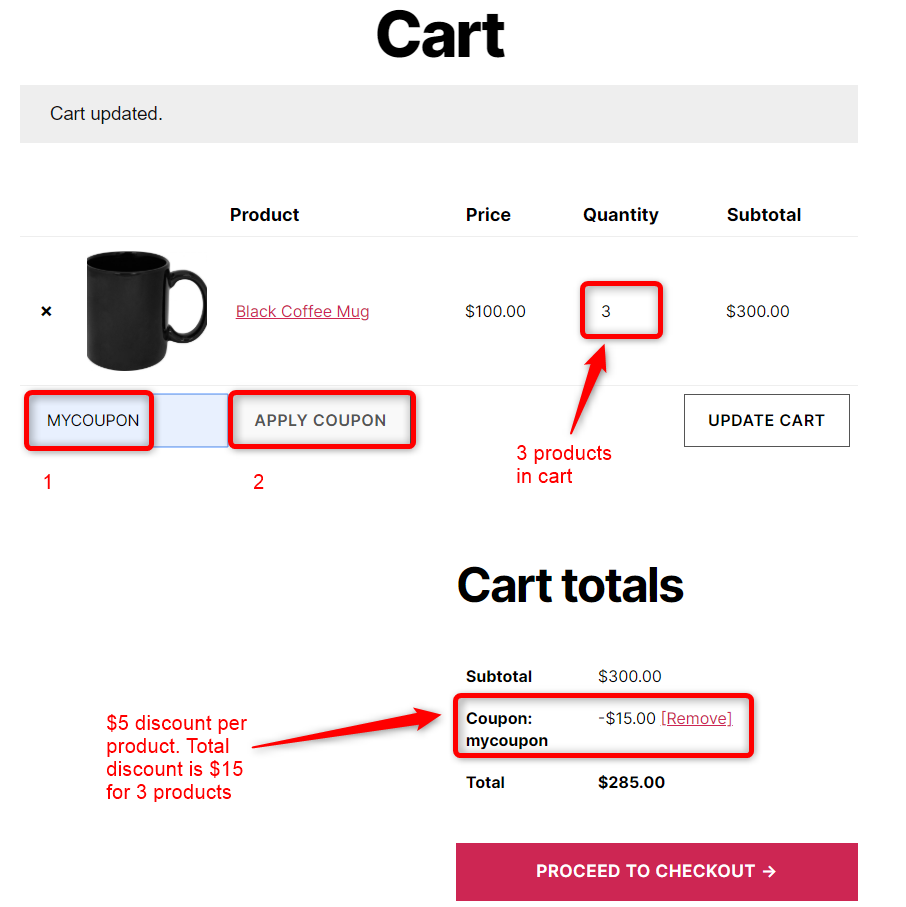
Now in the front-end of the website, on the cart page enter the coupon code MYCOUPON and click on Apply Coupon
Here is a preview of our cart in the front end. You can see that the $15 discount has been applied as we have 3 products in our cart.
You can set a minimum amount a customer has to spend in order to avail the discount.
For example, if your minimum amount is $100 and a customer purchases an item worth $90 they will not be able to avail the discount.
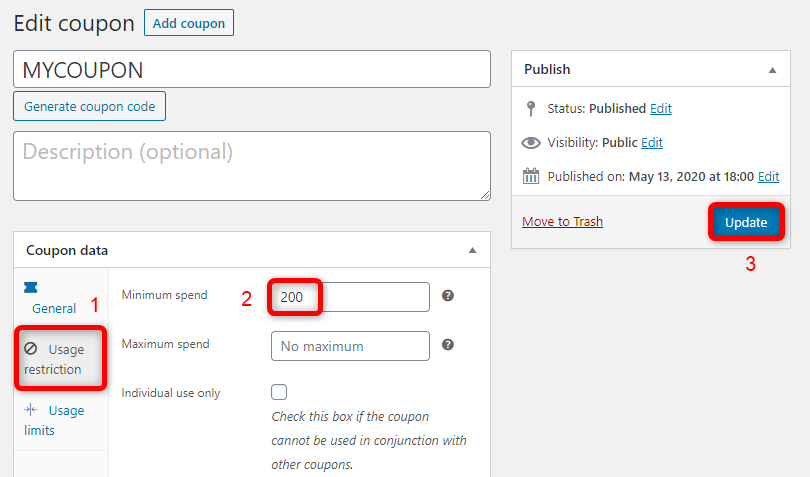
Go back to the coupons page and click on Usage Restrictions.
Enter the minimum amount that the customer should spend to avail the discount. For example, we have entered $200.
Then click on Update.
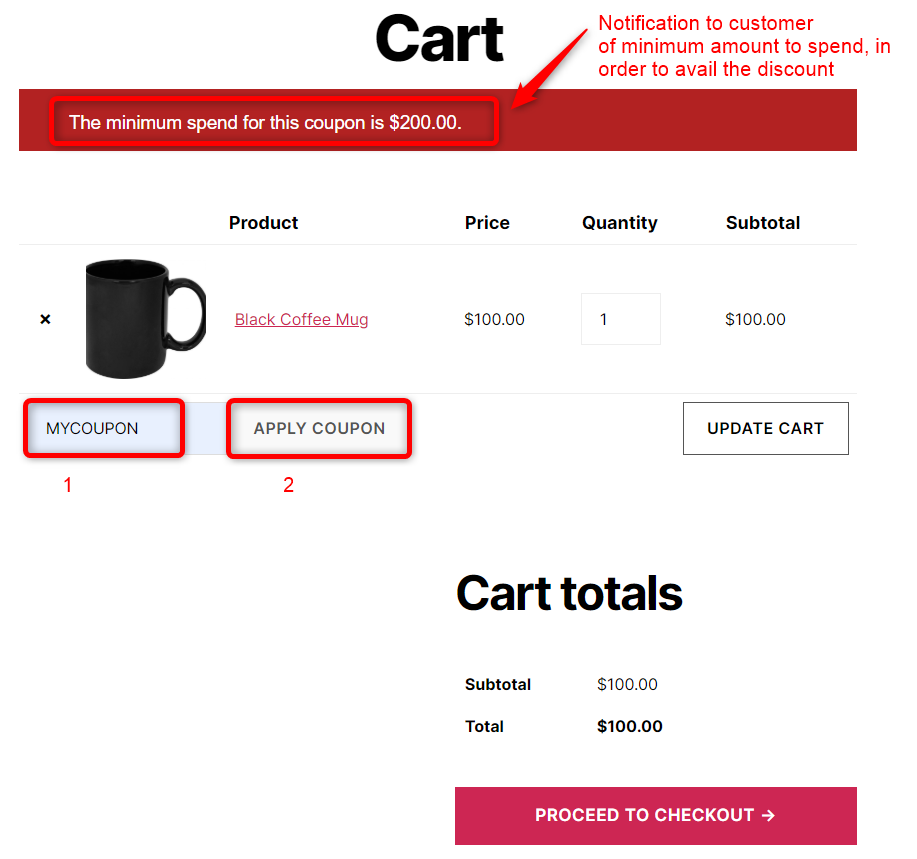
Now if we go to the cart page and enter the coupon code and click on Apply Coupon, you can see that the customer is notified the minimum spend for the coupon is $200.
The customer, therefore, needs to purchase more products or they will not be able to avail the discount.
Sometimes you may only want to give discounts on some products and not all products in your store.
You can restrict which products customers can avail the discount on.
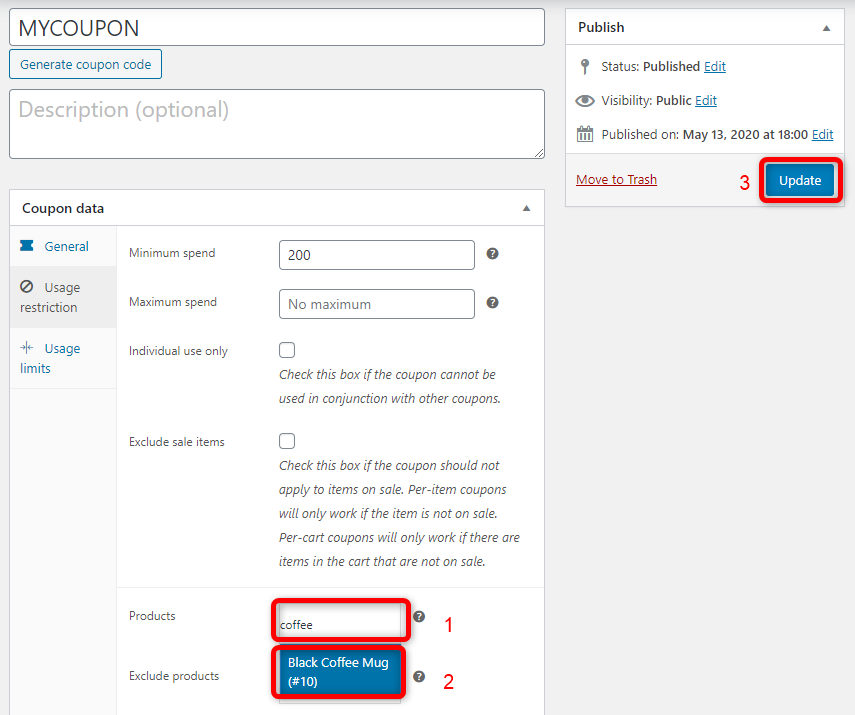
Go to the coupons page, click on Usage Restrictions and in the products field enter the name of the products for which you would like the discount to be offered. Click on the product to select it.
Then click on Update.
For example, we want the discount only to be offered on the Black Coffee Mug.
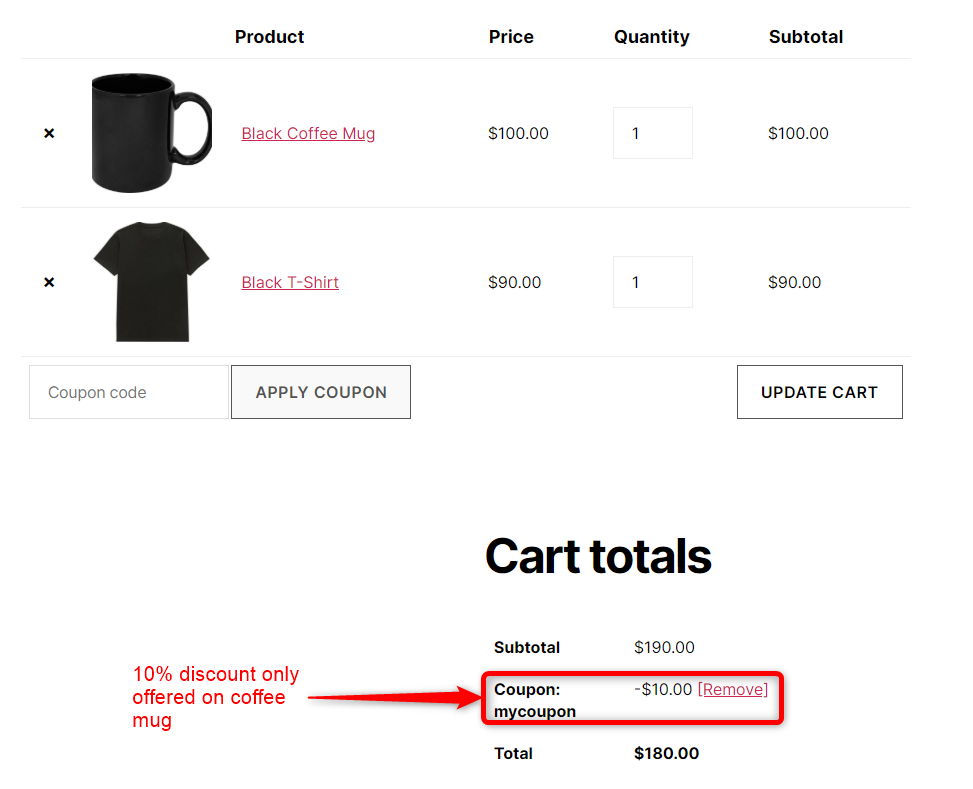
Now if we go to the front end of our website, in the example below, you can see the 10% discount has only been applied to the Coffee Mug and not the T-shirt.
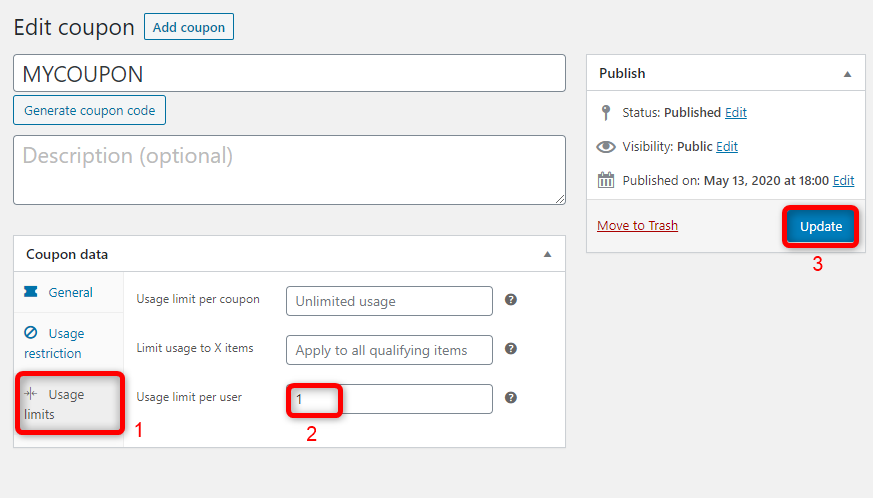
You can restrict the number of times a customer can use a coupon.
For example, if you only want each customer to use the coupon once only.
Go back to the coupons page, click on Usage limits, in the usage limit per user section enter 1. Then click on Update.
This will ensure the coupon can only be used once by one user.
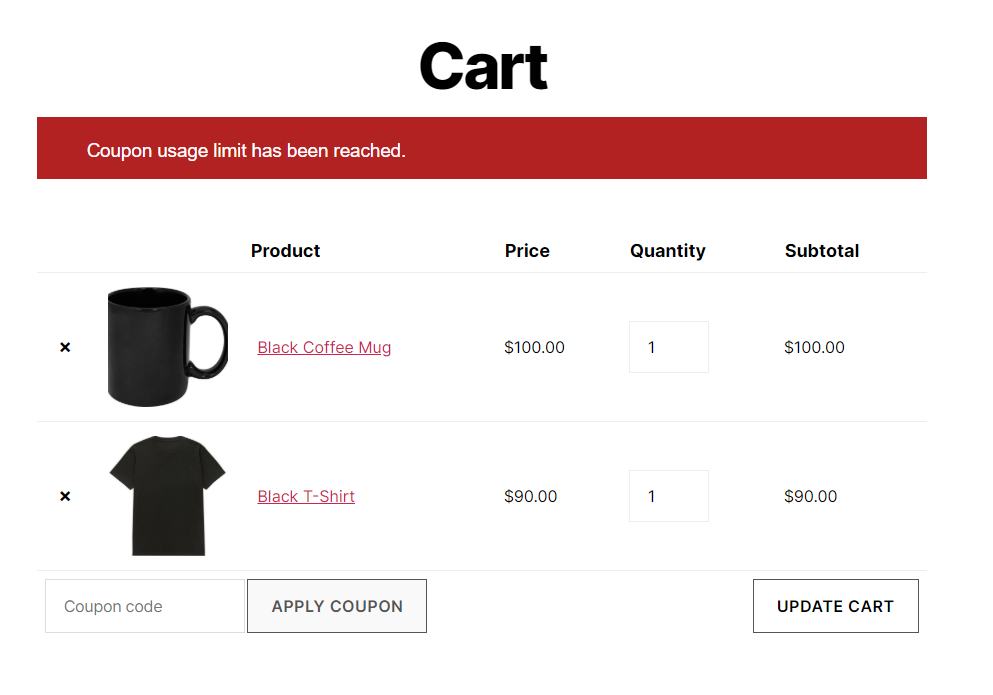
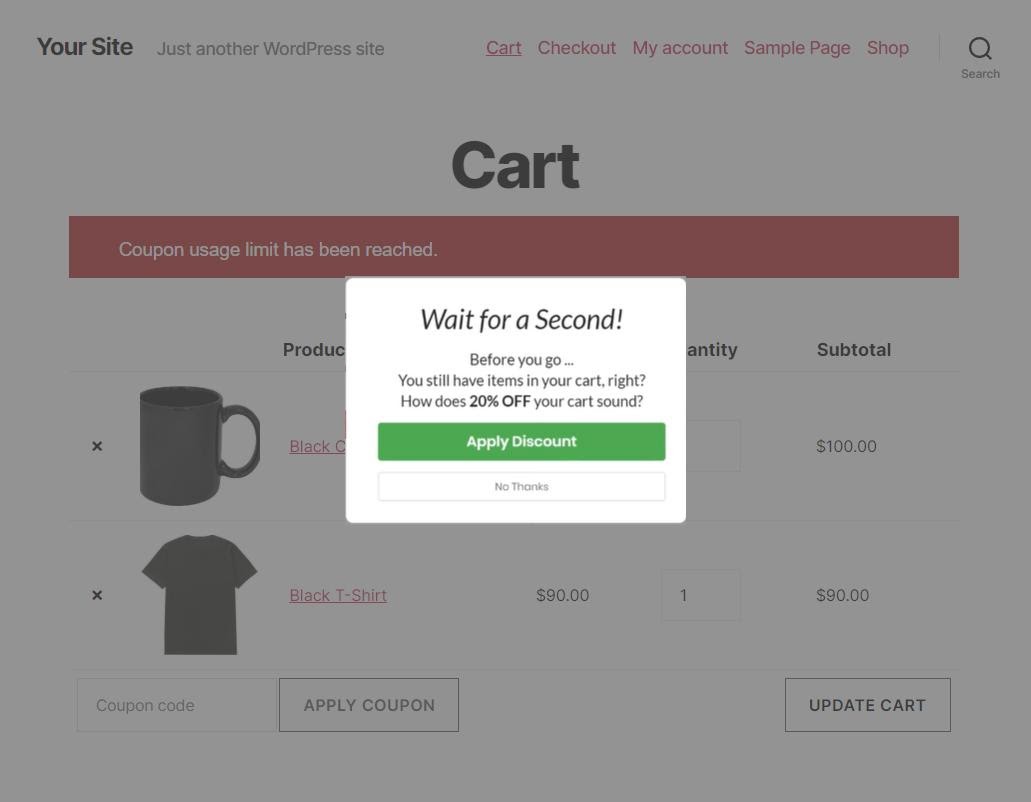
If the customer now completes an order by clicking checkout, if they come back to buy more products, and try to use the coupon code, they will see a notification saying Coupon usage limit has been reached as shown below.
Suppose you only want the coupon to be used 100 times and no more than that.
Go back to the coupons page, click on Usage limits, and in the usage limit per coupon field enter 100. Then click on update.

This coupon will now only be used for the first 100 times.
Suppose you only want the coupon to be used before a certain date.
Go back to the coupons page, click on General and in the coupon expiry date section enter a relevant date.
Then click on Update.
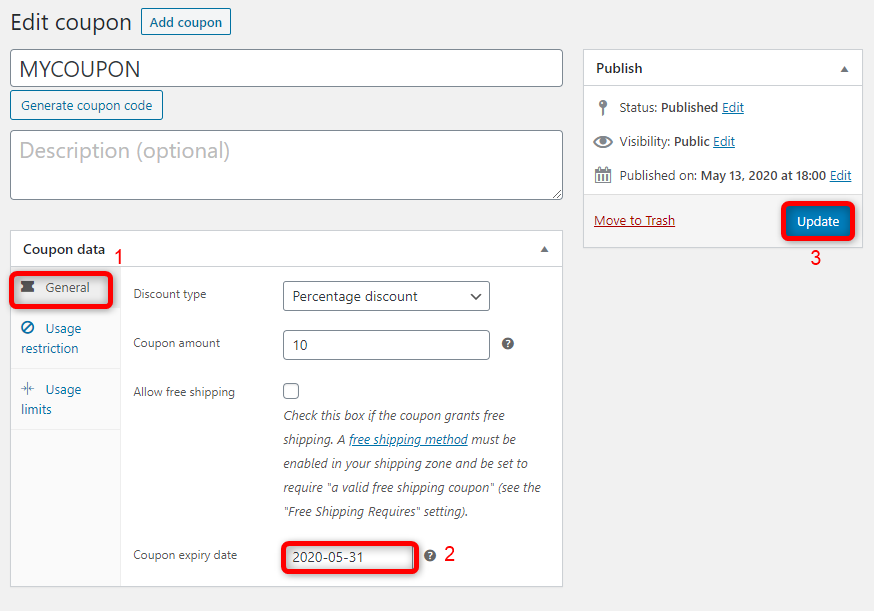
In the above example, the coupon will now only be available for use before 31st May 2020.
You should now be familiar with the process for creating coupons and displaying them on your website.
Now we will look at how you can display the coupons on your website to let your customers know about the discount. Here is a step by step guide.
HOW TO DISPLAY COUPONS On Your Website?
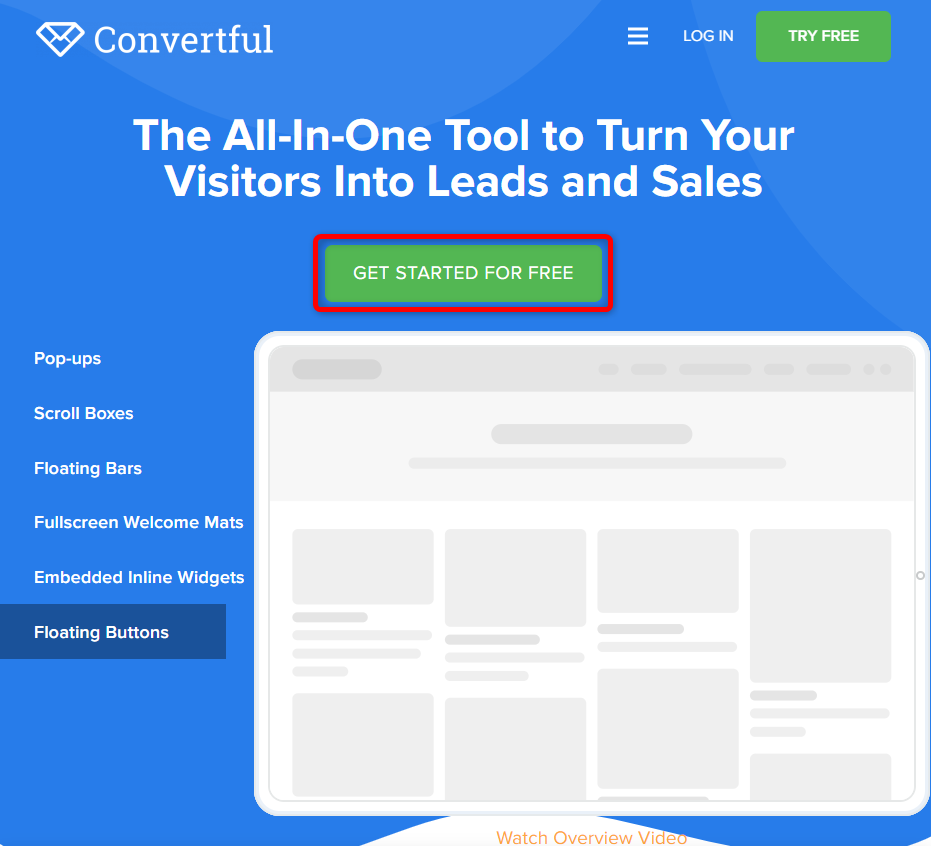
Visit https://convertful.com and click on GET STARTED FOR FREE
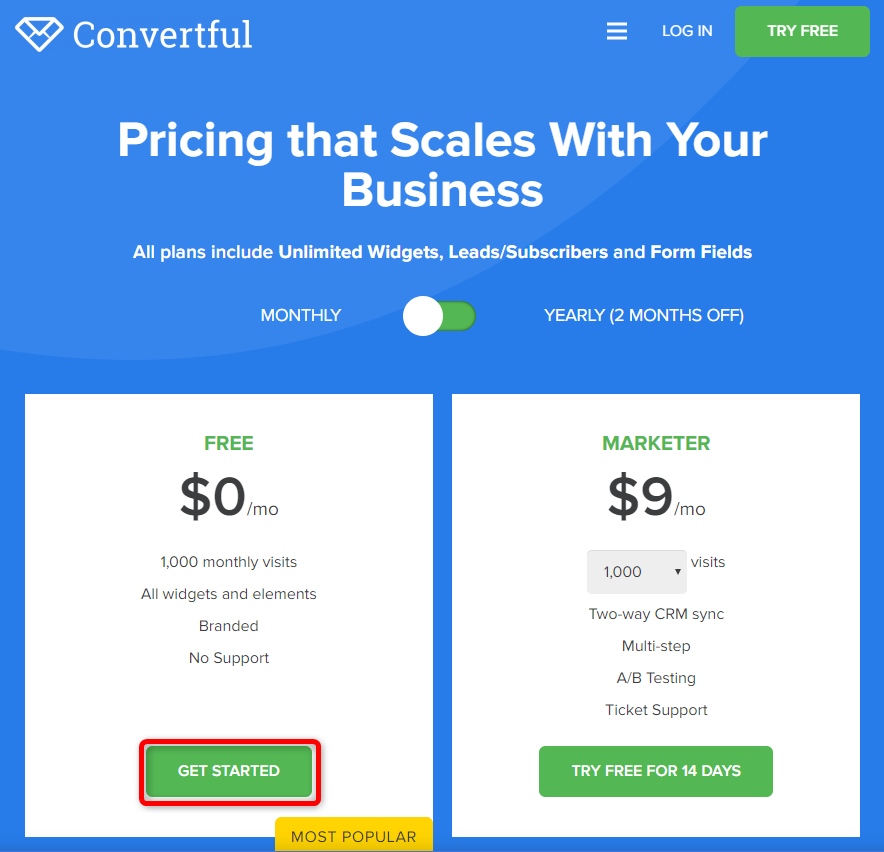
Select the free plan and click on GET STARTED
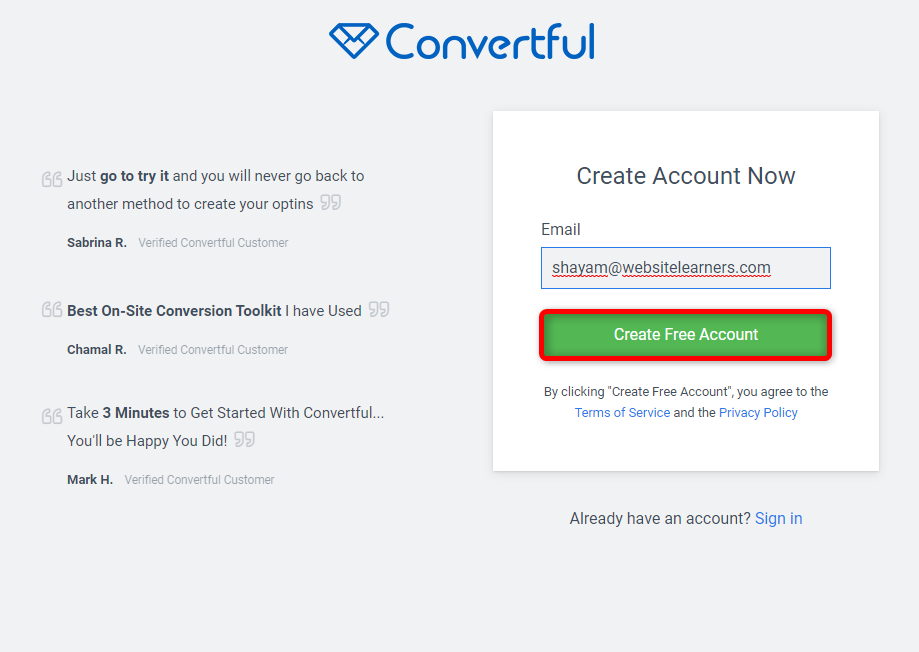
Enter your email and click on Create Free Account
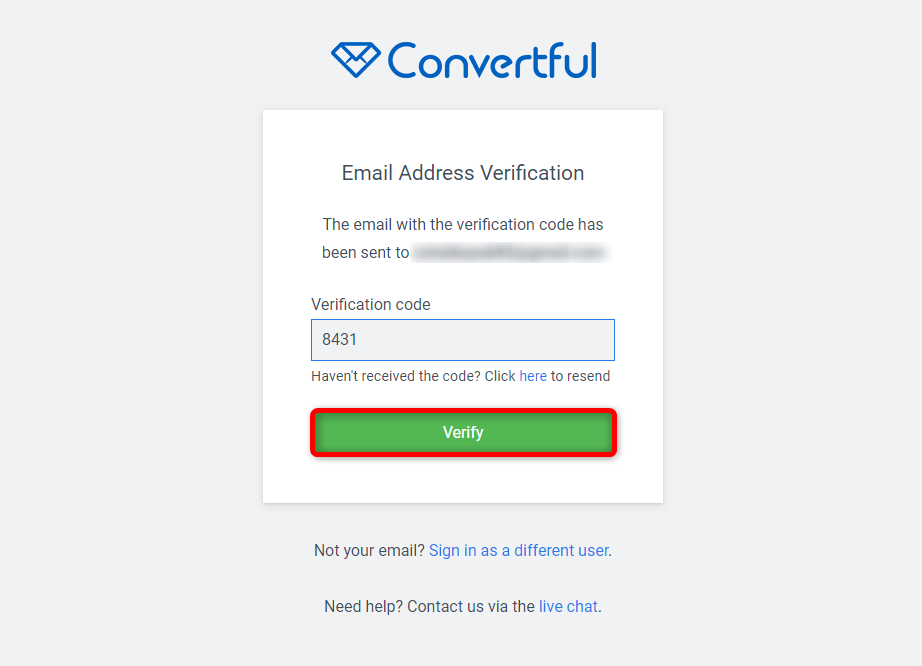
Enter the code that you receive in your email and click on Verify
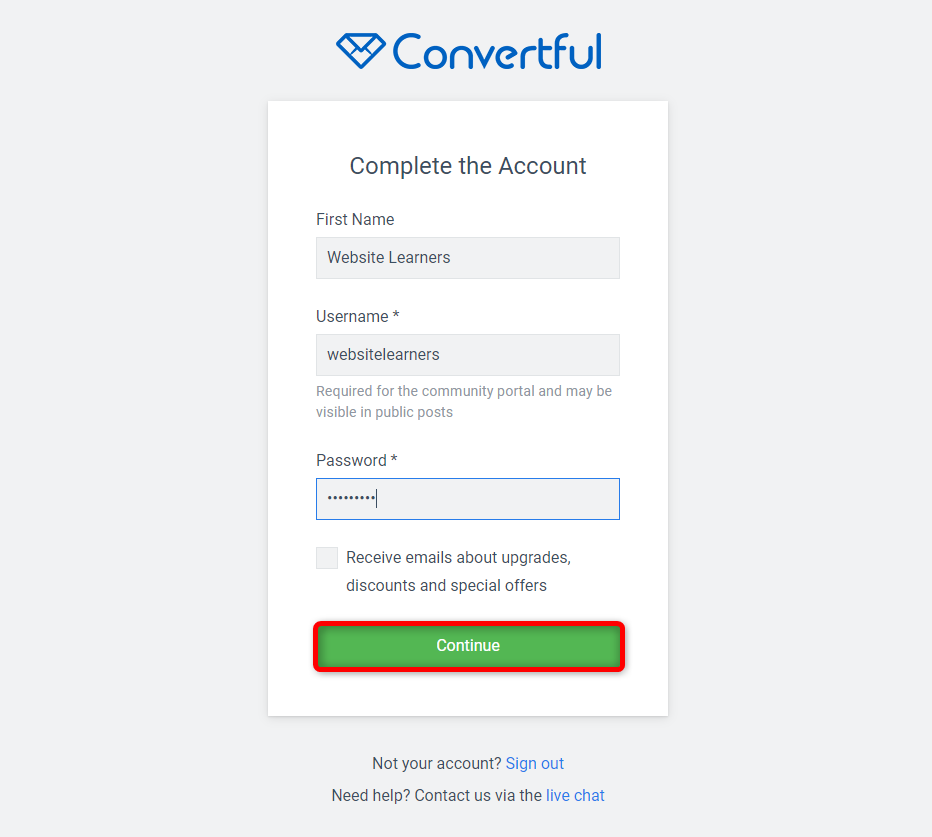
Enter your name, username, password and click on Continue
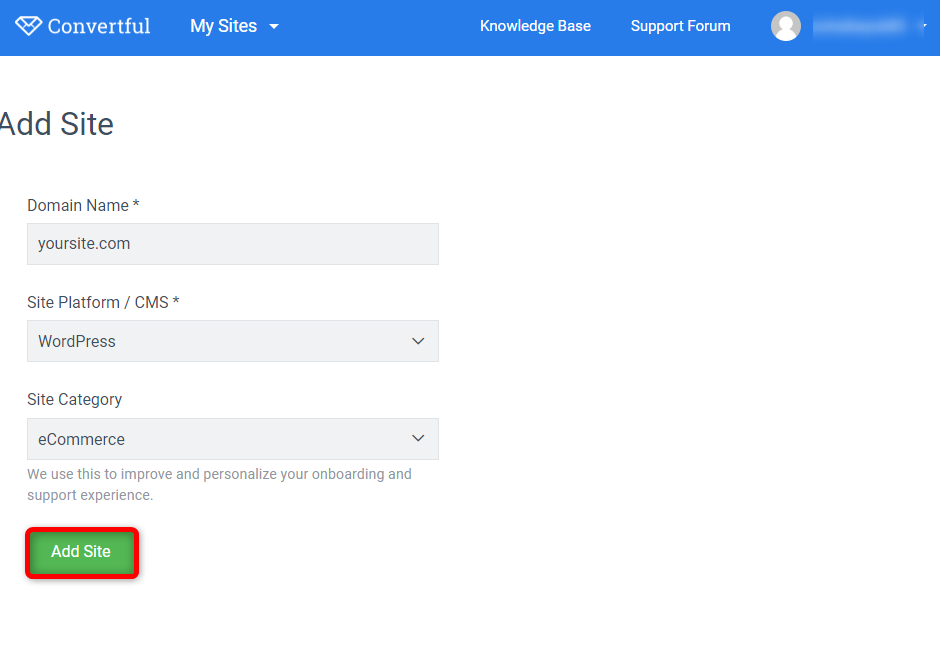
Enter your site’s address, select WordPress from the site platform and select eCommerce from the category. Then click on Add Site.
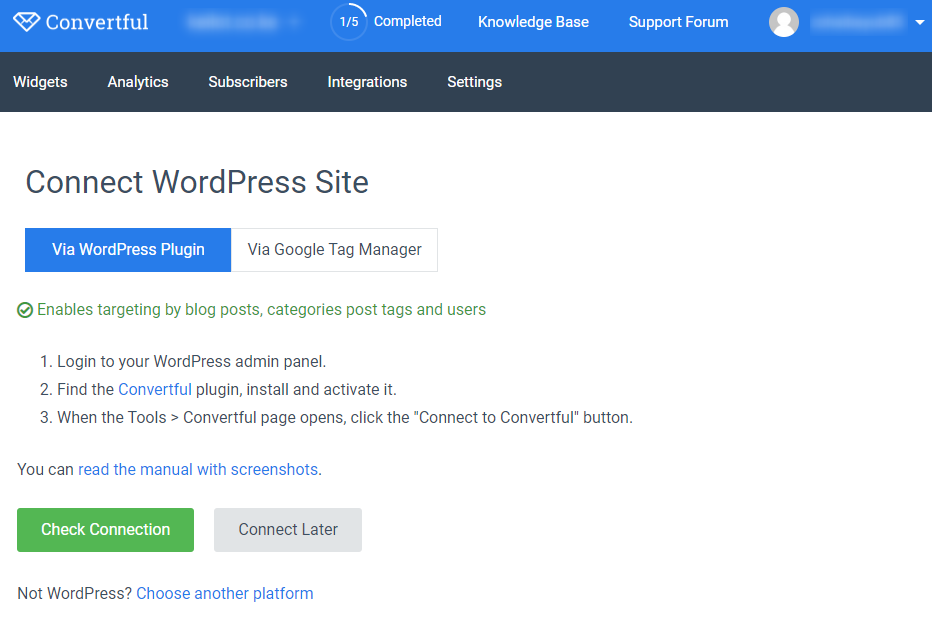
You will then need to connect your website to your account. As shown below it can be done in 2 ways. The first way, through the WordPress plugin is easier.
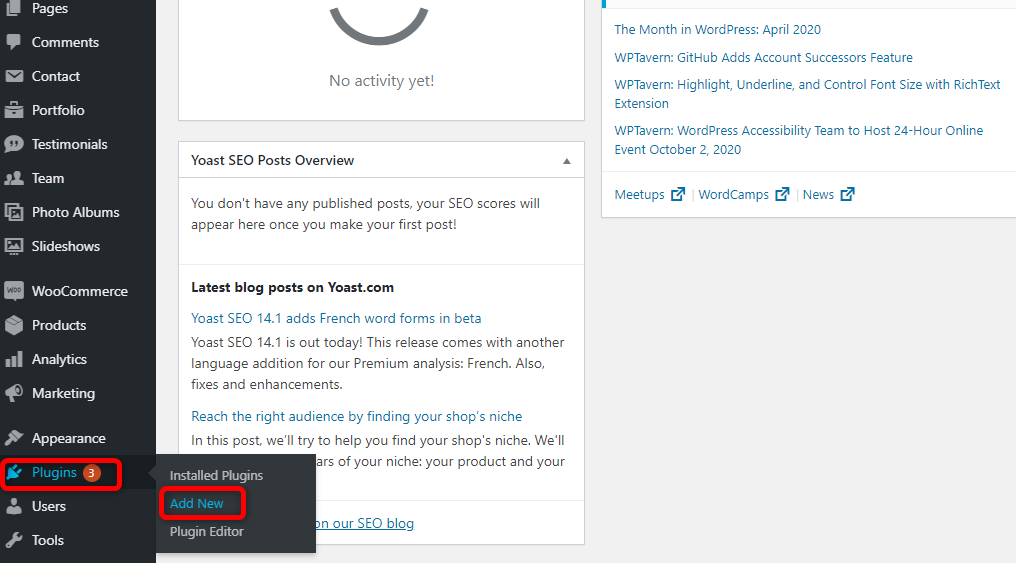
In your website’s dashboard, under the plugin’s menu click on Add New
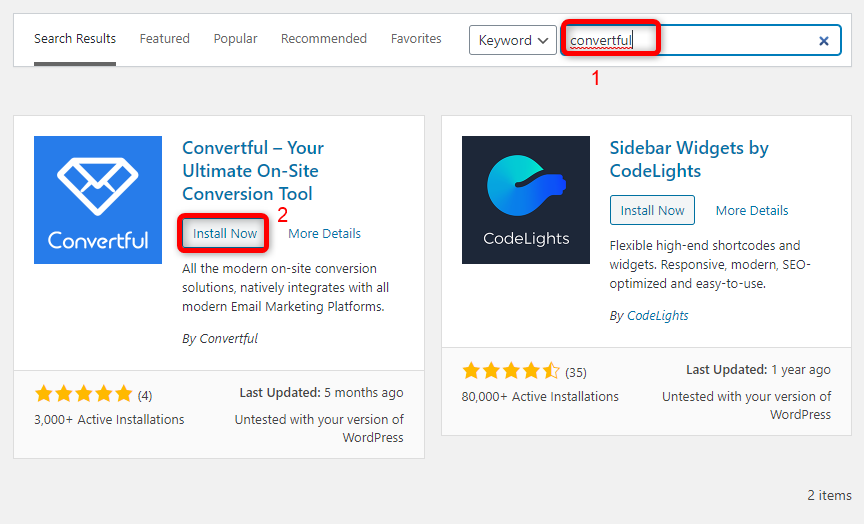
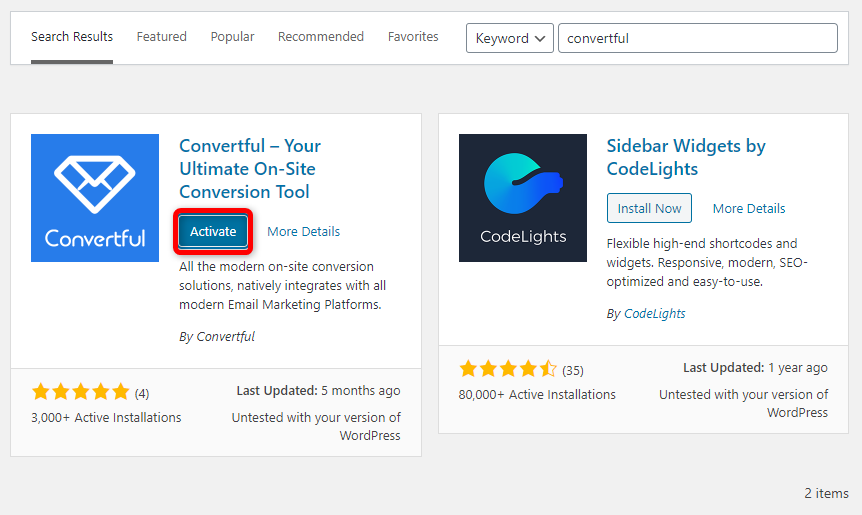
Search for the Convertful plugin and click on Install Now
Click on Activate
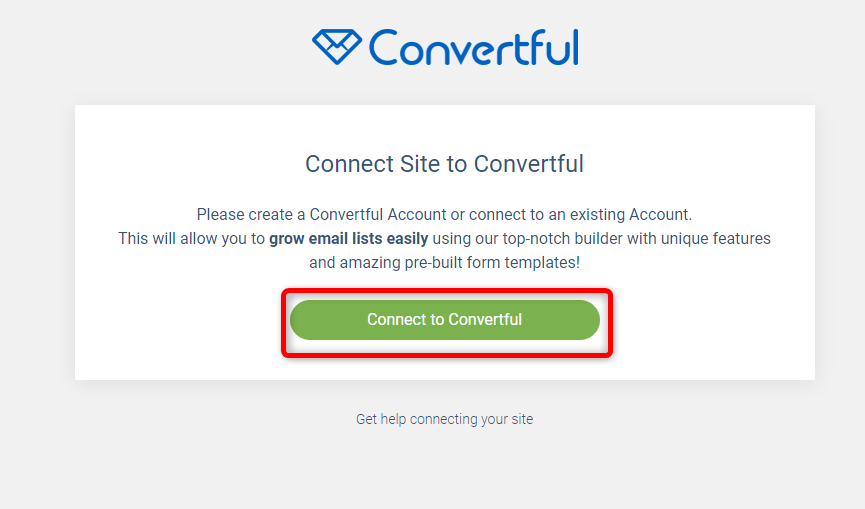
After activating the plugin, you will see the following screen. Click on Connect to Convertful
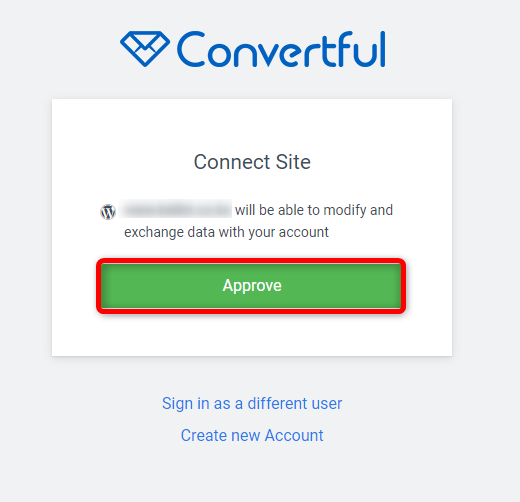
You will get the following notification. Click on Approve
In this method, when a user tries to leave your website they will see a pop-up notifying them of the discount available. An example of the pop-up is shown below.
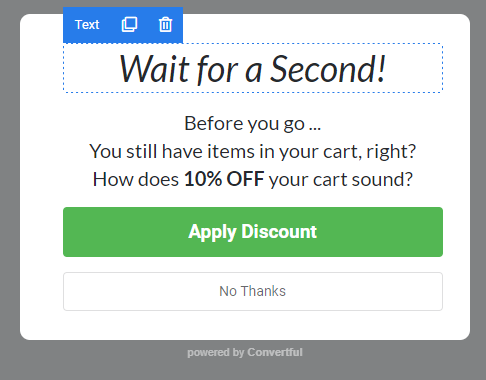
This will encourage users to complete their purchases and not leave without purchasing.
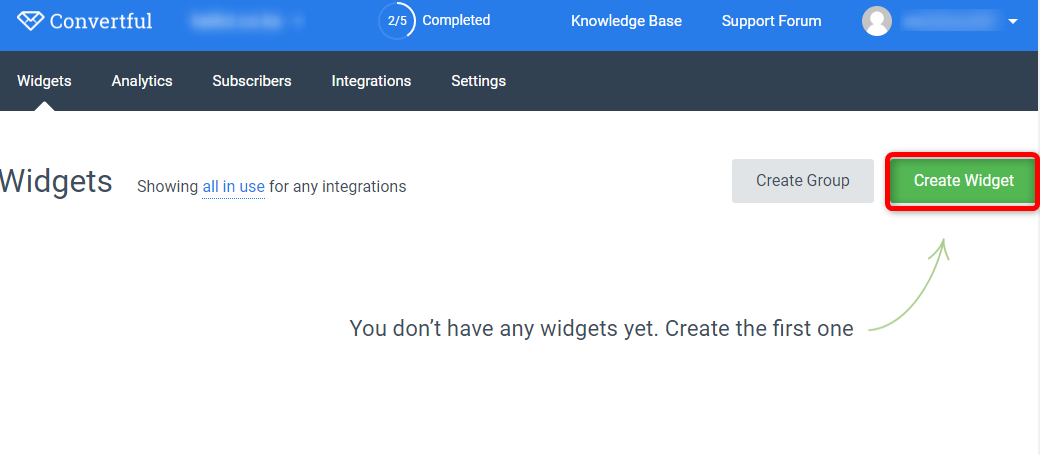
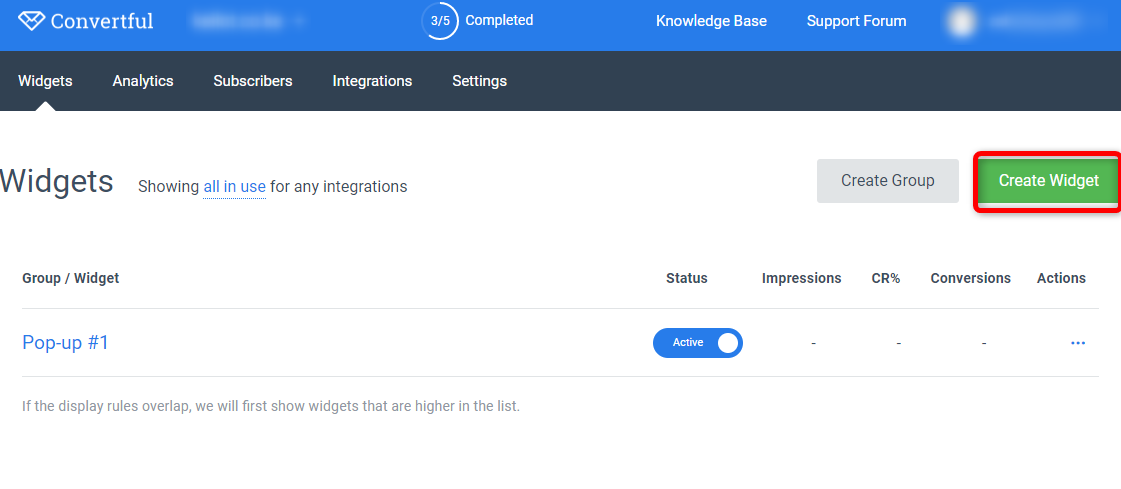
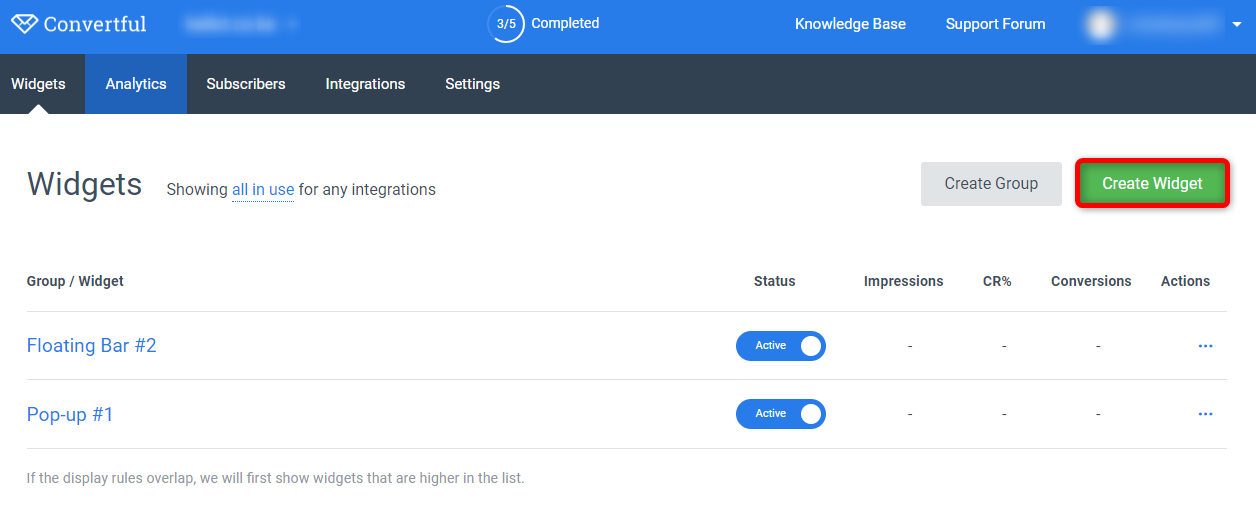
Once you have connected your website to convertful you will now need to create a widget.
Click on Create Widget.
Using a widget you can create the form that will show the discount code on your website.
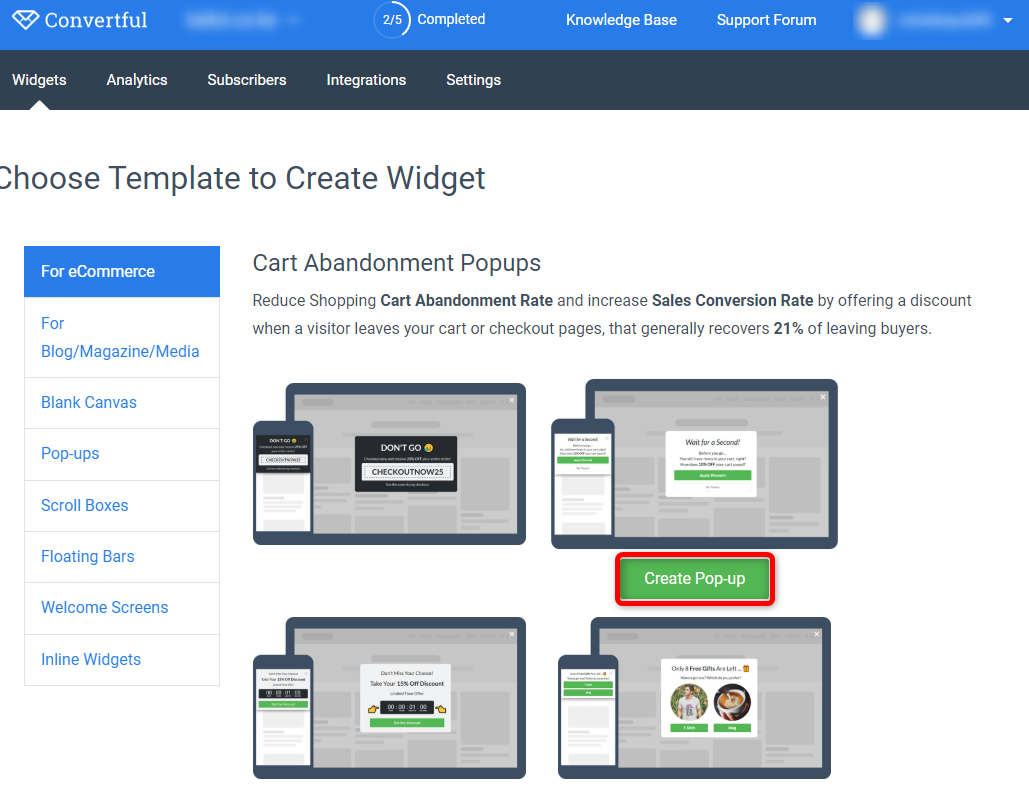
You will get this page where we have different types of forms that you can add to your website.
You can choose any form that you like.
We have chosen the second form. Click on Create Pop-up
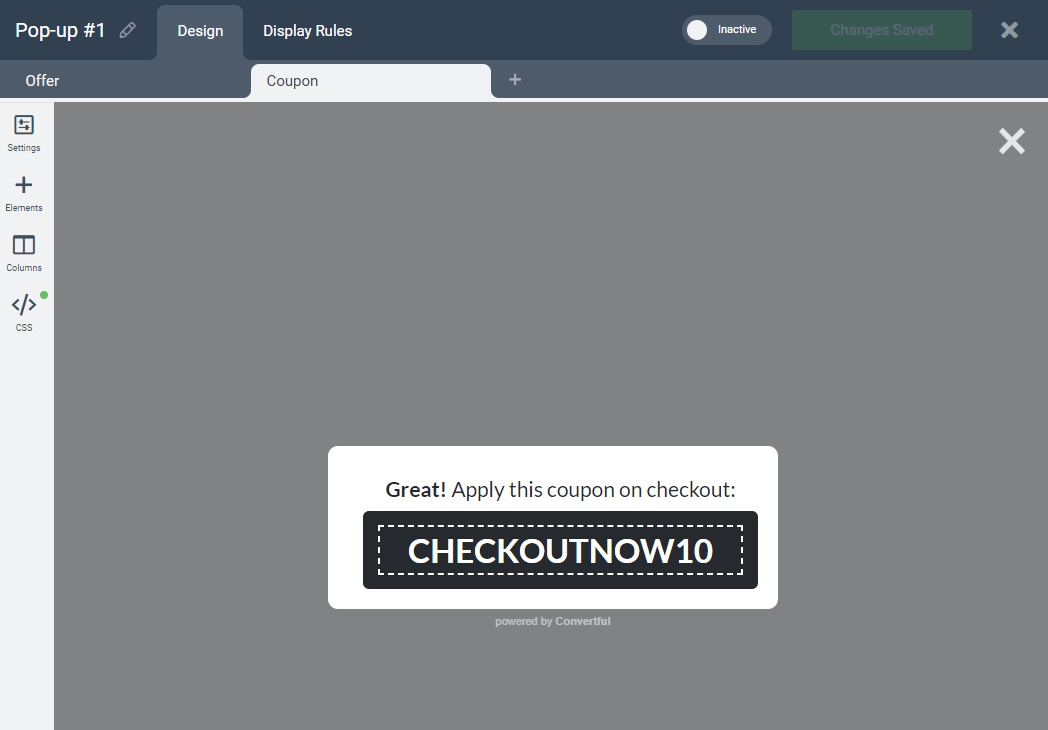
This is how the form will look like on our website.
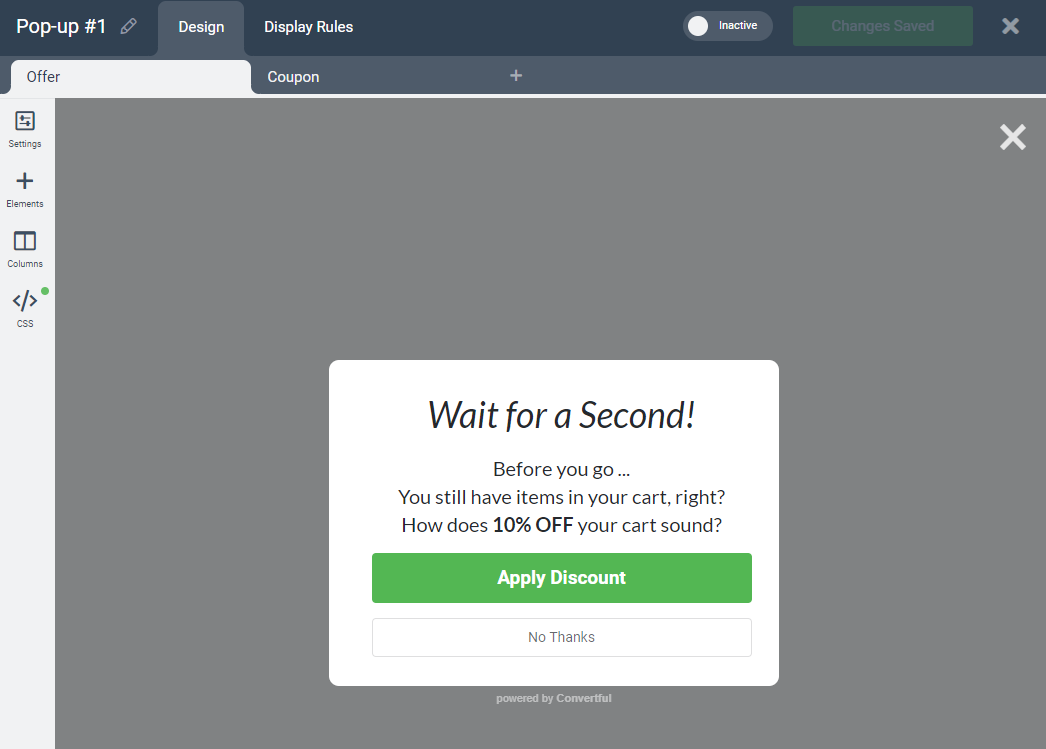
You can see the form has 2 pages.
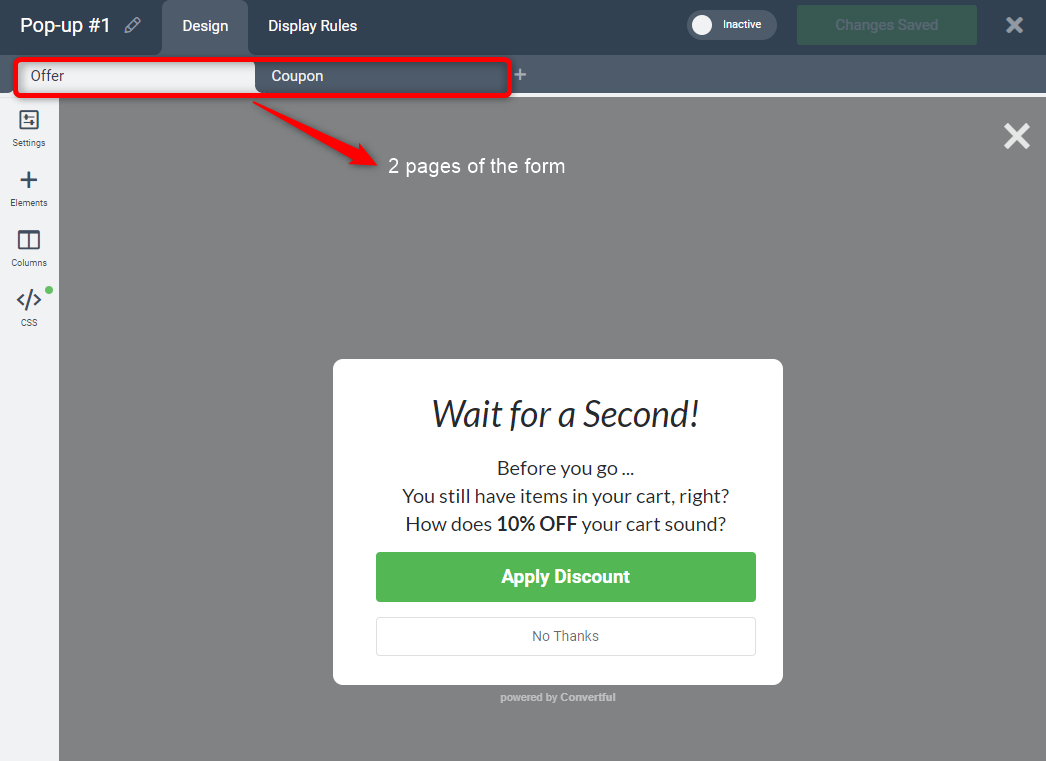
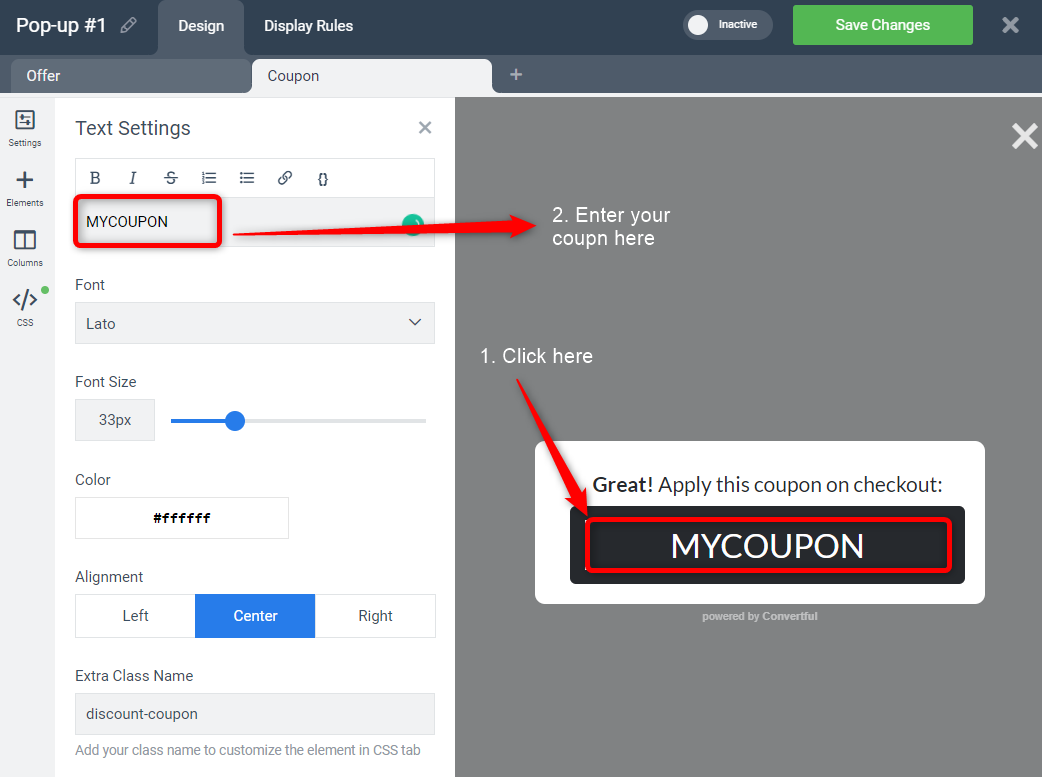
If the visitor clicks on Apply Discount, they will see this page. The page has a sample coupon code.
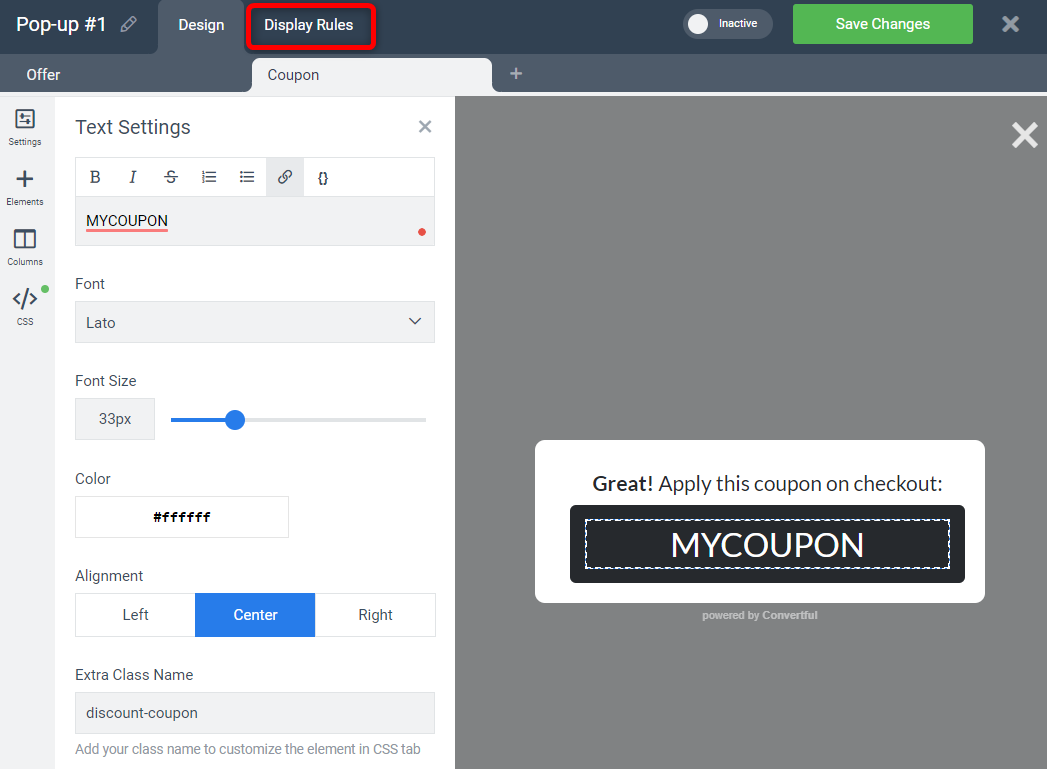
You will need to change this to your coupon. Simply click on it and enter your coupon as shown in the example below.
At the top of the page click on display rules
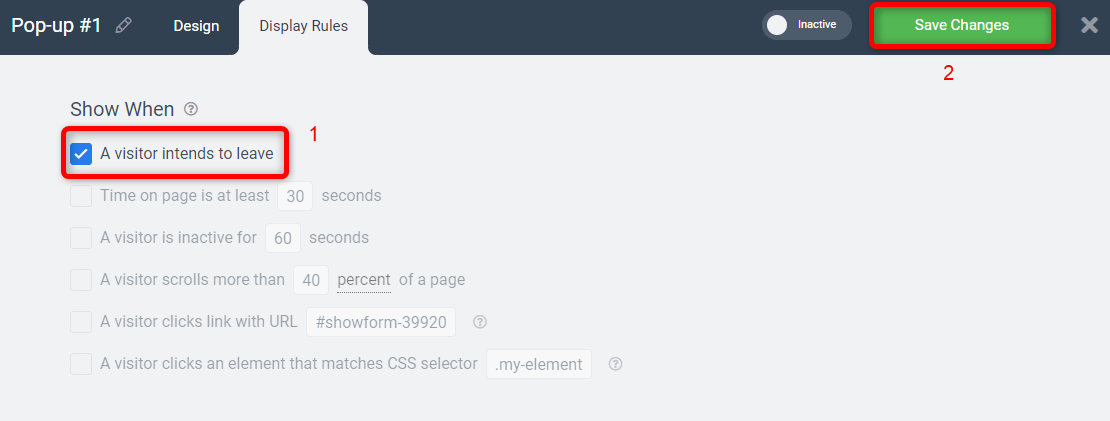
Here you can see different options for displaying your form. Suppose you want to display your form when a visitor tries to leave your website.
Click on A visitor intends to leave and click on Save Changes.
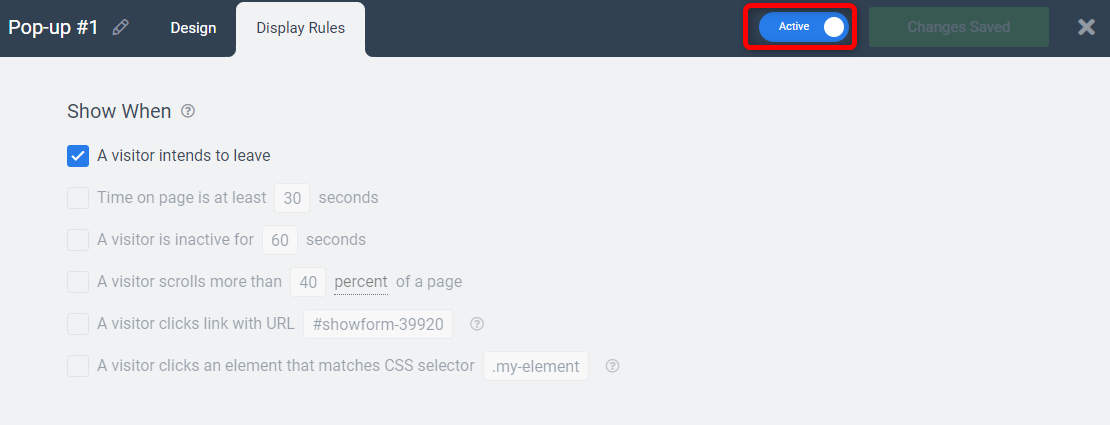
Finally, we need to activate the form. Toggle the Inactive button and make it Active.
Now if a customer visits your website and tries to leave it they will see the form. An example is shown below.
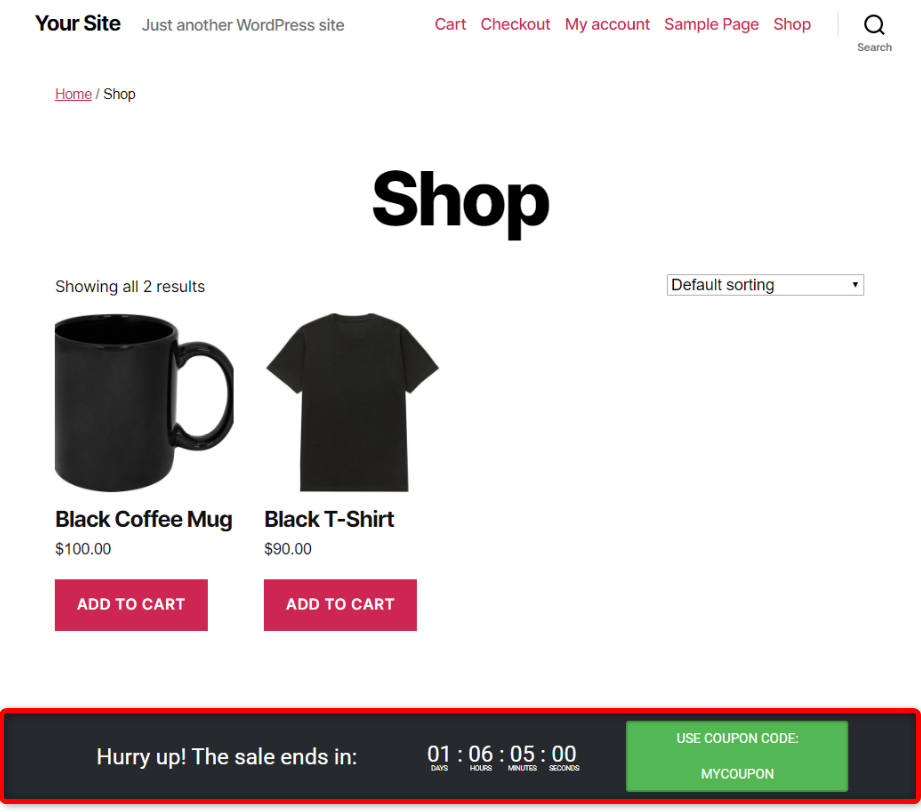
In this method, a countdown timer with a message showing the discount will be displayed at the bottom of your homepage. This will show to all visitors and let them know of the discount.
An example of the countdown timer is shown below.

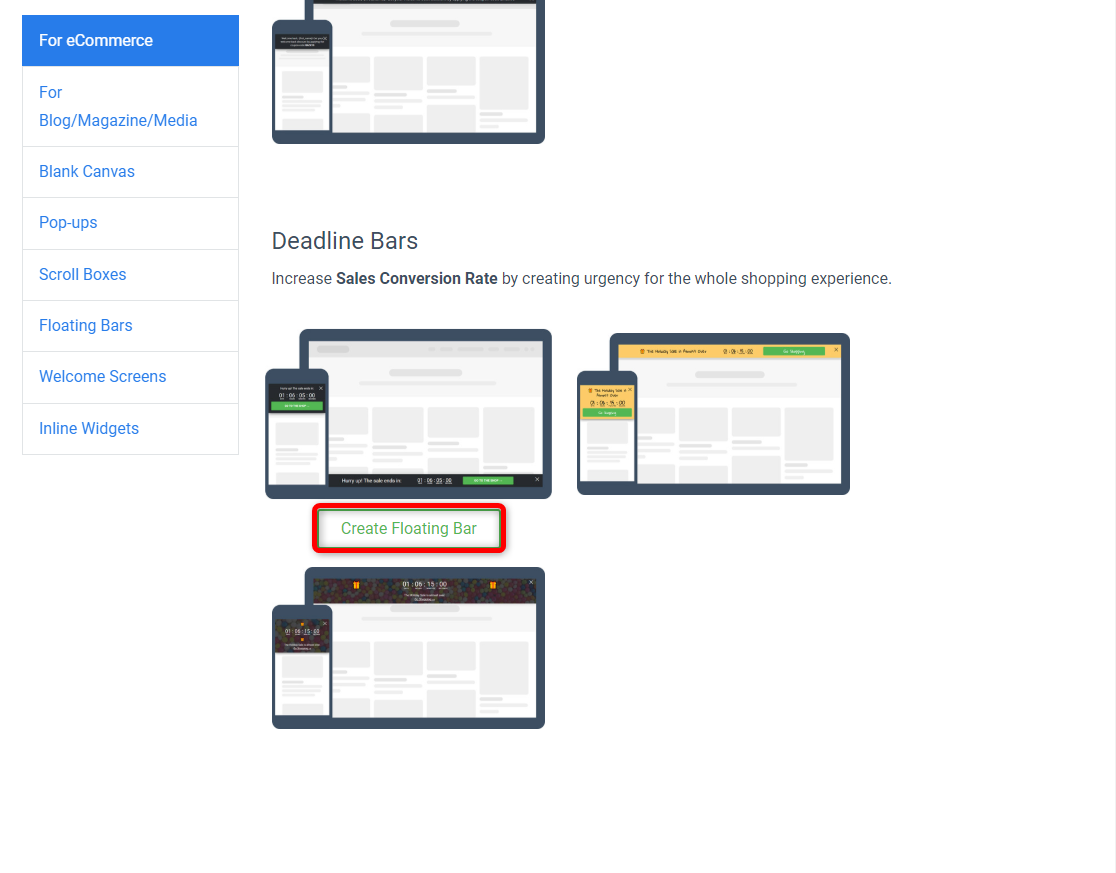
Go back to convertful and click on Create Widget
From the deadline bars group at the bottom of the page select the first one and click on Create Floating Bar.
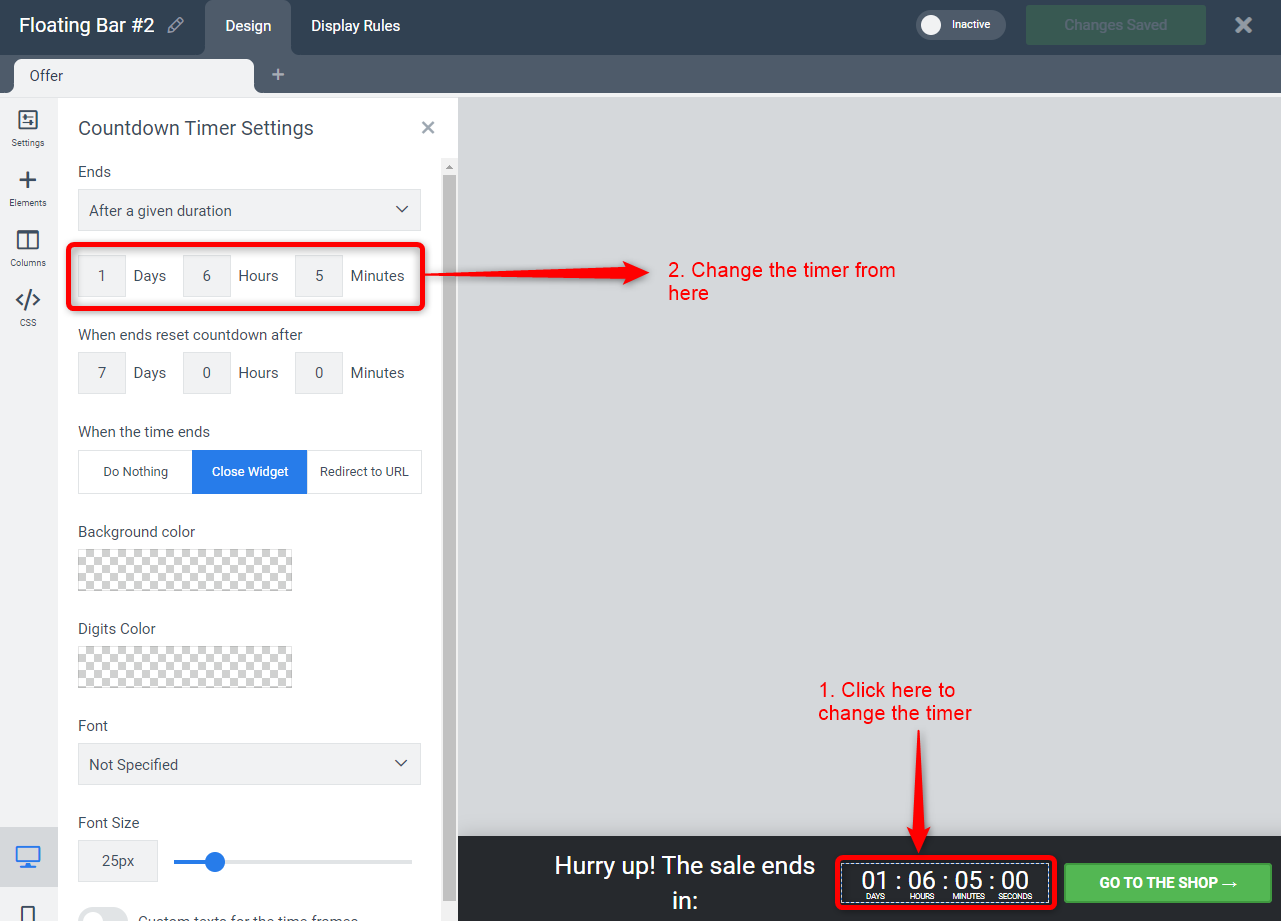
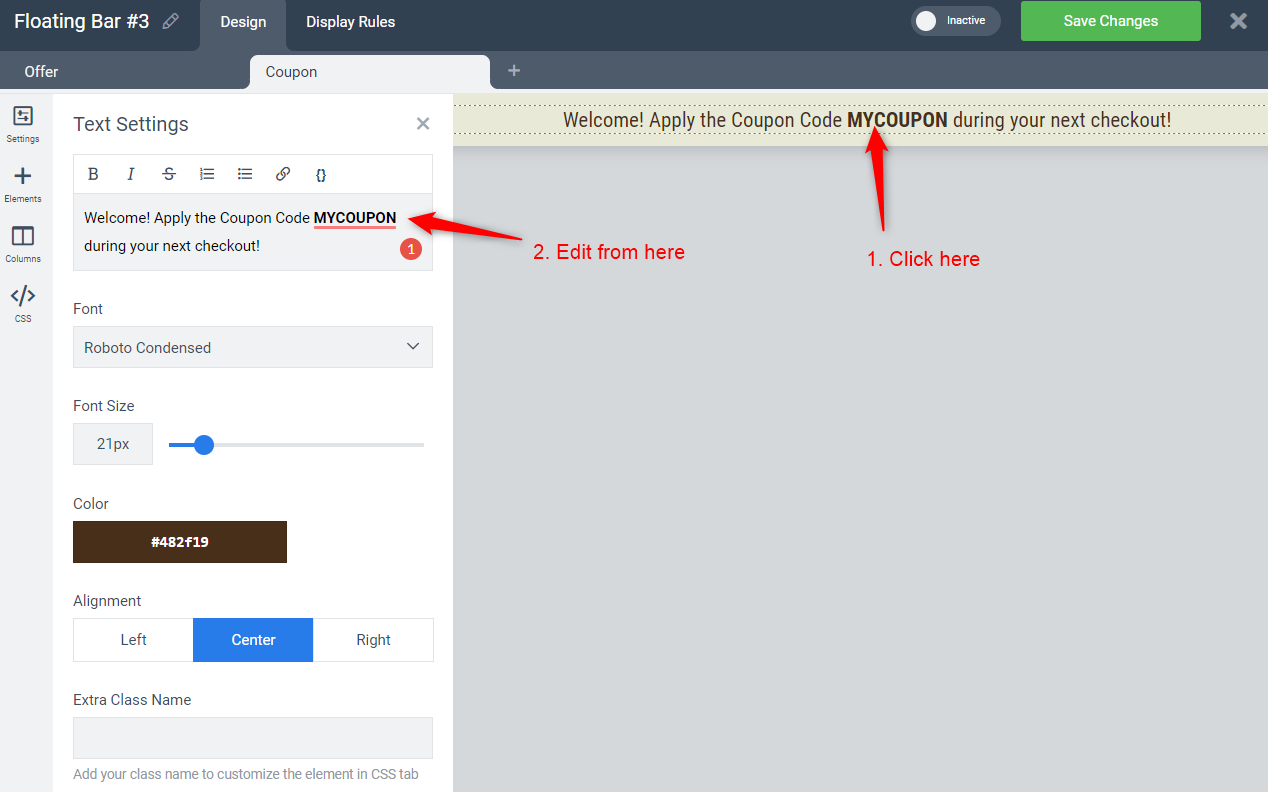
Click on the timer to change it. Then edit it from the left hand section.
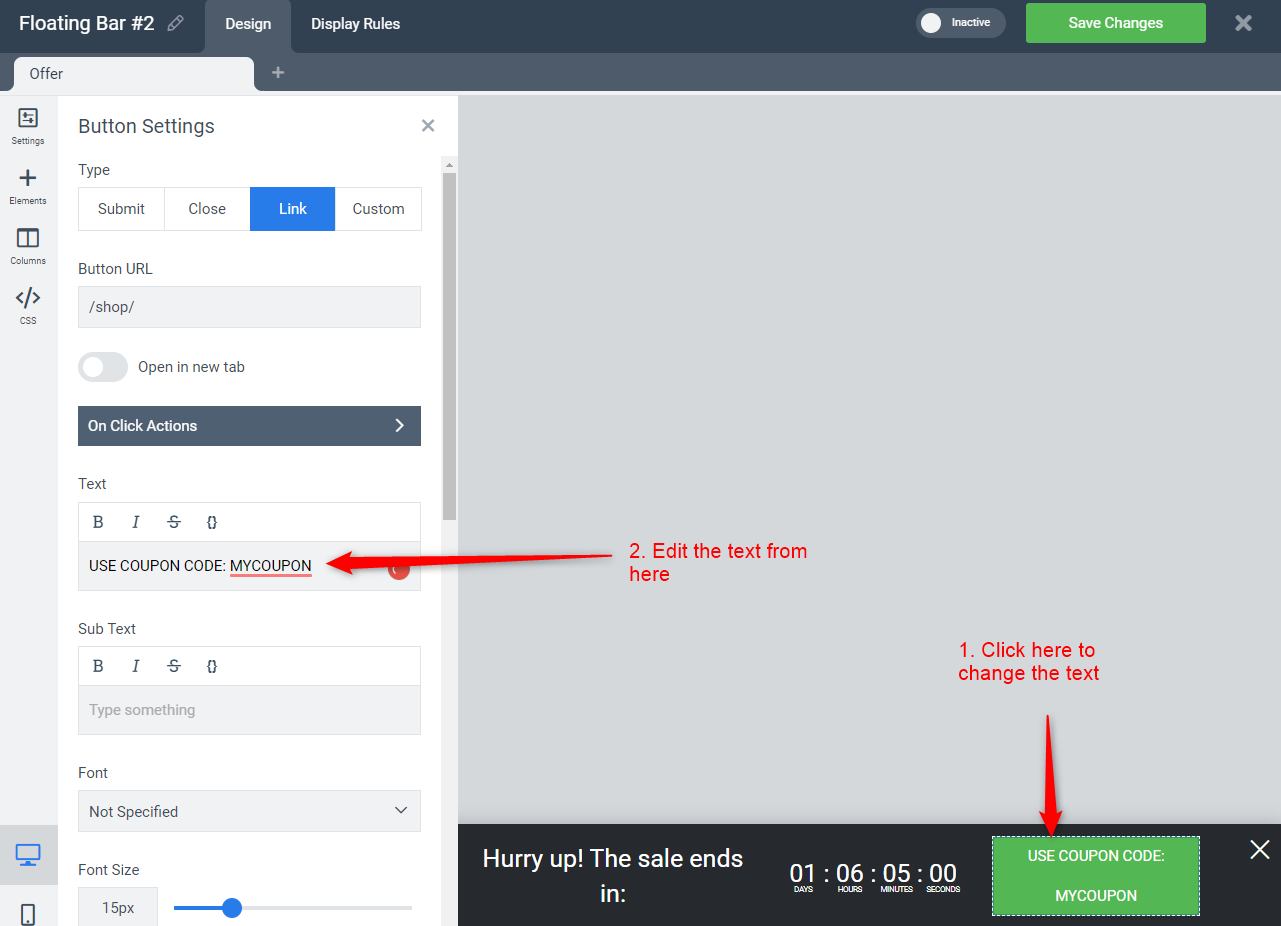
Click on the green button to change the text and edit the text from the left-hand section as shown.
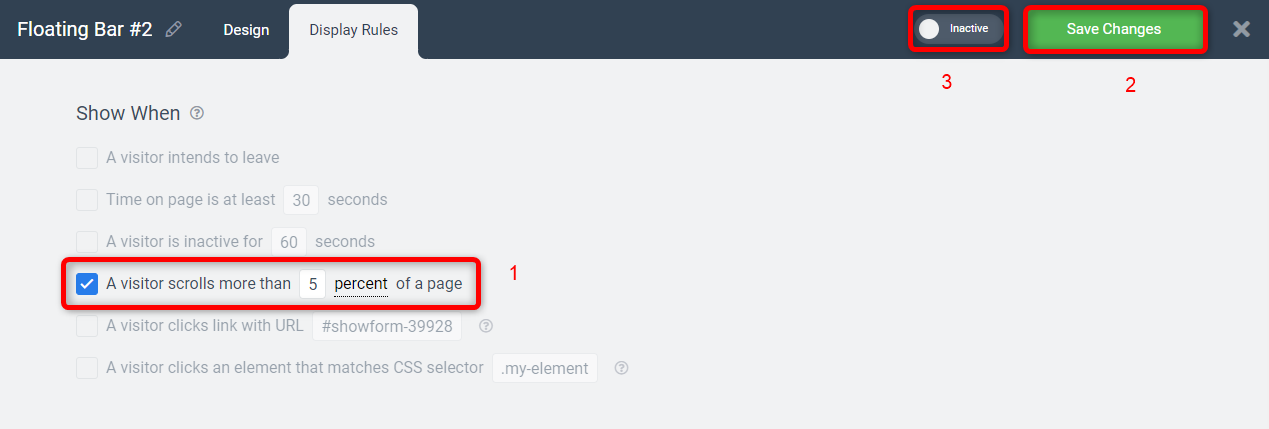
Click on the Display Rules tab at the top. Here you can see a few options for displaying the form on your website.
You can select any option, most are self-explanatory.
We have selected: A visitor scrolls more than 5 percent of a page. In this case when a visitor scrolls down, using their mouse on any page on your website, they will see the form. If they leave the website without scrolling they will not see the form.
Click on Save Changes
Then toggle the inactive button to activate the form on your website.
Now if your visit your website you should be able to see the form
In this method, customers will be required to enter their email ID in order to see the discount coupon.
This can help you collect your customers emails and you can use these to keep in touch with them. They can also come in handy when you want to send newsletters to customers, for example, informing them of new products and services.
Here is how the form will look like on your website.

Once a visitor enters their email and clicks on Get the discount they see the discount coupon shown below.

Go back to Convertful and click on create widget.
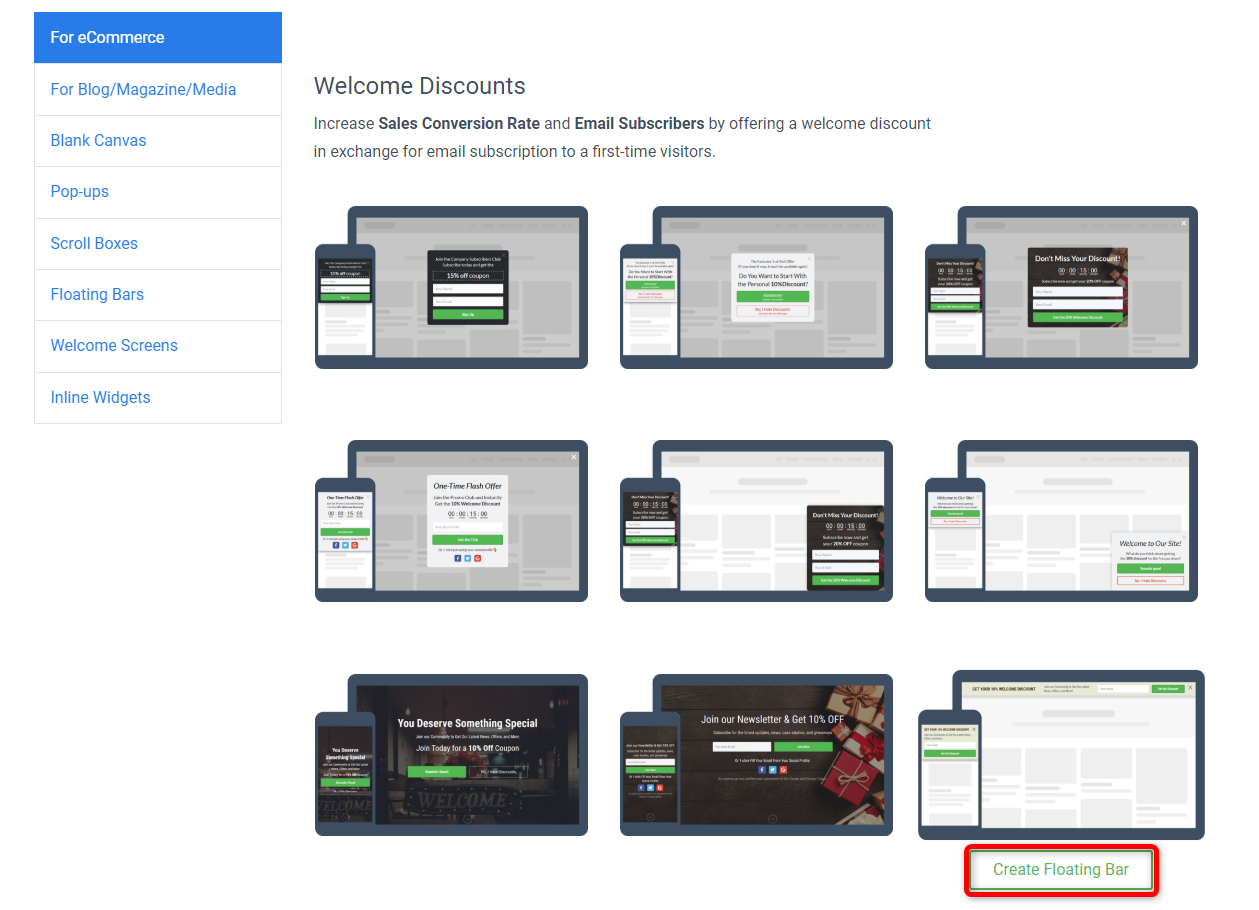
On the next page there are several form designs that you can select from.
Under the Welcome Discounts section, we have selected the last one. You can select any that you wish.
Click on Create Floating Bar
This form also has 2 pages.
The visitor will first see the page shown below.
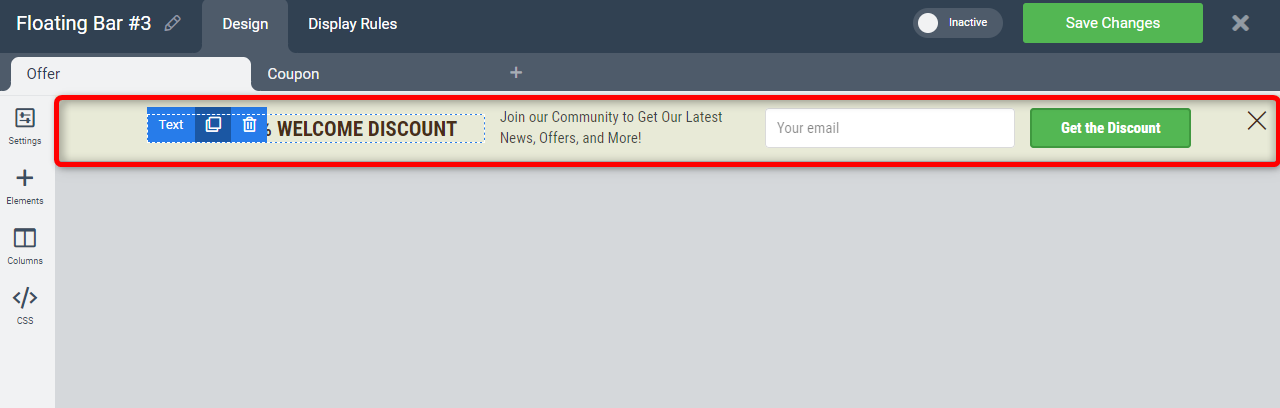
If they enter their email ID and click on Get the Discount they will see the next page shown below.
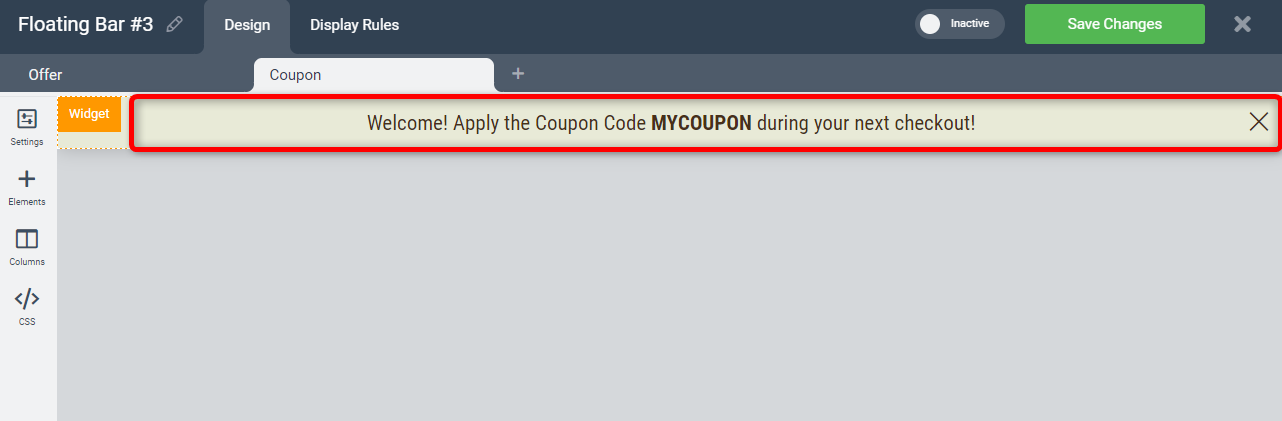
You can edit this text by simply clicking on it and editing from the left-hand section.
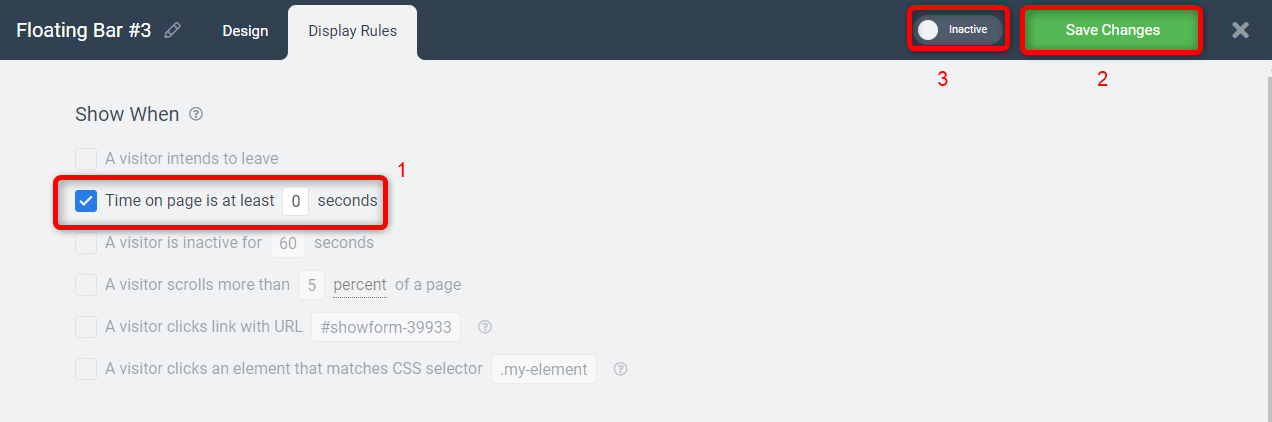
Click on the Display Rules tab at the top. Here you can see a few options for displaying the form on your website.
You can select any option.
We have selected: Time on page is at least 0 seconds
Click on Save Changes
Then toggle the inactive button to activate the form on your website.
Now if you visit your website you should be able to see the form at the top of your website.

And this is how you can easily add coupons to your e-commerce website and display them on your site.
With WordPress, you can easily create a mobile app for your eCommerce website. Check our video tutorial on how to turn your website into a mobile app.
As an eCommerce business owner, we know how much difficult it is to increase sales and user experience. But, with WordPress plugins, you can increase your sales & customer experience. So, we made a list of 15 must-needed plugins for every ecommerce website that helps you in boosting sales & revenue.
And for more such video tutorials on customizing your eCommerce website, subscribe to our YouTube channel.
Coupon codes are discount codes that you can use for online or in-store shopping.
1.Open WooCommerce settings in your WordPress dashboard
2.Check “Enable the user of coupon codes” and click on save changes.
1. Create an account on Convertful
2. Installing the Convertful plugin
3. Connect your website to Convertful
4. Create your popup form
5. Display it on your website
Do you want to learn WordPress to build any kind of website you want? Then this is the only course you need to take.
View CourseSEO isn't as difficult as you might think. Learn how to start growing organic traffic to your website with our easy to follow video .
Watch VideoSign up for our WordPress Course today!
9 Comments
Leave a CommentSrinivas Chukka
Very very easy to use and excellent looking coupons website in India. I adore the manner in which you compose this article. Much obliged to you for imparting this awesome post to us.Y
Swarna Rajan
Thank you, Srinivas. We are glad you found our article helpful. 🙂
SOUHARDYA
I WAS SEARCHING THIS COUPON CODE AND REDEEM CODE RELATED STUFF FOR LONG . THANKS A LOT
Everett
Very good article. I’m facing some of these issues as well..
Karthik Tatikonda
We are glad that this blog helped you, Everett. 😁
Sunil
I want to start eCommerce website.
I have product catalogue with price.
How much cost required for creating fully loaded eCommerce website?
Karthik Tatikonda
Hi Sunil, You can create an E-commerce website for free, you just need to pay for domain & hosting. To create an e-commerce website, please follow the steps mentioned in this video: https://www.youtube.com/watch?v=8wA6uPEu9hM 😁
Ned
Very well done & written.
Karthik Tatikonda
We are glad that this blog helped you, Ned. 😁