Shopify is an eCommerce platform that is specifically built to create online stores. It comes with a wide variety of eCommerce themes to sell both physical as well as digital products.
It acts as an all-in-one platform for beginners to list products, sell products, and even ship products to customers.
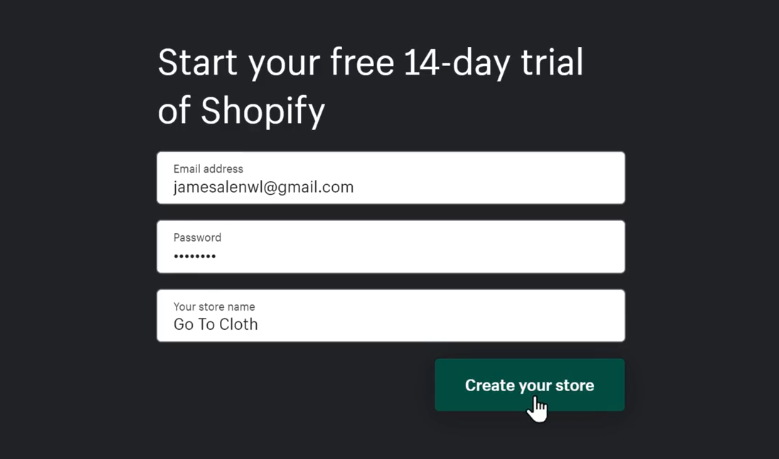
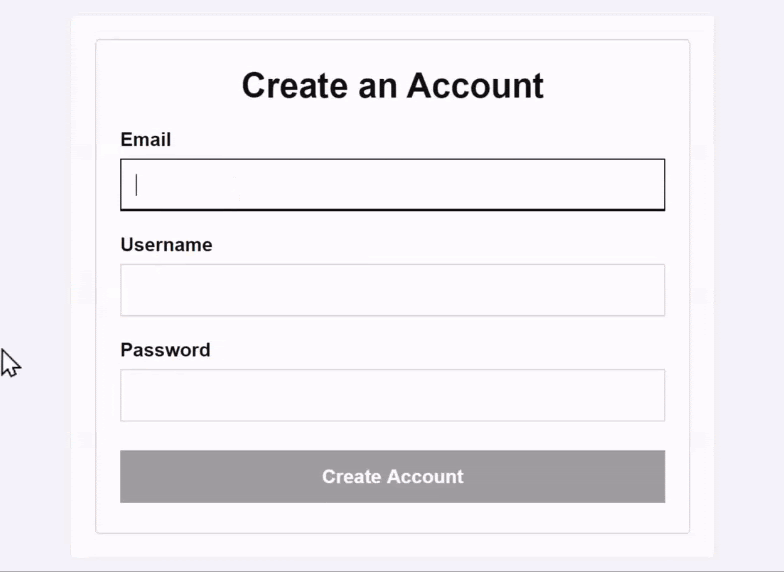
Here, enter your Email address and click Start free trial.
On the next page, enter a password for your account, and then the name for your online store.
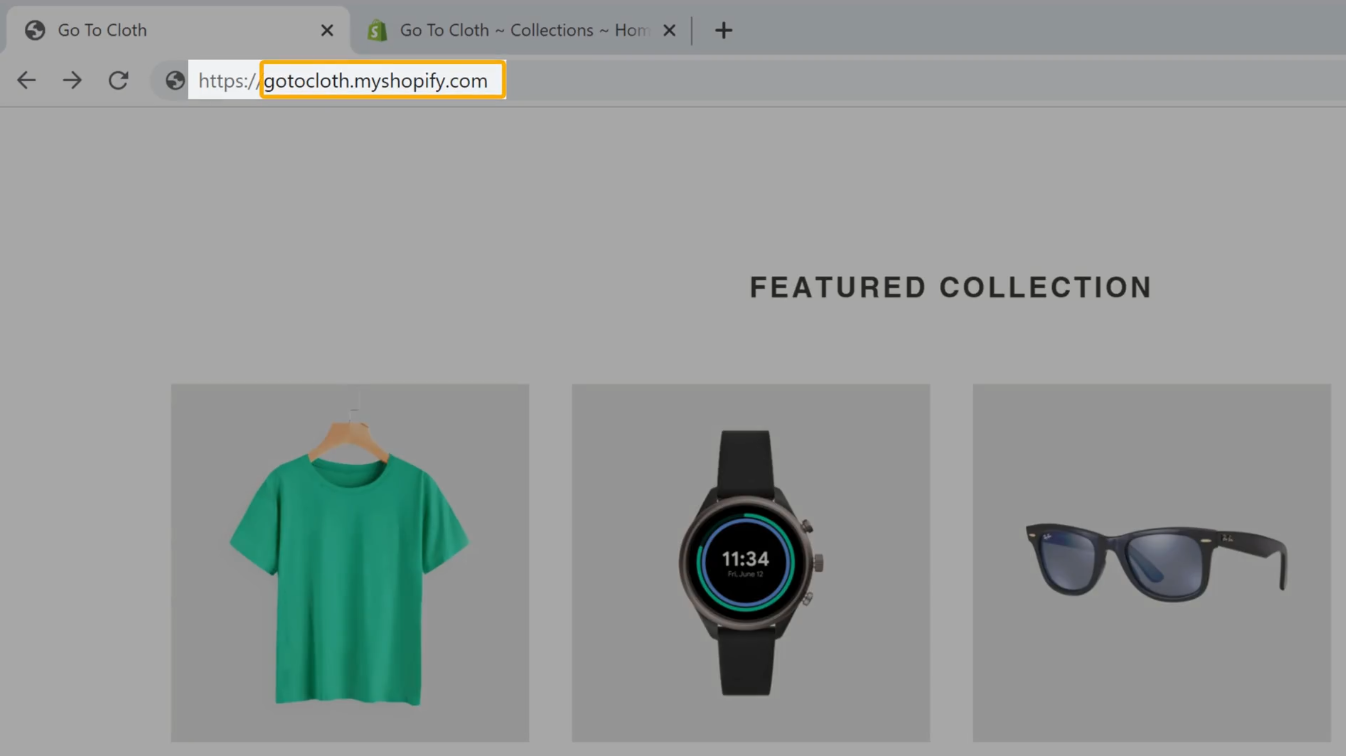
This store name also serves as your website address. For example, we entered ‘Go To Cloth’ as the store name. So, the website address will be ‘gotocloth.myshopify.com’.
Once you have entered the password and store name, click Create your store.
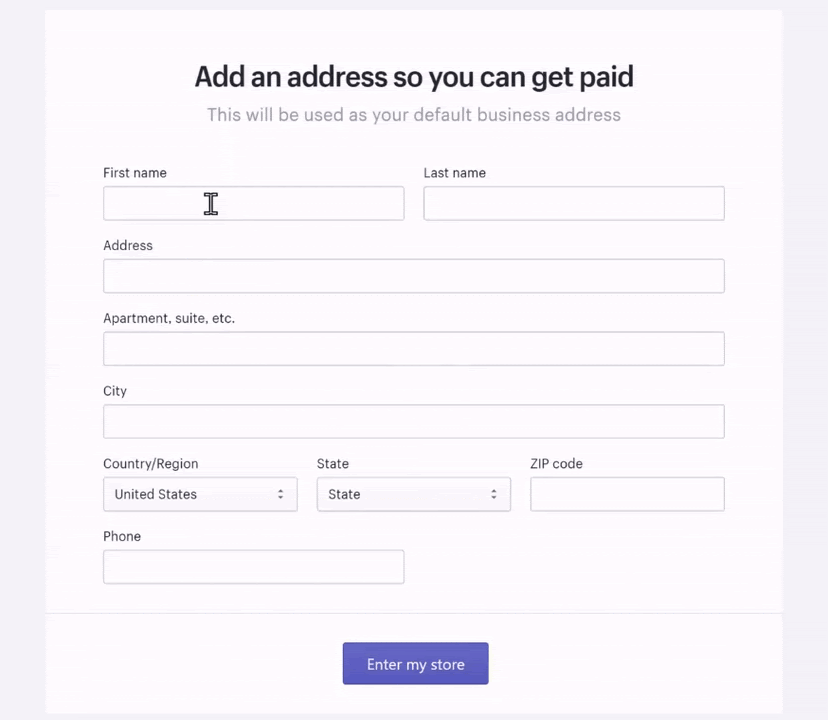
Now, to complete setting up your shopify account, enter the Address and respective details.
Once entered, click Enter my store.
With that you have just created a Shopify account.
Having created your shopify account, your shopify website will also be live on the Internet.
To check that, enter the website address of your store in the search bar.
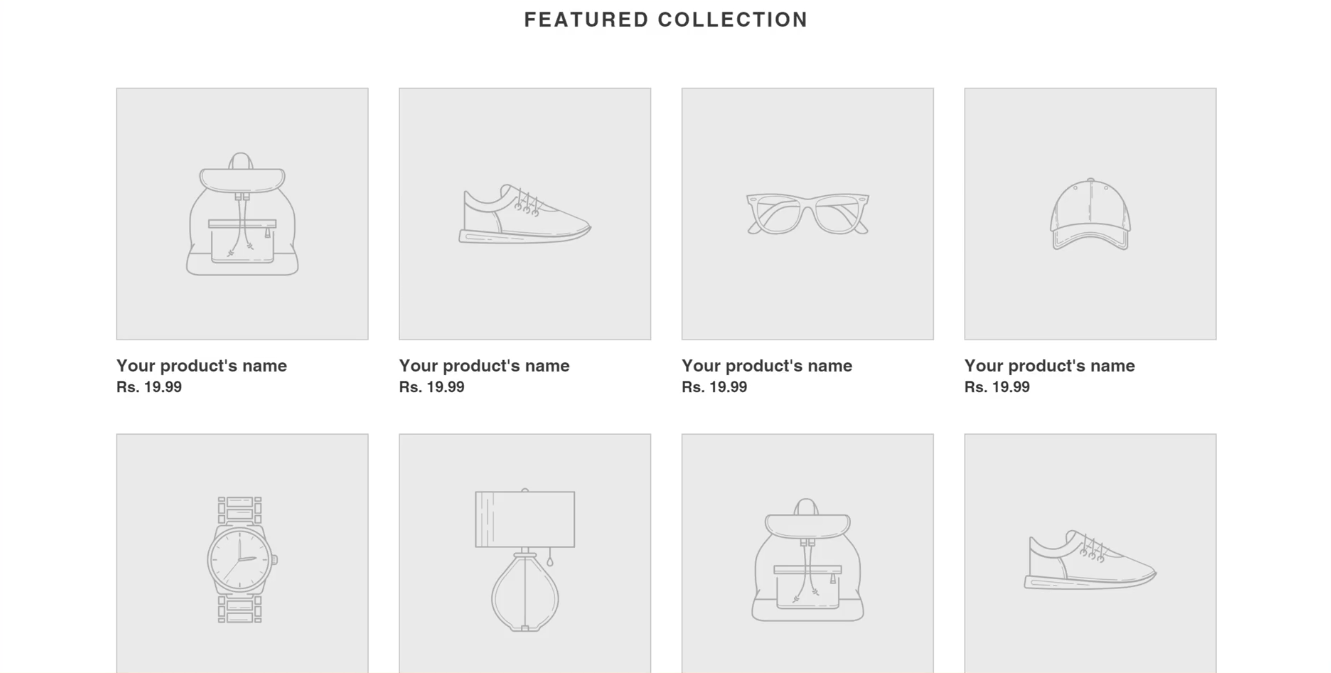
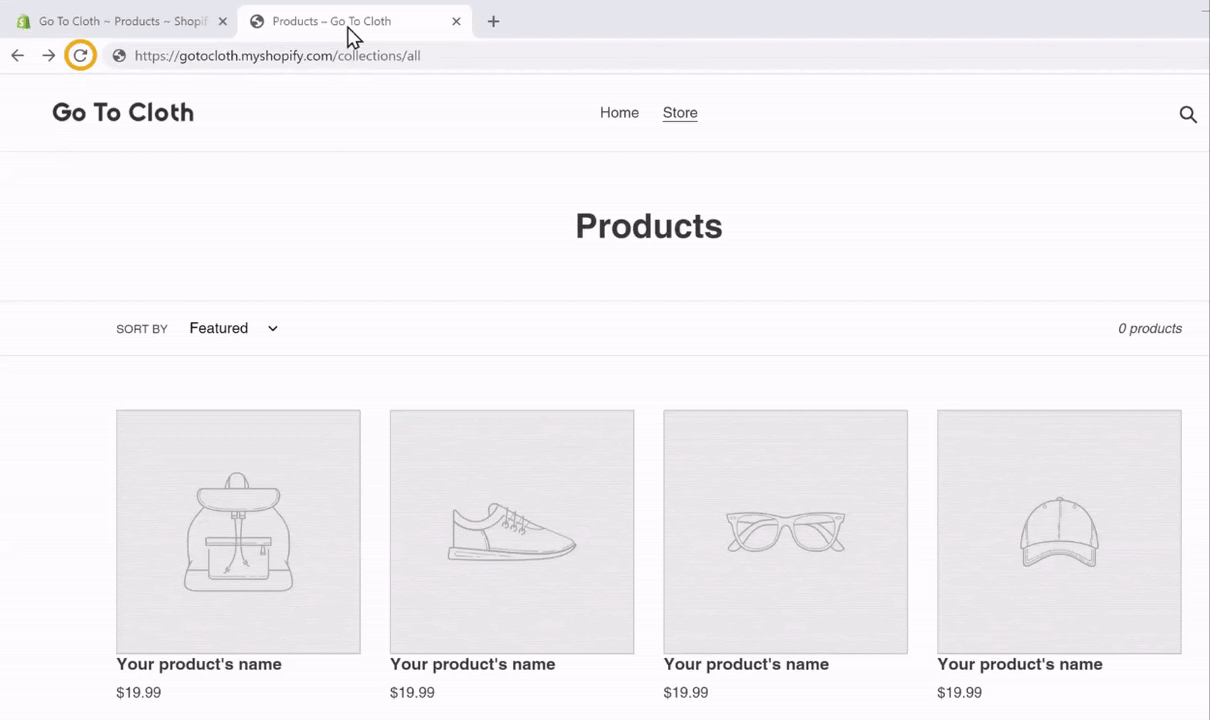
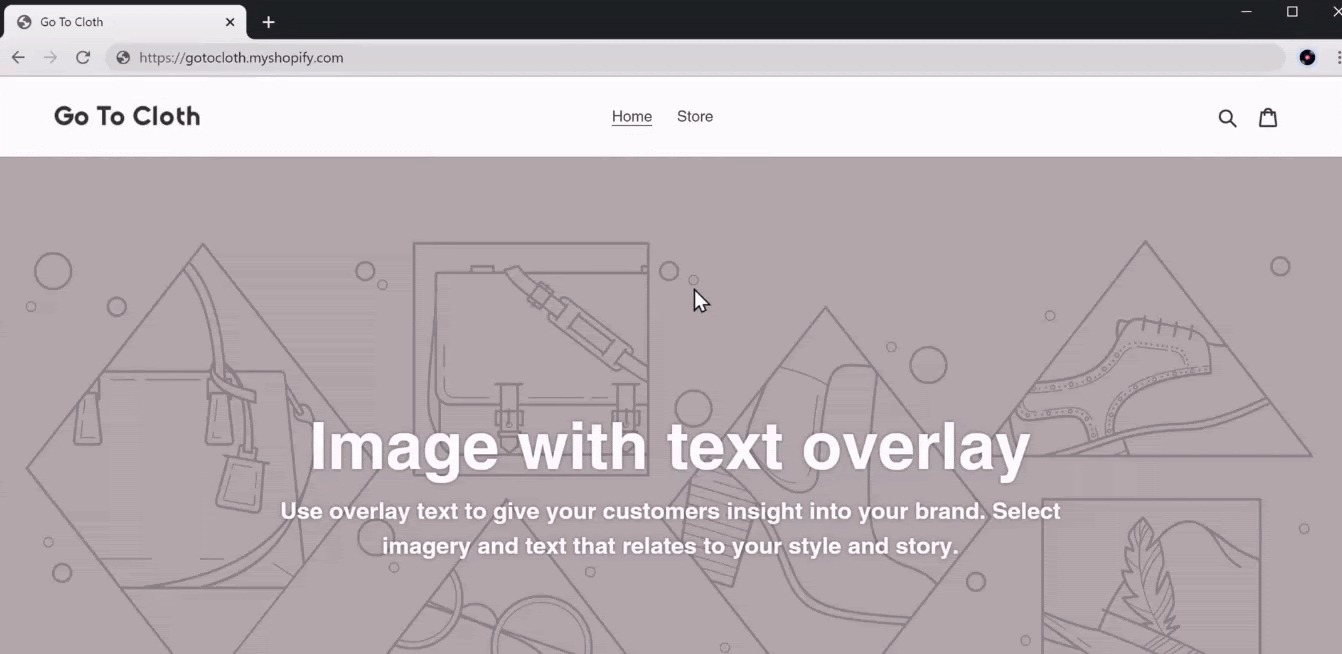
As you can see, our website is live with two default pages, ‘Home’ and ‘Store’ displayed on the menu.
On scrolling down a bit, we also have an empty products section on the website.
But an empty website doesn’t look that great, right?
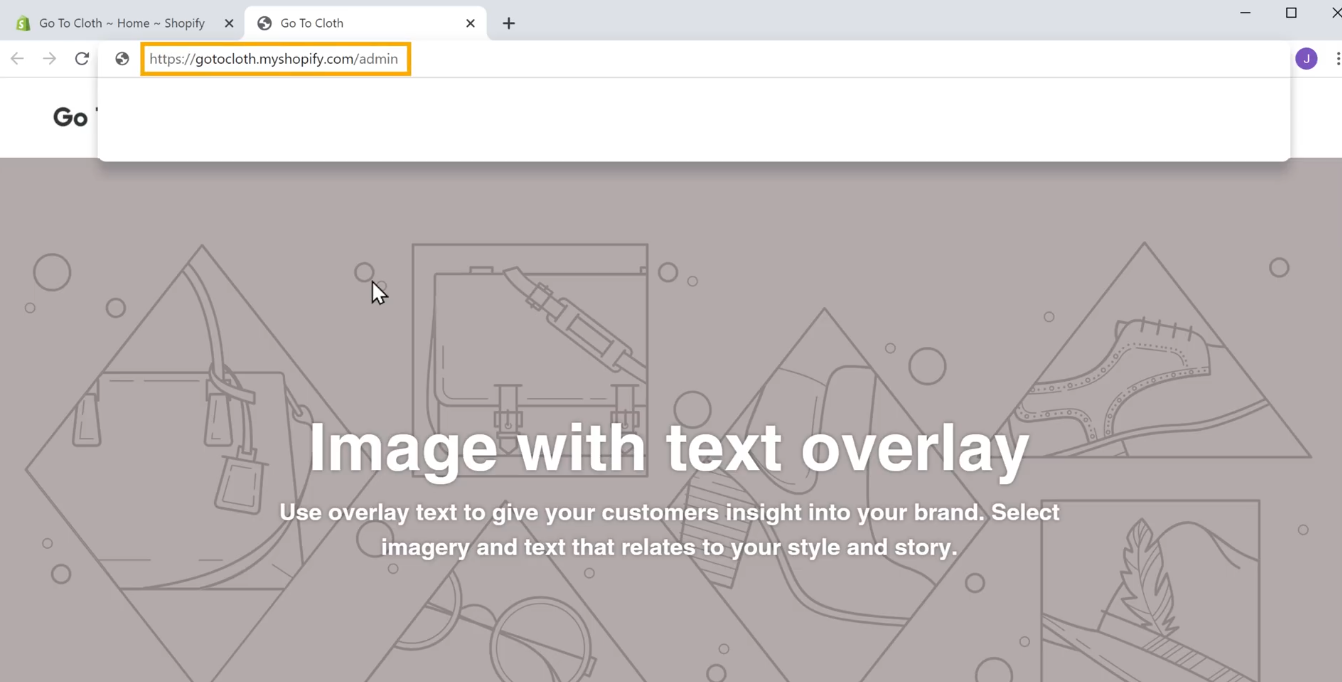
In order to make any kind of changes to the website, we first need to log in to the Shopify website.
So, to log in and access the admin page of the website, add ‘/admin’ at the end of the website address.
This will redirect to the admin area, from where we can control all the aspects of the website.
Step 2.2: Add Products to the website
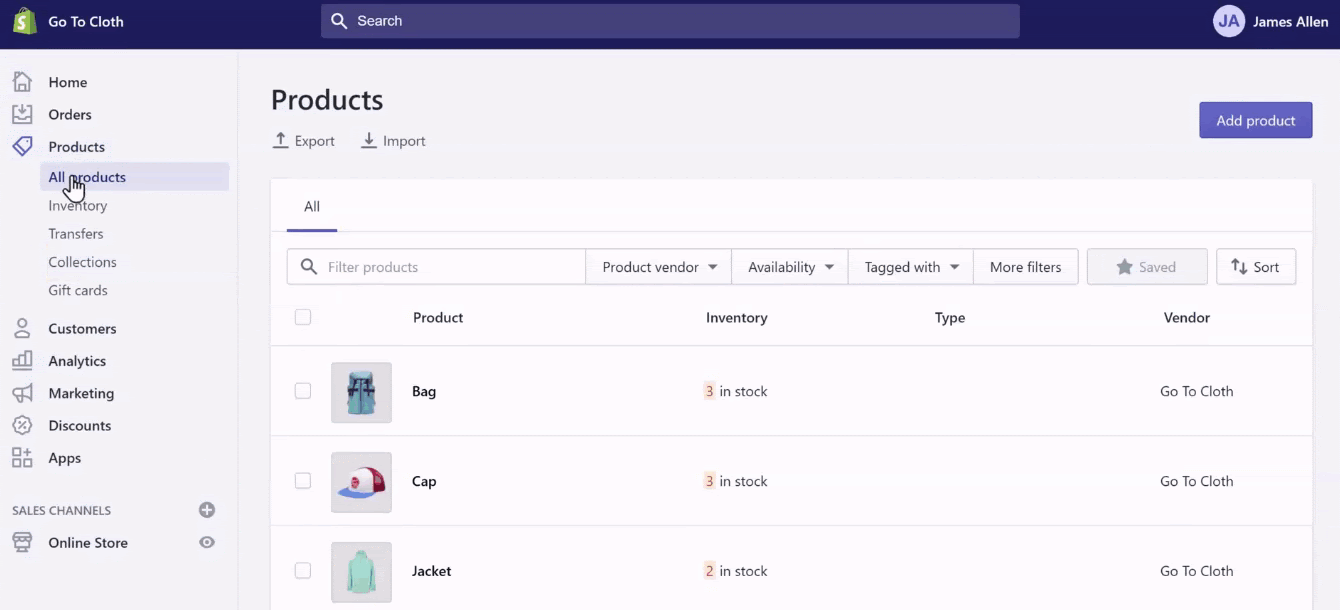
To add products to the website, select Products from the left-side menu of the admin area.
And click Add product.
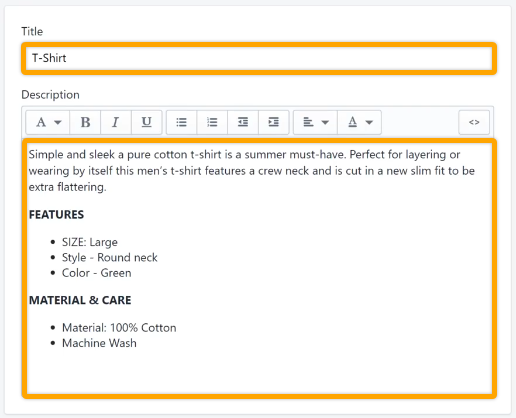
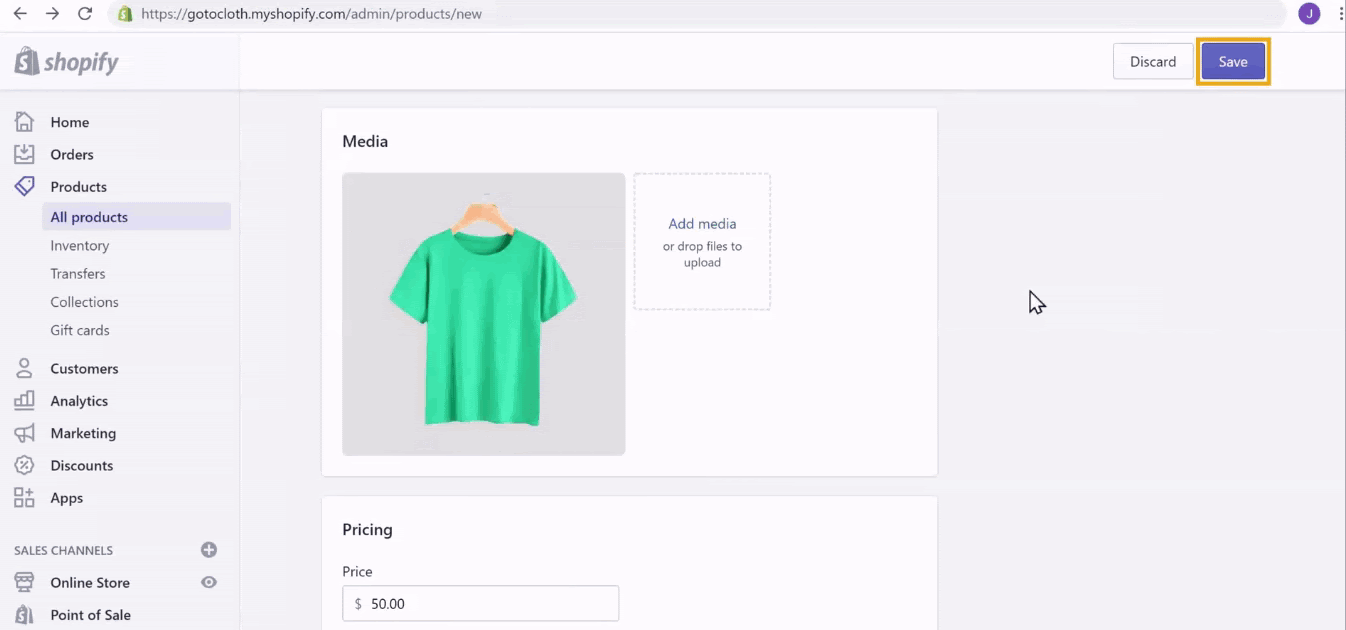
In the Add product section, enter the Product type in the Title section.
Then enter brief details about the product in the Description section.
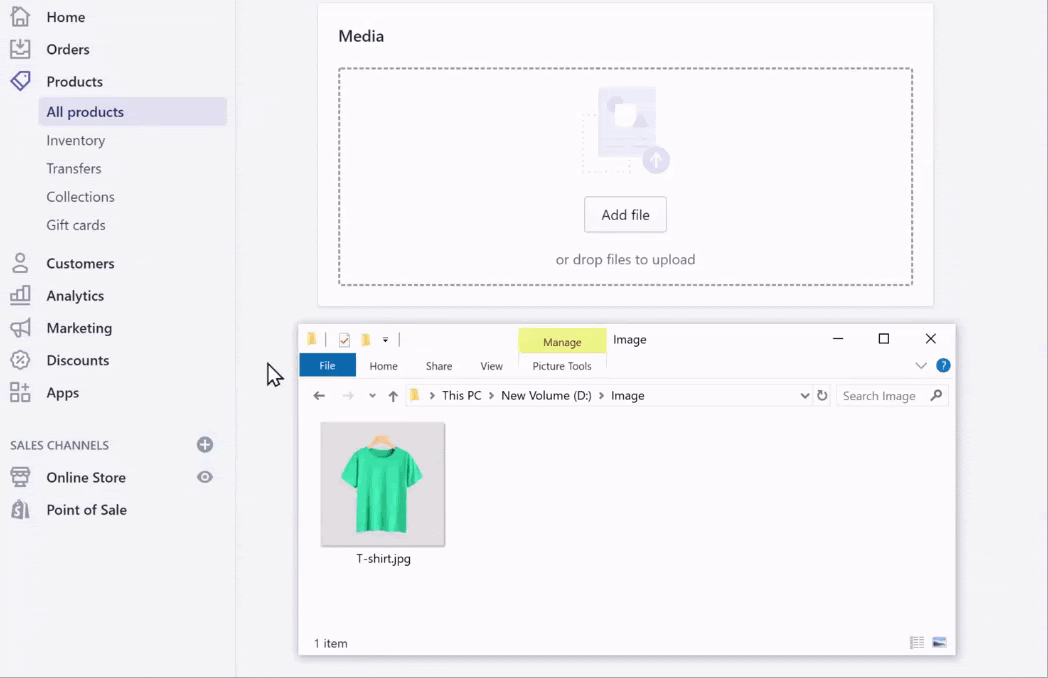
With the title and description of the product in place, it’s time to add an image of the product.
So, drag and drop an image of the product in the Media section.
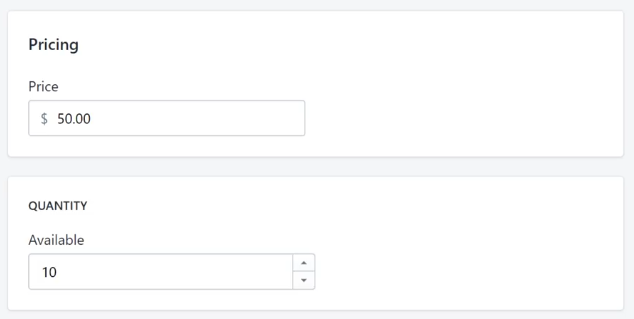
Now that we have uploaded the product image, we need to enter the Price of the product.
After that, in the Quantity section, mention the number of products that are available in the stock.
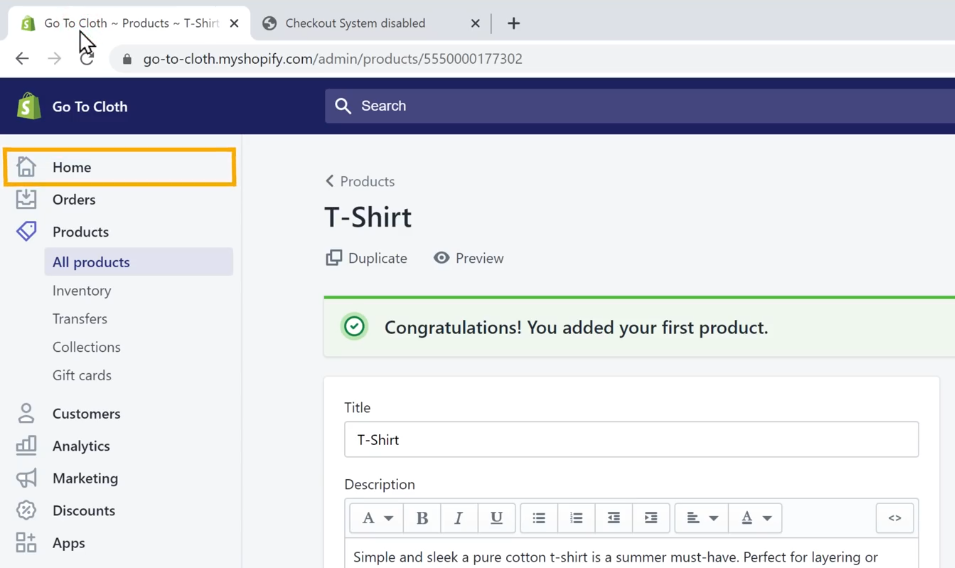
Check once that every detail is filled, and then click Save.
With that, we have just added our very first product to create an online store.
Yes, as simple as that!
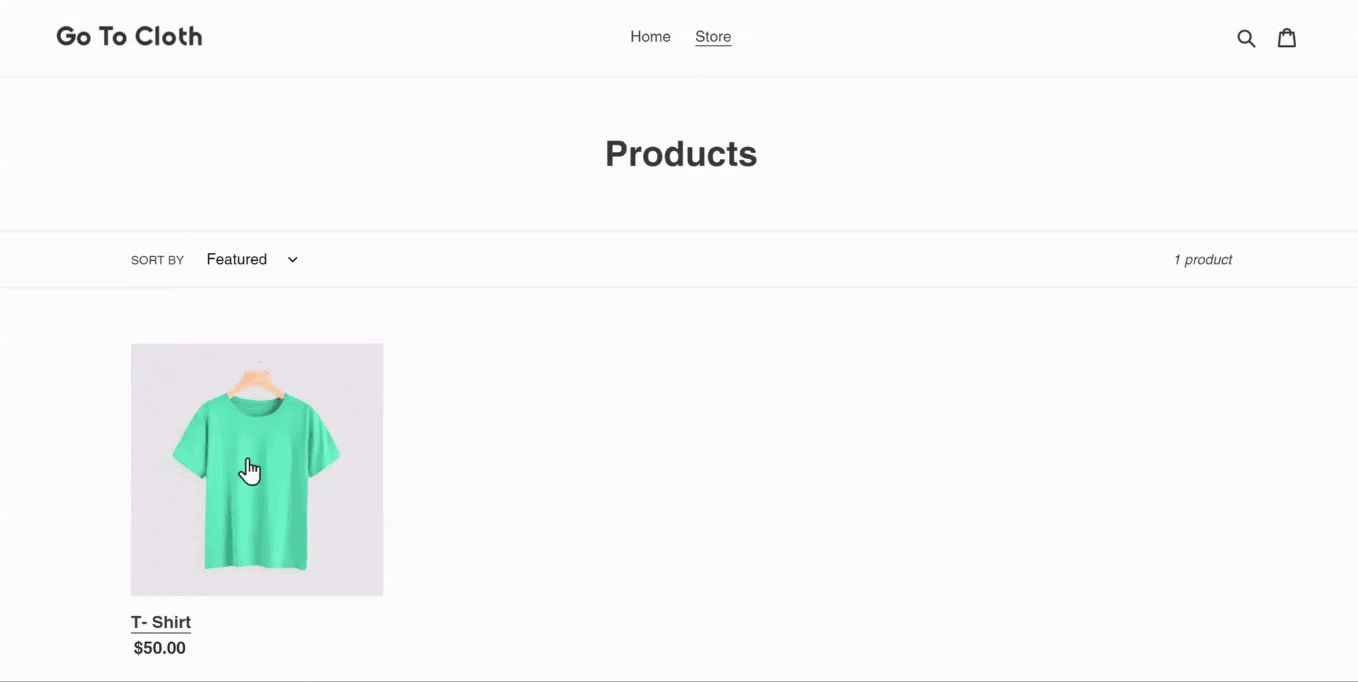
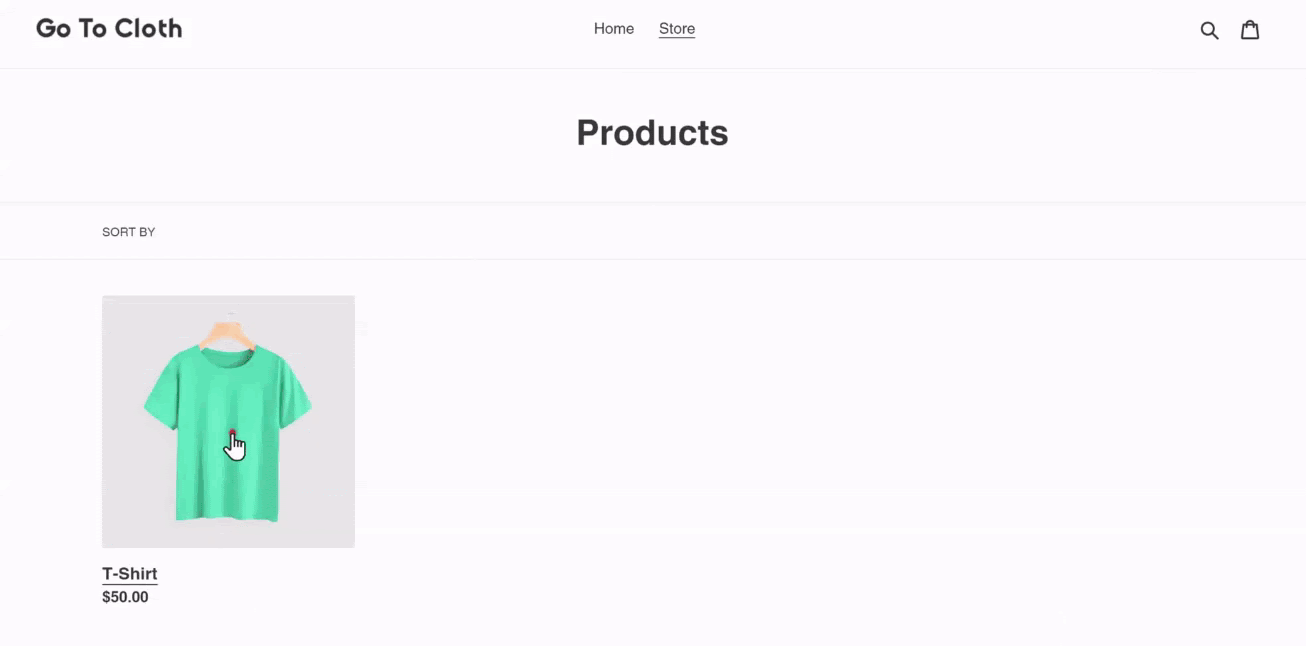
To check how it looks on the website, head to the website, and click refresh.
As you can see, the product we added is displayed along with the price.
You can even click on the product to head to the purchase page with the product description we added.
Looks good, doesn’t it?
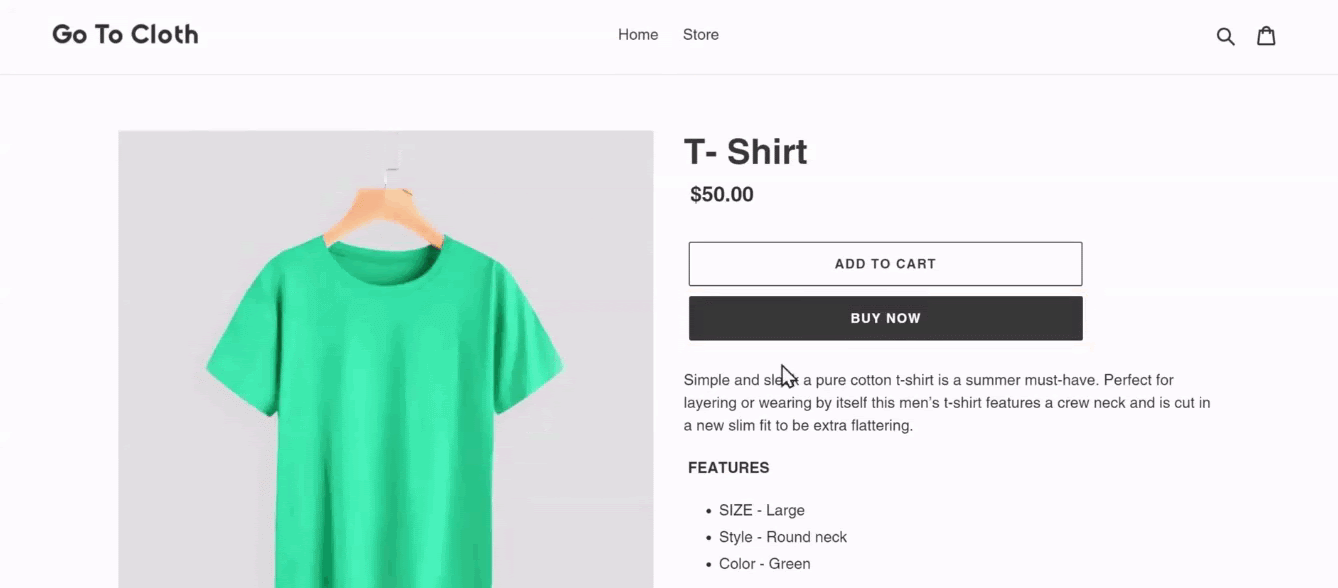
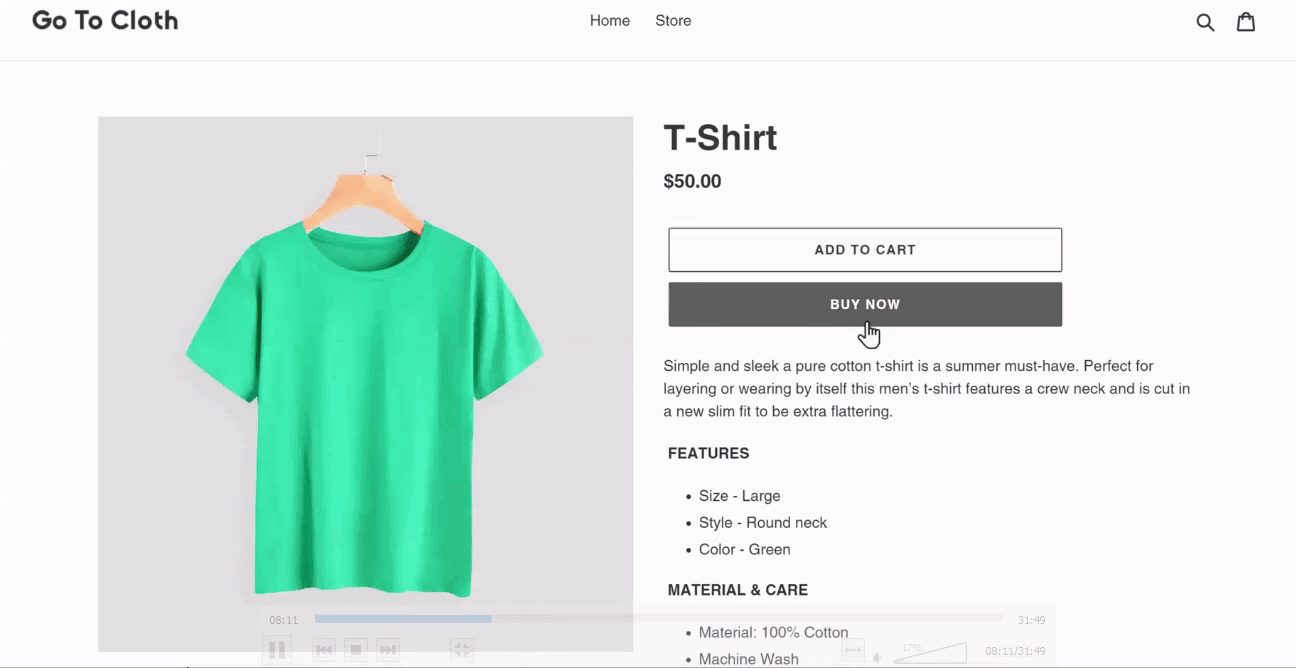
But when you try to purchase the product by clicking on Buy Now, you will get a message saying, ‘Checkout is not available.’
This is because, with a free trial, the checkout option is deactivated by default in Shopify.
To enable the checkout, we need to purchase a Shopify plan, which gets us to the next step.
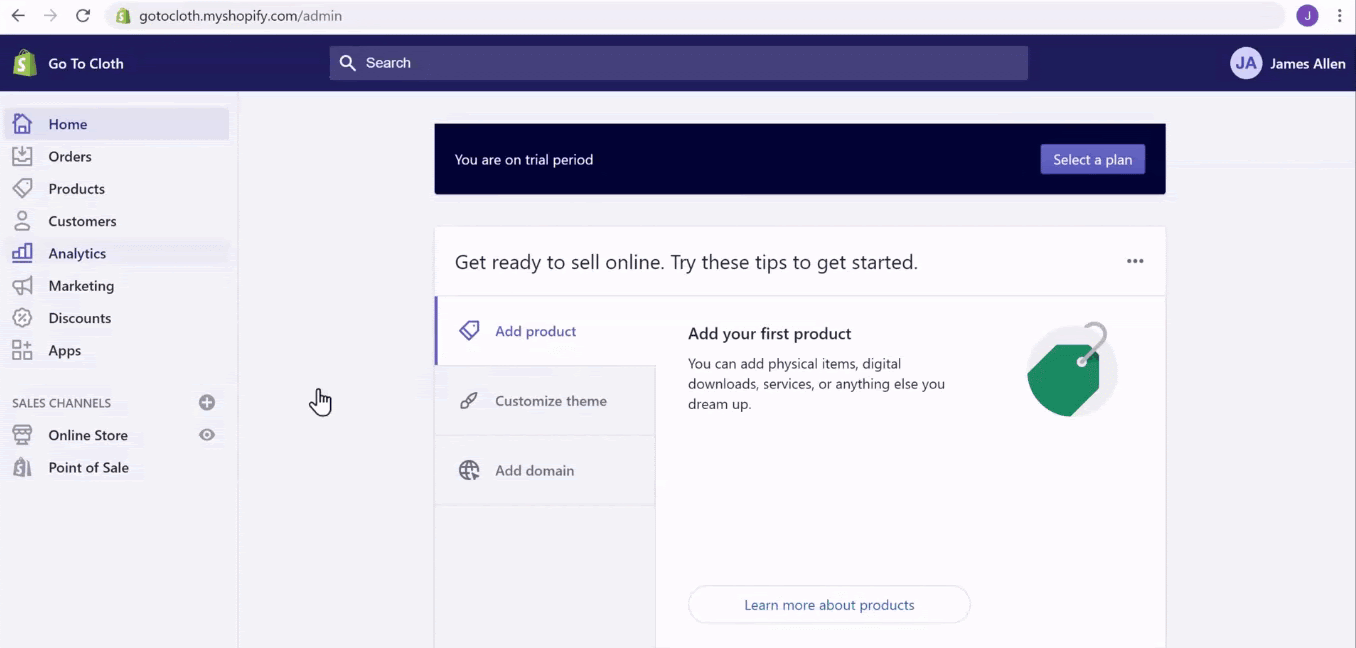
Step 2.3: Choose a Plan on Shopify
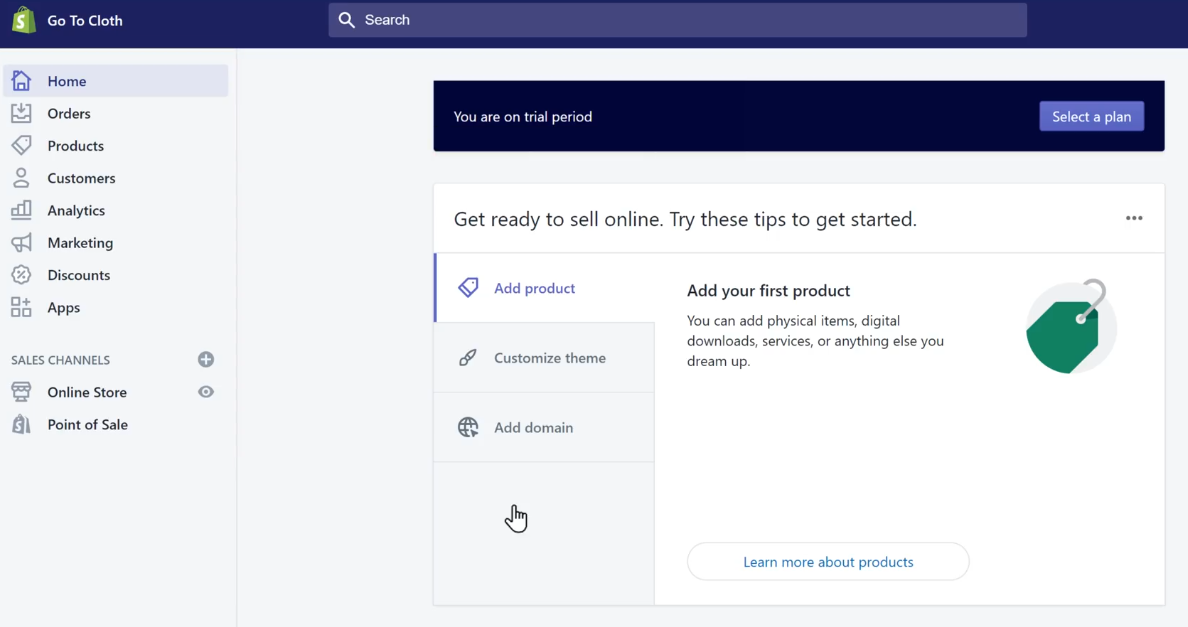
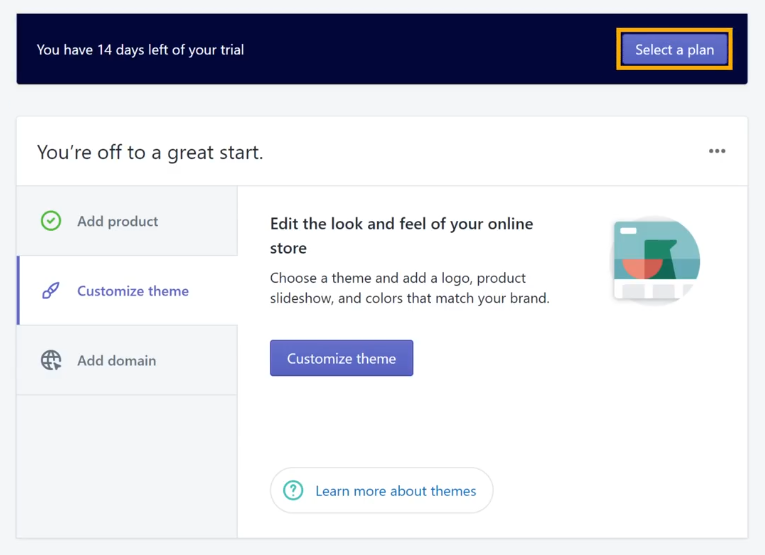
To choose a Shopify plan, let’s go back to the admin area and click Home from the menu.
In the Home section, click Select a plan to choose from the Shopify plans.
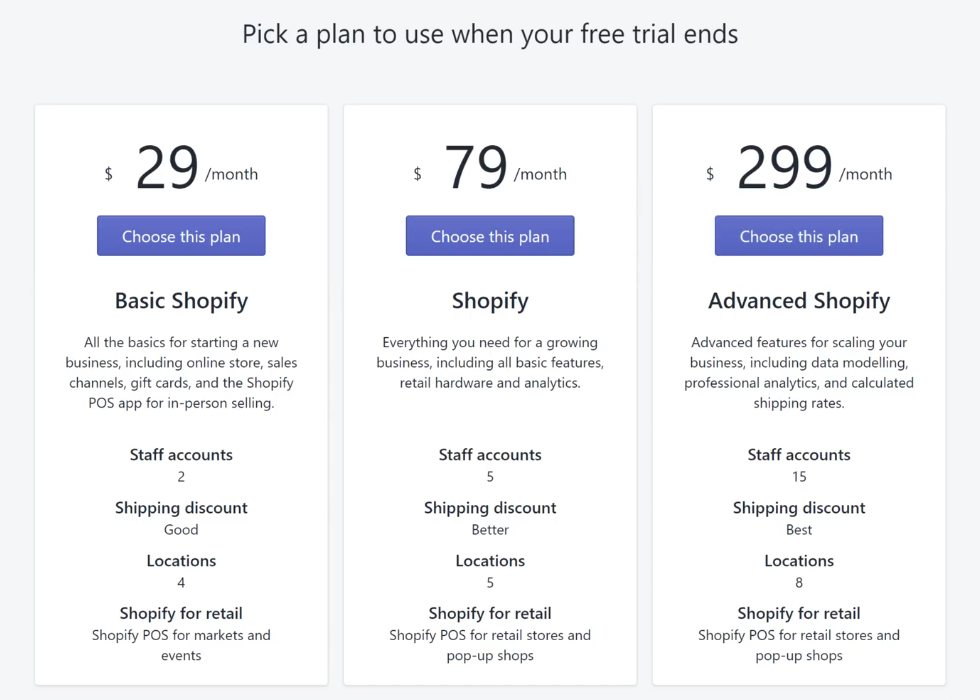
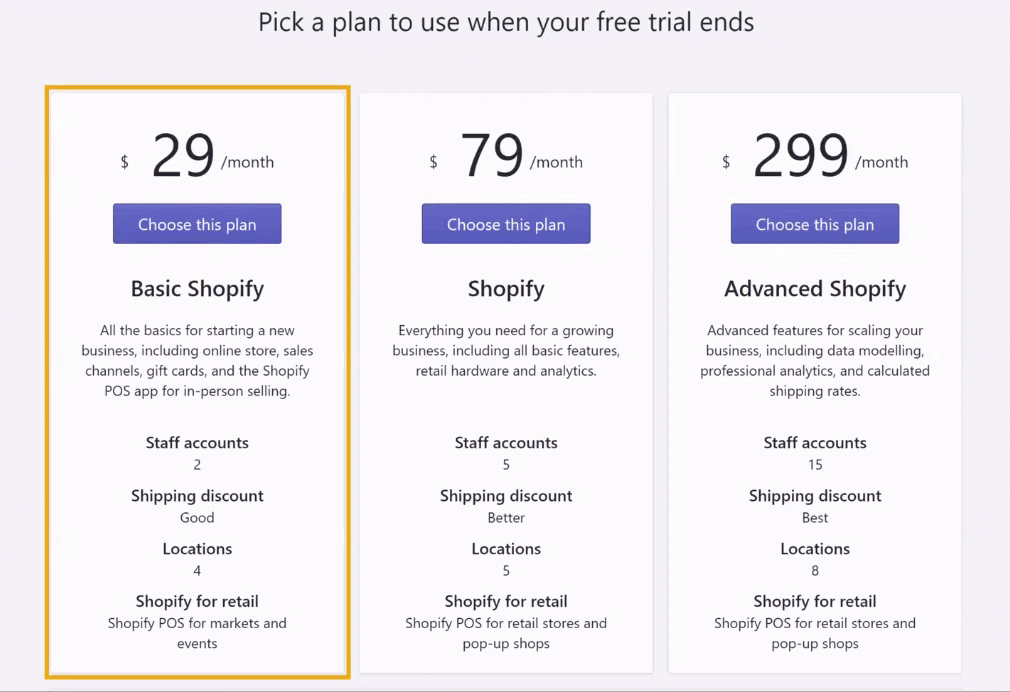
This will bring us to the Pick a plan for your store section where the three different Shopify plans will be displayed.
The three different Shopify plans, Basic Shopify, Shopify, and Advanced Shopify, are displayed along with the features they offer.
As we are only starting now, let’s select the Basic Shopify plan by clicking on Choose this plan.
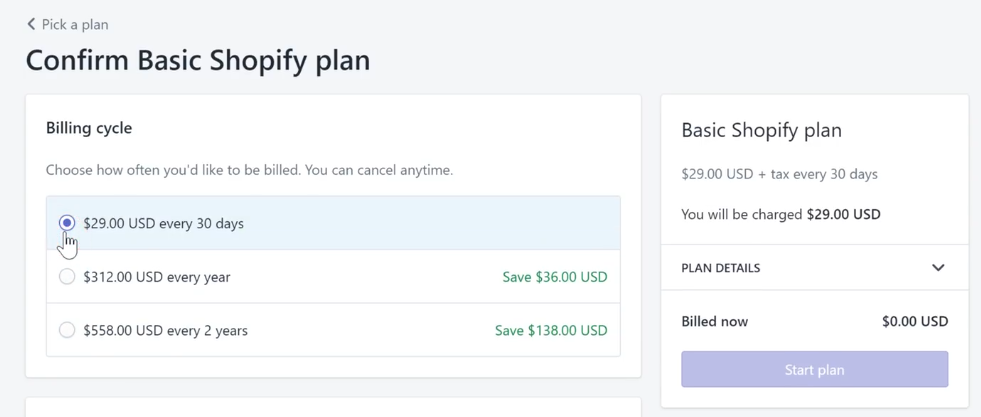
In the Confirm Basic Shopify Plan section, we need to select the Billing cycle, which decides how often we need to make the payment.
We are going with the billing cycle of every 30 days for the store.
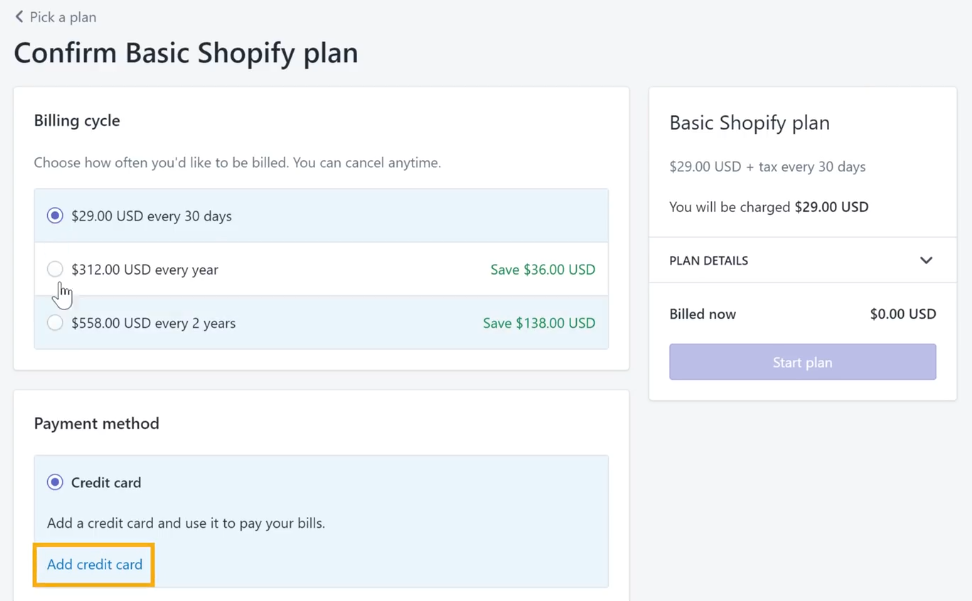
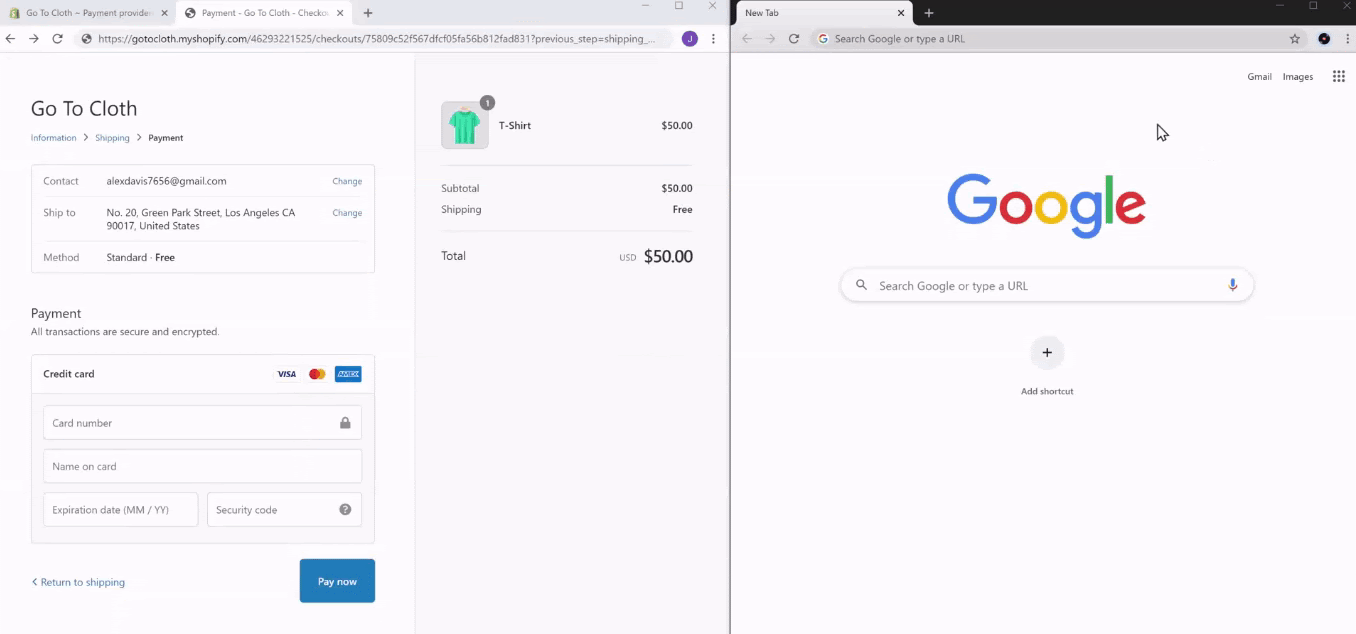
Once the billing cycle is selected, it’s time to add the Credit card to the payment method.
Click Add credit card.
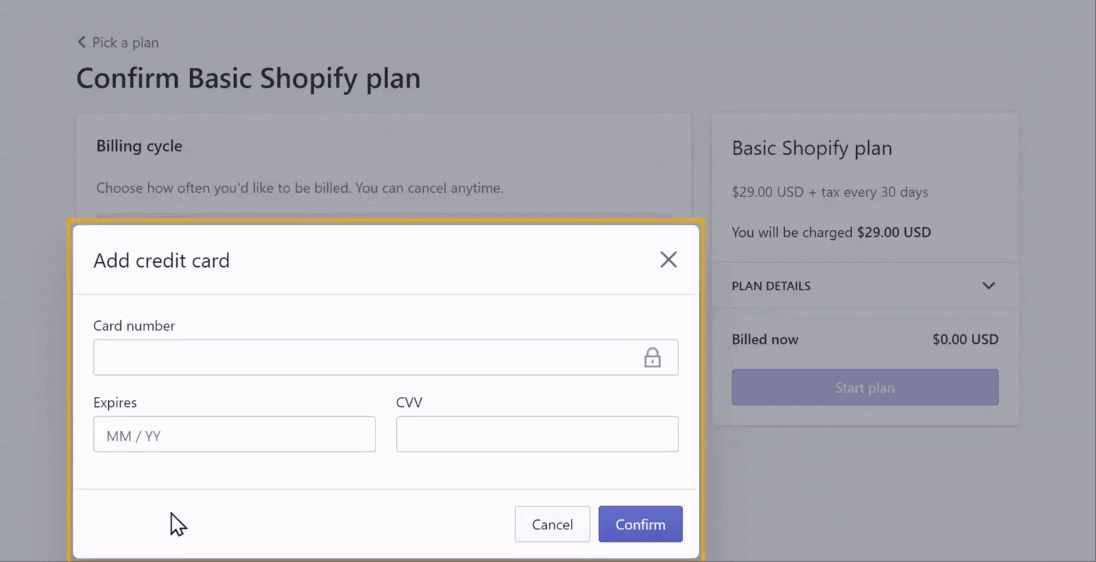
Once the trial period of 14 days is over, the credit card will be charged according to the chosen plan.
So, enter the card details and click Confirm.
With the credit card details entered, we have successfully chosen a Shopify plan to create an online store.
Now that we have chosen a plan, we need to check whether we can checkout and purchase a product.
So, let’s go back to the product page and click Buy Now again.
Yay! We have got our checkout page.
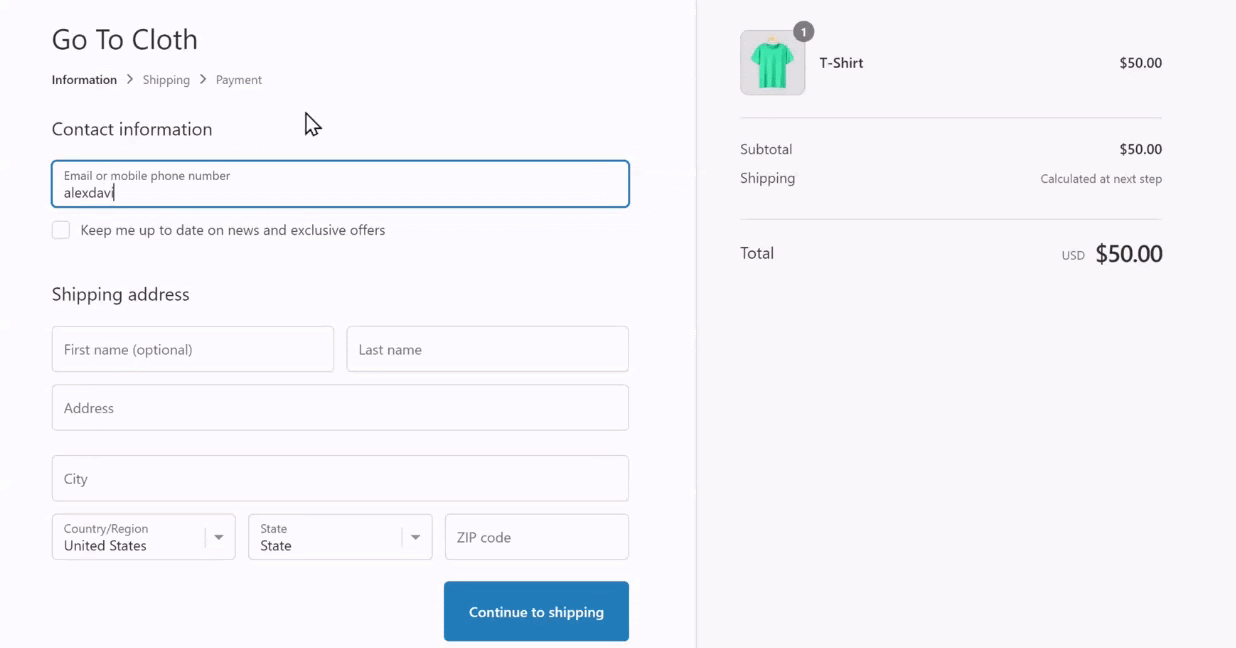
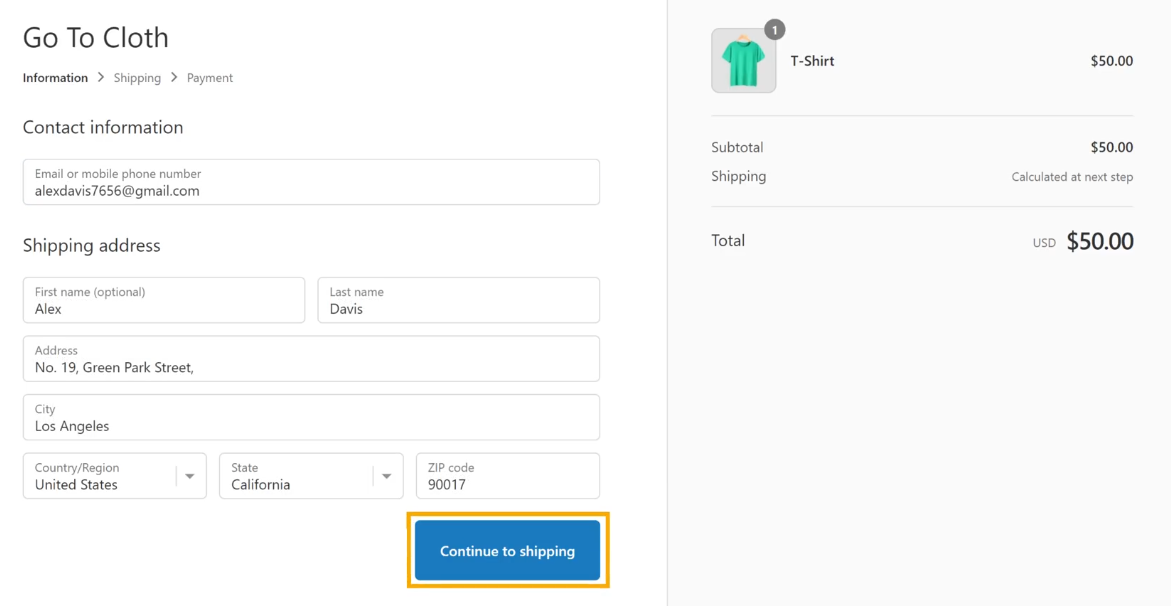
Let’s fill in the details such as Contact Information and Shipping address.
Then click Continue to Shipping.
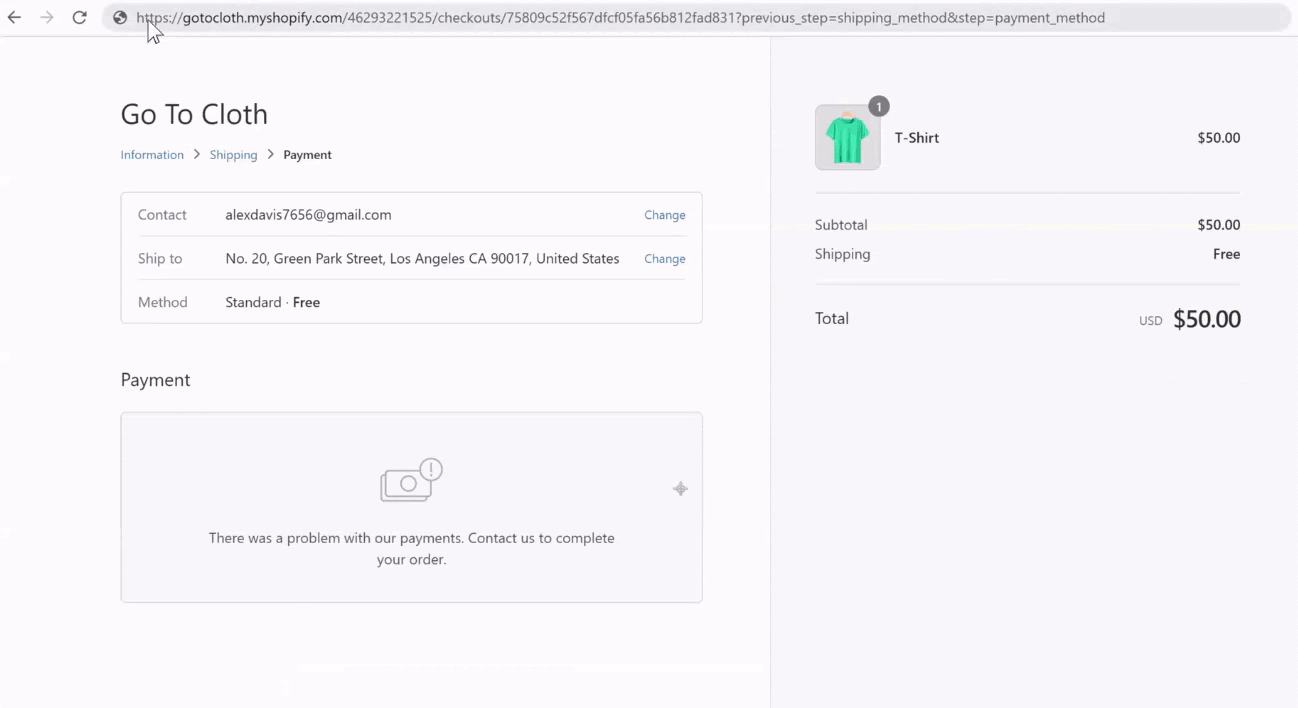
Now we get an error in the Payment section,
‘Your payment method is not set up.’
Yup, in order to make the customers purchase a product, we need to set up a payment method in the online store.
Step 2.4: Set up a payment method
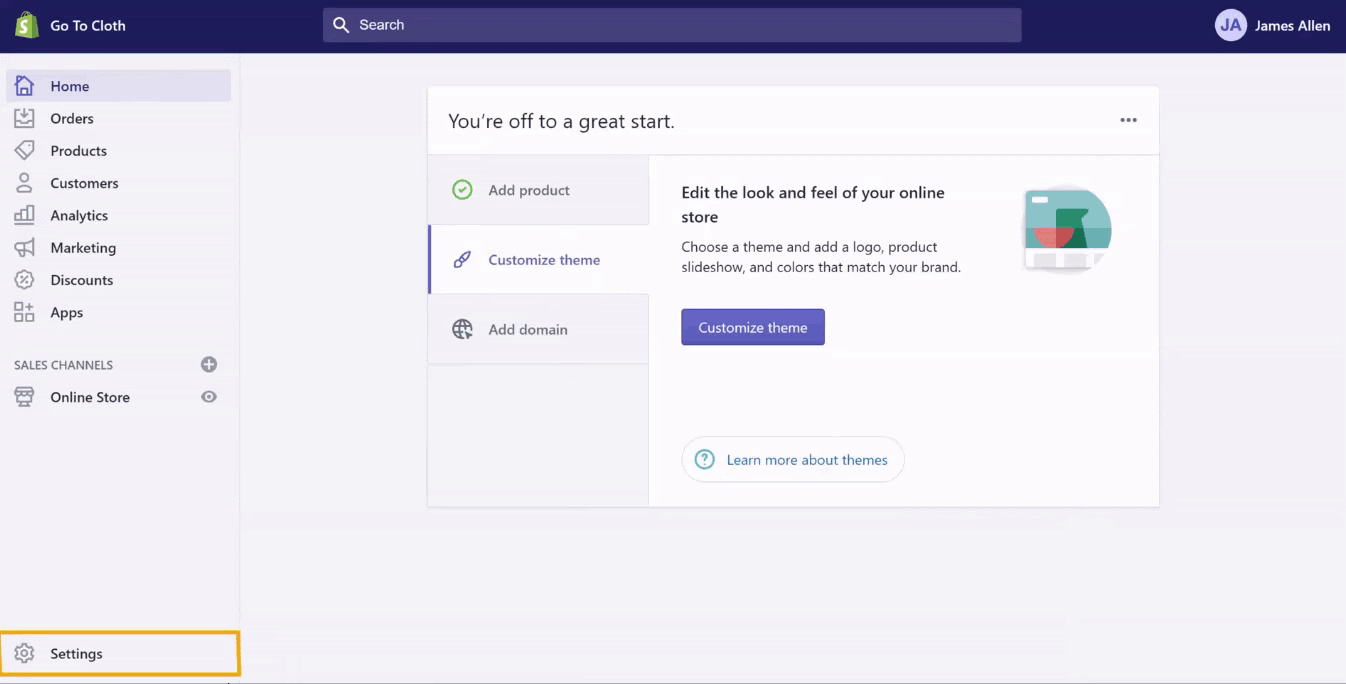
To set up a payment method, let’s go back to the Shopify admin area, and click Settings.
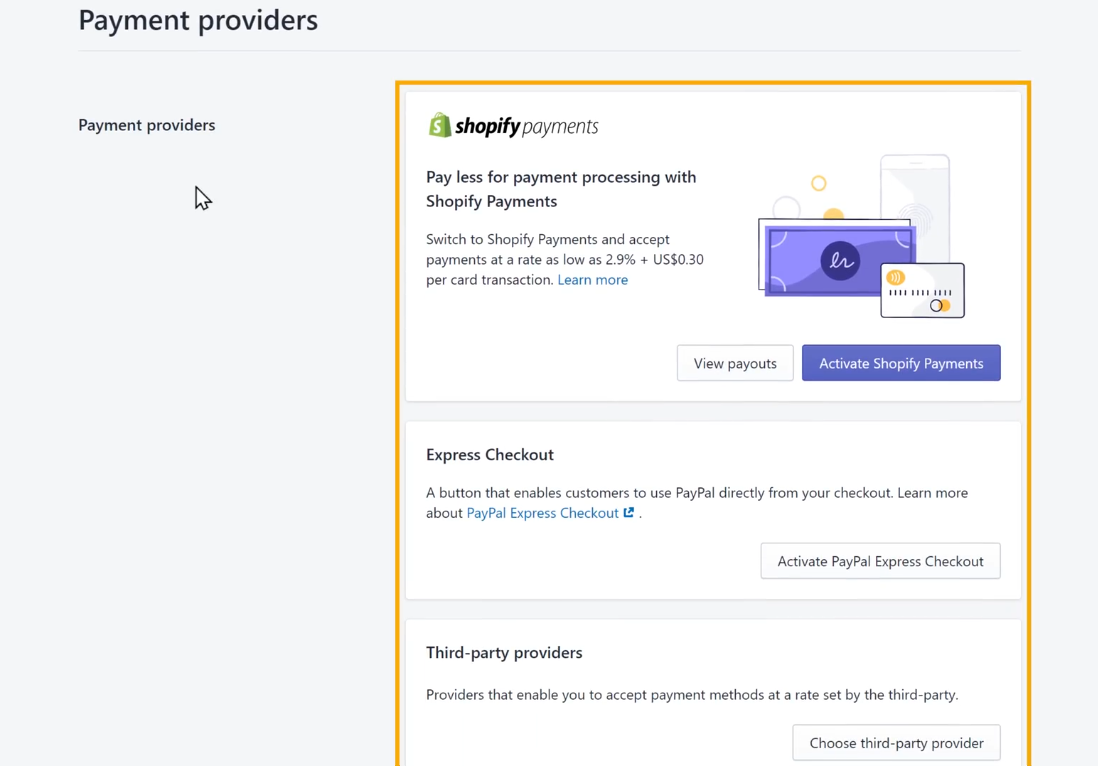
In the Settings, select Payments to set up a payment method for the customers.
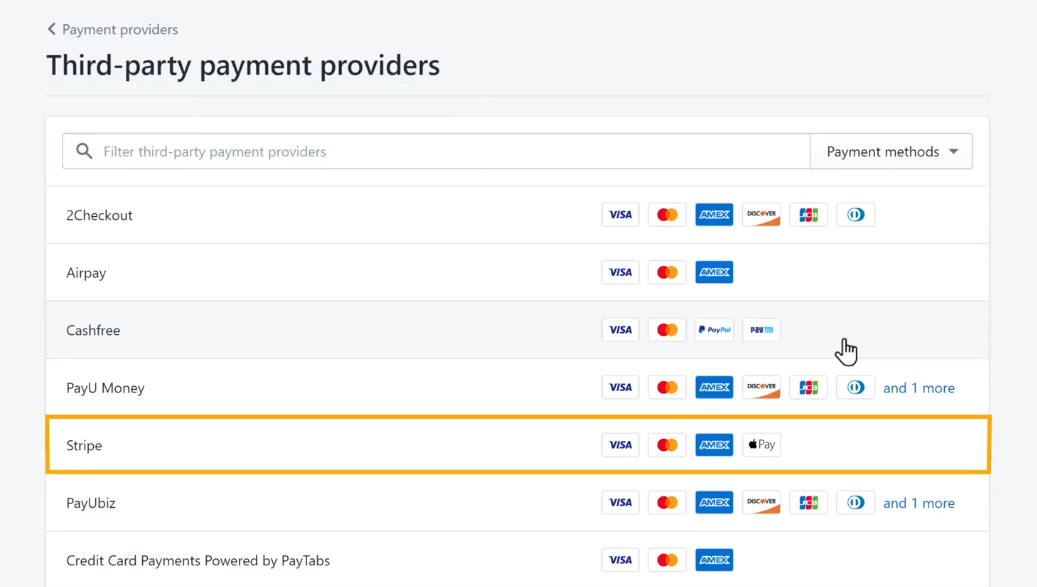
This will open up the Payment providers section displaying the different payment methods such as Shopify Payments, Express Checkout, Third-party providers, and so on.
If Shopify Payments is not available in your country as of now, it is better to choose Third-party providers as a payment method.
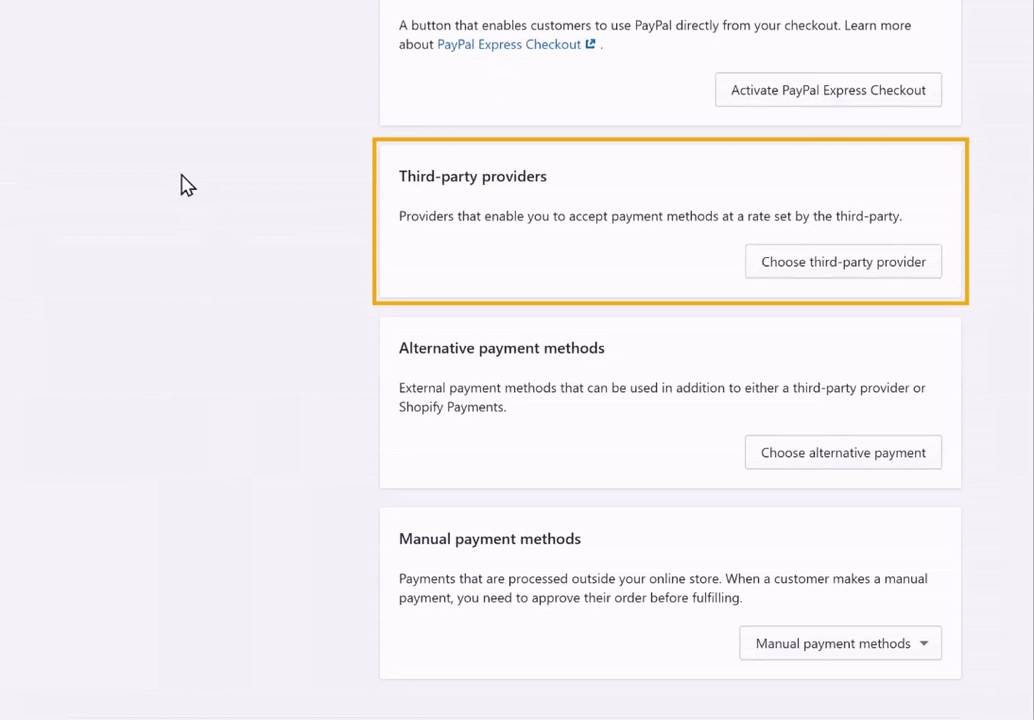
So click on Choose third-party provider.
This opens up the Third-party payment providers section with several payment providers listed one after the other.
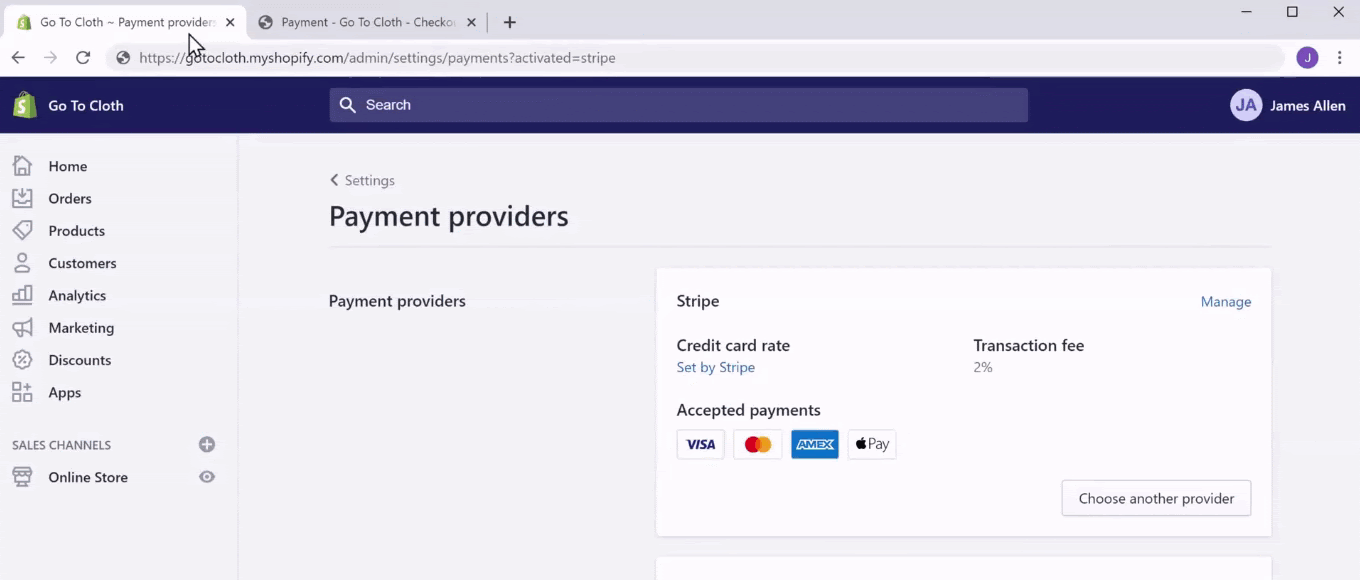
It’s advisable to choose a popular and trustworthy payment provider like Stripe. So we are going with Stripe by clicking on it.
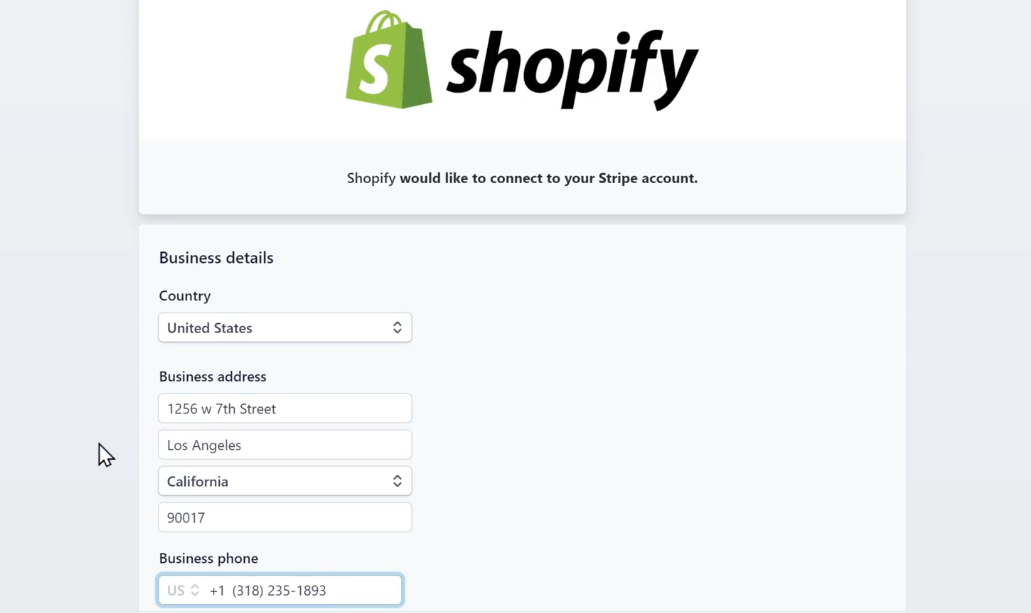
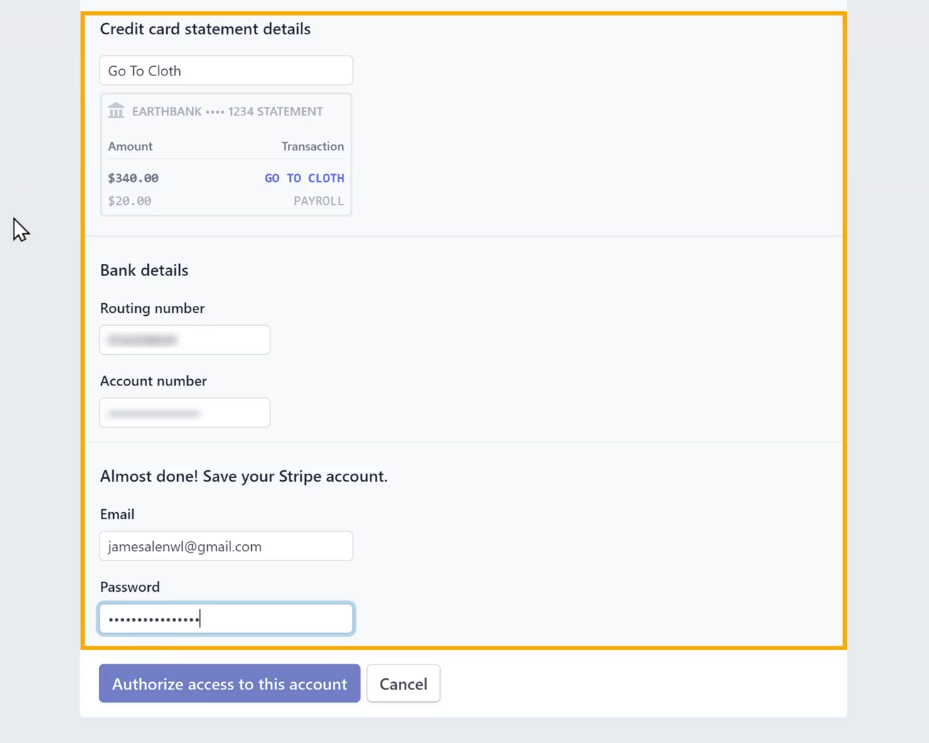
To set up Stripe payment, we first need to enter Business details such as address and phone number.
Then, we need to enter the bank account details where we will be receiving the customer payments.
And before we finish setting up, let’s enter an Email and Password for the Stripe account.
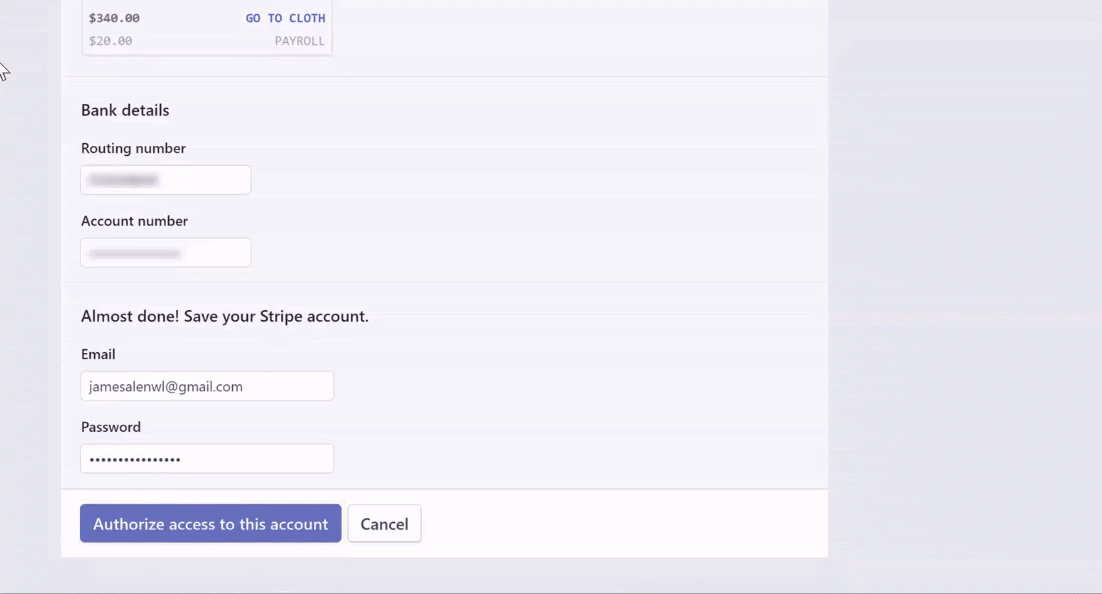
Once you have entered all the details, click on Authorize access to this account.
Now, with the Stripe payment method added, we have successfully set up a payment method for the customers on the Shopify website.
To check the payment method, let’s go back to the checkout page, and refresh the site.
We can see that the error message we had previously is replaced by the Payment method we just set up.
So, with the payment method in place, our Shopify website is ready for customers.
But if you access our website from a new window, we don’t get the website we just set up!
Our website is not visible in the new window.
Why is that?
Well, it’s because we haven’t made our website visible to the customers.
How can we make it visible then?
Step 2.5: Make your Shopify store available for customers
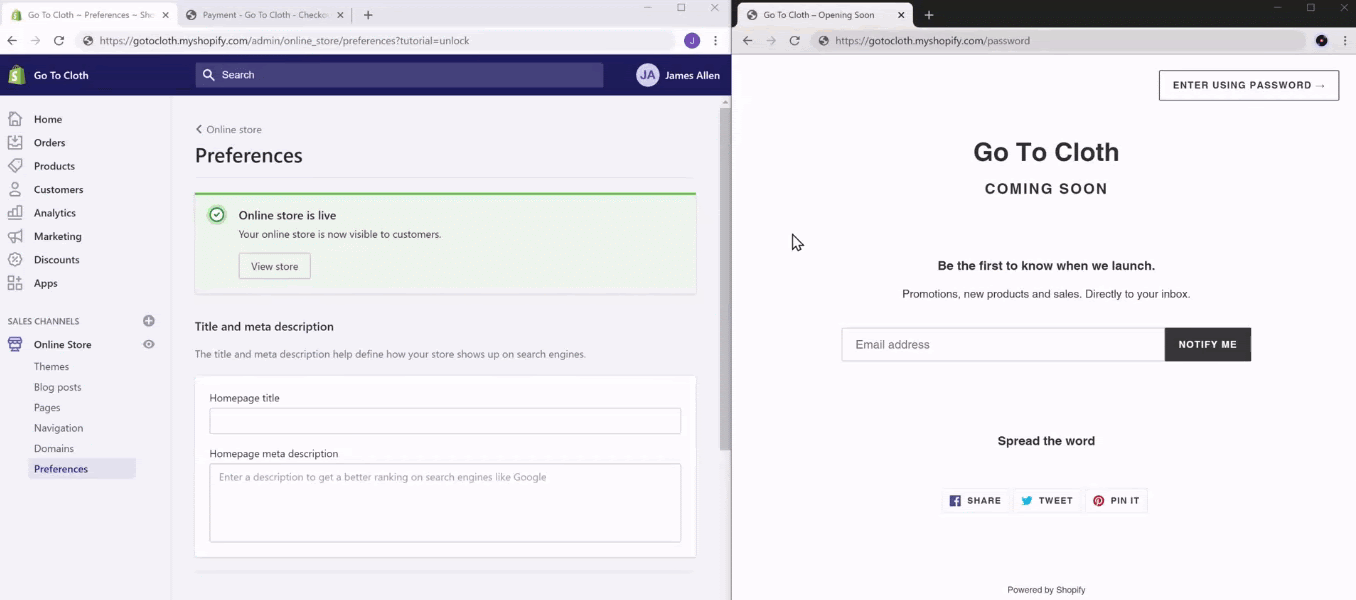
To make the website visible to customers, we need to change a setting in the Shopify admin area.
So let’s go to the admin area and select Online Store from the Sales Channels section.
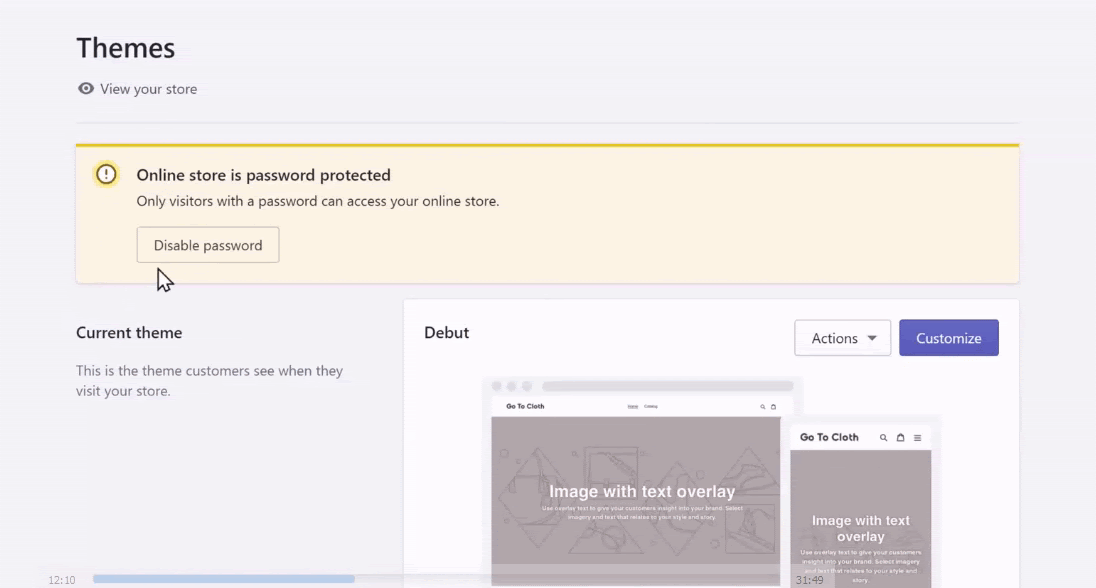
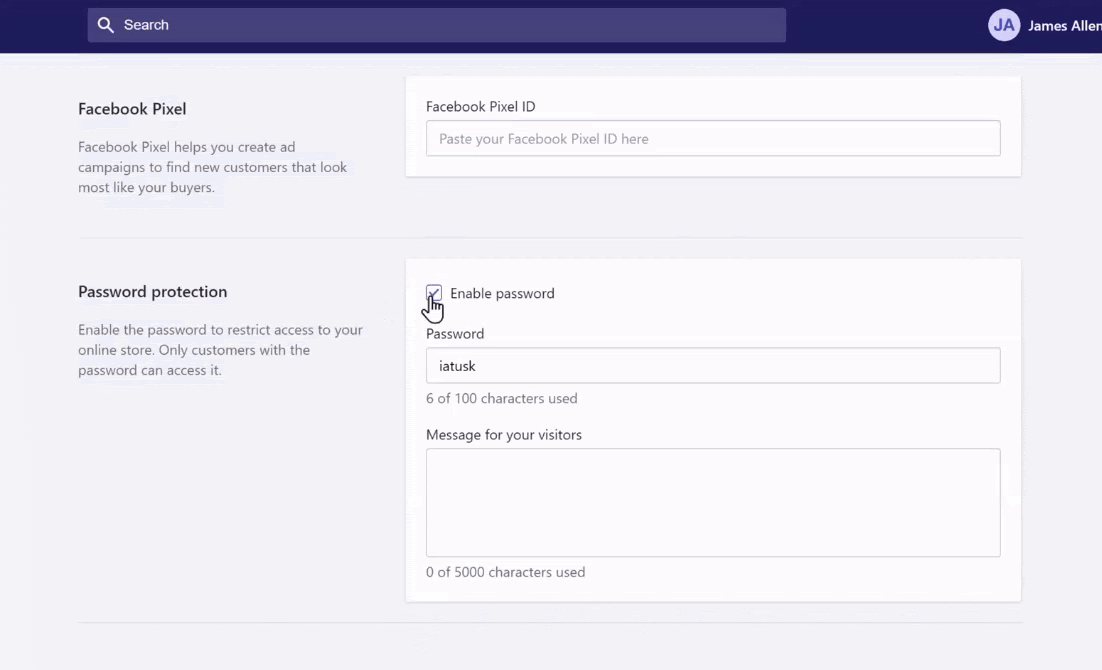
We can notice that it says, Online store is password protected. This means that the online store will not be visible to customers.
So, to change that, click on Disable password.
In the Password Protection section, uncheck the Enable password checkbox.
And click Save to apply the changes.
As you can see, it says, Your online store is now visible to customers.
So, let’s try that by refreshing the website on the new window we opened.
And there we have it! Our online store is now visible to the customers.
So that is how you can create an online store in no time. And it will be visible for customers to purchase the products.
So, let’s check it for ourselves, shall we?
Let’s try to buy a product,
Go to the website and select Store.
And just like a customer, let’s select a product and click on Buy It Now to purchase the product.
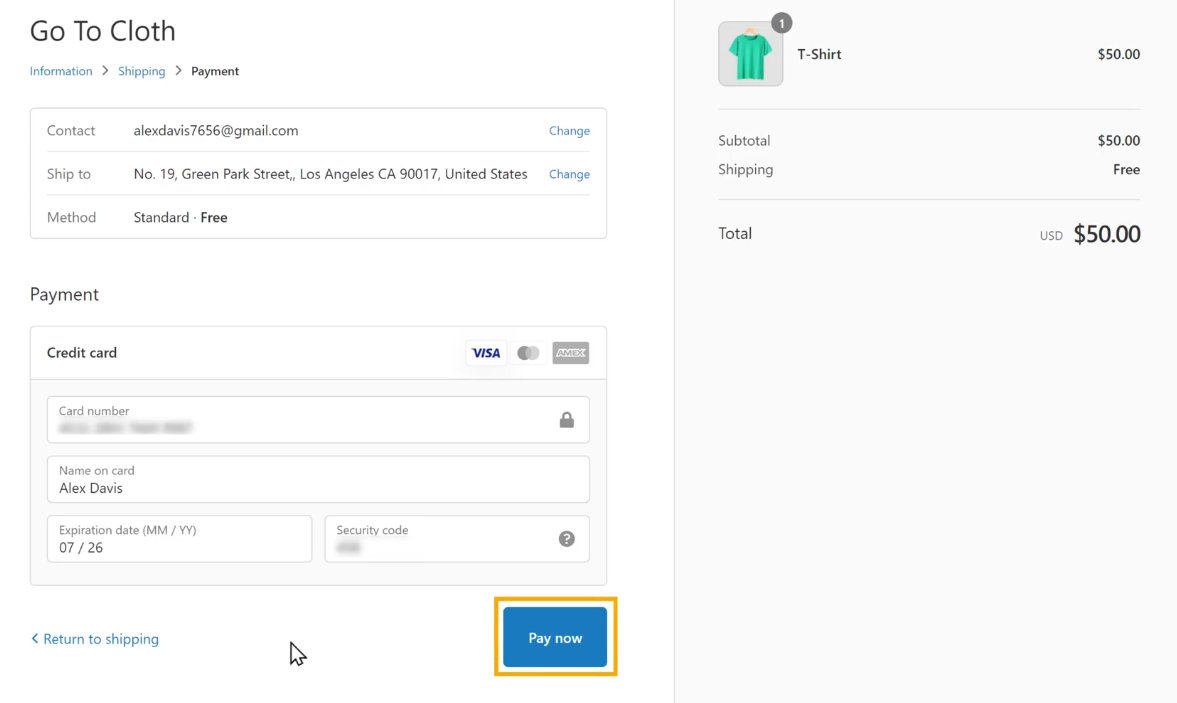
Enter the customer details and click Continue to shipping.
Now enter the payment methods to complete the purchase.
And click Pay now.
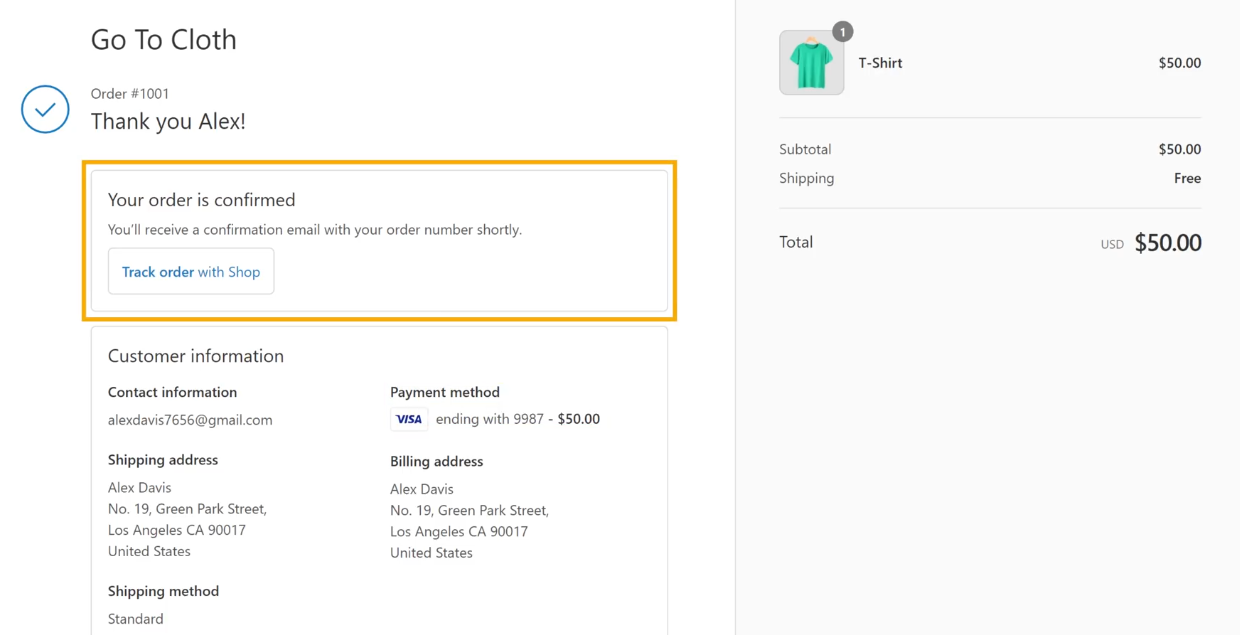
Once you click Pay now, the payment will be made, and the success message will be displayed,
‘Your Order is Confirmed.’
Ok, now from a customer perspective, they can check the products and even purchase the desired product from the store.
But from a business owner perspective, what happens when a customer makes a purchase?
What goes behind the purchase of a product?
How will you know that the payment is made for a purchased product?
So, what exactly happens when a customer orders a product?
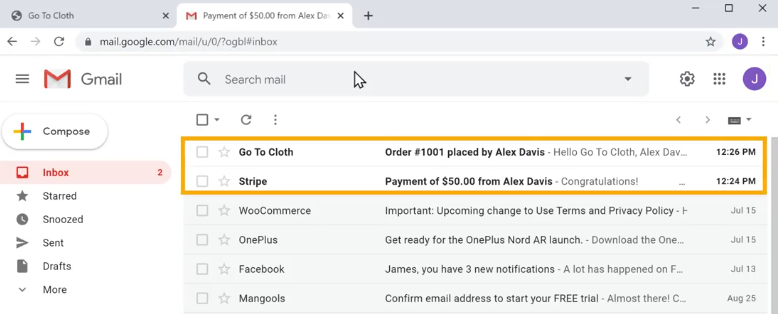
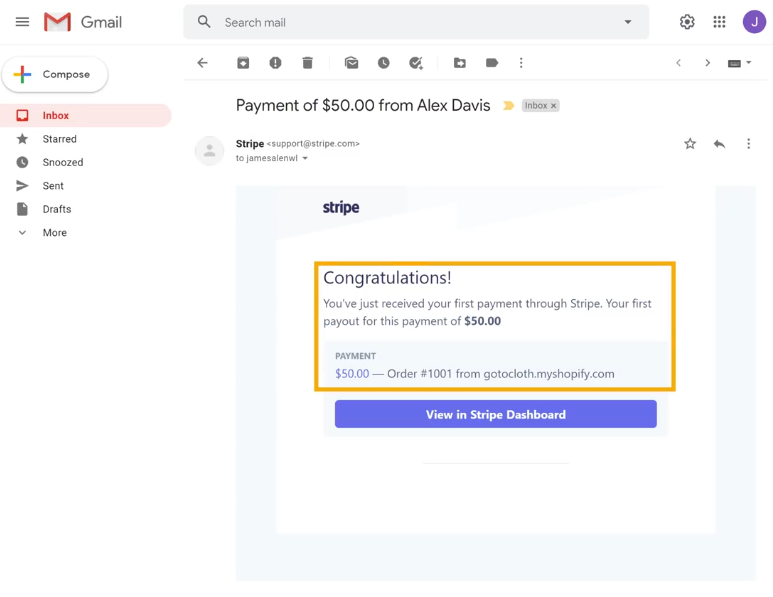
Well, right after a customer purchases a product from the store, you will receive two Emails in the Inbox.
As you can see, one is from the Shopify store and the other is from Stripe regarding the payment details.
The Email from the Shopify store contains all the details regarding the purchase, including the product, the customer details and also the shipping address.
Whereas, the Email from Stripe contains the payment information, thus confirming that an order has been placed in the store.
This is how you, a Shopify store owner, will know when a customer places an order on your website.
With that, we have created our own Shopify store that lets customers purchase products with successful payment methods.
Moving on, we need to change the look of the online store.
Step 3: Design your Shopify website
We will change the look and design the Shopify website in two steps,
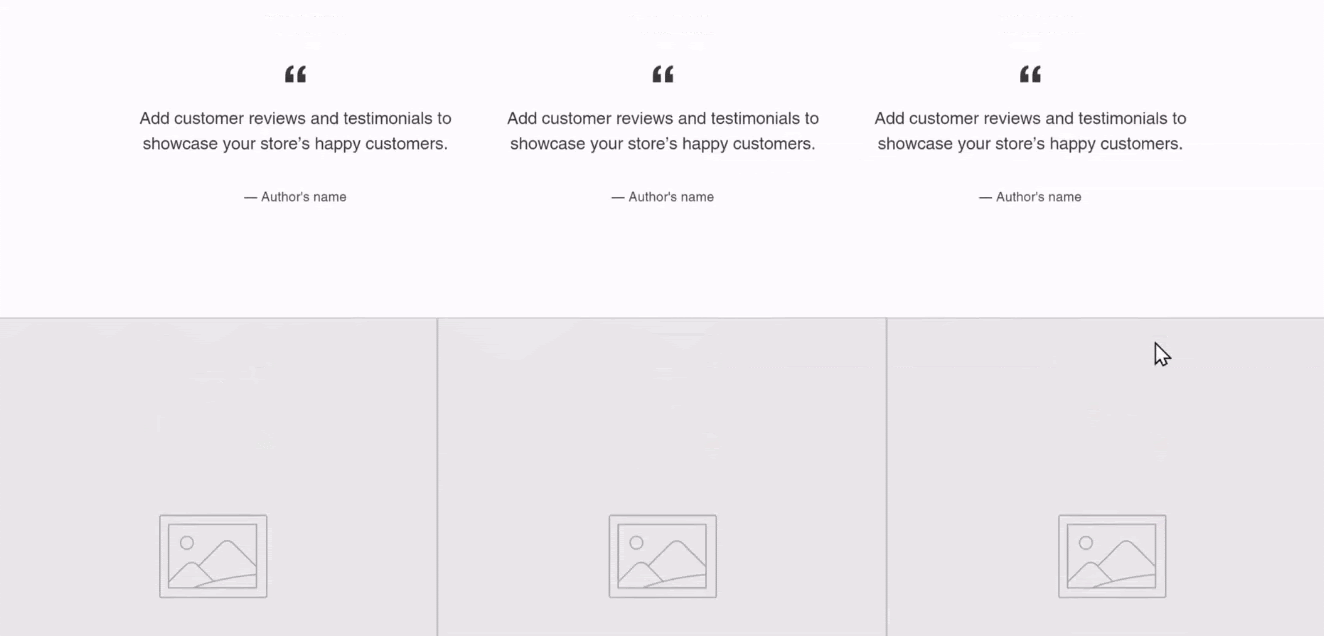
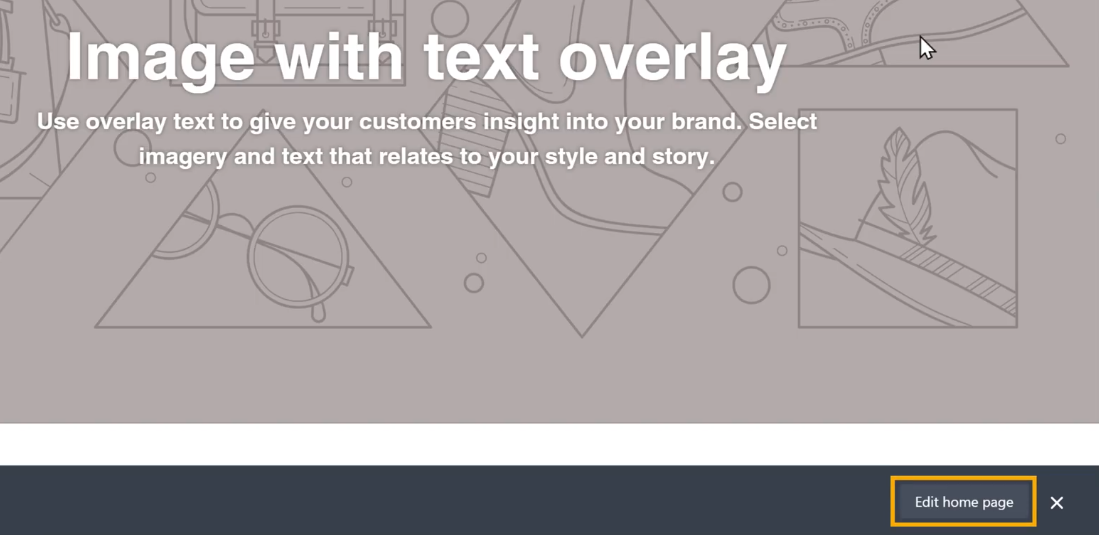
As of now, we have a default setting on the homepage of the store, filled with the sample content that comes with it.
Don’t you think we need to change that?
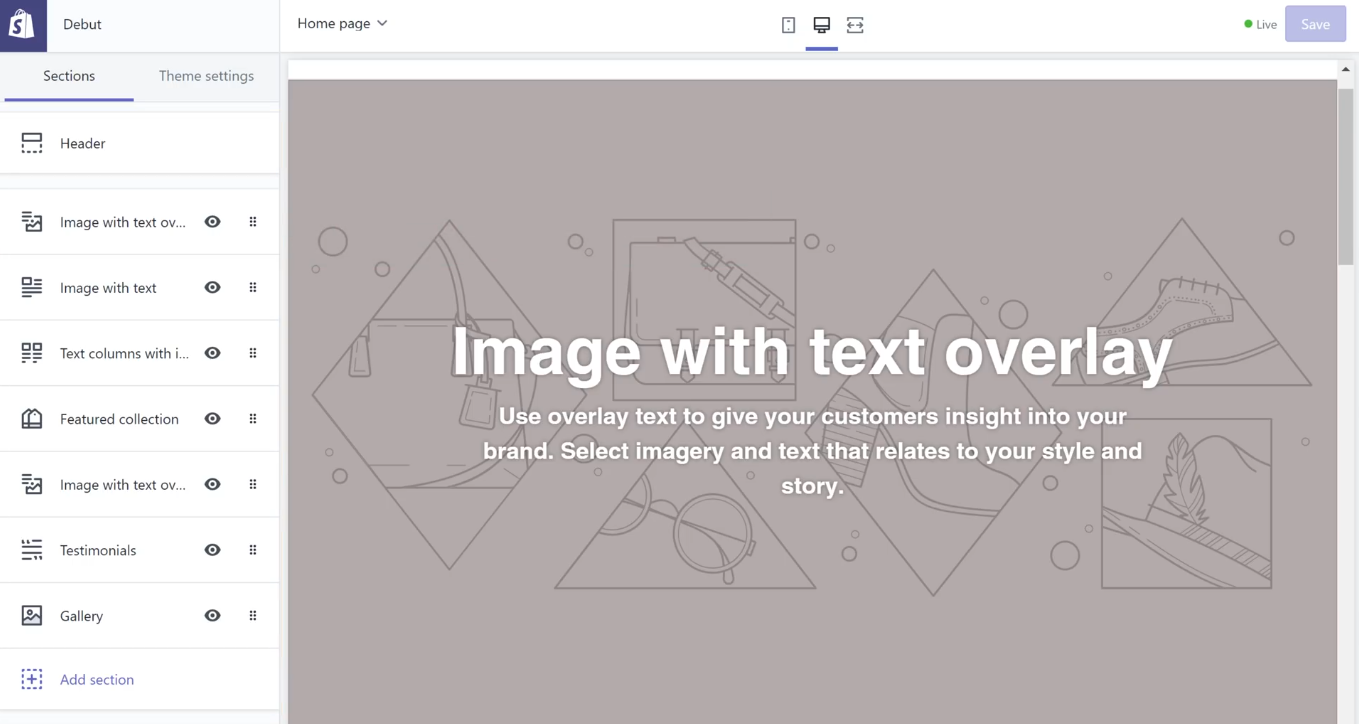
So to change the look and content of the homepage, click Edit home page at the bottom of the page.
This will take you to the editing section for the home page.
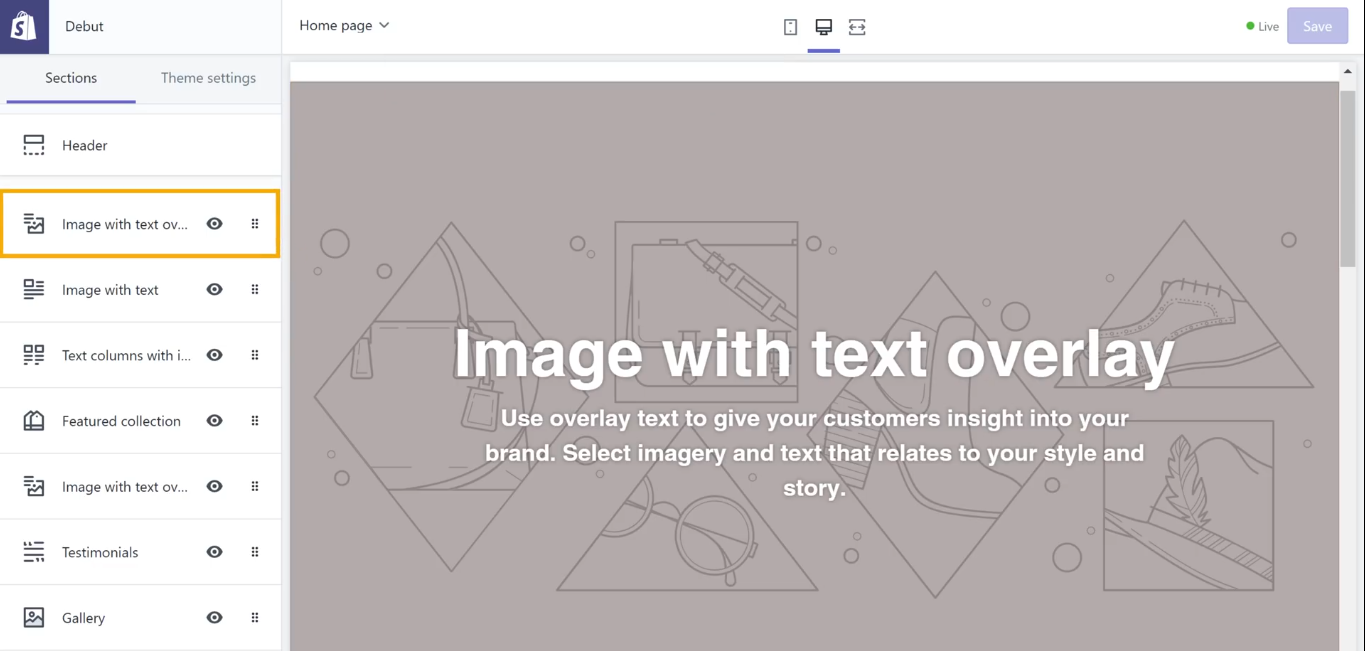
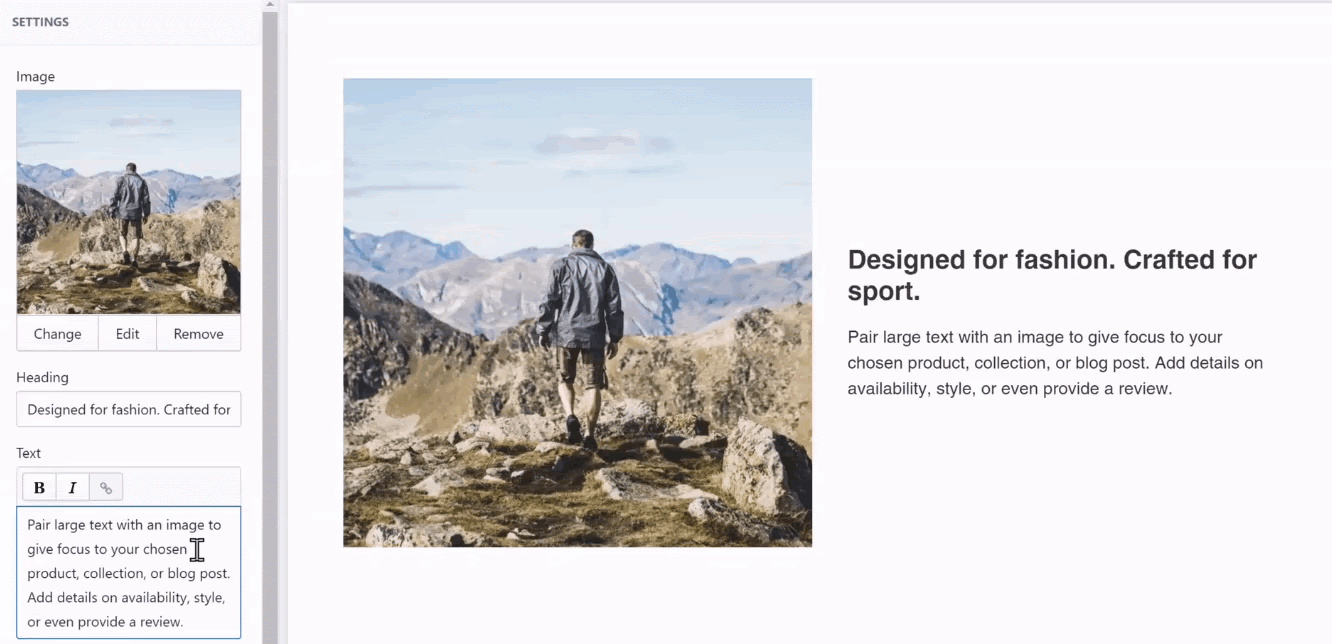
Now if you want to edit the first section of the page, all you need to do is select that particular item from the left menu.
Within the section, we have different features to edit, like background image, content, etc.
Say, you want to change the text in this section,
Be it the heading or the other text, all you need to do is select the existing text in the left menu and type in the new text.
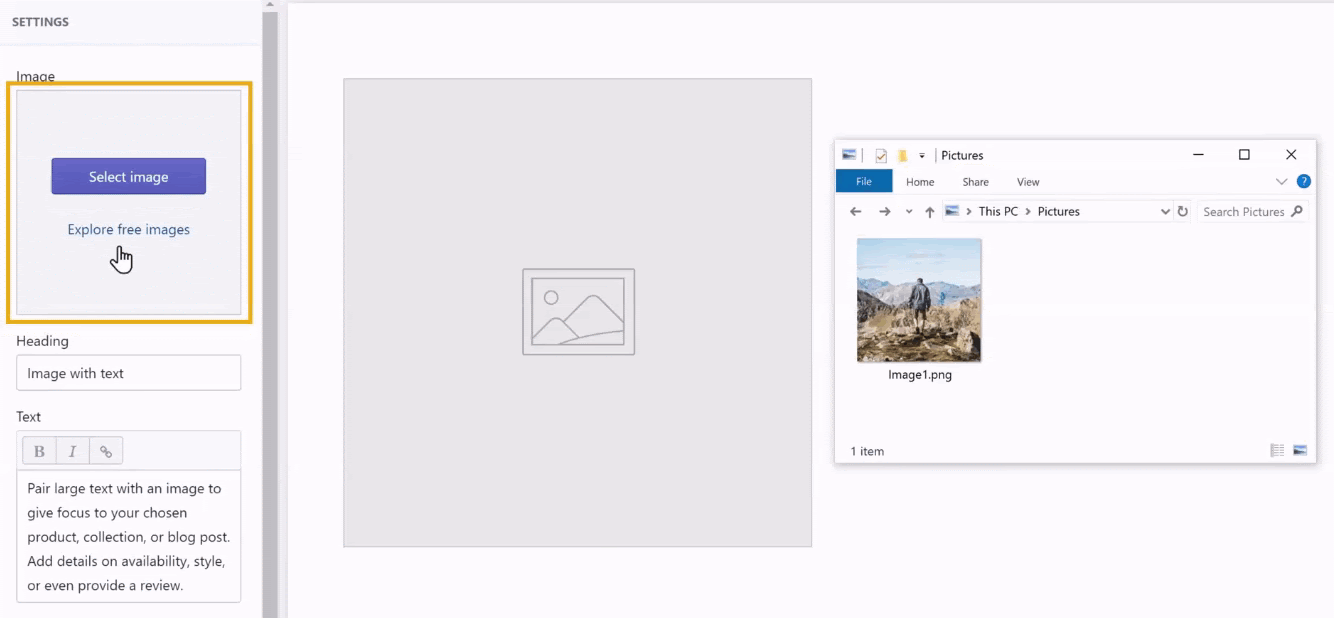
And if you want to change the default background image, select a new image from the system, drag and drop it in the Image section of the menu.
Now we have changed the text and image in the first section of the home page.
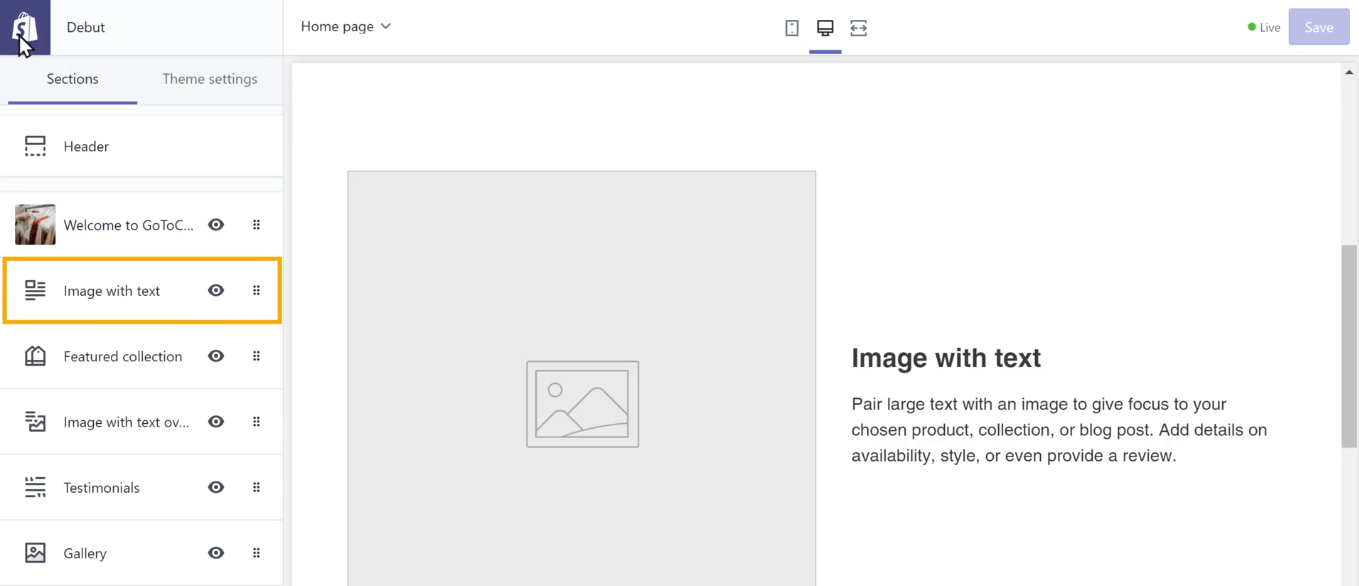
To edit the other sections of the home page, click the back arrow to view all the items on the left menu.
Select the particular section that you want to edit, and repeat the editing process as the first section.
Like, dragging and dropping a new image from the system,
And changing the existing default text by typing the new text.
This way, we can edit all the sections, and in turn, the entire home page.
Even though we have changed the look of the home page, we can still improvise on it.
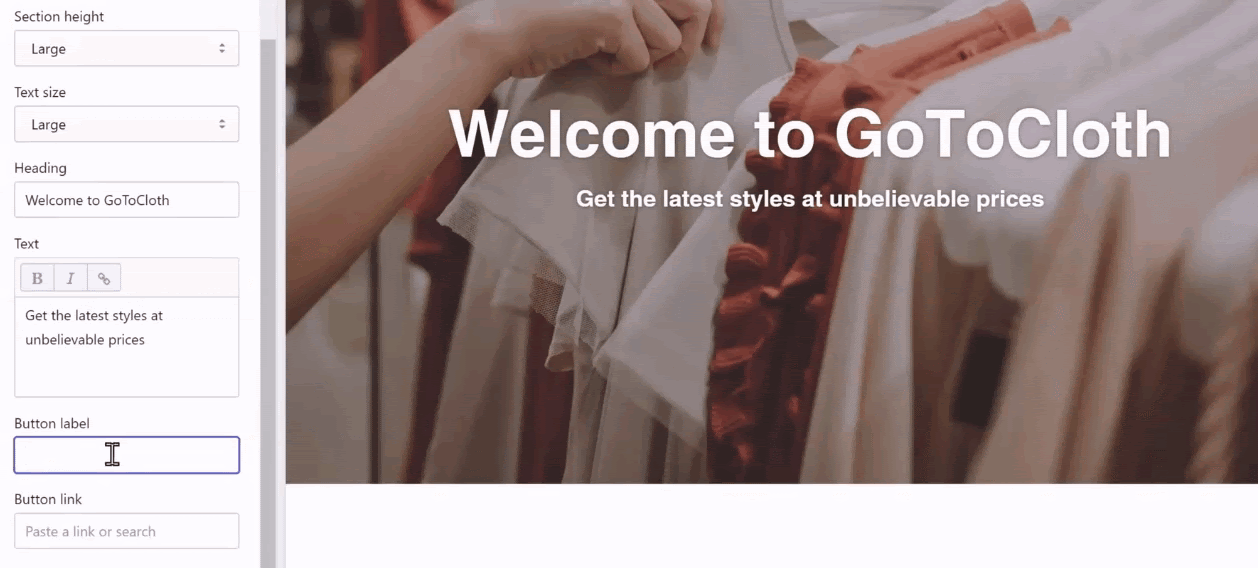
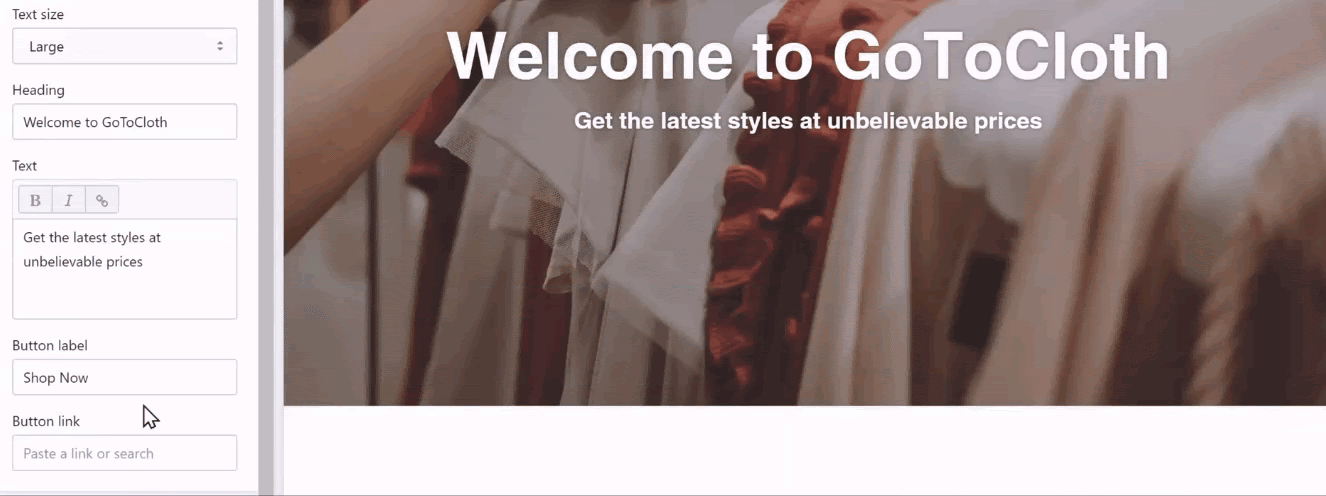
How about we add a simple Button that takes the customers directly to the products?
That would make the process much easier, right?
To add a button, first select the particular section.
Scroll down the left-side menu to find Button elements, Button label and Button link.
Add the button text in the Button label box.
After that, we need to add a link to redirect the customers that click on the button.
Say we want to link the button to the ‘Products’ page, click on the Button link box, and select products.
By doing so, the button will be created on the section.
This way, whenever a customer clicks on the button, he/she will be redirected to the Products page.
So, once you are done with all the changes, click Save at the top right of the page.
Now to check how the changes look on the home page, let’s go to the website and click refresh.
As you can see, we have successfully added content and changed the look of the home page on the website.
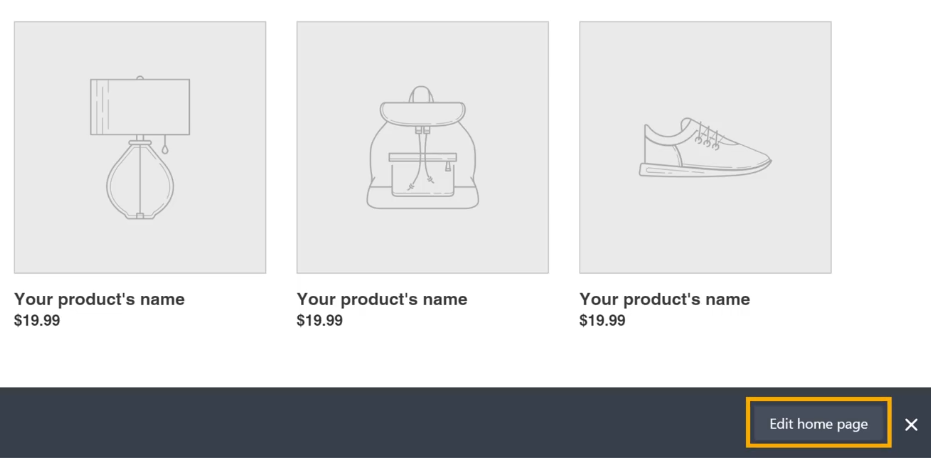
But it still looks kind of empty without the products, right?
So, let’s now look at how to add products to the home page.
Step 3.2: How to Add Products to the homepage
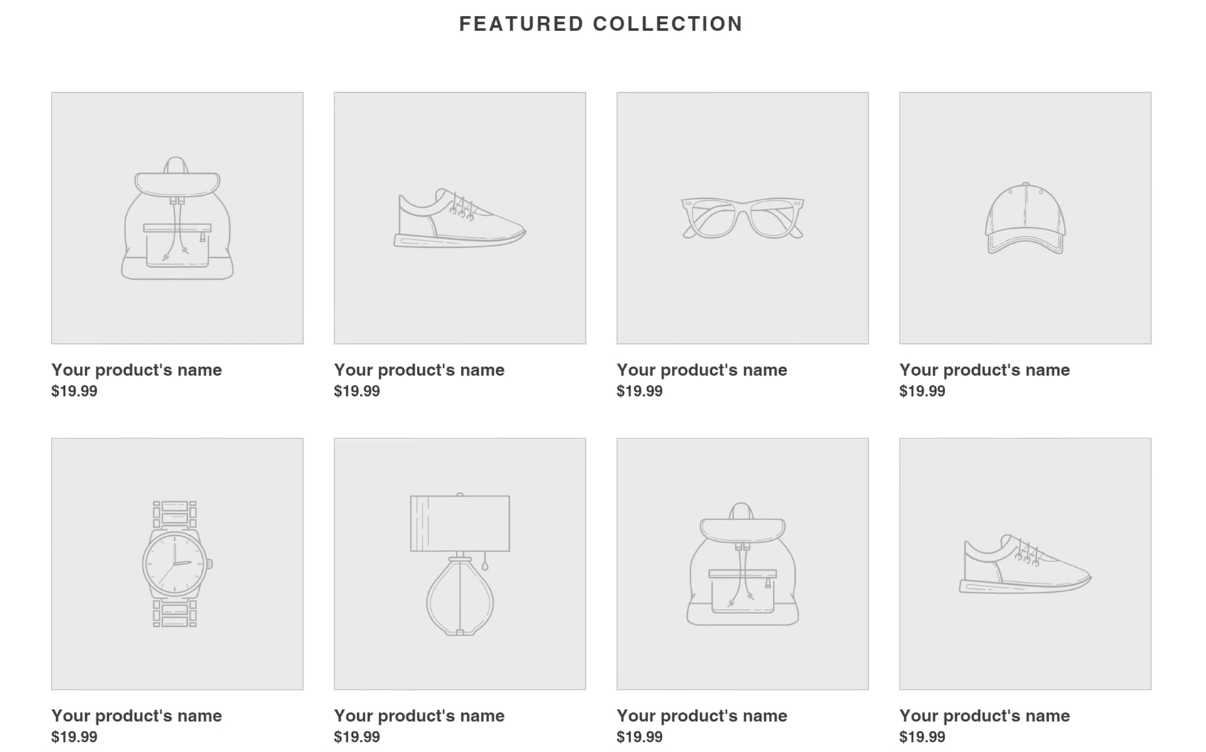
As of now, in the process to create an online store, we have an empty Featured collection section with none of our products displayed on the home page.
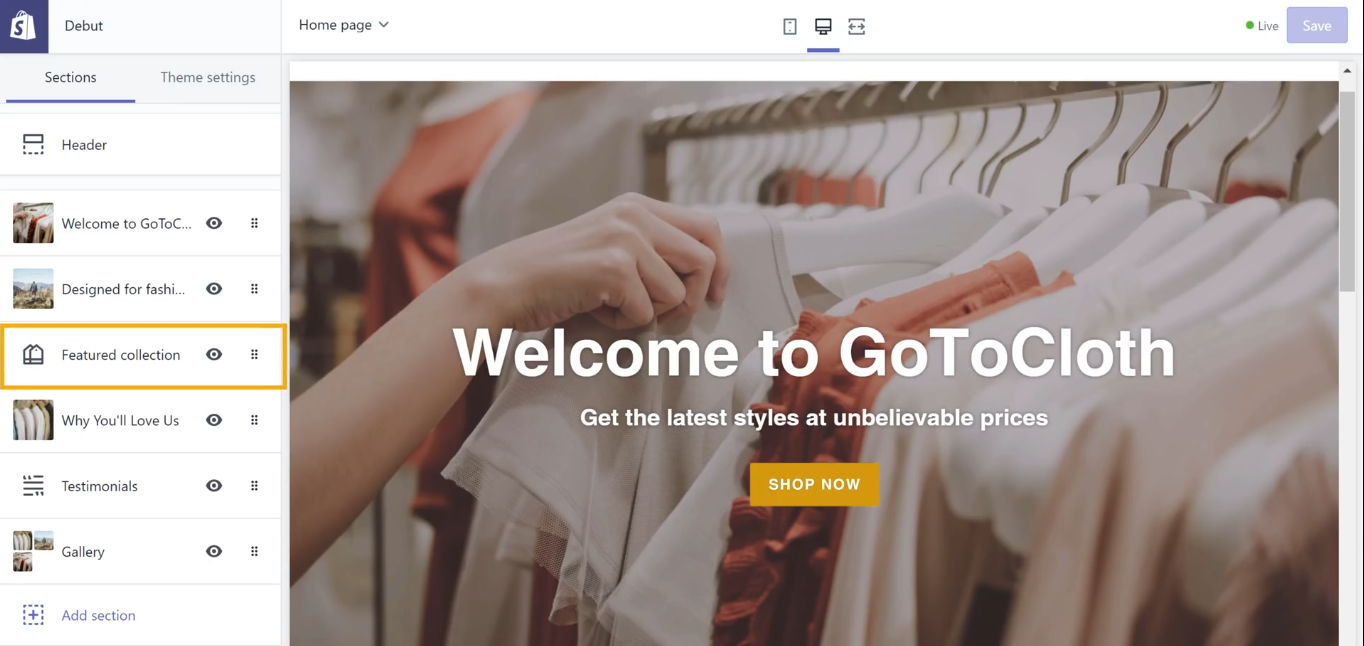
Before getting into the steps, we first need to enter the editing section by clicking on the Edit home page button.
Step 3.2.1: Choose the Collection of products
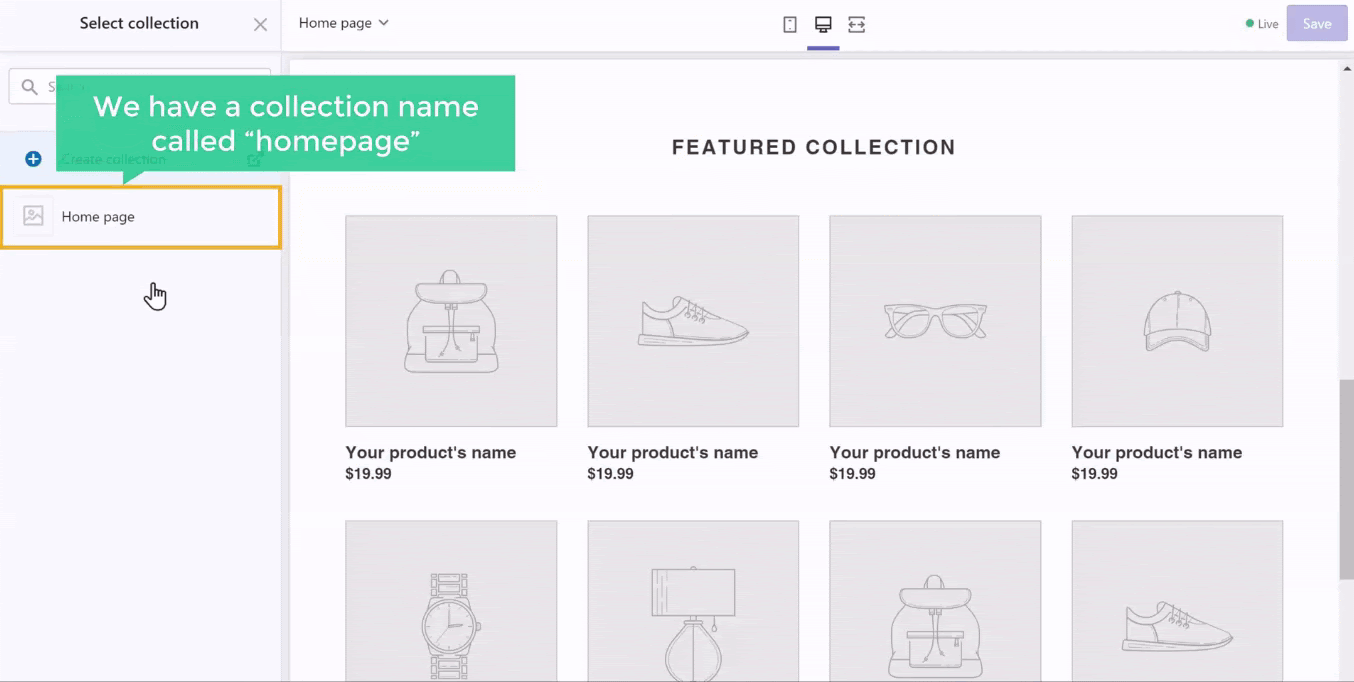
Now to select the collection, let’s select the particular section, the Featured collection.
And then click Select collection to choose the collection of products.
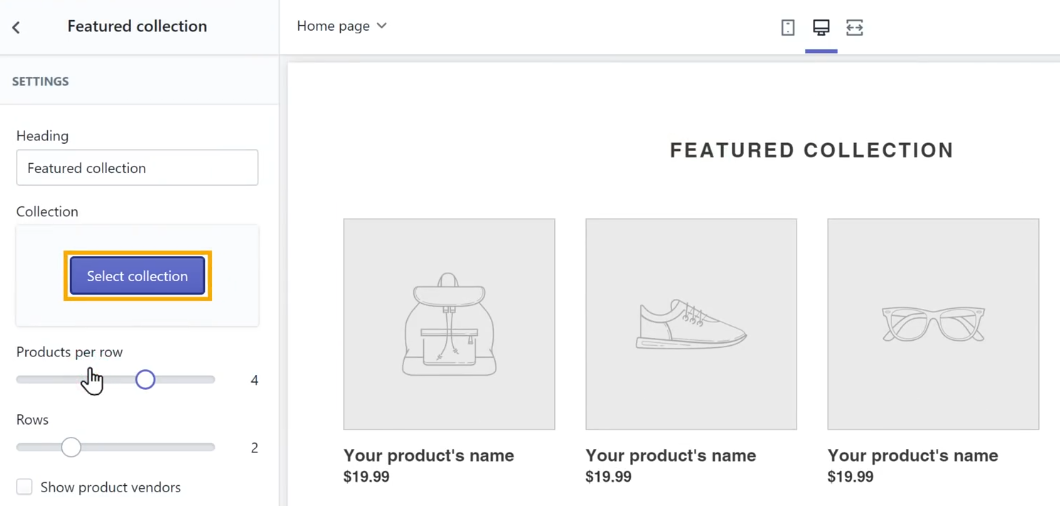
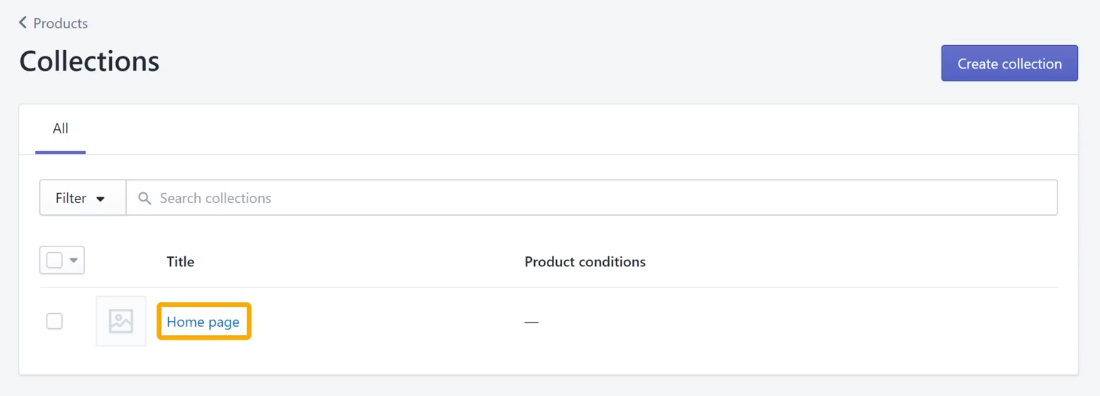
This will open up the collections that are available in the store.
It shows that we have a collection named Home page.
So let’s select that and click Select at the bottom of the page.
With that, we have successfully chosen the collection of products to be displayed on the home page.
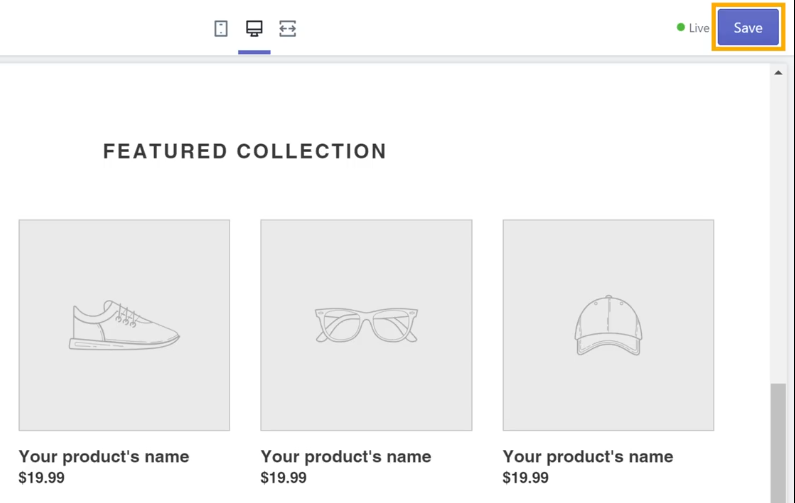
Click Save to save the changes.
Now let’s add some products to the collection.
Step 3.2.2: Add products to the collection
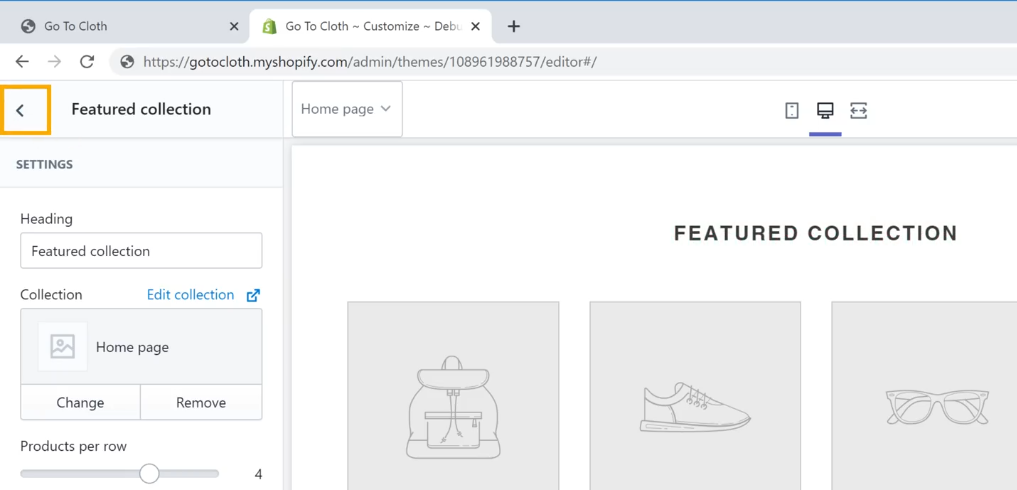
To add products to the collection, let’s first go back to the main editing menu.
And click the Shopify icon to go to the Shopify admin area.
In the admin area, on the left-side menu, select Products.
And click on Collections.
Here we can notice the Home page collection that we chose for the home page of the store.
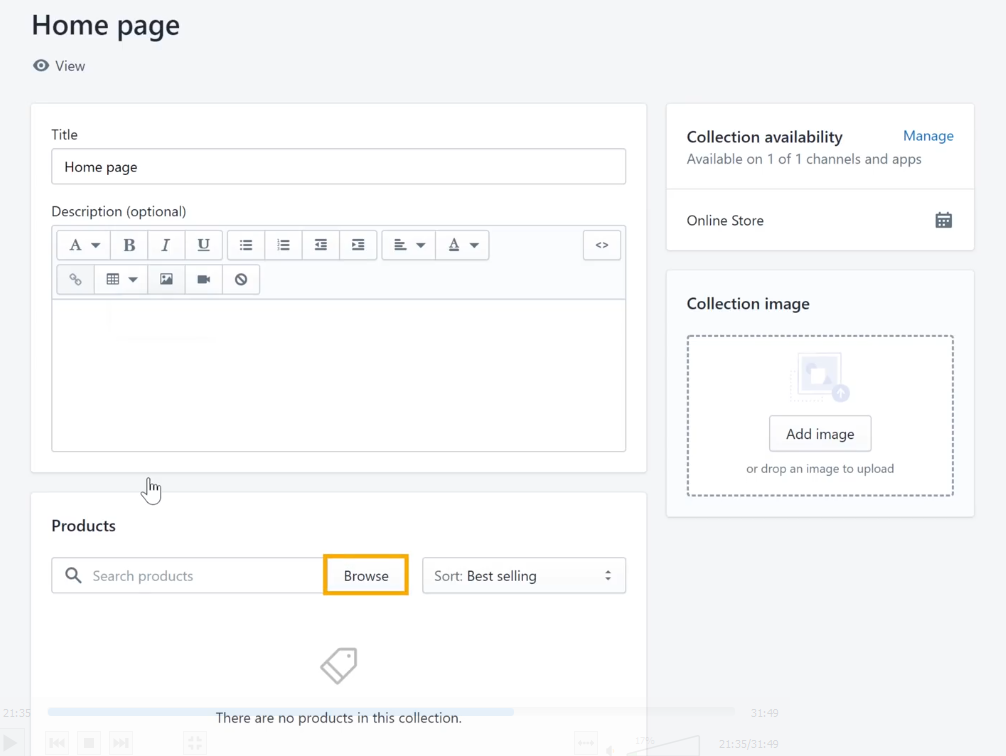
Click on the Home page collection to edit and add products to it.
After the Home page collection opens up, click Browse in the Products section.
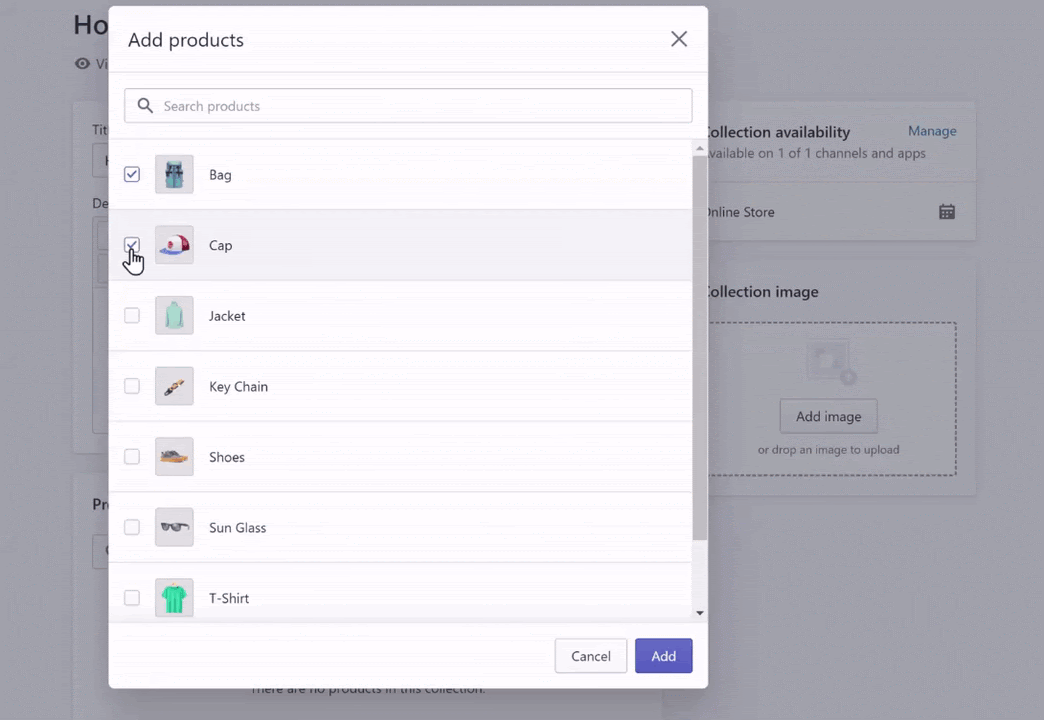
This will open a pop up with a list of all the products available on the website.
Select the products that you want to add on the home page,
And click Add.
Now the products will be added to the Home page collection.
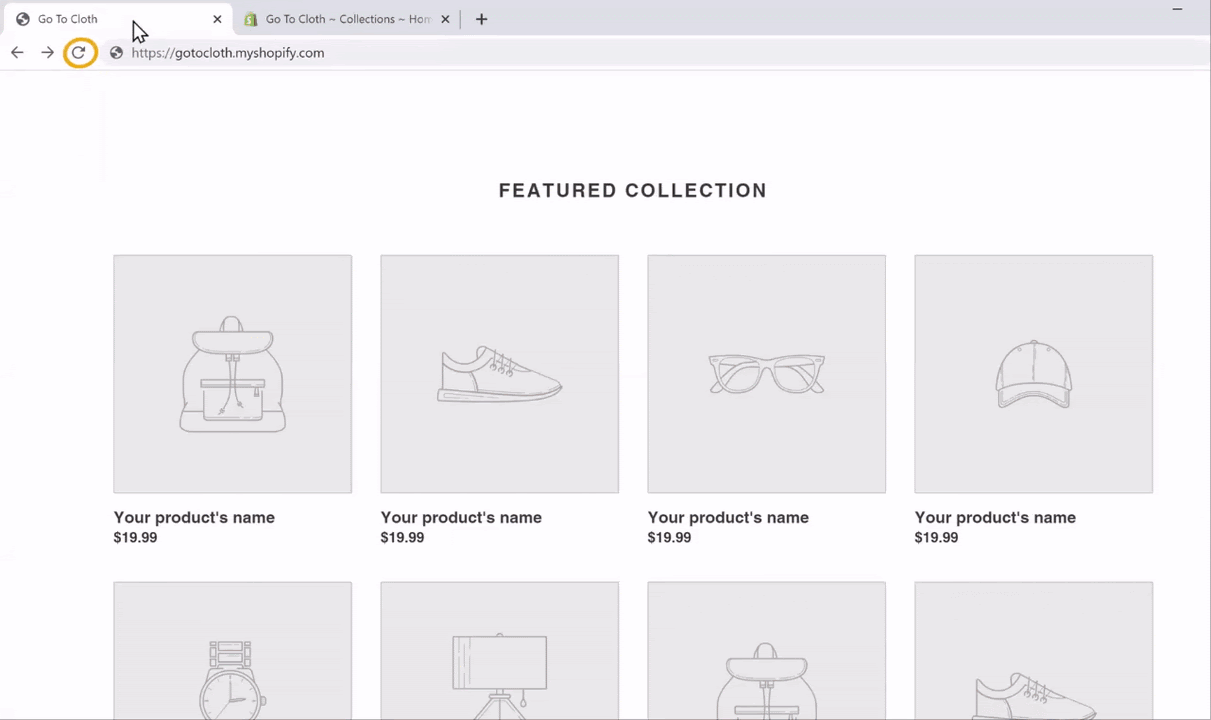
To check whether the changes are reflected, refresh the website once.
As you can see, the products we added are shown in the Featured collections section of the home page.
And this is how we can edit, design, and add products to the home page of the Shopify website.
We have designed the home page, added products to the store, and even have a smooth checkout process.
But there is one thing we still need to work on!
Our website address!
Our website address is gotocloth.myshopify.com.
That doesn’t look good, right?
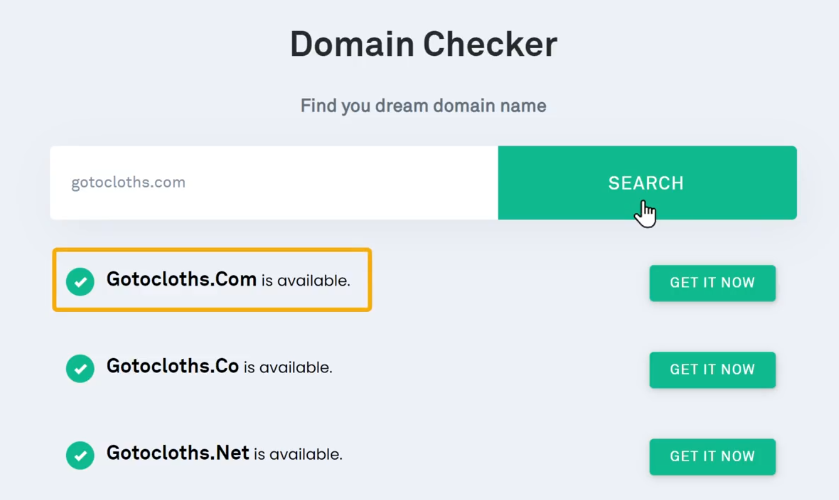
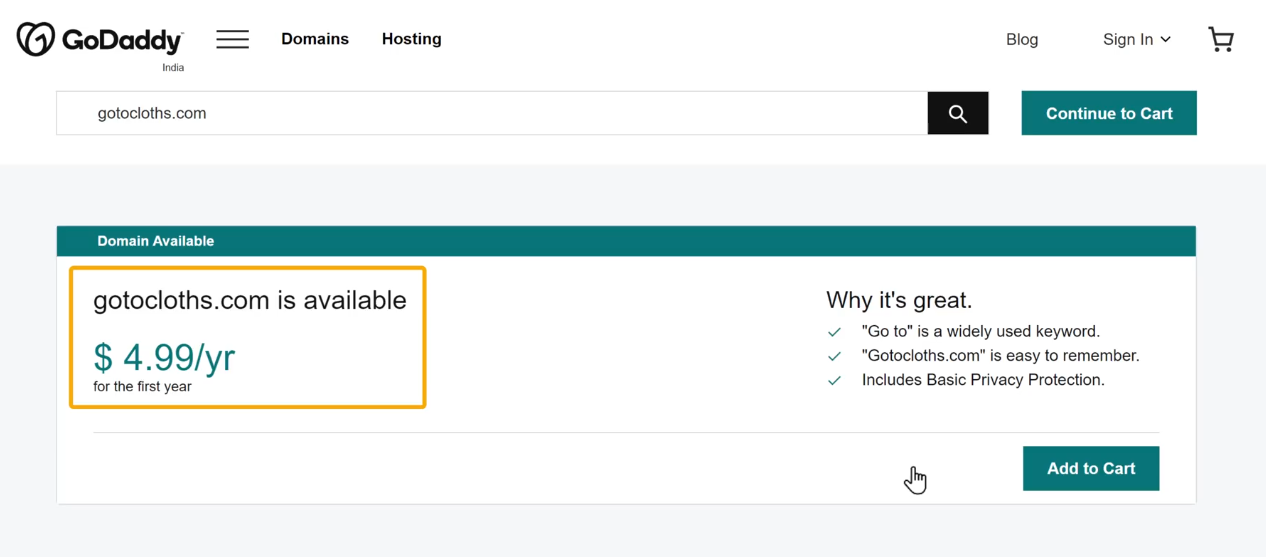
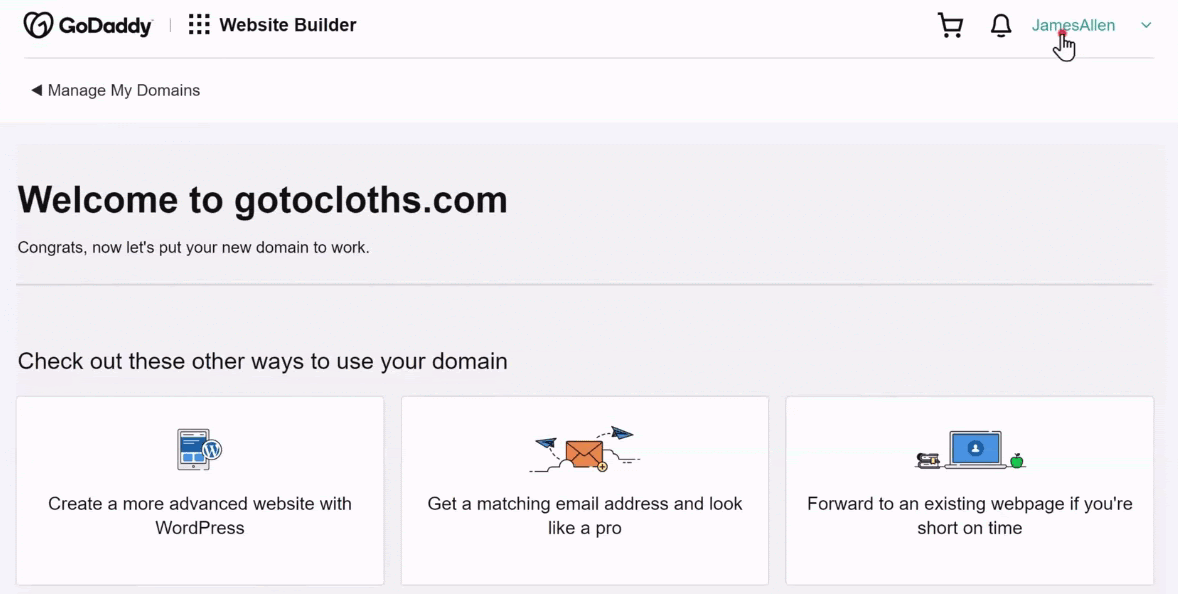
It is always good practice to have a domain name like ‘YourWebsite.com’ (like ‘gotocloths.com’), because it’s more catchy than the free one, and provides visibility and credibility as a brand.
Also, Domain name matters when it comes to the SEO of the website.
So let’s look at how we can do that.
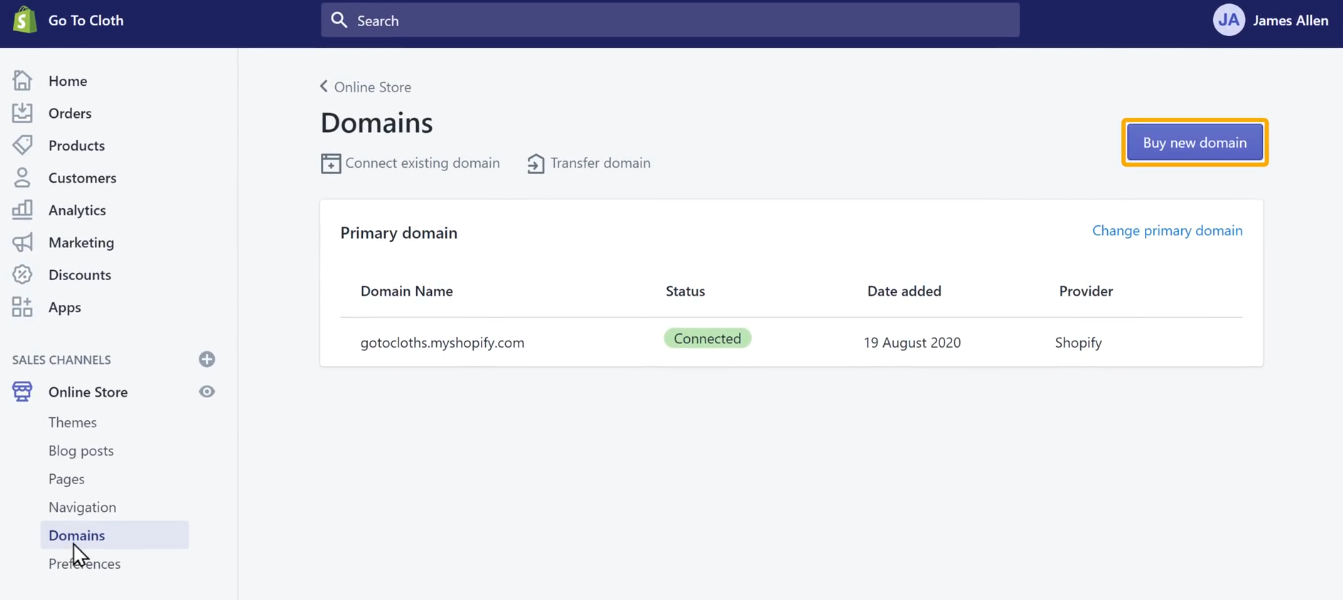
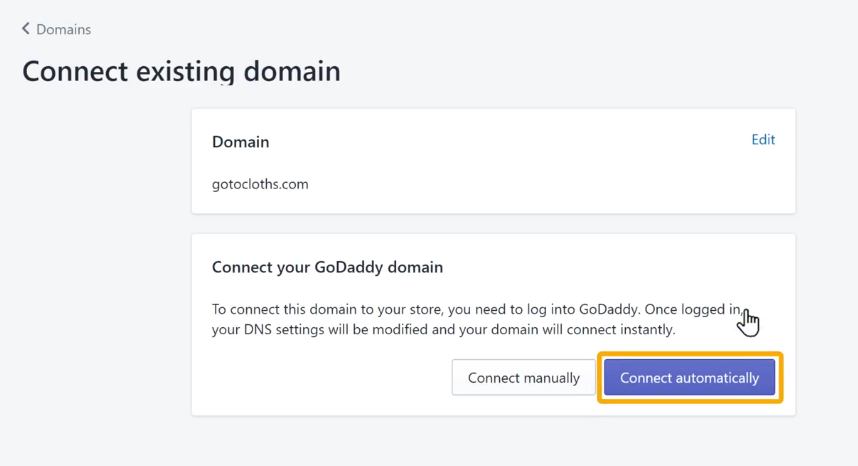
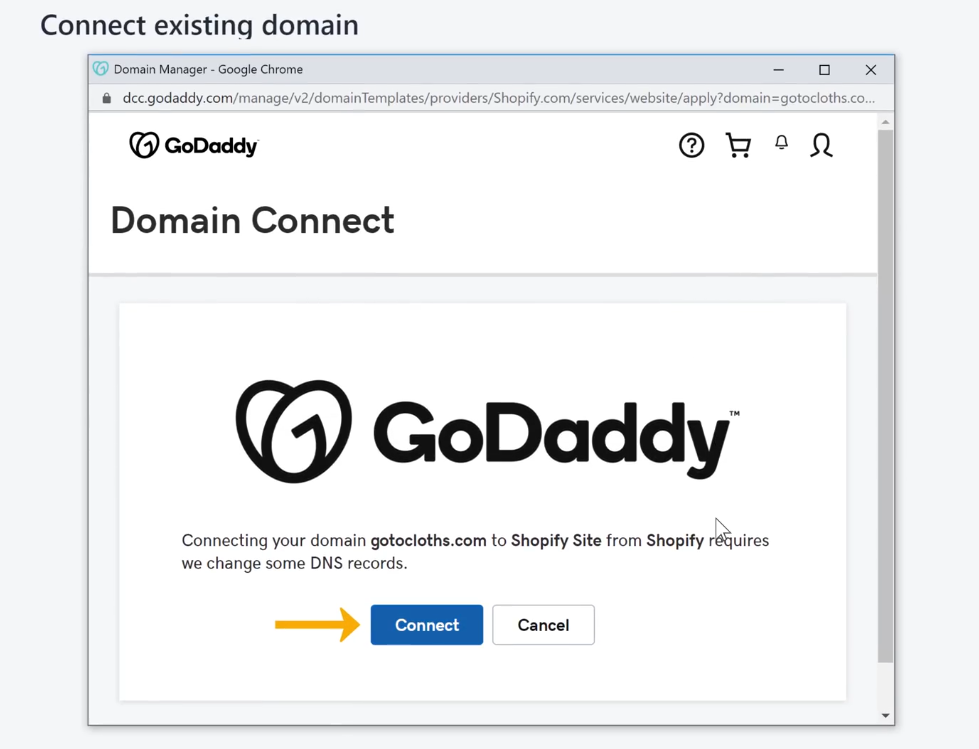
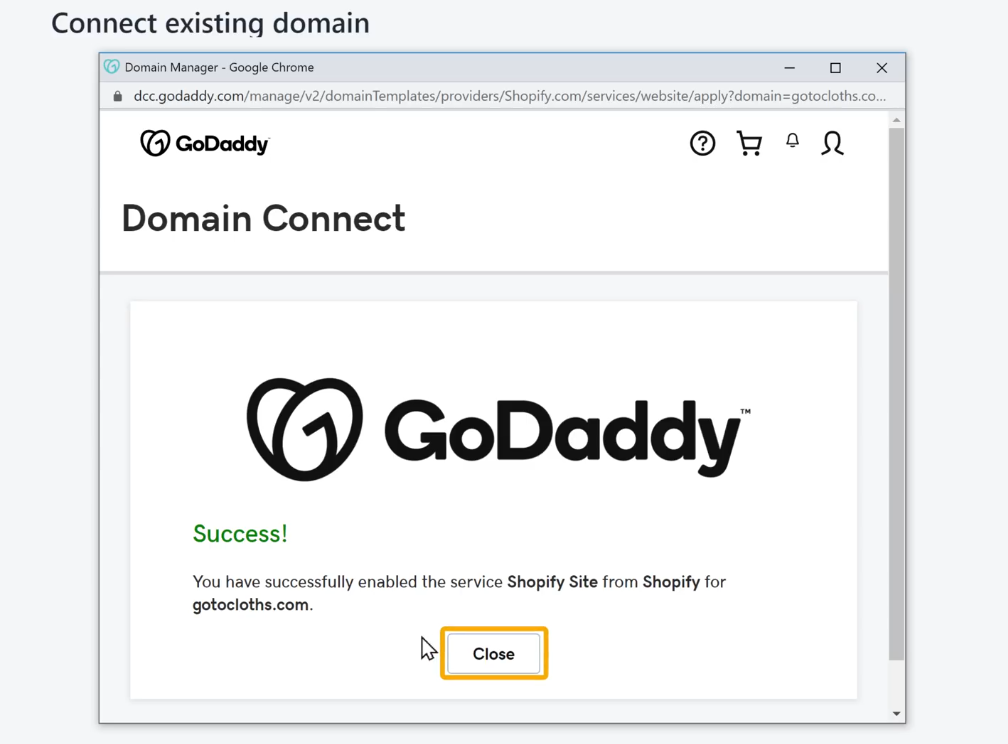
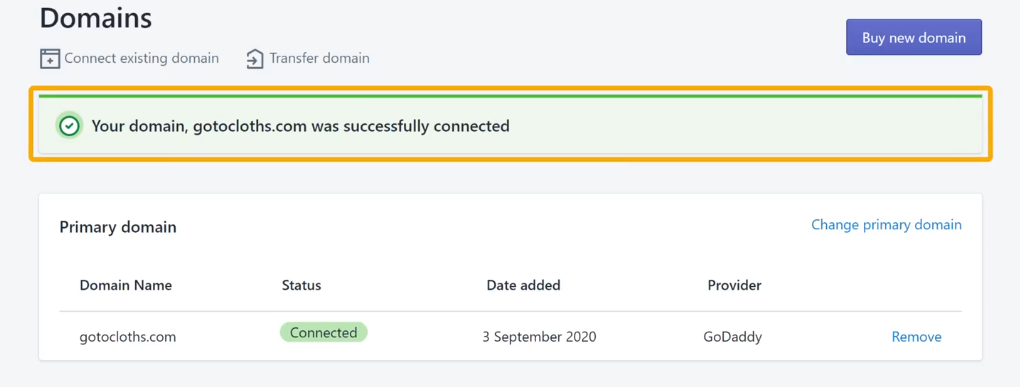
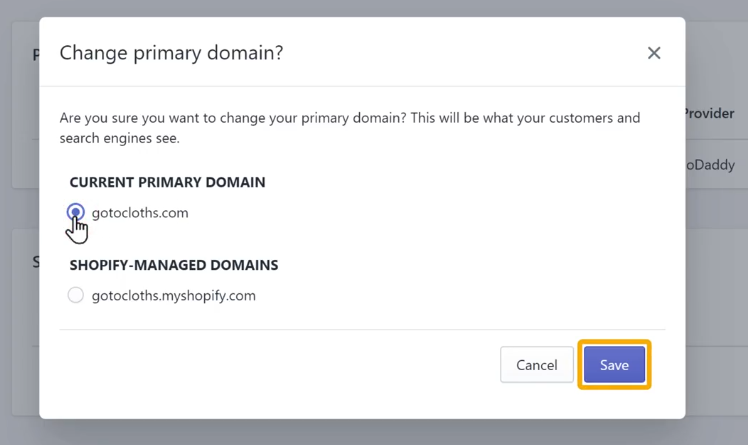
Step 4: How to get a unique domain name for your online store
As we are on a free Shopify plan, we don’t have a custom domain name for the website.
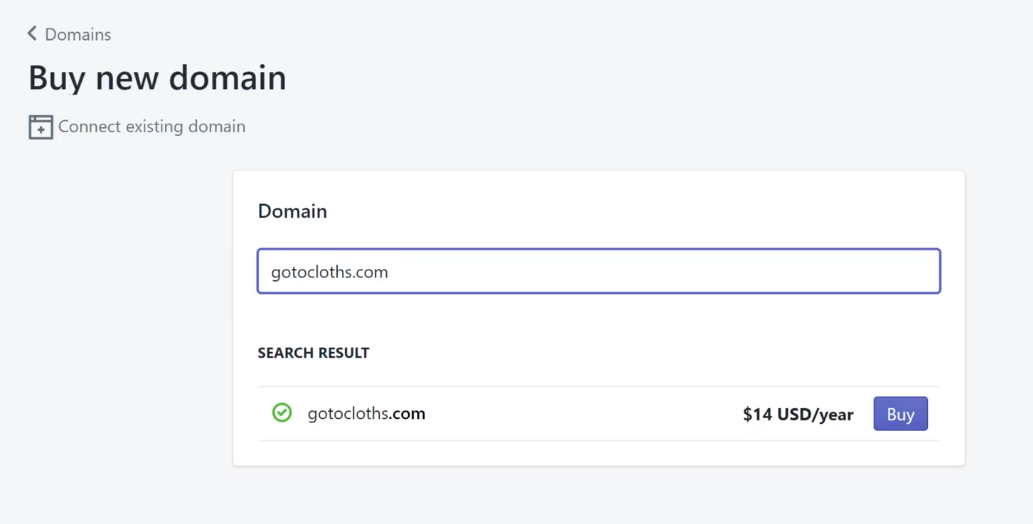
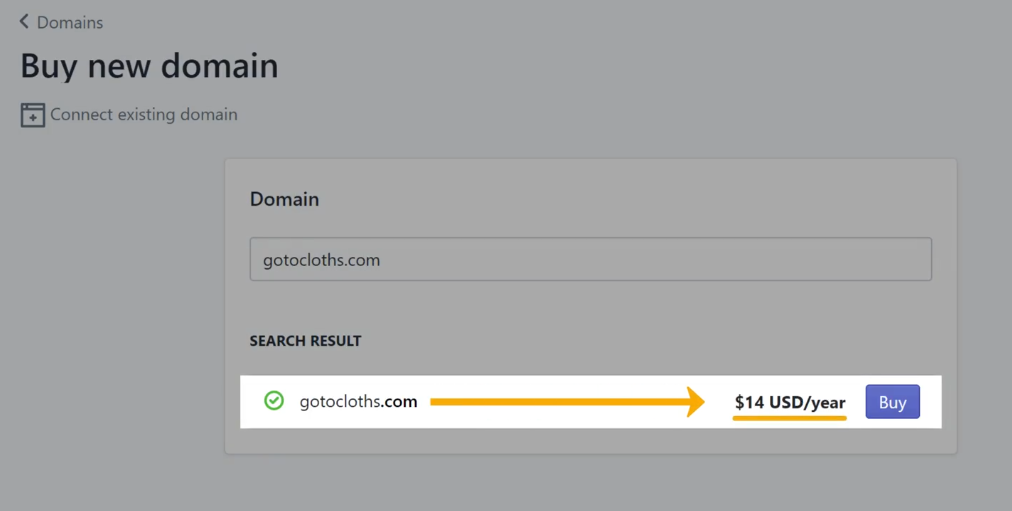
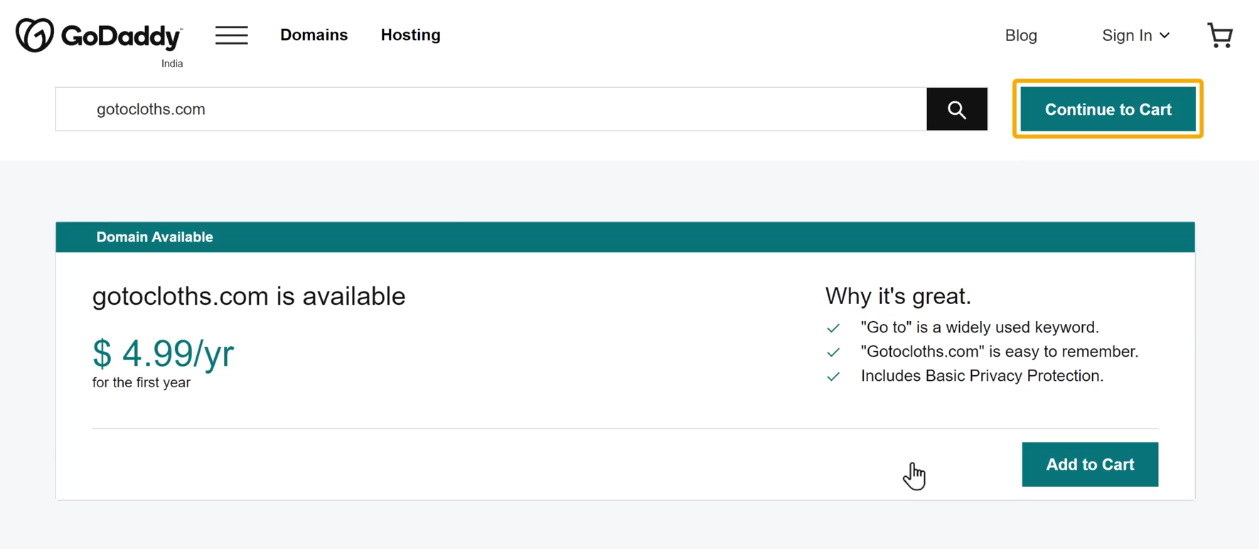
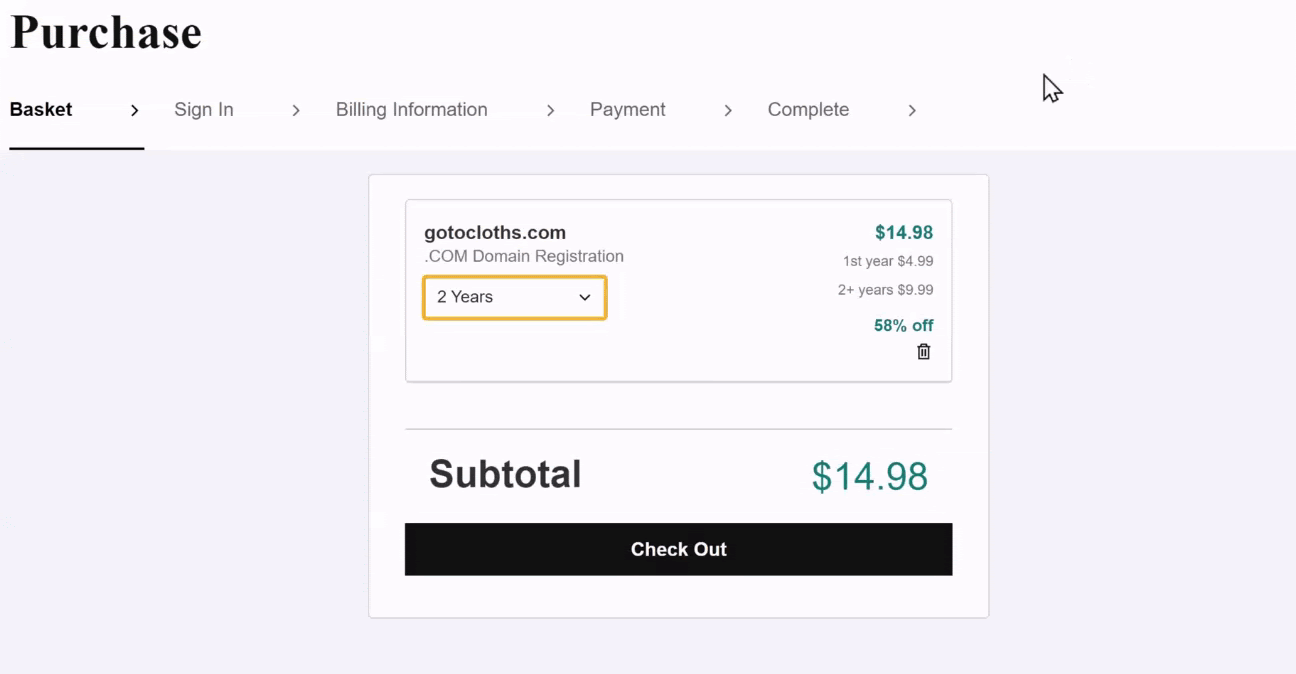
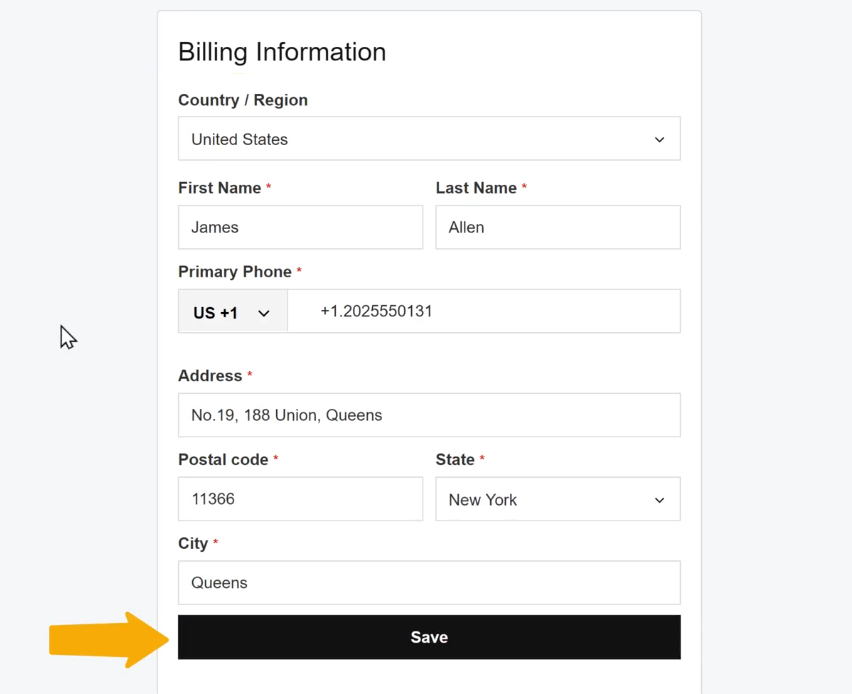
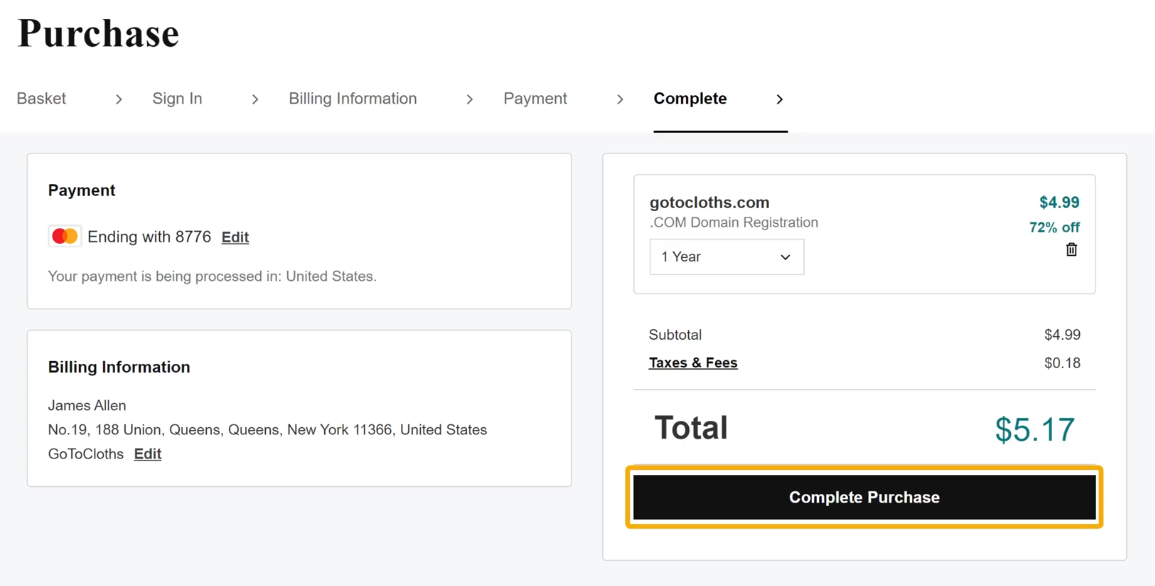
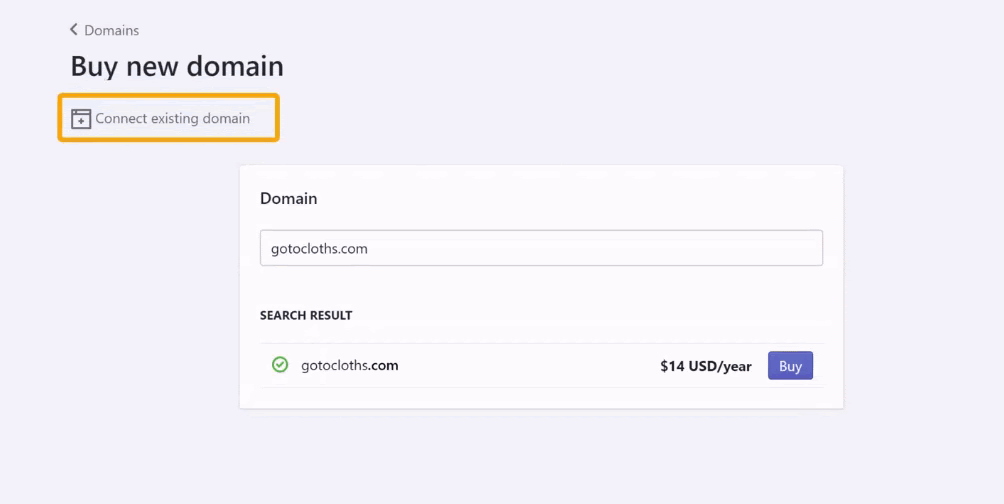
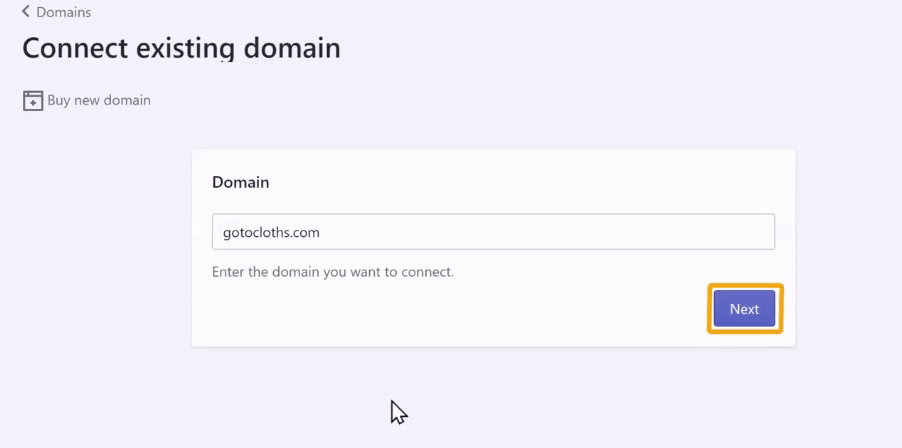
So, to create an online store with a unique domain, we need to purchase a .com domain.
We are going to get a unique domain name in just three steps,
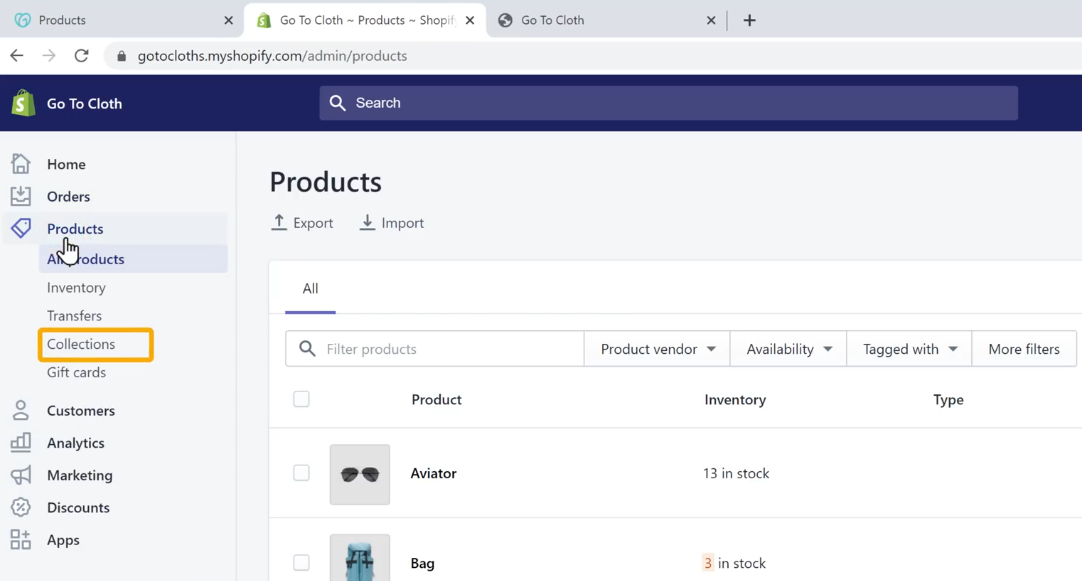
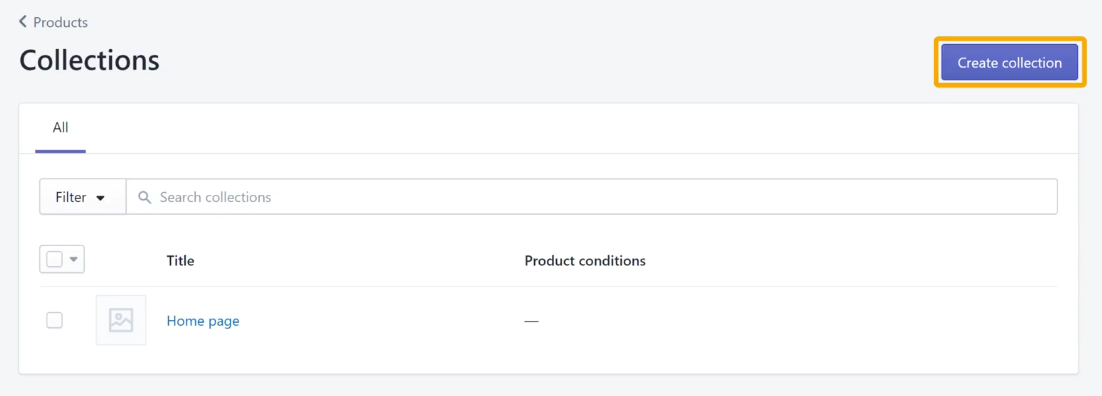
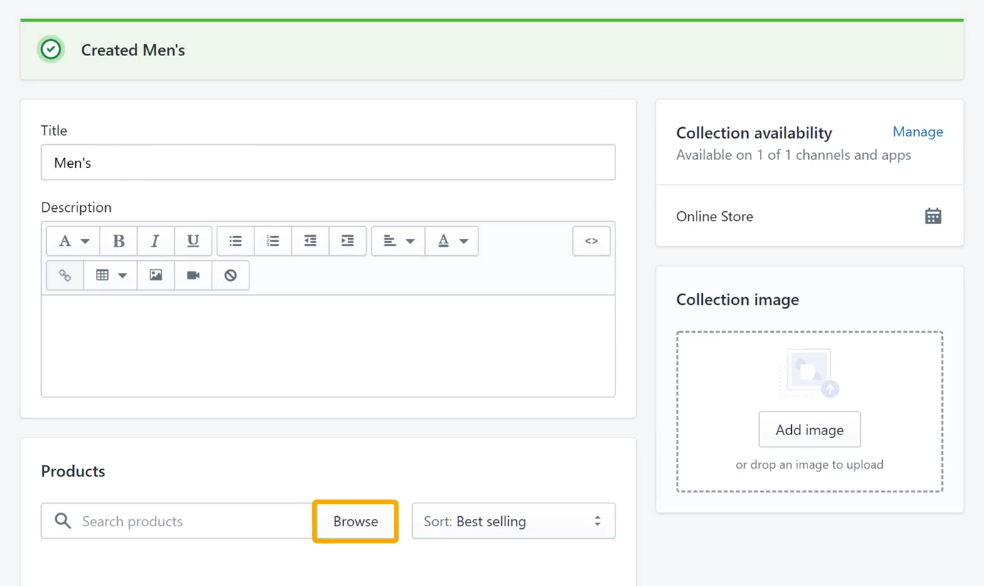
To create a collection, let’s go to the Shopify admin area,
Select Products, and click Collections.
In the Collections section, we can see the existing collection we have already created for the home page.
To add a new collection, let’s click Create connection.
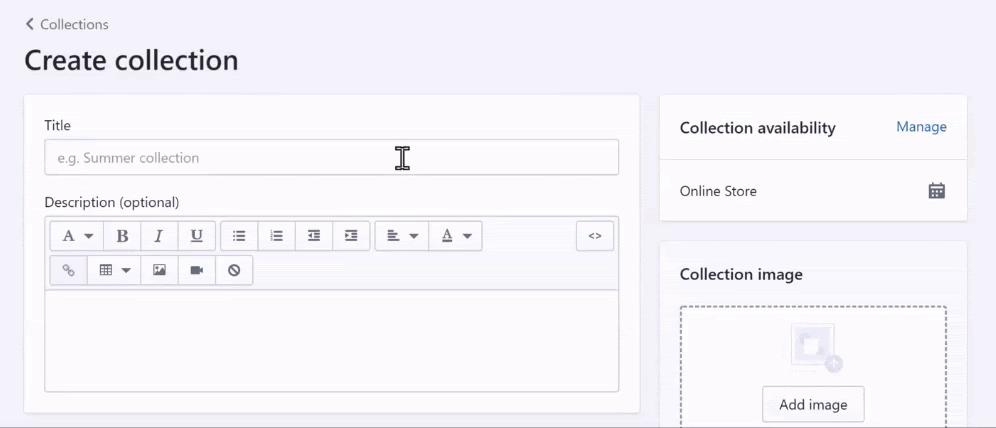
Here, enter the name for the collection in the Title box.
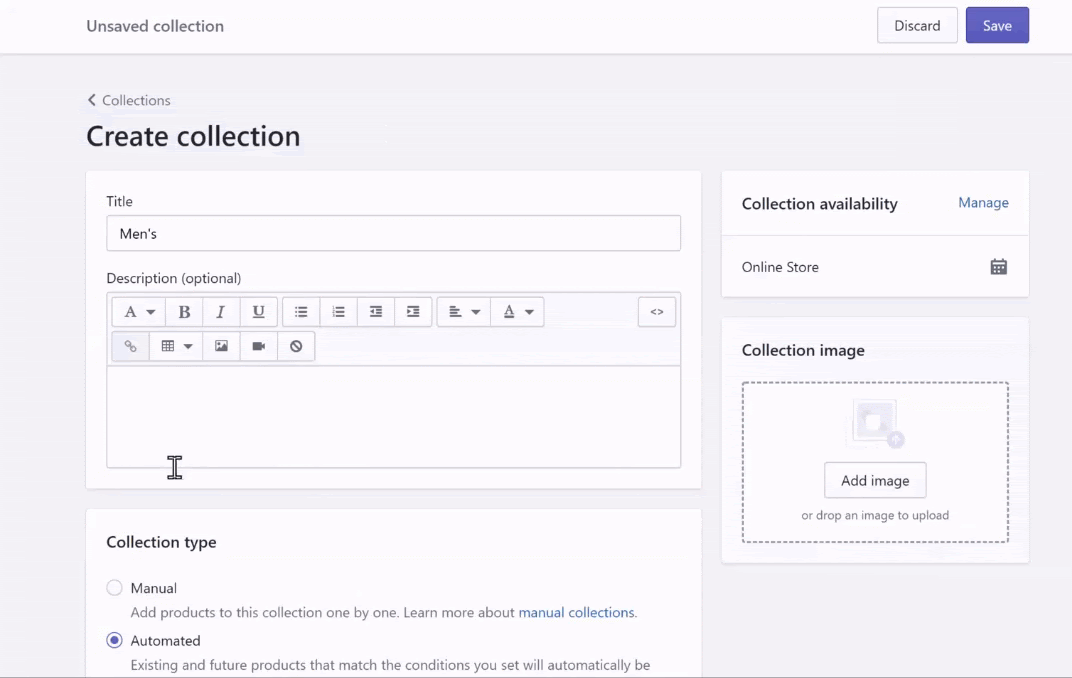
Let’s say we are creating a collection for Men wear, we can call it Men’s.
Once you have entered the name of the collection, choose Manual from the Collection type,
And click Save.
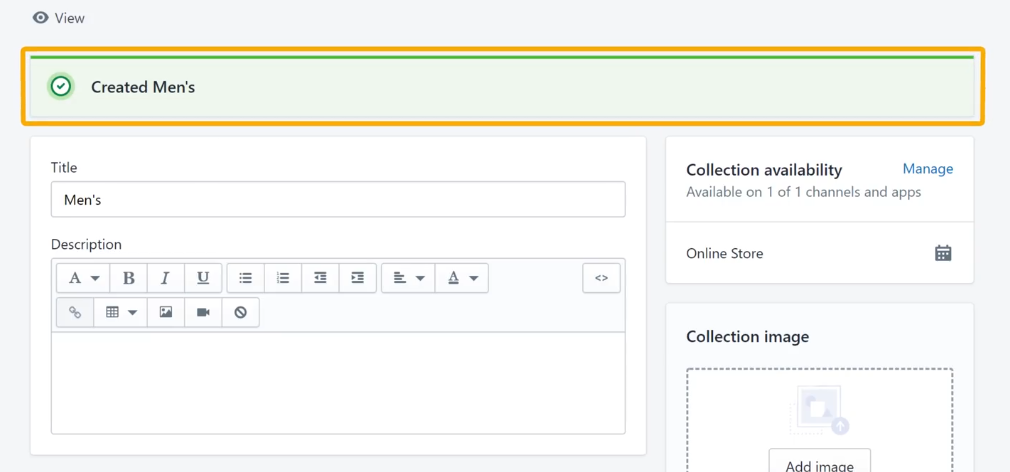
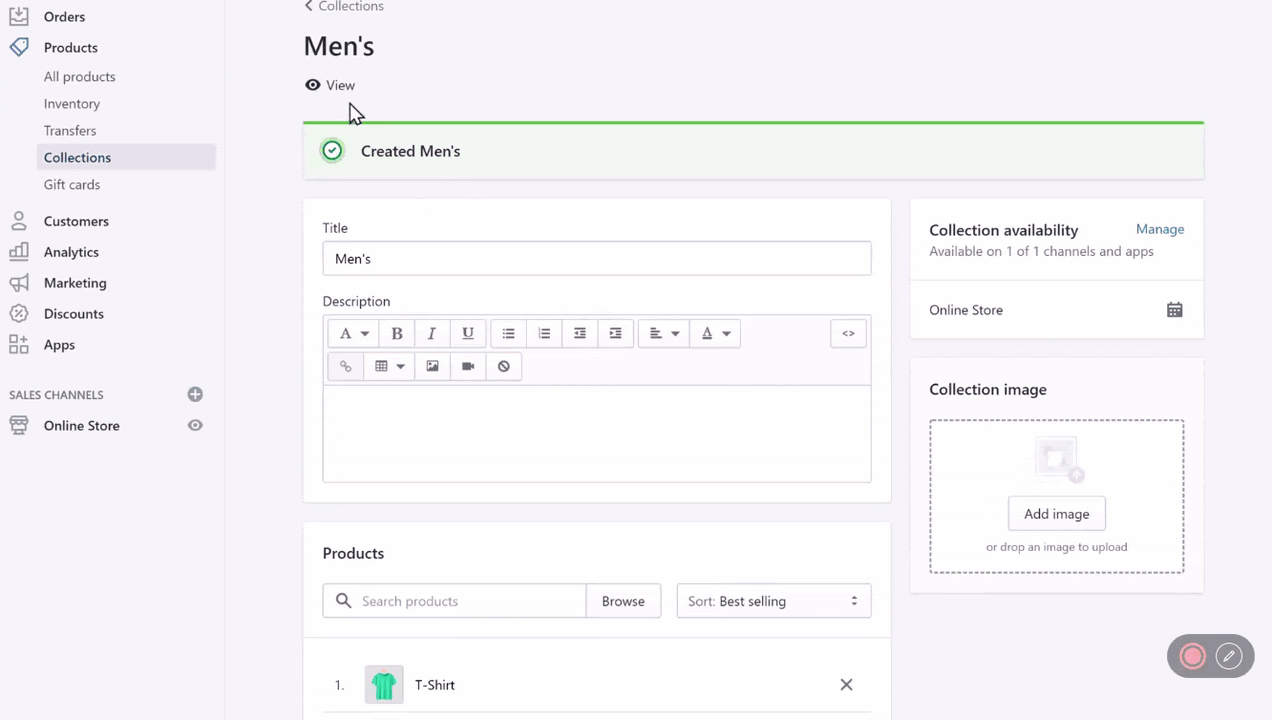
Now we have successfully created a collection named Men’s.
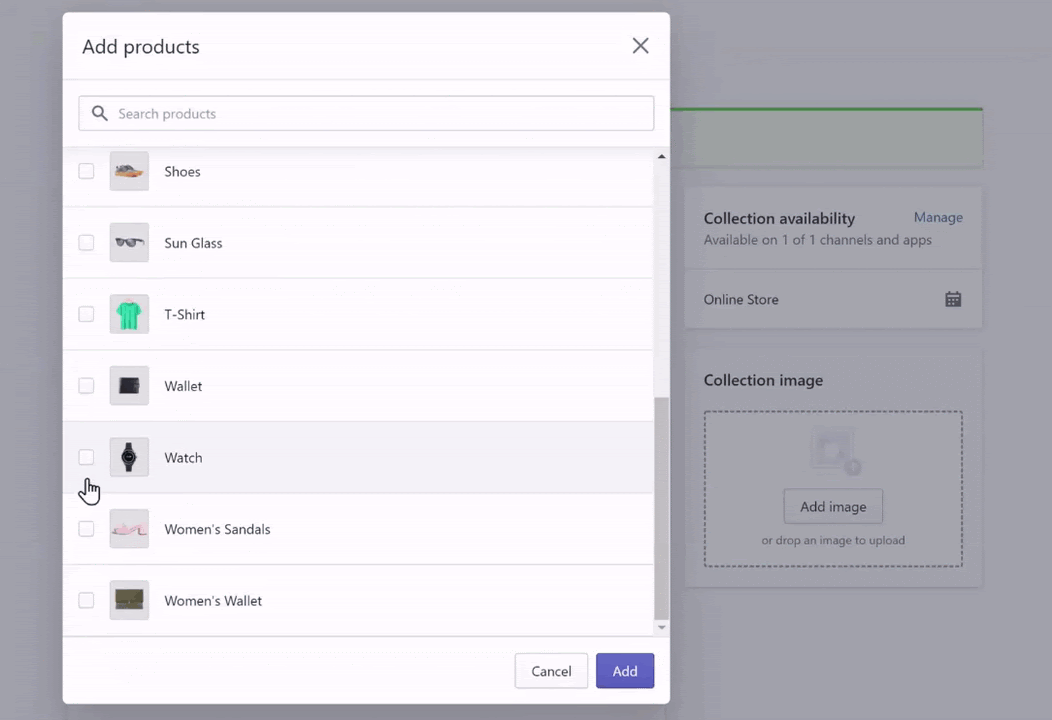
To add products to the created collection, click Browse in the Products tab.
Then select the products that you want to add to the collection.
And click Add.
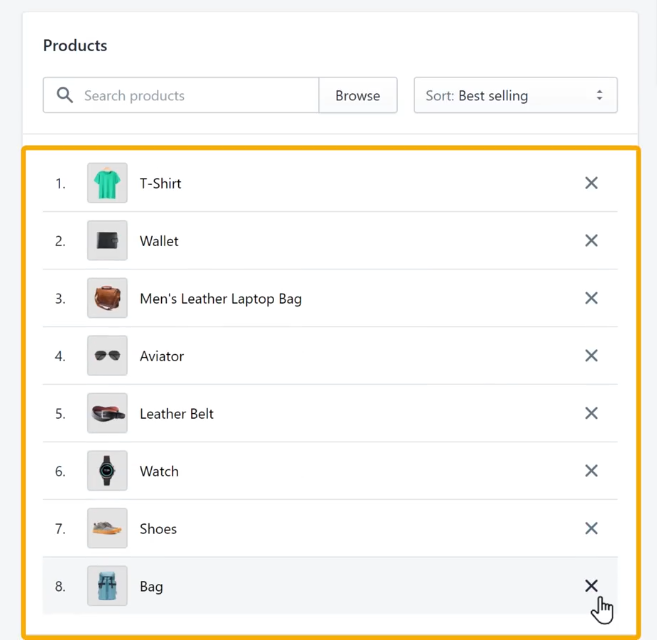
Now the selected products will be added to the collection.
To preview the collection, click View under the collection name.
As you can see, we have successfully created a new collection for the online store.
For easy access, we need the collection to be one of the menu items.
Add collection to the menu
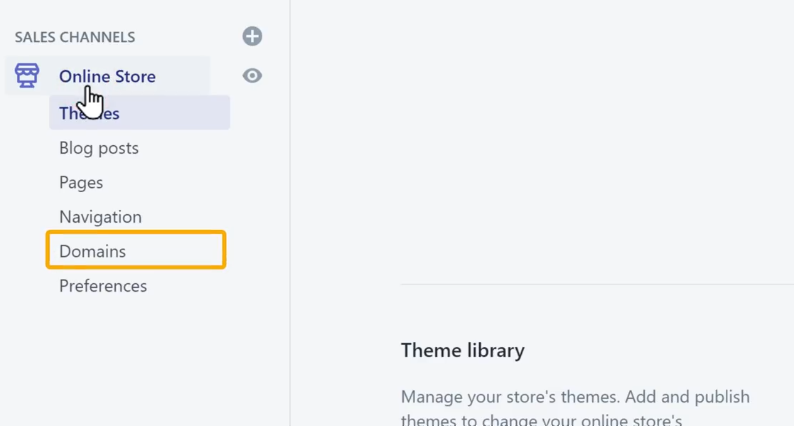
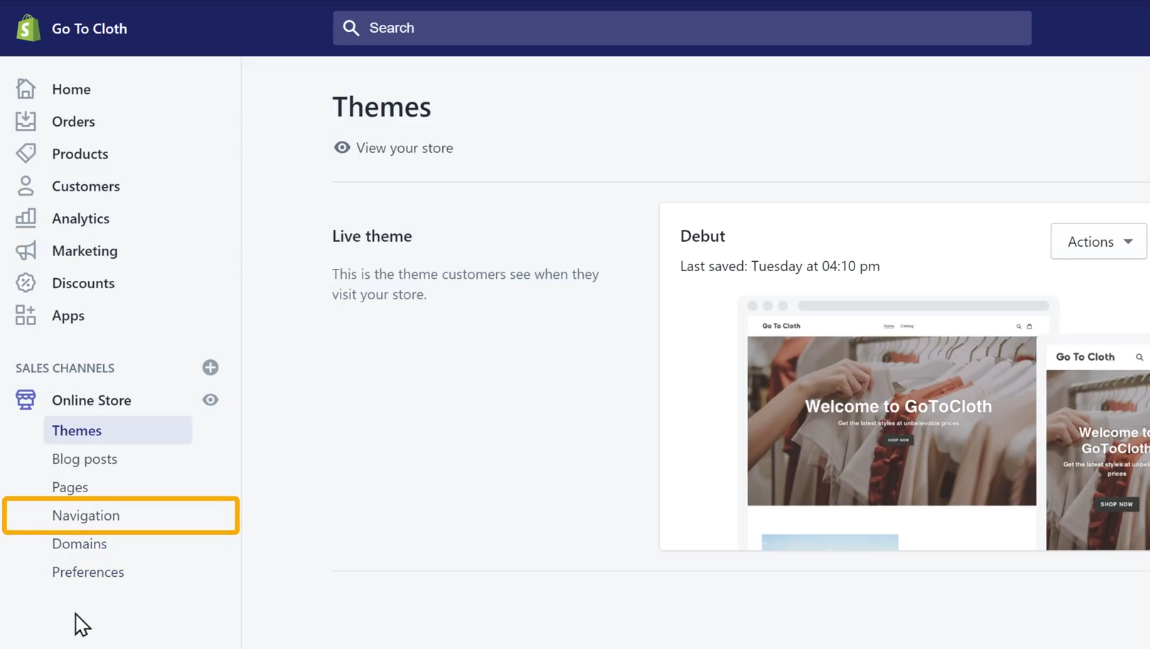
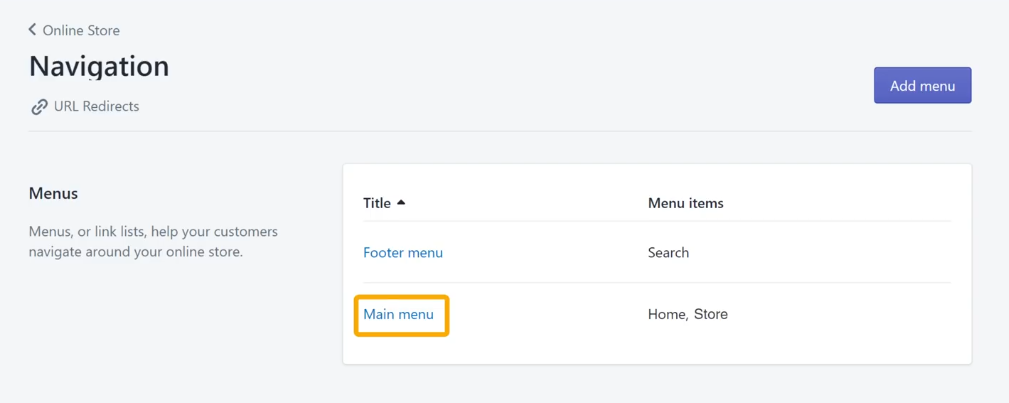
To add the collection to the website menu, let’s go to the Shopify admin area and select Navigation under Online Store.
As you can see, we have two different types of menus, the Main Menu and the Footer Menu.
Main menu is the one that’s visible in the header section of the website, and that’s where we need to add the collection.
So, click Main menu.
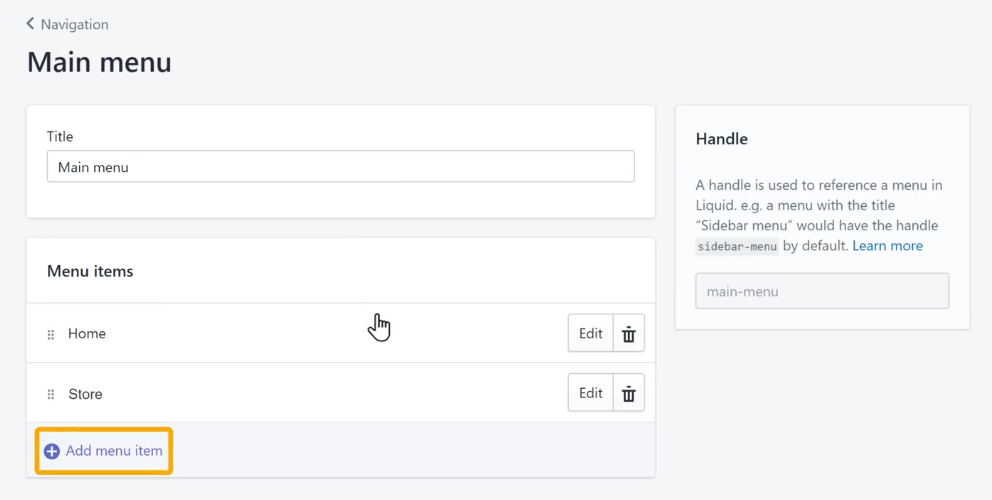
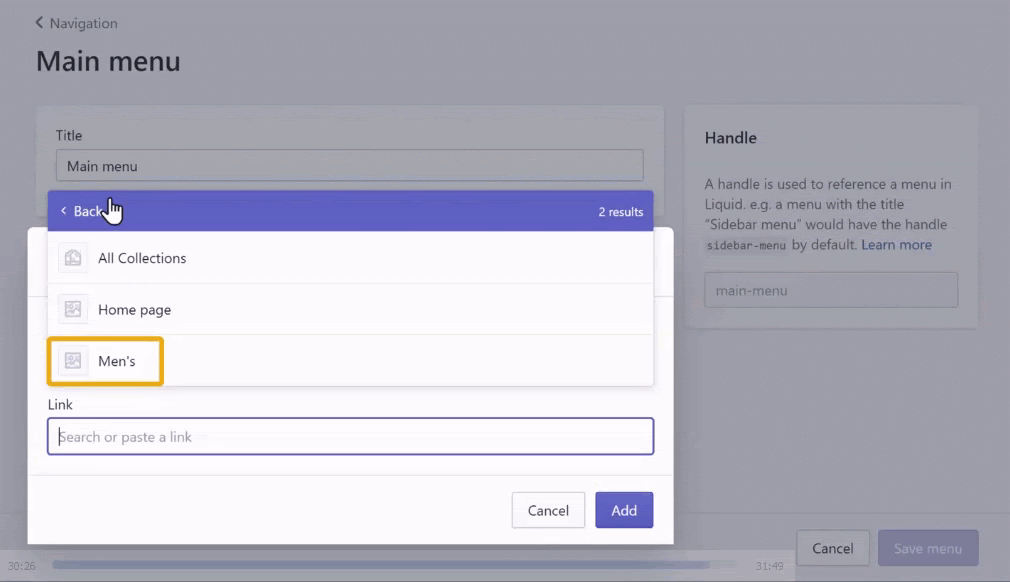
In the Main menu, click Add menu item.
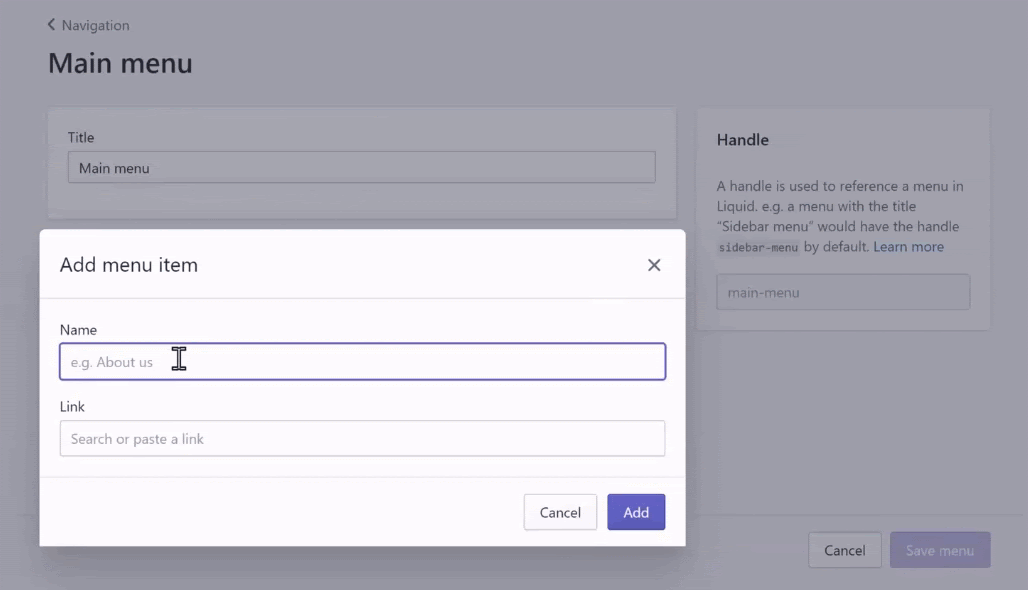
In the pop-up, enter the name of the menu item in the Name box.
Then, in the Link box, select Collections.
In the collections, choose the one we just created.
Then click Add.
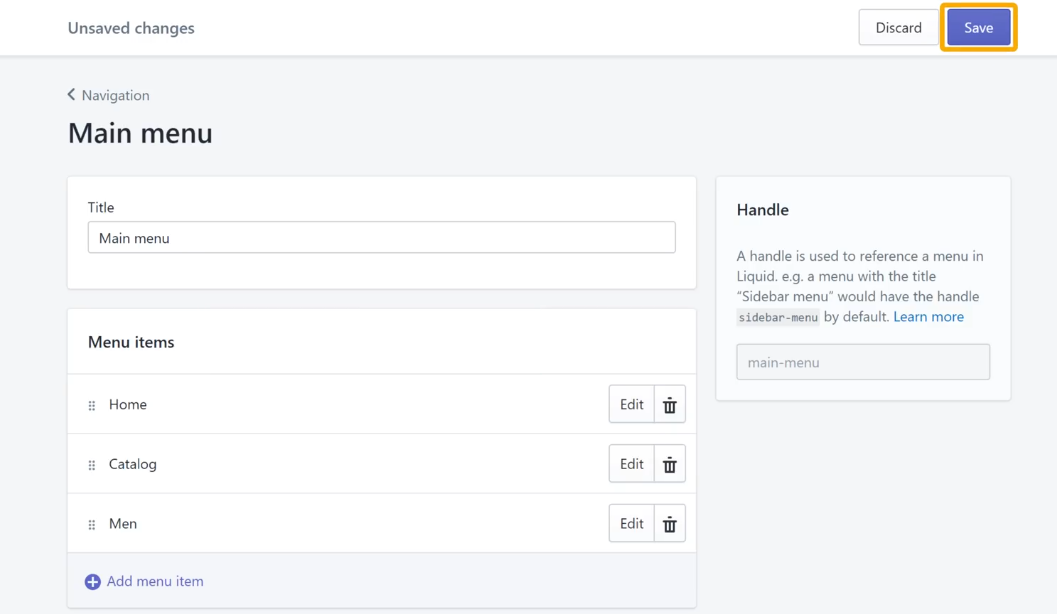
Now the collection will be added as the main menu item.
To save the changes, click Save.
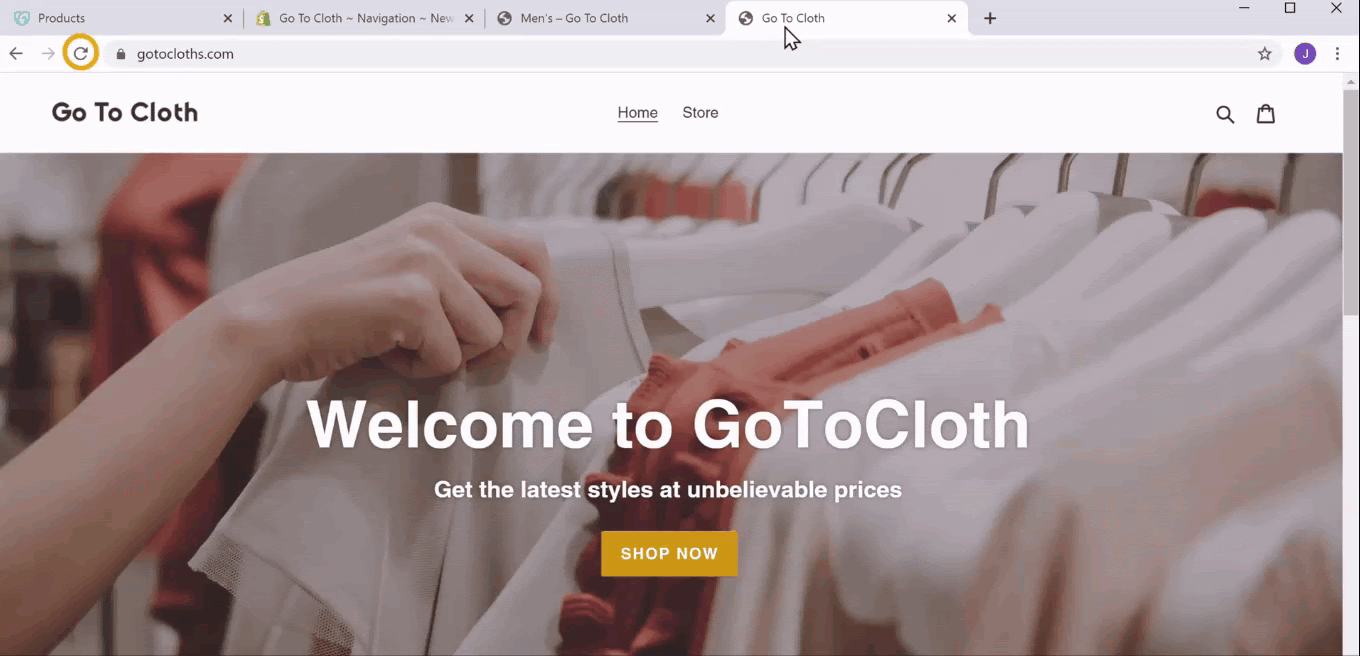
If we can refresh the website, we can find that a new menu item has been added to the Main menu.
And that is how you can add different collections to the Shopify website.
How does Shopify dropshipping work?
Before we look into how Dropshipping works on Shopify, let’s first look at what dropshipping is.
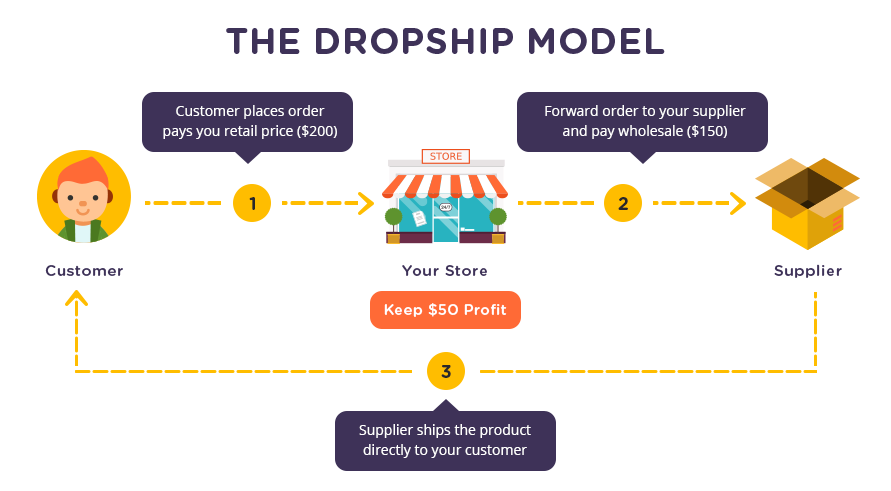
Dropshipping is a type of retail business model where a seller doesn’t necessarily have the products in stock. It works like, when a customer makes a purchase, the product is directly sent to the customer from a third-party supplier.
Basically, the seller doesn’t directly get involved with the product but still makes money at the end of the day. While it may sound a bit complex, it’s quite easy to set up and reduces the stock maintenance cost.
Shopify, being one of the top eCommerce platforms, has become the ideal solution for dropshipping because,
Beginner-friendly – While other eCommerce platforms require some sort of technical knowledge to set up a store, Shopify makes it extremely user-friendly and straightforward to start a Dropshipping store.
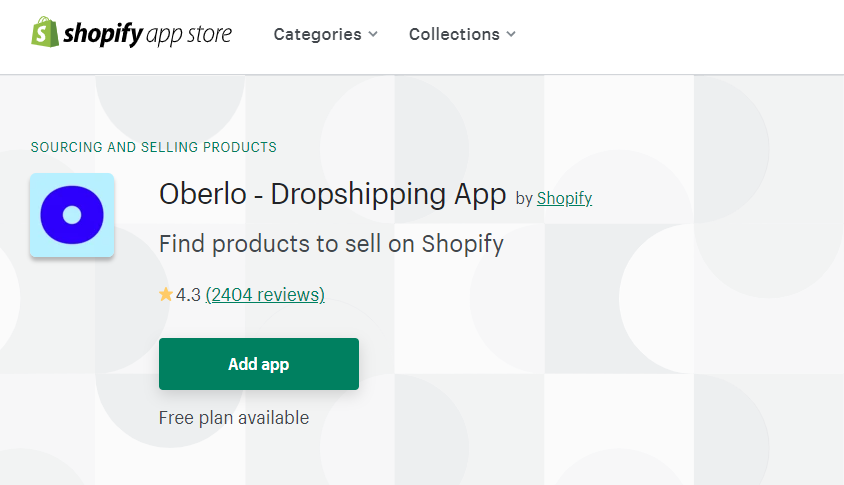
Oberlo – Dropshipping App – Shopify has Oberlo, a powerful dropshipping app in its store. Oberlo is specifically made for dropshipping and makes it really easy to find products online.
And with Oberlo, we can easily import products into the Shopify store and start selling, without worrying about the shipping and packaging.
However, to answer the most asked question of, ‘How much money can I make dropshipping on Shopify?’, it depends!
Yes. Be it Shopify or any other eCommerce platform, making money totally depends on the amount of work put in, and eventually the number of products sold. To conclude, Shopify with its brilliant platform alone can’t assure that you can make money via dropshipping.
How to make shopify websites mobile friendly?
Be it Shopify or any other platform, a mobile-friendly website always has an upper hand over the competitors.
In the first quarter of 2022, mobile devices generated 54.8 percent of global website traffic, consistently hovering around the 50 percent mark since the beginning of 2017.
And it is no rocket science to make a website mobile-friendly. Though a Shopify store by default is responsive, we can make it more mobile-friendly using the following tips,
Make the menus visible – Menus are extremely important for new visitors to navigate the online store. They connect and interlink all the pages of the website, making sure the potential customer is not lost.
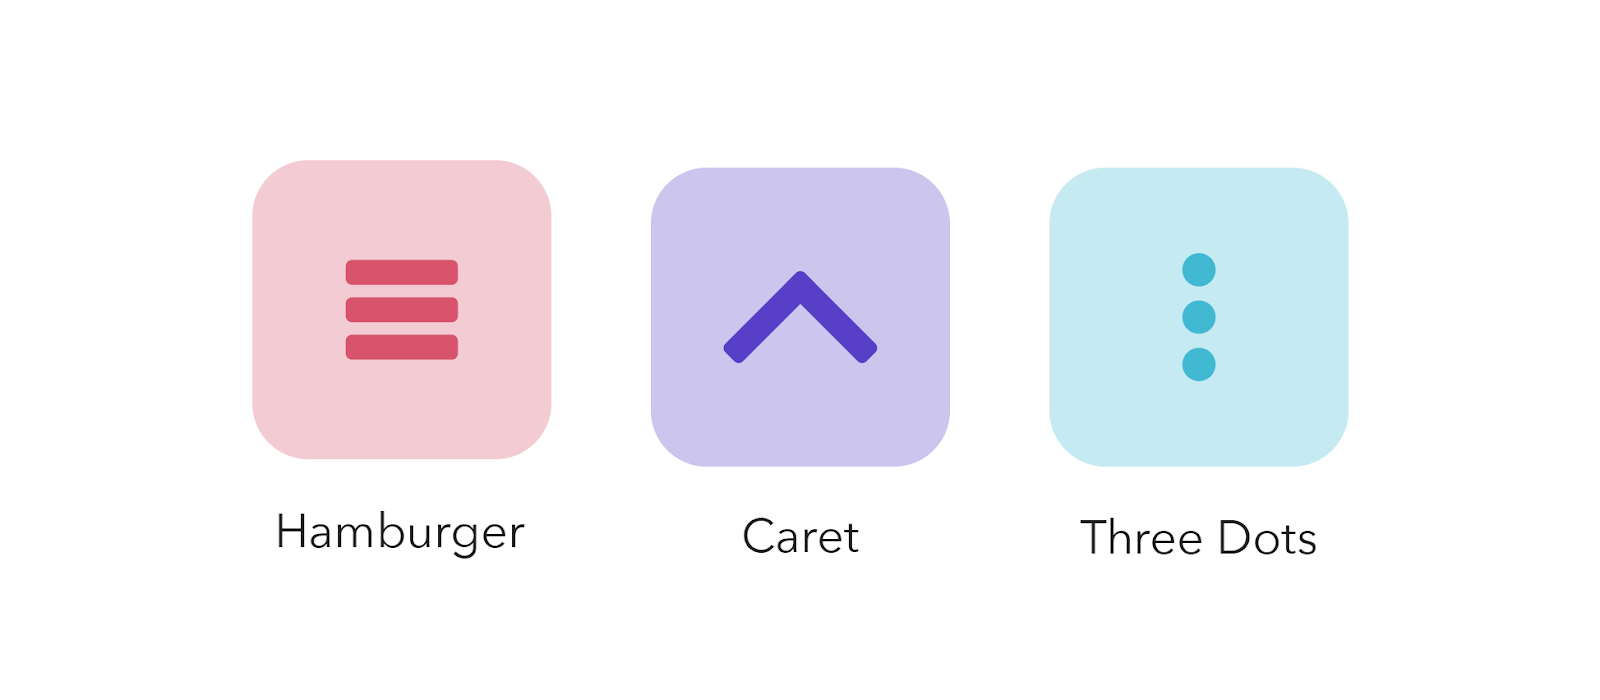
So, it is important to keep the menus visible even on the smaller screen mobiles. You can make use of a single Hamburger, or a Three dots menu, and display the other menu items under them in a collapsible fashion.
Keep Call-To-Action Buttons visible – In an online store, the Call-To-Action (CTA) button, be it ‘Buy Now’, or ‘Purchase’ is extremely important as they determine whether a potential sale happens or not.
So it is crucial to have a CTA button that’s clearly visible and accessible across all devices. This ensures that the customers don’t abandon a product just because they don’t know how to proceed further.
While it is important how the online store appears on mobile, it is also equally important to make sure that the website loads fast for the visitors.
How to speed up shopify websites?
To speed up the Shopify website, here are some general tips that can be achieved with the help of Shopify Apps.
Optimize Images – Image optimization is a basic necessity to load any type of website on the Internet. It is essential to compress the images and have a limit on the number of images added on a single web page.
Shopify has several different Apps that make the job easier by optimizing images without any loss in quality.
Fix Broken links – A broken link is a web page that’s not accessible to the visitors. While it may occur due to a number of reasons, at the end of the day, it will negatively impact the user experience.
It can increase the number of unnecessary HTTP requests and affect the website performance. We can keep them at bay by using free Shopify apps specifically made to remove broken links.
Use AMP – Accelerated Mobile Pages (AMP) is a plugin/integration that is solely developed to make the web pages load faster on mobile devices.
And Shopify has AMP-specific apps that can do wonders for your eCommerce website.
How to Convert your Shopify Store into a Mobile App
While an eCommerce website is great for business, it just can’t compete with a dedicated mobile app. With an app, customers can access your business in a matter of a few clicks, and need not enter the website address each time.
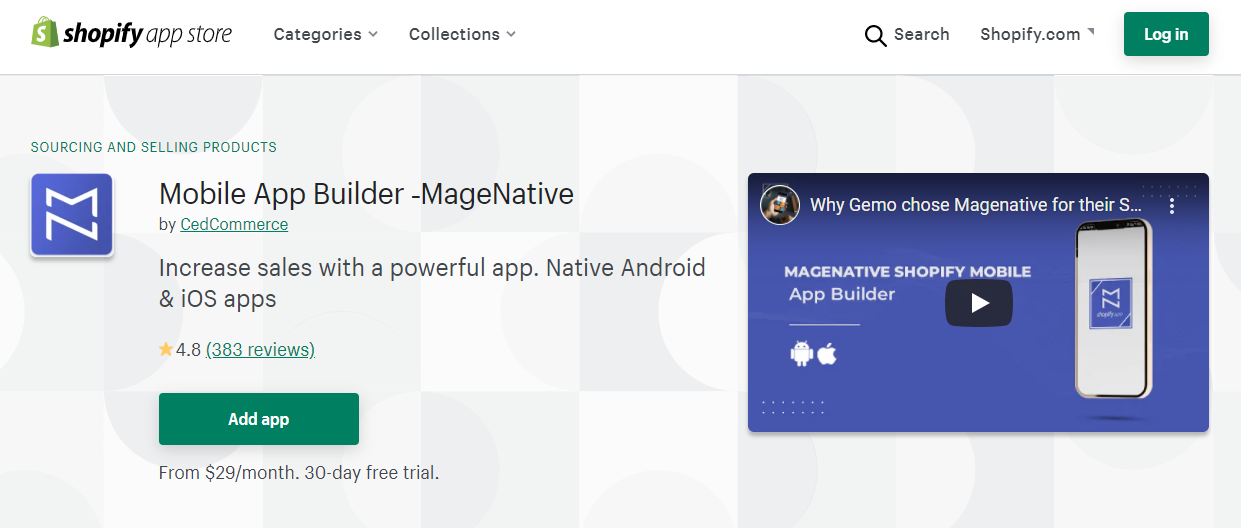
Thanks to Shopify, the process of converting a Shopify store to a mobile app is much easier with its built-in Mobile App Builder apps. We are going to use one such Shopify App called MageNative to convert the Shopify website into a dedicated mobile app.
MageNative is an amazing solution that lets us convert the website into a mobile app in no time. While there are other free options available within the Shopify app store, MageNative stands out with its unique features like an Animation banner, product slider, etc.
So we are going to convert the website into an app in three steps,
Install MageNative App
Customize the look and feel of the App
Launch the Mobile App
Install MageNative App
To install the app, we will get into the Shopify app store and search for MageNative Mobile App. And then click on Add app.
Customize the look and feel of the App
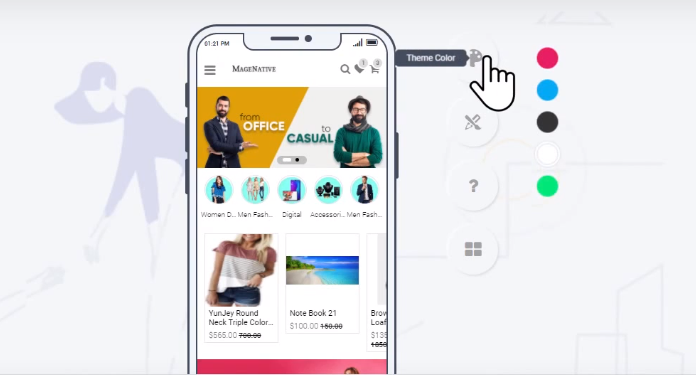
MageNative provides the business owners endless features to customize the look and feel of the app to suit their business needs. One can customize the overall theme, colours, and how the products are displayed on the app.
All within the beginner-friendly MageNative App builder.
And after customizing, one can also preview how the app will look for an end-user using the Preview option that’s available.
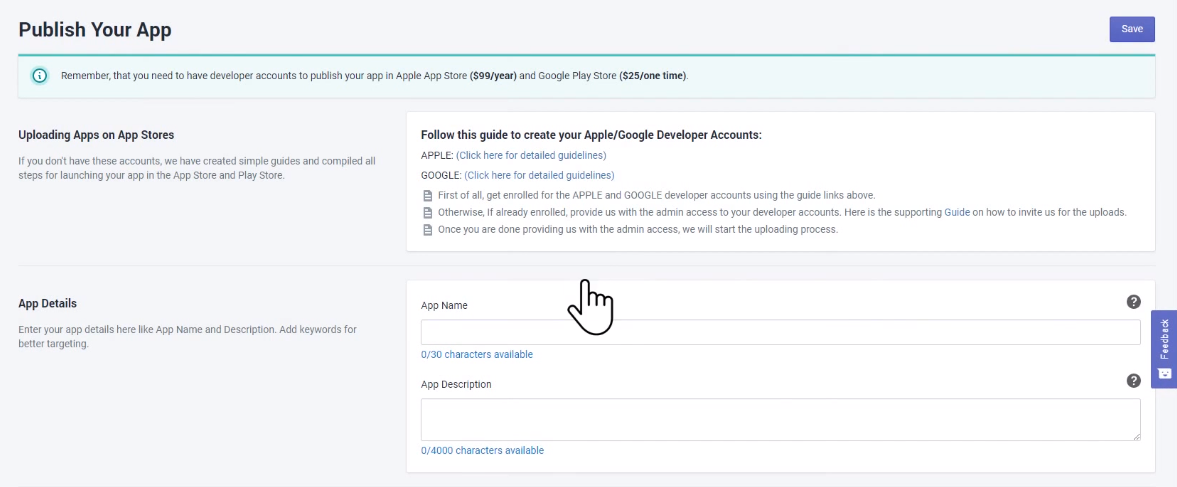
Publish the App
And once the app is all set up, we can easily publish the App through the Publish App section. We just need to enter App details, upload Logo and Banner images and a set of keywords, and click Save. And that’s it! A dedicated mobile app for the Shopify website will be live on the App Store.
And that is how we can convert our Shopify store into a dedicated Mobile App. It’ll be rewarding in the long run and definitely make the entire process of purchase easy from a customer’s perspective.
What makes Shopify worth the price?
While the Shopify paid plans may seem a bit pricey, they definitely provide all the essential functionalities for an eCommerce platform. They help business owners focus on the business rather than worrying about the technicalities involved in running an online store.
Advanced features – Unlike the traditional eCommerce platforms, Shopify provides advanced features like selling the products directly on Facebook and Amazon. This makes it the ideal choice for beginners starting out in the competitive market.
Plugins – Shopify is fully optimized with regards to having an eCommerce website. So, they have more than a thousand plugins that help the website owners to include all kinds of features on the website.
Affordable Overall – And, if you factor in the set-up and maintenance cost of other eCommerce platforms, Shopify is far more affordable and a better solution for beginner eCommerce owners.
But, at the end of the day, it depends. If you are a business owner who wants to establish an online store and sell products, then Shopify is the easiest solution for you.
But if it’s not your main priority, say you just want to make money out of affiliate links, then there are other options like WordPress blogs, and so on.
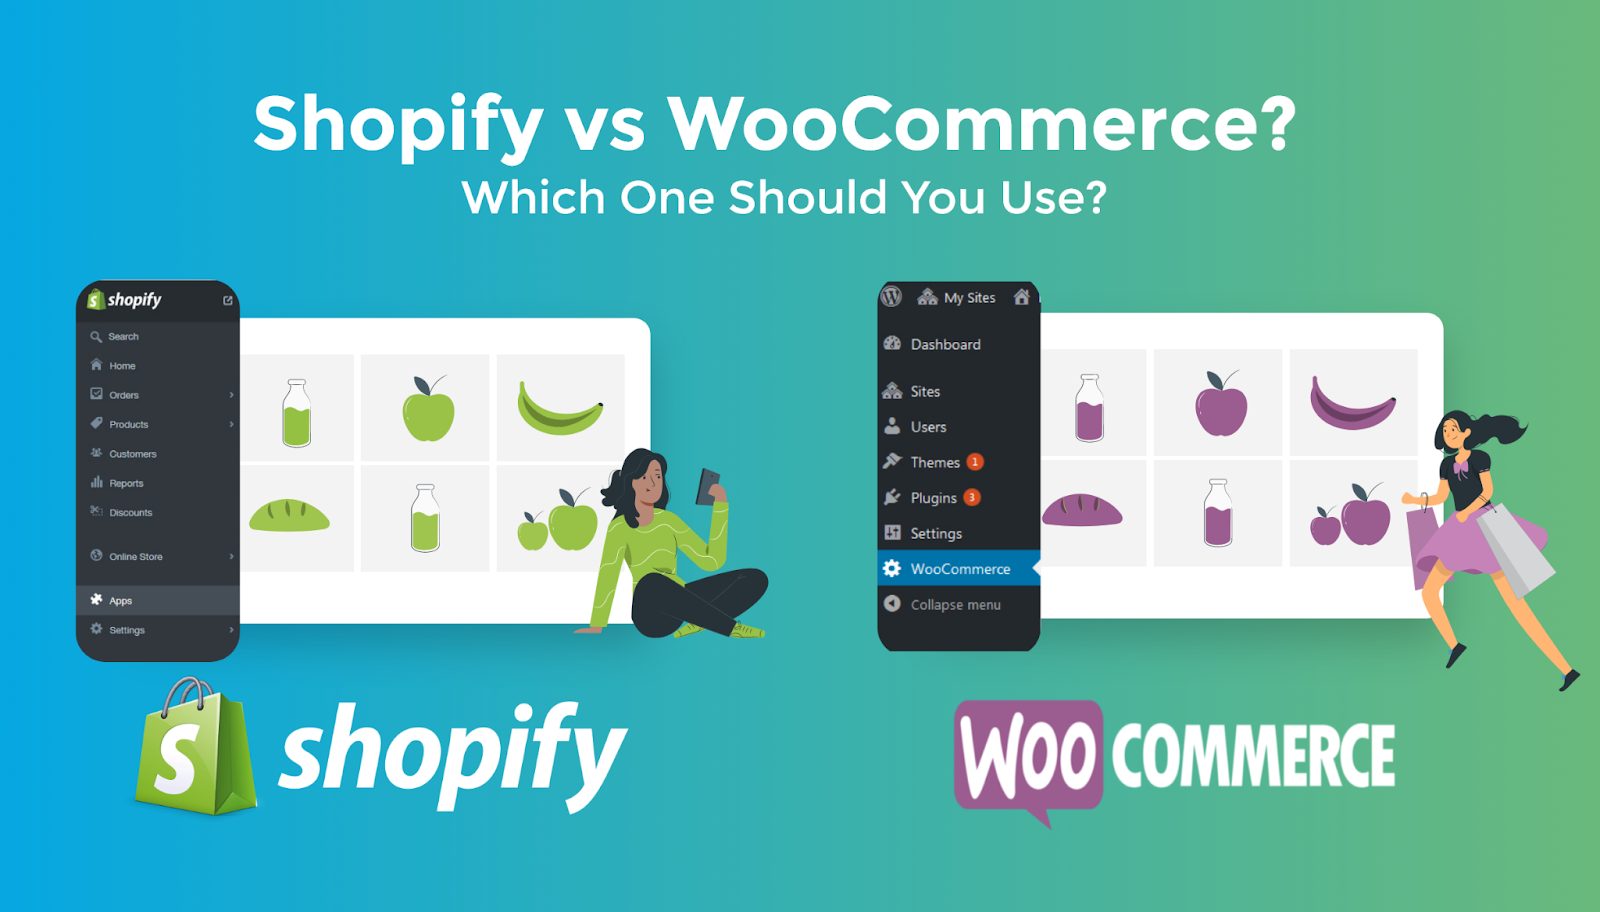
Shopify vs WordPress: Which Should You Choose?
Business owners often get confused between Shopify and WooCommerce to build an online store.
Shopify is a complete eCommerce platform that is exclusively built to develop online stores without having to worry about the technical aspects involved in maintaining one.
WooCommerce is an open-source plugin, part of the huge content management system, WordPress. WooCommerce is an eCommerce-specific plugin that lets anyone easily run an online store using WordPress.
With Shopify, even beginners with zero technical knowledge can start an eCommerce website and start selling in no time. Shopify keeps it fairly simple by focusing on the important aspect of eCommerce, selling the product!
But this also means that you give the control of your website over to Shopify.
And that is exactly why some business owners prefer to use the trusted WordPress platform to build eCommerce websites with the help of the WooCommerce plugin. But, that comes with a bit of a learning curve compared to Shopify.
However, if you are ok with a slight learning curve, WordPress can be an amazing solution to build eCommerce websites.
WordPress, over the years, has grown to become the number one choice to build all kinds of websites. So, it’s a straightforward approach to build an online store with WordPress.
To get started, we have a dedicated video tutorial on How to Make an eCommerce website using WordPress.
And for more such informative tutorials, consider subscribing to our YouTube Channel.
Shopify offers a free trial period of 14 days for all plans. However, a Shopify website in its free version does not look appealing and is not recommended for professional businesses.
Also, with a free trial, the checkout option is disabled for the customers. So, you need to select one of their three paid professional plans and create your own online store.
Is Shopify good for beginners?
Absolutely! Shopify is exclusively built for beginners who wish to create their own eCommerce websites without any type of coding. Non-technical beginners can make use of the amazing platform to launch their own online store in no time.
Which is a better platform for an e-commerce website in the long run: WordPress or Shopify?
Both WordPress and Shopify are amazing platforms to build eCommerce websites. Though Shopify is extremely easy to set up, you don’t have full control over the website.
WordPress, on the other hand, with the WooCommerce plugin, comes with a learning curve but is the ideal solution if you want to take control over your website in the long run.
How is Shopify different from other e-commerce platforms?
The one thing about Shopify that makes it stand out from the other eCommerce platforms is how easy it is to set up a store. Shopify needs no technical assistance in creating an online store.
This makes it different from the other platforms that may require a slight learning curve of the technicalities involved in managing an eCommerce website.
Can I sell anything on Shopify?
Yes! Shopify lets you sell pretty much anything over its platform. The products can be physical products that require shipping, or even digital products like courses, Ebooks, etc. Shopify also makes it really easy to start dropshipping using its platform.
Do people make money on shopify?
Yes, people do make money on Shopify. And that’s what makes Shopify one of the most trusted eCommerce platforms on the Internet. However, the money made out of an online store typically depends on factors like business type, the amount of work put in.
Is Shopify good for dropshipping?
Yes. Shopify has proven time and again to be a good platform to start a Dropshipping store. It is beginner-friendly and also has dropshipping-specific apps like Oberlo to make it easy to get started on a dropshipping store.
How much does the Shopify website cost?
Shopify has three paid plans to start selling through an online store. The three plans are Basic Shopify, Shopify, and Advanced Shopify, priced at $29, $79, and $299 per year respectively.
Apart from the Shopify plan, you may also need a unique domain name for the online store. We recommend purchasing a domain from GoDaddy as it’s affordable compared to buying it right within Shopify.


Add a Comment
Leave a Comment