How to Remove Background Noise from Videos: A Comprehensive Guide
Posted on
June 12, 2023
by

in
Guides
Are you tired of dealing with unwanted background noise in your videos? In this guide, we’ll teach you how to remove background noise from videos, making your videos sound like they were recorded in a professional studio. Read on to learn how to enhance your video’s audio quality in just a few simple steps.
Table of Contents
Noisy backgrounds can be a real pain when creating videos. They can distract viewers and make it difficult to understand the content. However, with the right tools and techniques, you can easily remove background noise and make your videos sound crystal clear.
To get started on how to remove background noise from video, we will use a tool called Descript.
So first, let’s see how you can install it on your computer.
The first step in the process of removing background noise from your videos is to download and install Descript, a powerful and user-friendly software.
To begin, navigate to the Descript website by clicking on this link. You will be directed to their homepage, which offers an overview of the software’s features and capabilities.
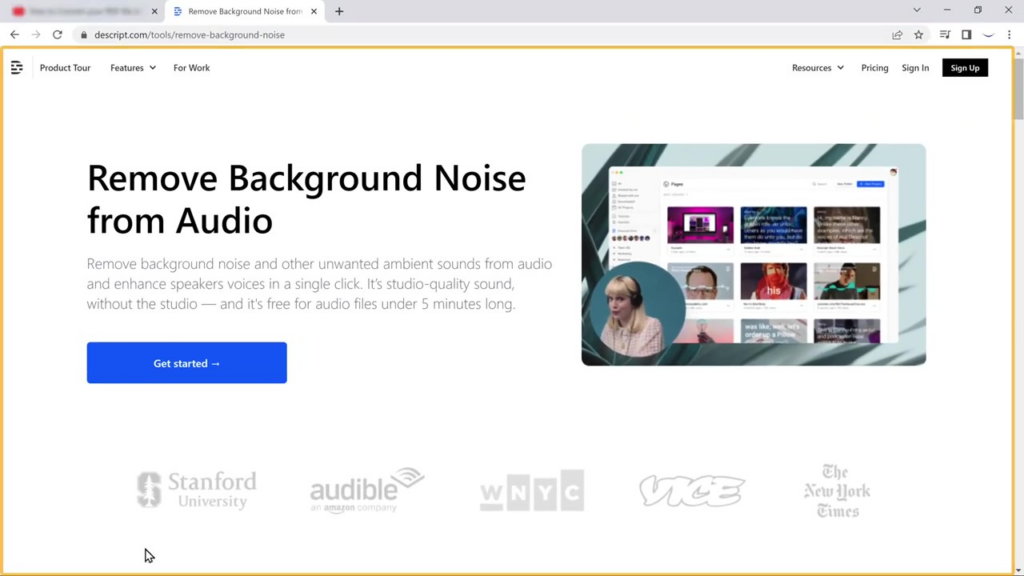
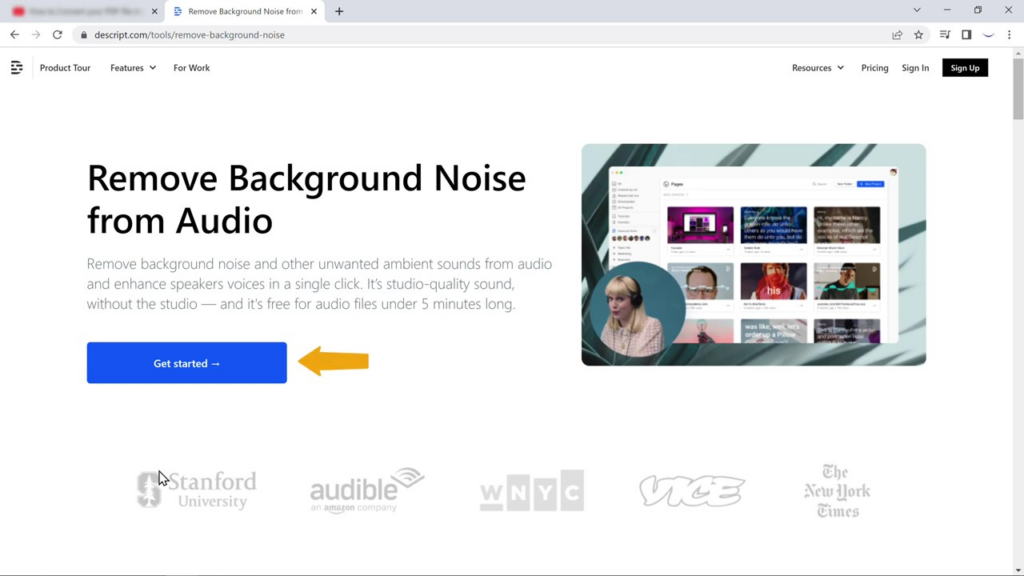
Before downloading the software, you’ll need to create an account. Now click on ‘Get started’ as shown below.
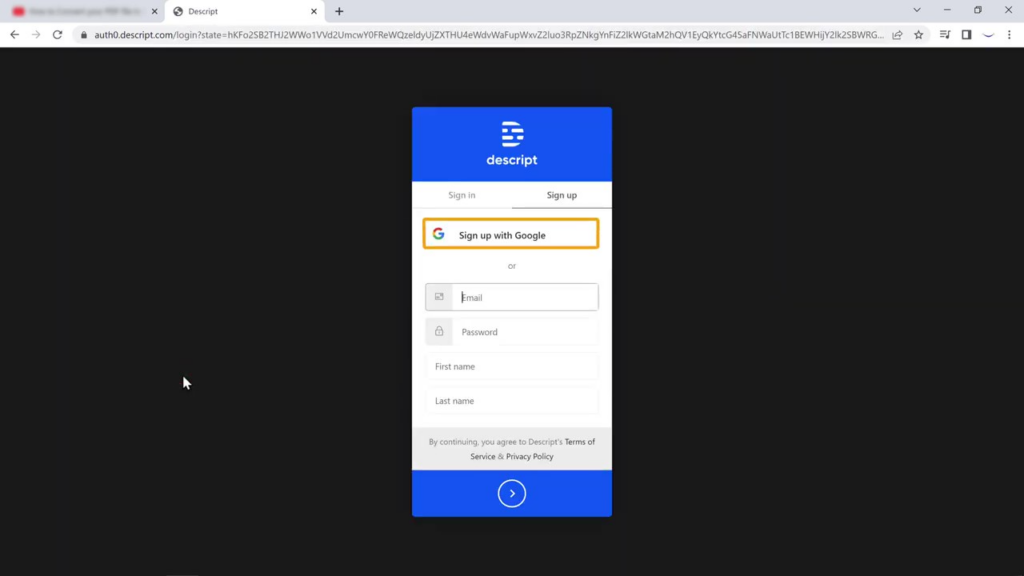
You will be prompted to enter your email address or sign up using a Google account. Choose your preferred method and follow the on-screen instructions to complete the account creation process.
If you signed up using an email address, you might receive a confirmation email from Descript. Open the email and click on the confirmation link provided to verify your account.
Once you do this, Descript will be downloaded on your computer automatically.
Now if you click on the Descript file, it will be installed. So next, let’s see how you can import a video in Descript.
After successfully installing Descript, next let’s see how you can import your video, assess its audio quality, and identify any background noise issues that need to be addressed.
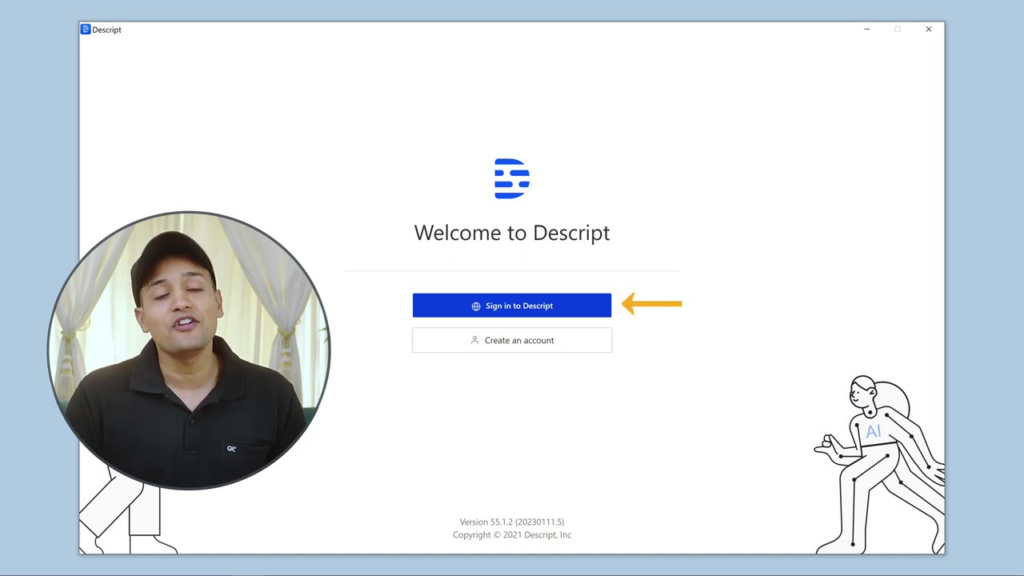
Begin by launching the Descript application on your computer. Sign in to your account using the email address or Google account you used during the registration process.
Upon signing in, you will be prompted to select your intended use for the Descript software.
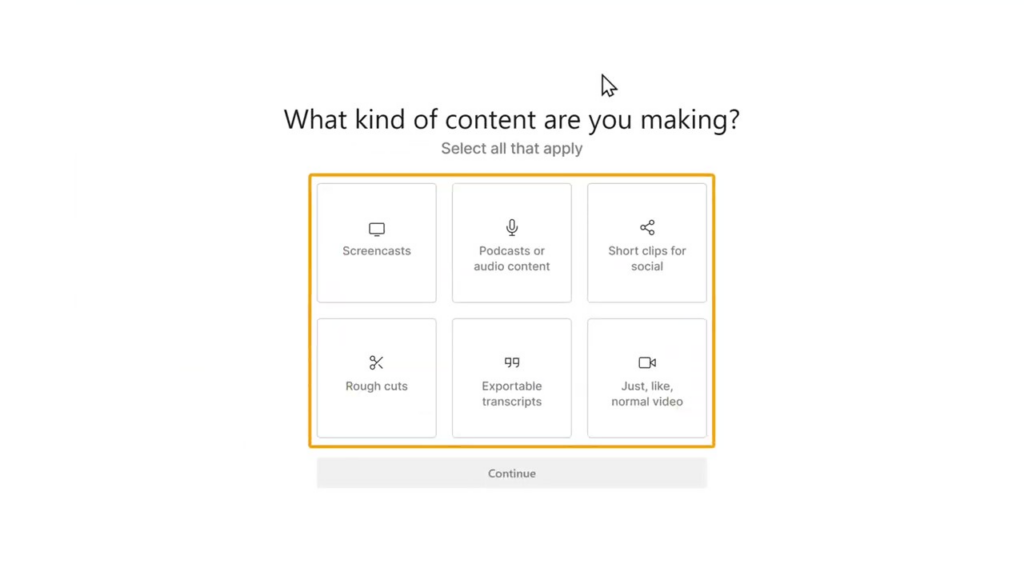
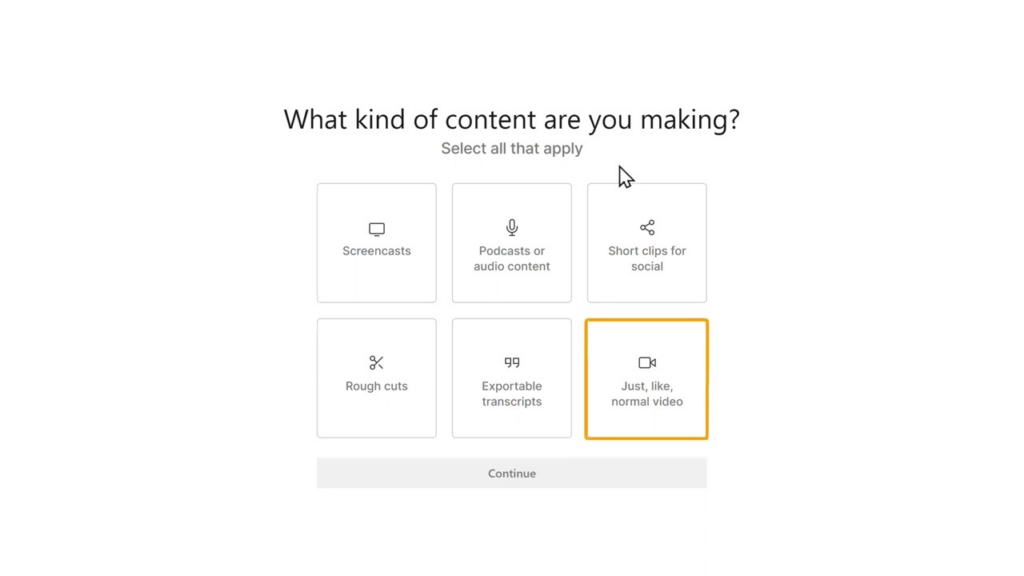
As we are editing the video, we will select the video option.
After selecting the “Video” option, continue through the setup process by following the on-screen instructions. This may involve granting permissions, choosing a default folder for project files, or configuring other settings related to video editing.
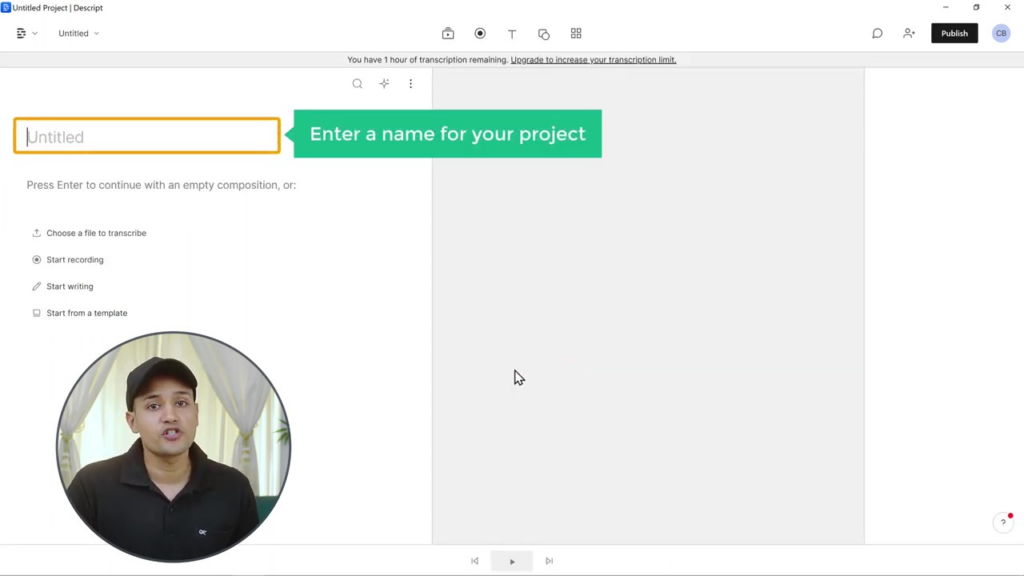
With the initial setup complete, you’re now ready to start a new project. Click on the “New Project” button, which can usually be found on the main screen.

A dialog box will appear, prompting you to enter a name for your project. Choose a descriptive and unique name to help you easily identify the project later.
To import your video into Descript, locate the “Add” button or the “Import” option within the software interface.
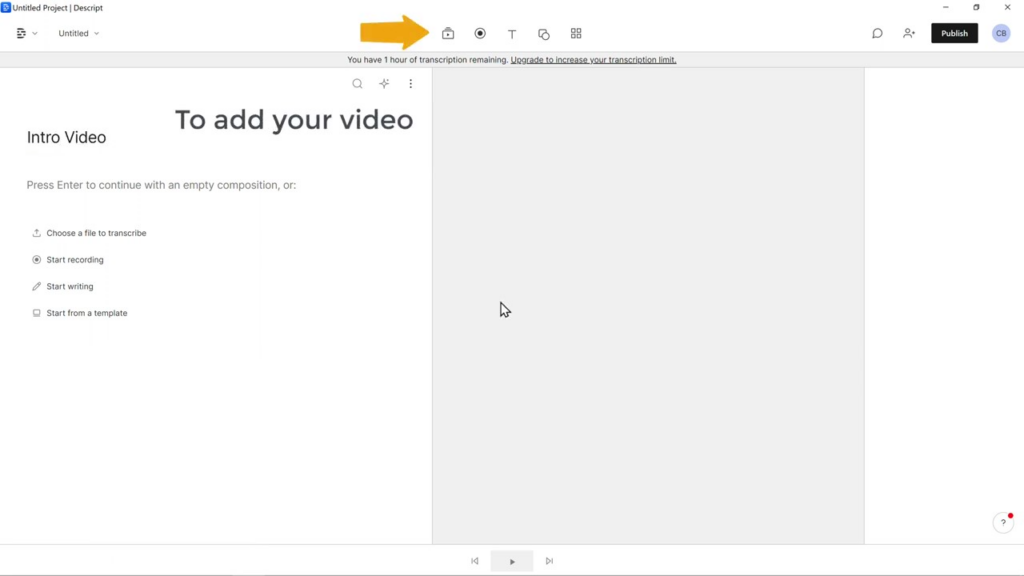
Click on it and then navigate to the folder on your computer where the video file is stored.
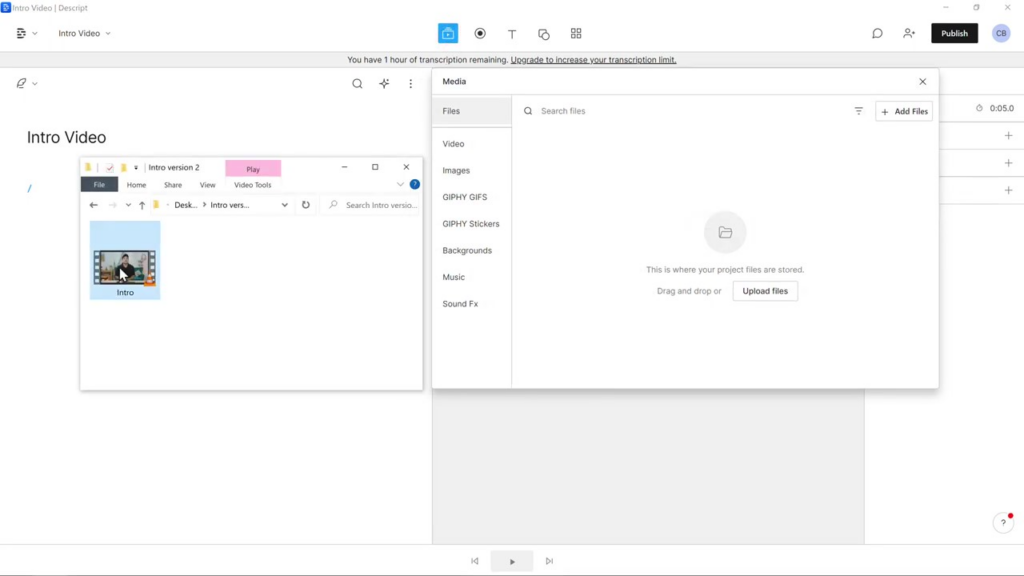
Select the video file you wish to edit and click “Open” or “Import” to add it to your project.
Once your video has been successfully imported, it will appear within the Descript workspace. Before moving on to the next step, take a moment to preview the video and assess its audio quality. Listen carefully for any background noise, echoes, or other audio issues that may need to be addressed. Make a mental note of these issues, as they will be the primary focus during the noise removal process.
By completing Step 2, you have successfully imported and assessed your video using Descript. You are now ready to move on to the next step, which involves removing the background noise and enhancing the overall audio quality of your video.
Now we’ll remove the background noise from your video using Descript.
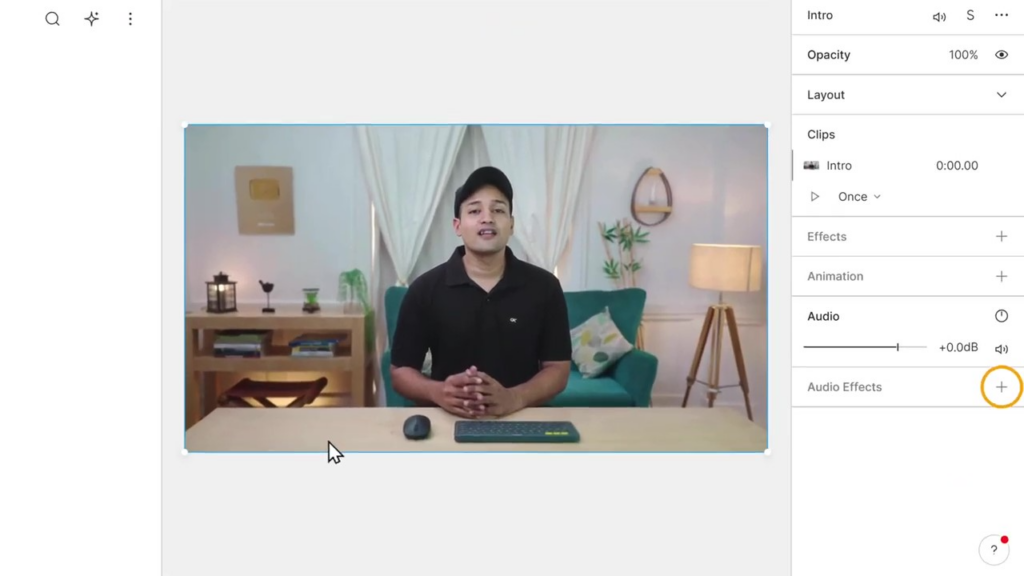
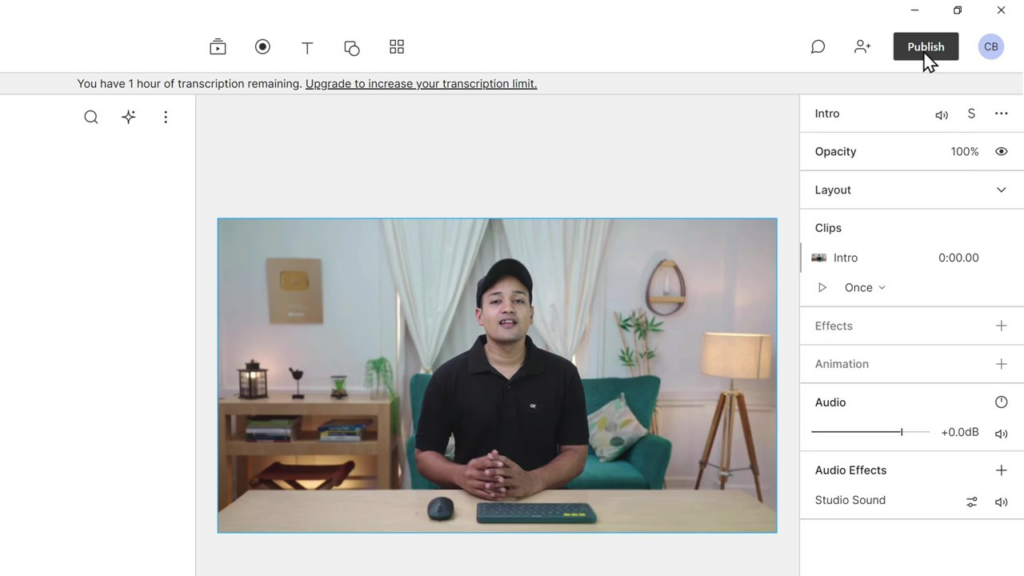
Before making any adjustments, ensure you have the correct video selected within Descript. To do this, click on the video thumbnail or timeline within the workspace. This will highlight the video and make it the active media file you’re working on.
With the video selected, locate the “+” icon in the audio effects panel, which is typically situated on the right side of the workspace or within the audio track settings. Click on this icon to open the panel and access the available audio effects.
Within the audio effects panel, navigate to the “Audio Repair” category.
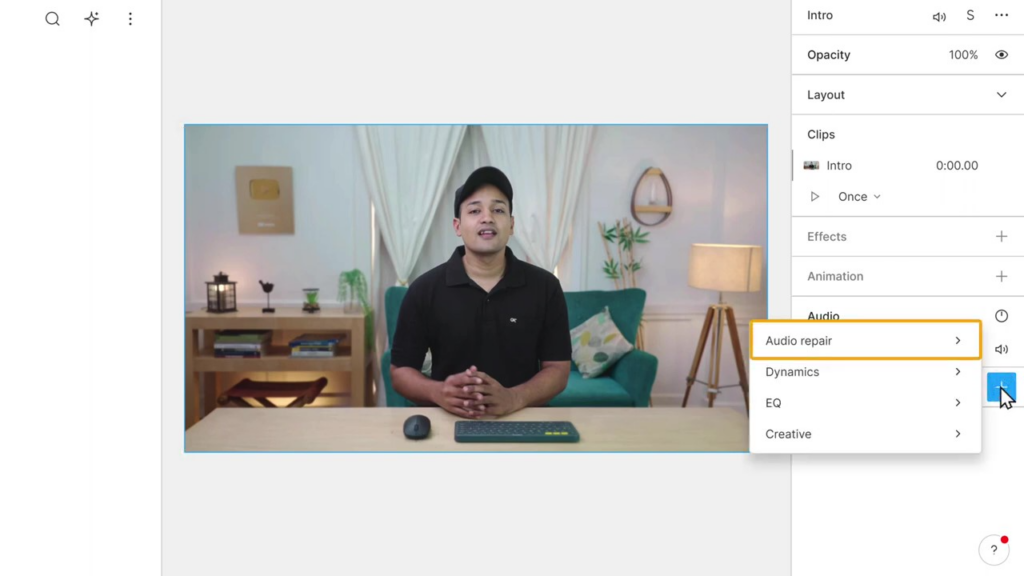
Look for the “Studio Sound” effect. Click on it to apply the effect to your video. The Studio Sound effect is specifically designed to remove background noise and enhance overall audio quality.
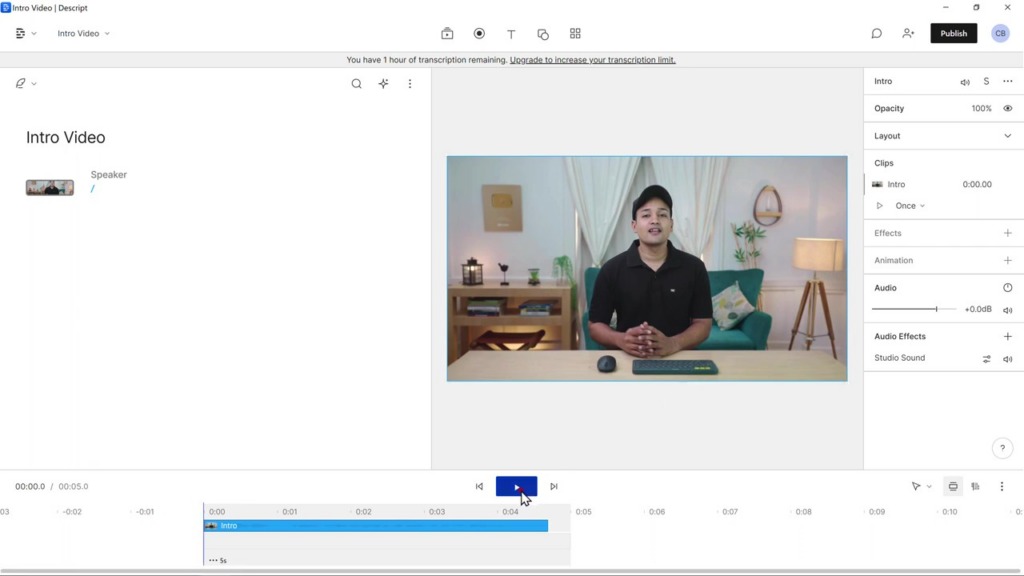
After applying the Studio Sound effect, Descript will begin processing your video. This may take several seconds or minutes, depending on the length and complexity of your video. Wait patiently for the processing to complete before moving on to the next step.
Once the processing is finished, it’s time to preview the improved audio quality of your video. Play the video from the beginning, and pay close attention to the areas where you previously noticed background noise or other audio issues. You should now hear a significant difference, with the background noise effectively removed and the overall audio sounding much clearer and more professional.
If you’re not completely satisfied with the results, you can experiment with additional audio effects or adjust the settings of the Studio Sound effect to achieve the desired audio quality. This may involve increasing or decreasing the noise reduction intensity, adjusting the equalizer settings, or applying additional audio enhancements.
So now, you’ve successfully removed the background noise from your video and enhanced its overall audio quality. With this task complete, you’re now ready to move on to the final step of exporting the enhanced video.
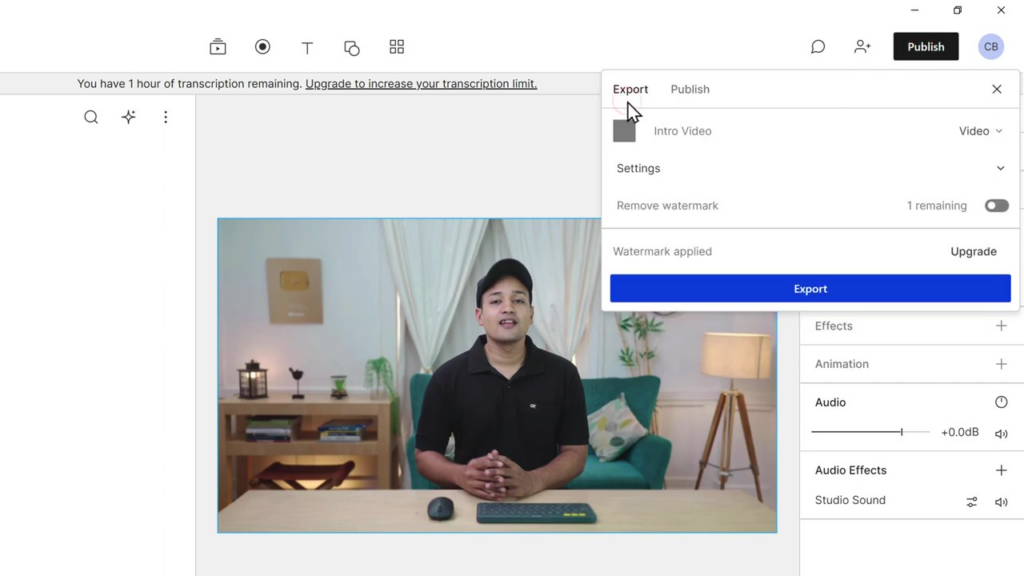
With your video’s audio now improved, go to the “Publish” option in Descript. This can typically be found in the top menu or toolbar within the workspace. Click on “Publish” to access the export options.
In the Publish menu, click on “Export.” This will open the export settings panel, where you can adjust various parameters, including video resolution and quality.
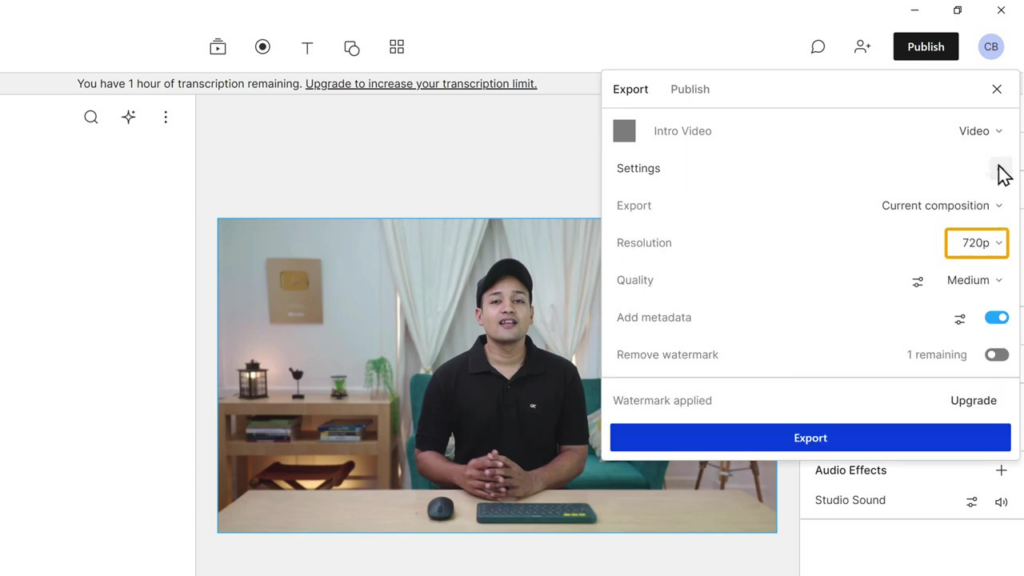
From the export settings panel, choose the video resolution that best suits your needs. Remember, the free version of Descript allows you to export up to a 720p resolution. If you require higher resolutions, such as 1080p or 4K, you’ll need to upgrade your plan. To select the resolution, click on the dropdown menu and choose the appropriate option.
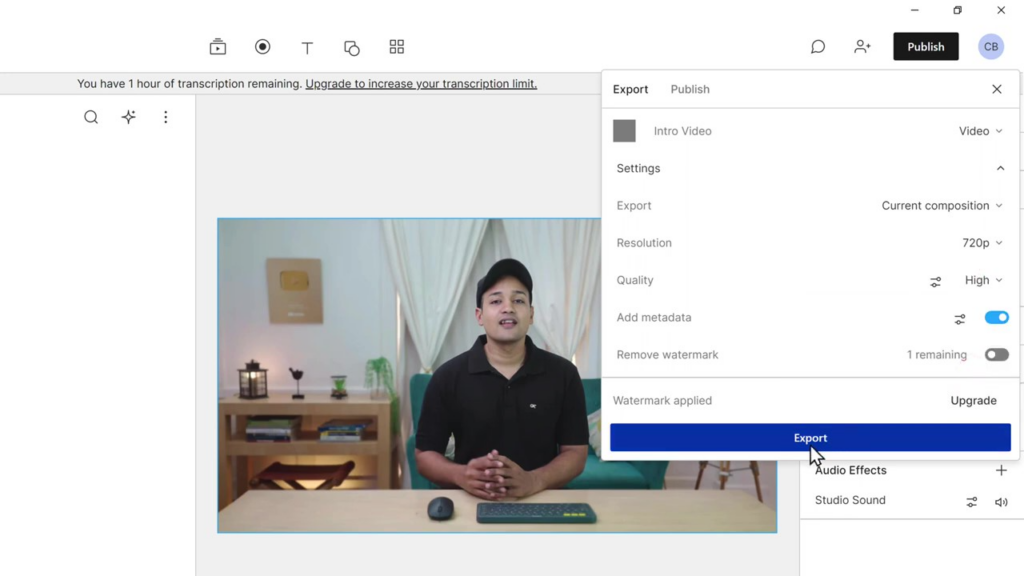
Next, set the video quality to “High” to ensure the best possible output. This can usually be found under the video resolution dropdown or in the advanced settings of the export panel. Click on the quality dropdown menu and choose “High.”

Before exporting your video, make sure you select the folder where you’d like to save the video file. This can be done in the export settings panel by clicking the “Browse” or “Choose” button. Navigate to the desired folder on your computer and click “Select” or “Save” to set the destination.
With all the necessary settings configured, click the “Export” button to initiate the export process. Depending on your video’s length and complexity, this might take some time. Wait for the export process to complete before moving on.
Once the export is finished, navigate to the destination folder you chose earlier, and locate the exported video file. Double-click on the file to play the video and evaluate the final result.

Your video should now have improved audio quality, free of background noise and other audio issues.
So now you’ve successfully exported your enhanced video, complete with improved audio quality. Now you’re ready to share your video with your audience, confident in the knowledge that your audio is clear and free from distracting background noise
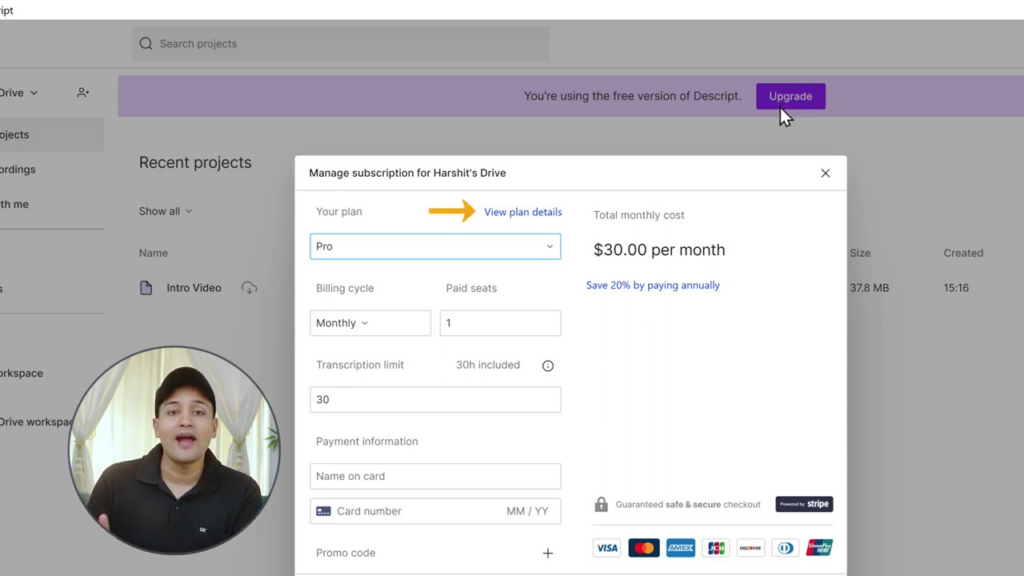
As mentioned earlier, the free version of Descript comes with limited features. You can use the basic noise removal tools at no cost, but if you want access to more advanced features, you’ll need to upgrade your plan. To do this, click “Upgrade” in Descript and
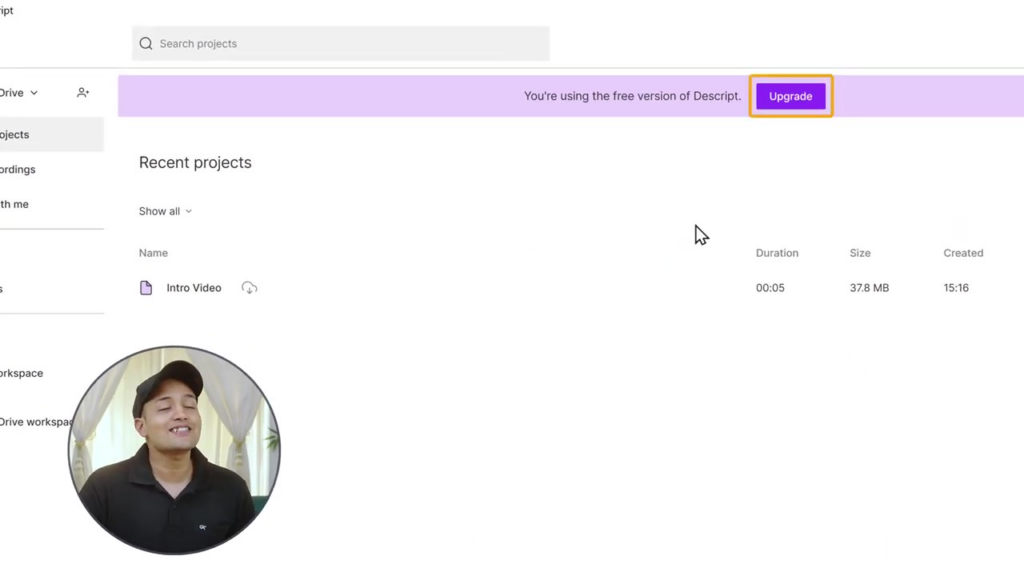
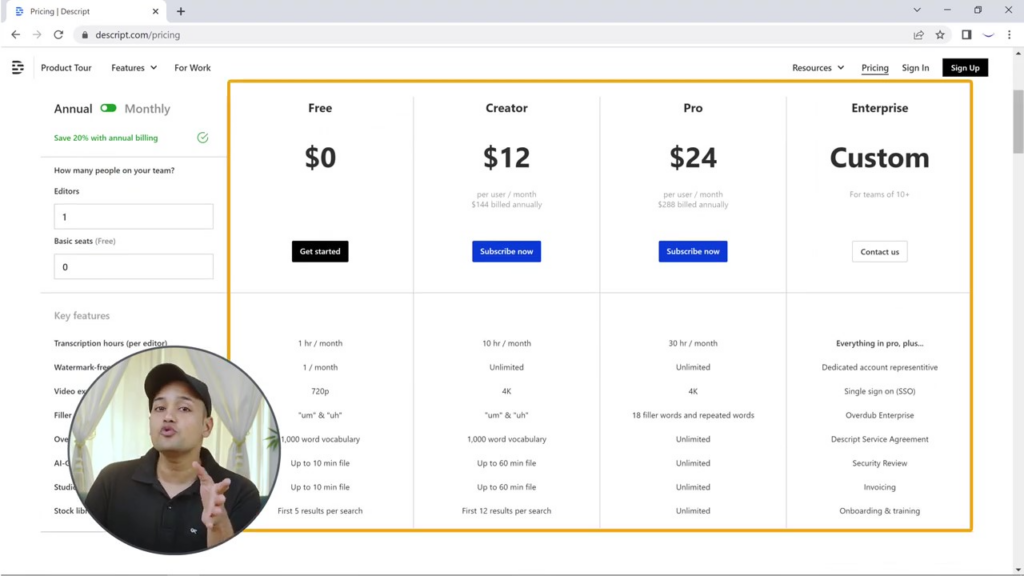
Review the available plans. Choose the one that best suits your video
Descript offers a variety of additional features that can further enhance your videos. For instance, if you’re interested in creating your own voice using AI or removing background noise from audio recordings, be sure to explore the other tutorials and guides available on our blog.
By following this comprehensive guide and using Descript, you can successfully learnt how to remove background noise from videos and achieve studio-quality audio. Your viewers will appreciate the improved audio quality, making your content more enjoyable and engaging.
Remember to explore other audio-related solutions, such as creating your own voice using AI or removing background noise from audio recordings, by checking out our other guides and tutorials. Don’t forget to subscribe to our blog for more tips and tricks on creating high-quality content.
We hope you found this guide helpful in removing background noise from your videos. With your newfound knowledge, you can now create professional-sounding videos that will captivate your audience. Good luck, and happy video editing!
In this guide, we recommend using Descript, a powerful tool that helps you easily eliminate background noise and enhance the audio quality of your videos
Descript offers a free version with limited features, which allows you to remove background noise from your videos. However, for access to more advanced features and higher export resolutions, you will need to upgrade to a paid plan.
Yes, Descript can also be used to remove background noise from audio recordings. The process is similar to the one explained in this guide for video files.
To export the enhanced video, click on “Publish” in Descript, then click “Export.” Select the desired video resolution and set the video quality to “High.” Finally, click “Export” to save the video file.
Descript offers additional features that allow you to create your own AI-generated voice. Be sure to explore the other tutorials and guides available on our blog to learn more about this feature.
Yes, there are alternative software applications and tools for removing background noise from videos. Some popular alternatives include Audacity, Adobe Audition, and iZotope RX. However, this guide specifically focuses on using Descript.
Yes, Descript is compatible with both Windows and Mac operating systems. Simply download and install the appropriate version for your computer to get started.
Do you want to learn WordPress to build any kind of website you want? Then this is the only course you need to take.
View CourseSEO isn't as difficult as you might think. Learn how to start growing organic traffic to your website with our easy to follow video .
Watch VideoSign up for our WordPress Course today!
Add a Comment
Leave a Comment