How To Create an eCommerce Website using WordPress
Posted on
November 27, 2020
by

in
Web Development
eCommerce refers to the sale and purchase of products over the Internet. Unlike physical businesses that happen in a brick-and-mortar store, eCommerce does all its transactions online.
So, an eCommerce website is a shop on the web that provides goods and services to a large Internet audience. You may have decided to build your own eCommerce website, but just not sure where to begin.
We do agree that creating an eCommerce website on one’s own can be a daunting task. But, What if we say you can create your own eCommerce website using WordPress, that too without any coding?
Yes, you can create your own eCommerce website using WordPress in 4 simple steps,
By the end of this article, you will be able to create a fully functioning eCommerce website with WordPress, where you can sell your products to the customers with features for them to even pay right within the website.
Aren’t you excited to create your own eCommerce website using WordPress?
So, Let’s get started!!
The first part of creating an eCommerce website using WordPress is to launch your website on the Internet. Launching your website refers to creating your website and making your website live on the web.
And we are going to launch your website in just 3 steps,
The domain is the address of your website, it’s the one your visitors enter in the search engine to come to your website.
Once you’ve chosen a domain name, click here to check whether your domain name is available or not.
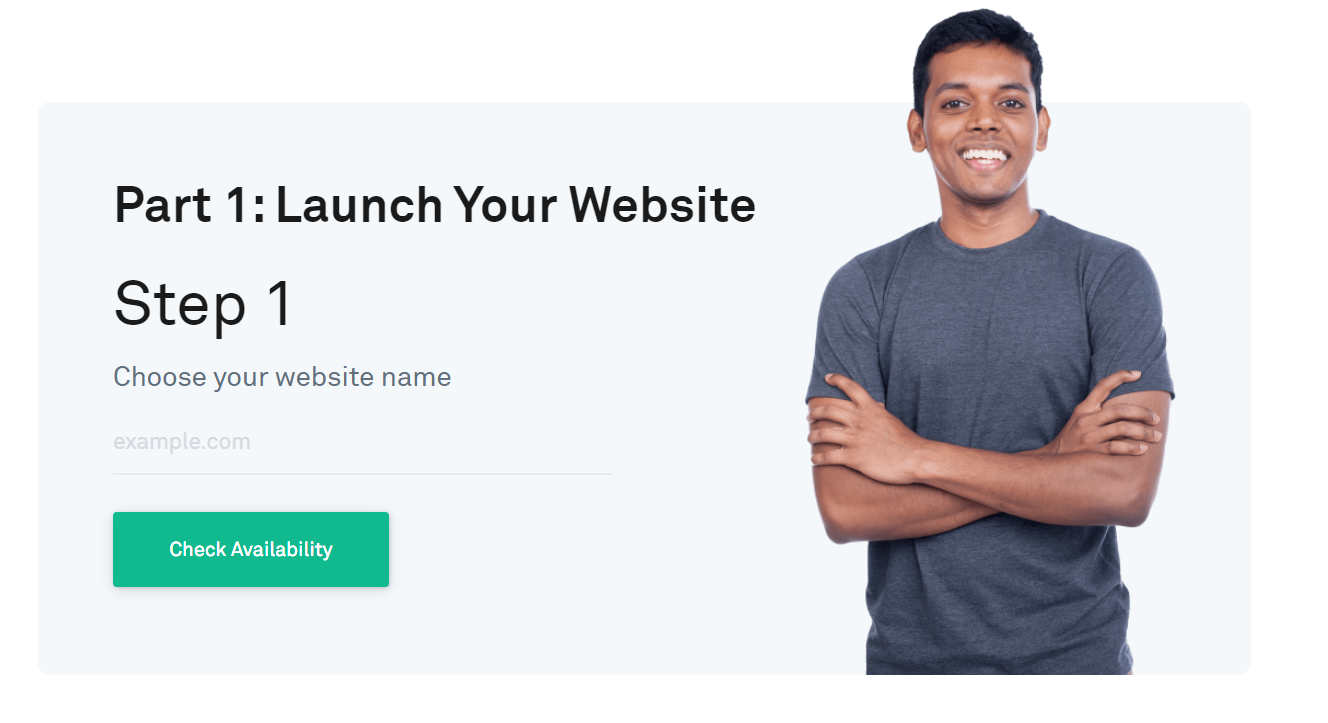
If your domain is available proceed to the next step or else try choosing other names.
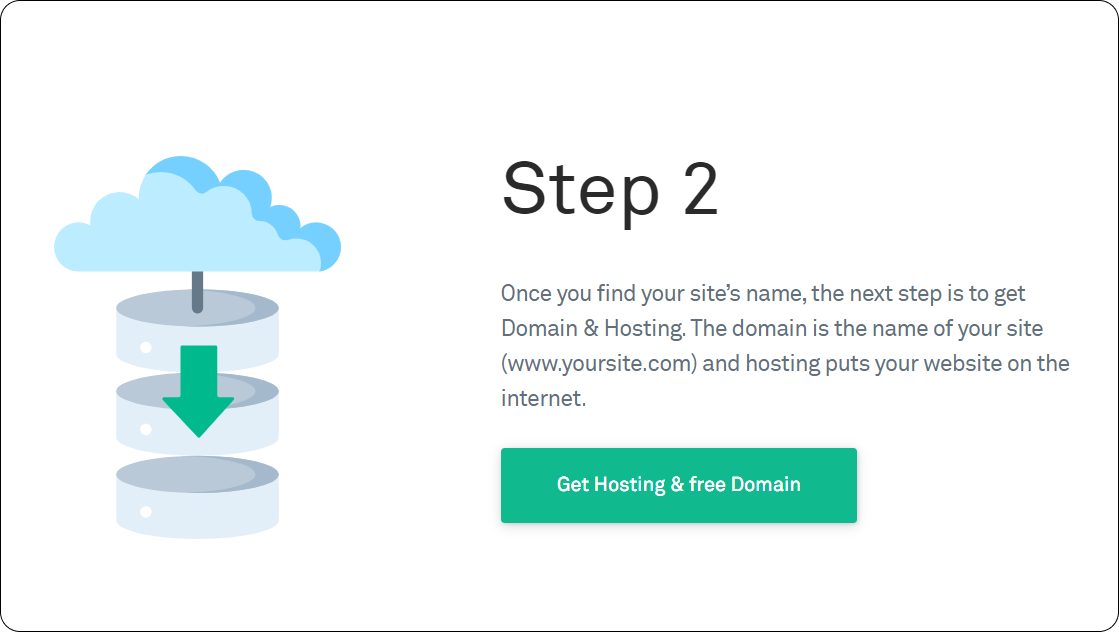
Hosting is the place where you will store all files that are related to your website. There are different types of web hosting available in the market, like Shared, VPS, Cloud hosting to choose from. But we have made it easy for you.
To purchase hosting and domain, just proceed to step 2 and click Get Hosting & free Domain.
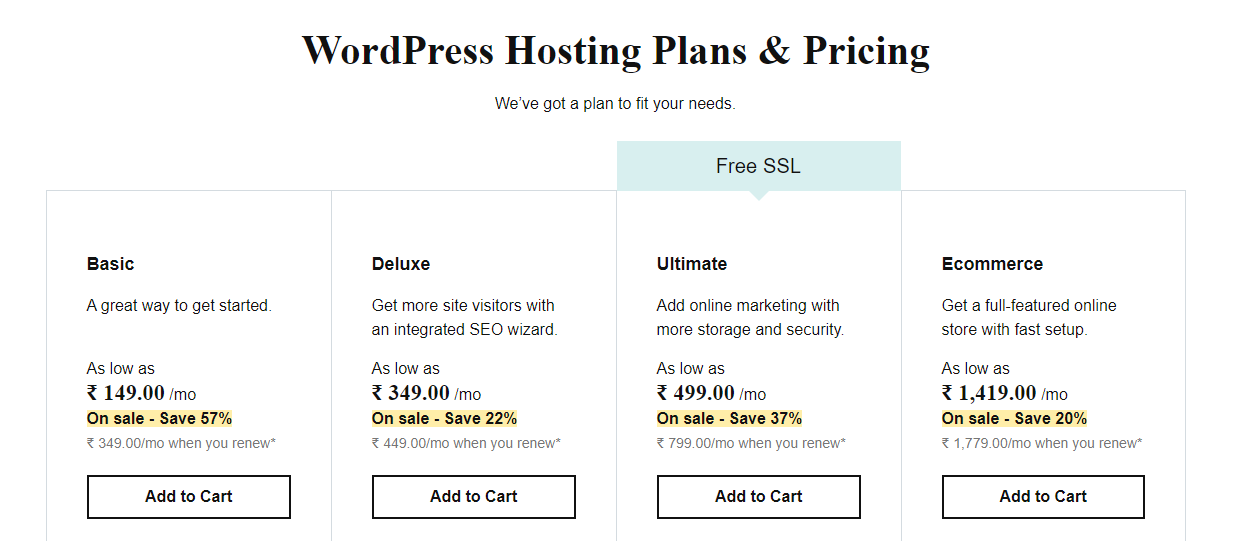
You will be navigated to the GoDaddy website where you can buy domain & hosting. After carefully considering the several factors to choose the hosting provider, we have come up with GoDaddy.
GoDaddy offers a variety of plans that suits the needs of everyone, from an individual to a full-featured eCommerce store. Choose a plan that meets your requirements, and then click Add to Cart.
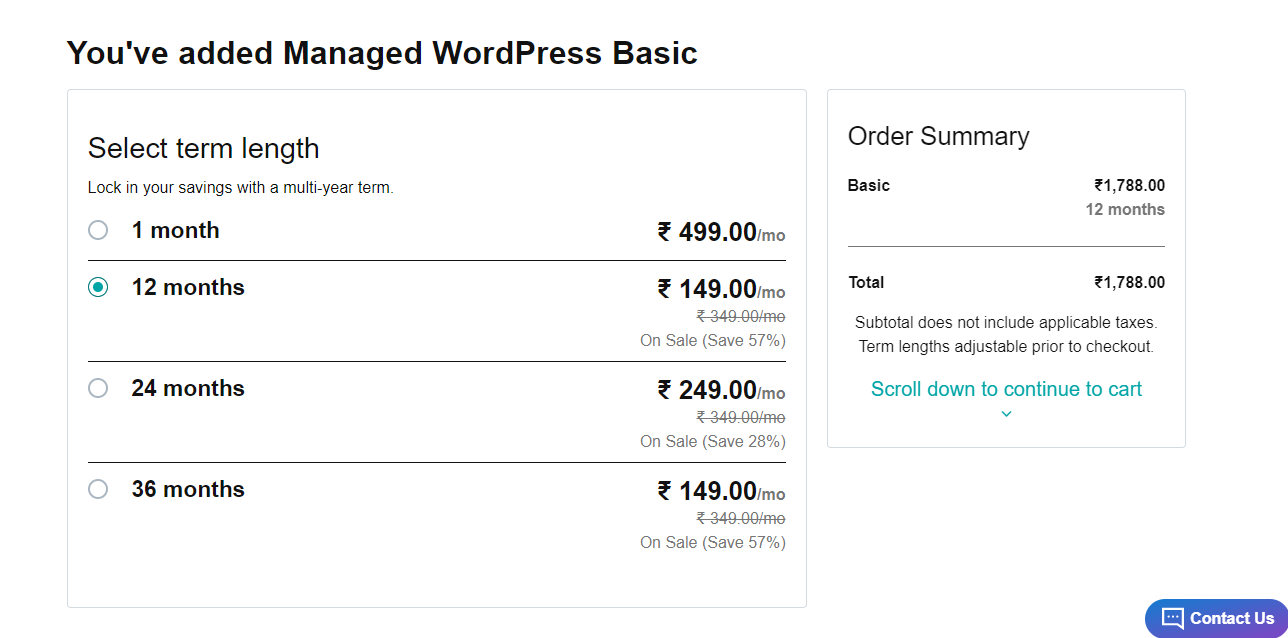
You will be asked to select the term length for your online store. Term length is how long your website will be live on the Internet. Choose a term length of your choice and click Continue.
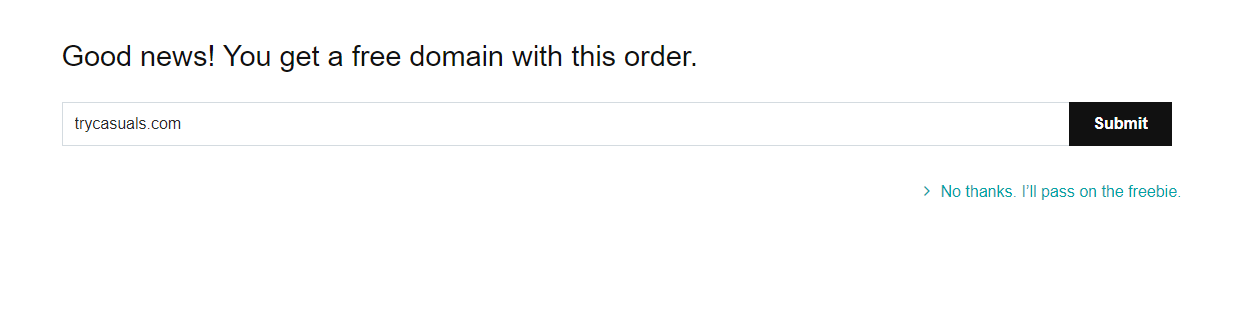
You will then be taken to the domain section where you need to enter the name that you’ve chosen in the previous step. Once entered, click Submit.
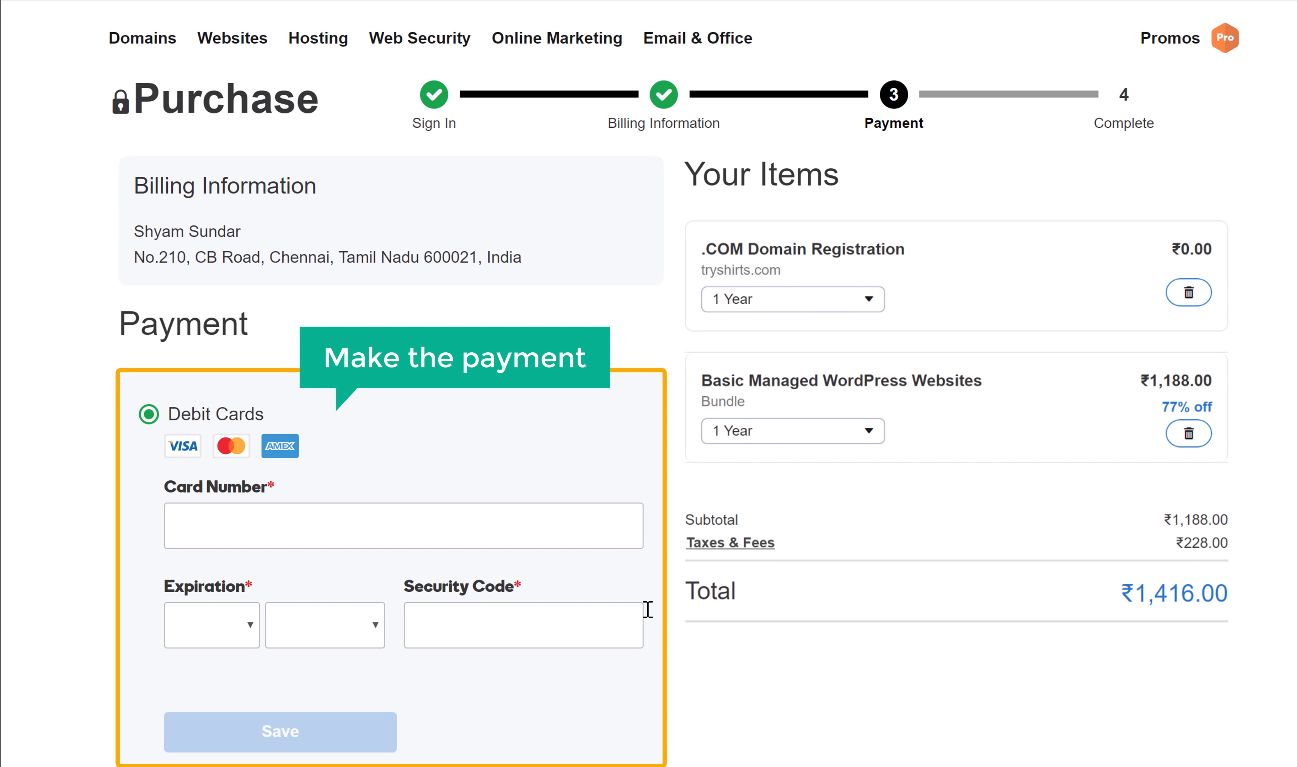
Enter your payment information on this page & make payment to get the domain & hosting.
Upon successful payment, you will be receiving a verification email from GoDaddy where you need to verify your email address to activate your account. Open your email & click the link provided in the email & then click verify mail.
As you’ve bought domain & hosting, you’re just one step away to launch your website.
As said above, we’re going to install WordPress on your website. Installing WordPress is so simple.
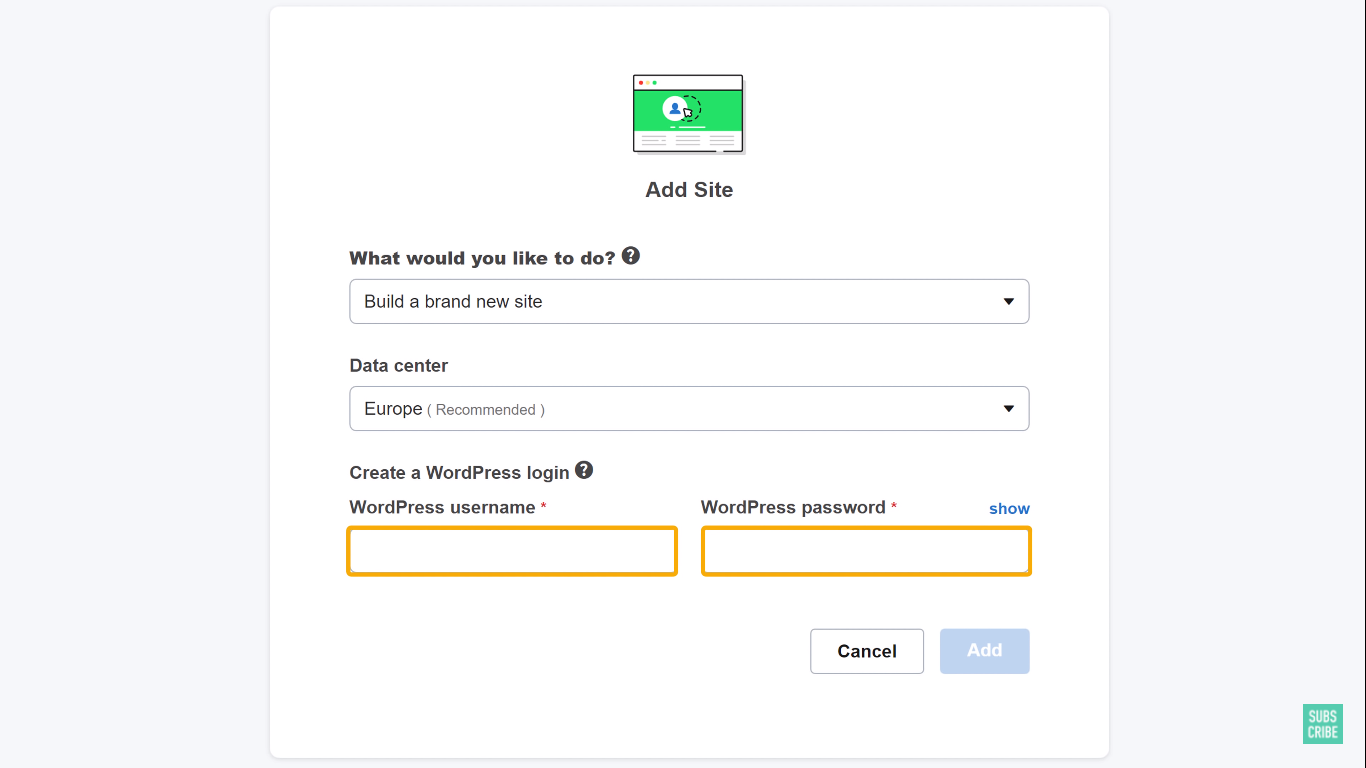
Install WordPress by clicking on Add Site.
Set up your WordPress account by providing your Username & password here. You need to enter these details every time you log in to your site. Click Add after you’ve entered these details.
You can see that WordPress is successfully installed on your Website which means that your website is live now.

Check your website by entering your website address in the browser.
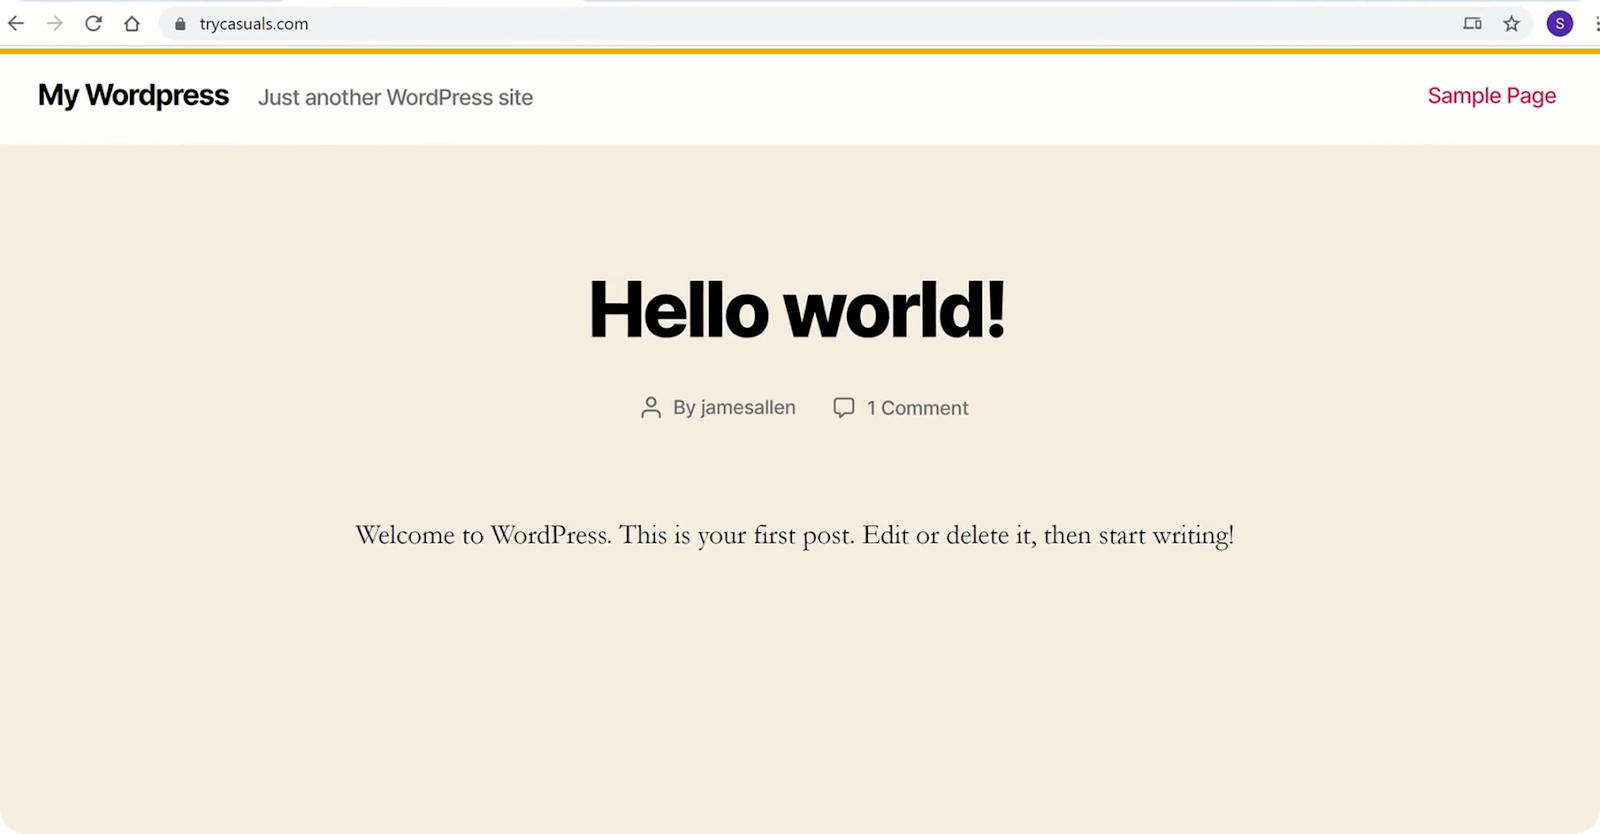
Hurray!! You’ve created your first website and launched it on the web.
So, what are you waiting for? Let’s turn your website into a fully functional eCommerce website.
Now that you have a website live on the Internet, you can easily build your eCommerce site from scratch in just 2 simple steps,
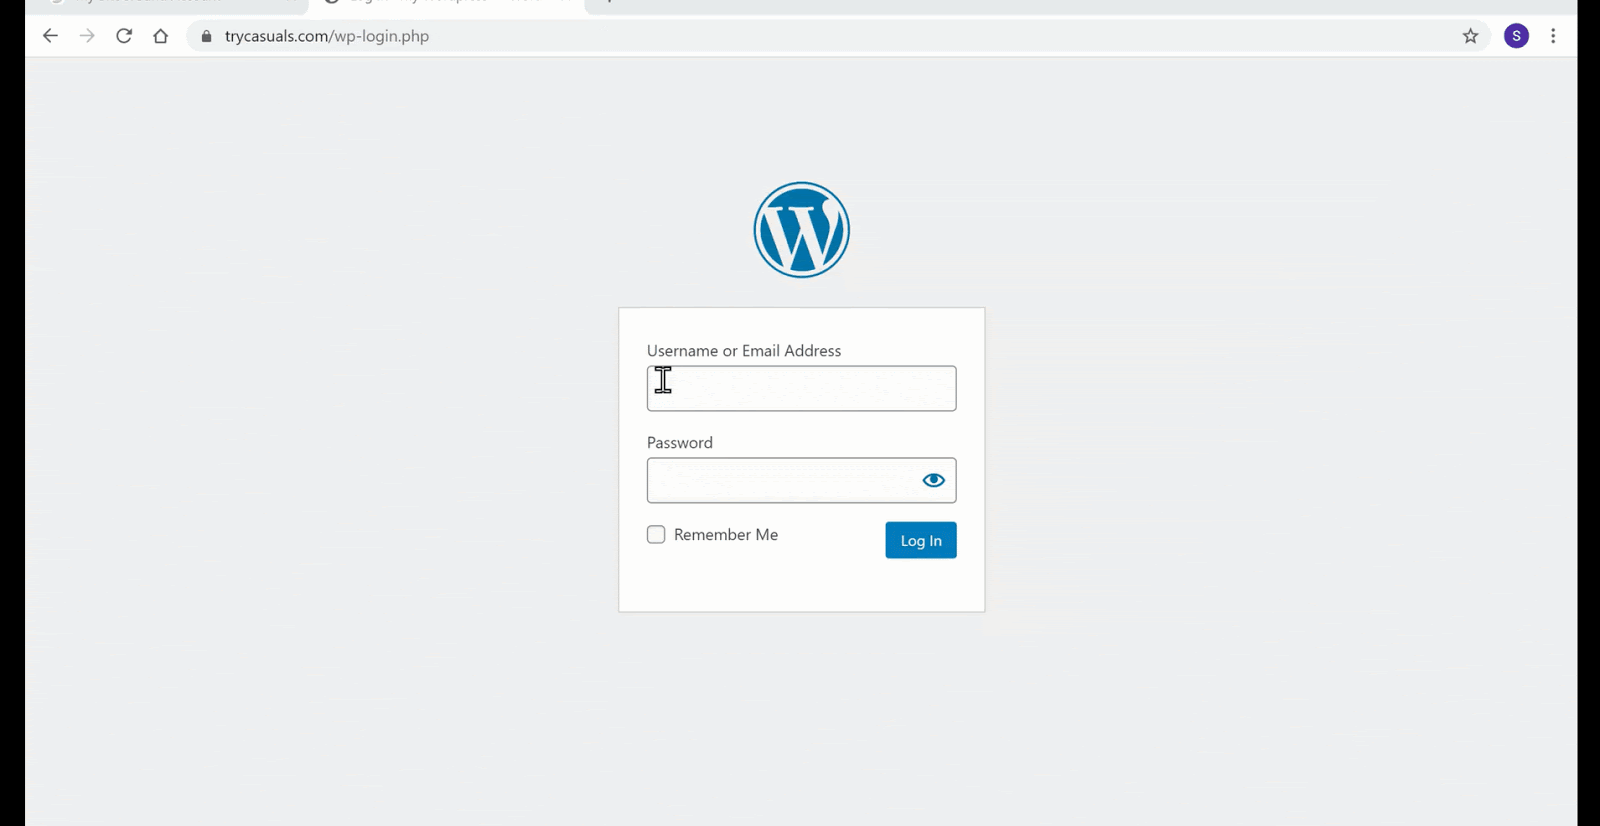
To login to your website, type “/login” after your website address.
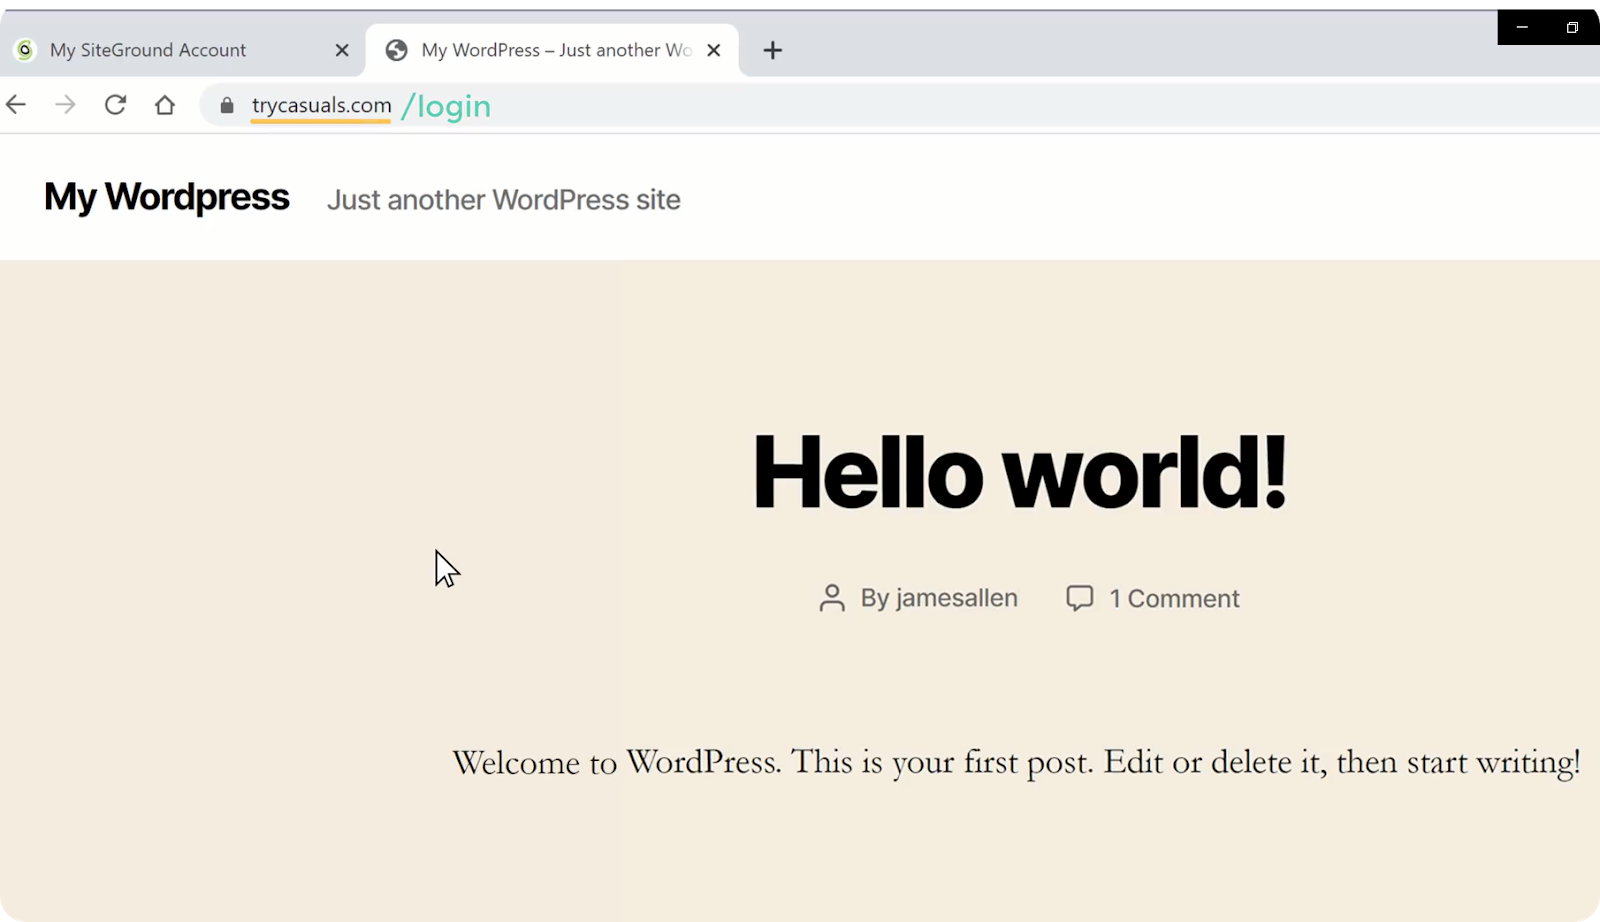
It will take you to the login page of your site. Now, enter the login details that you’ve created while installing WordPress, and click Login.
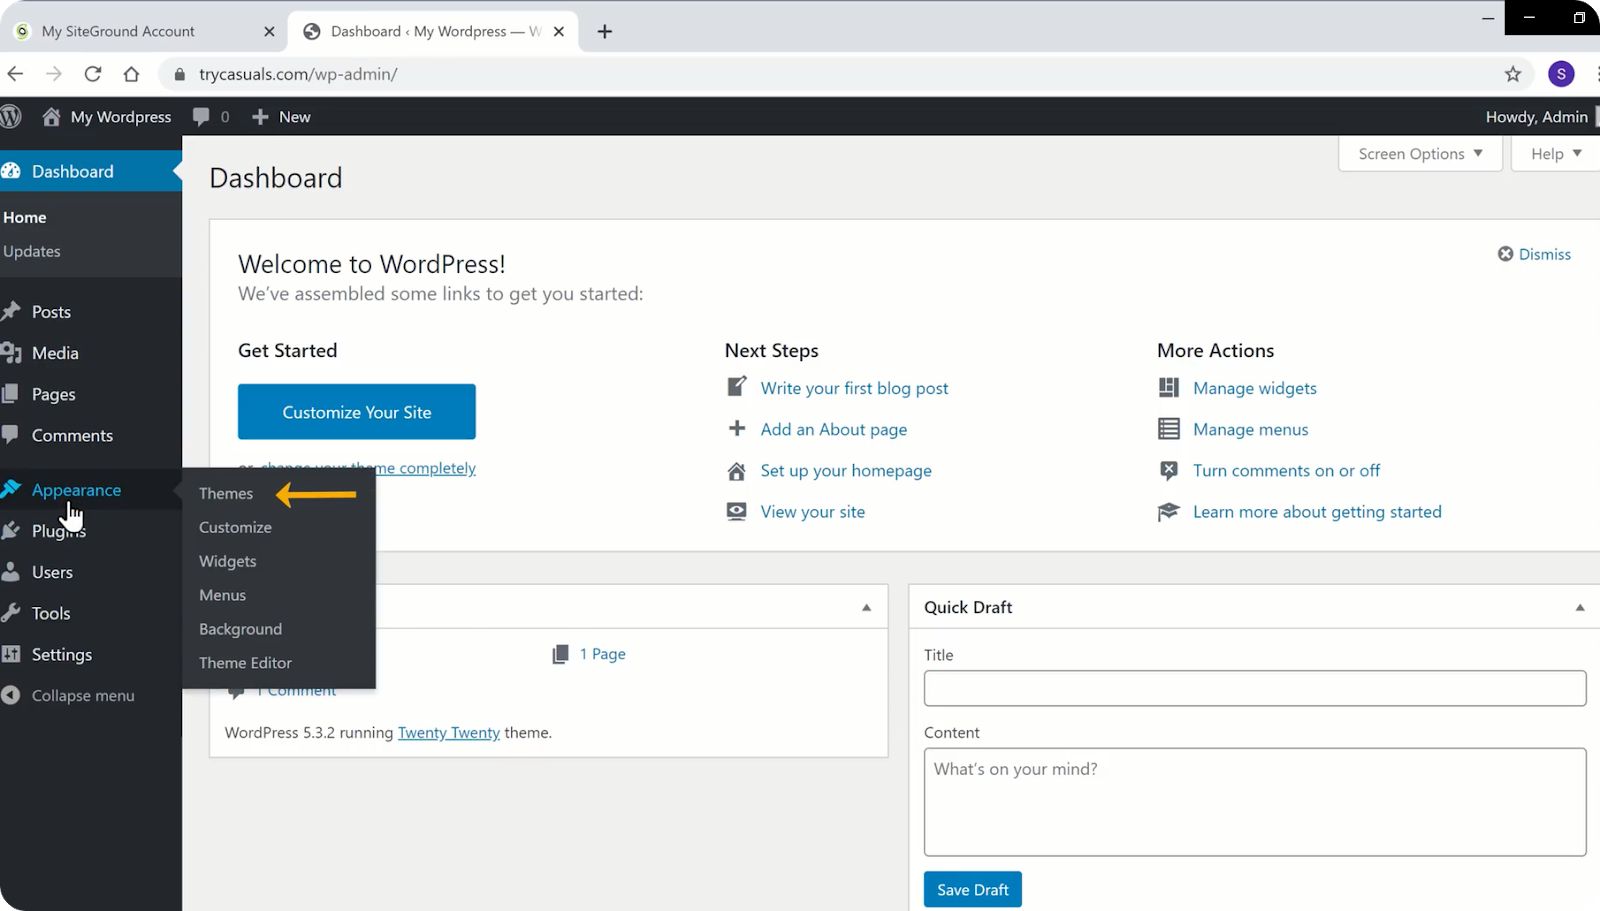
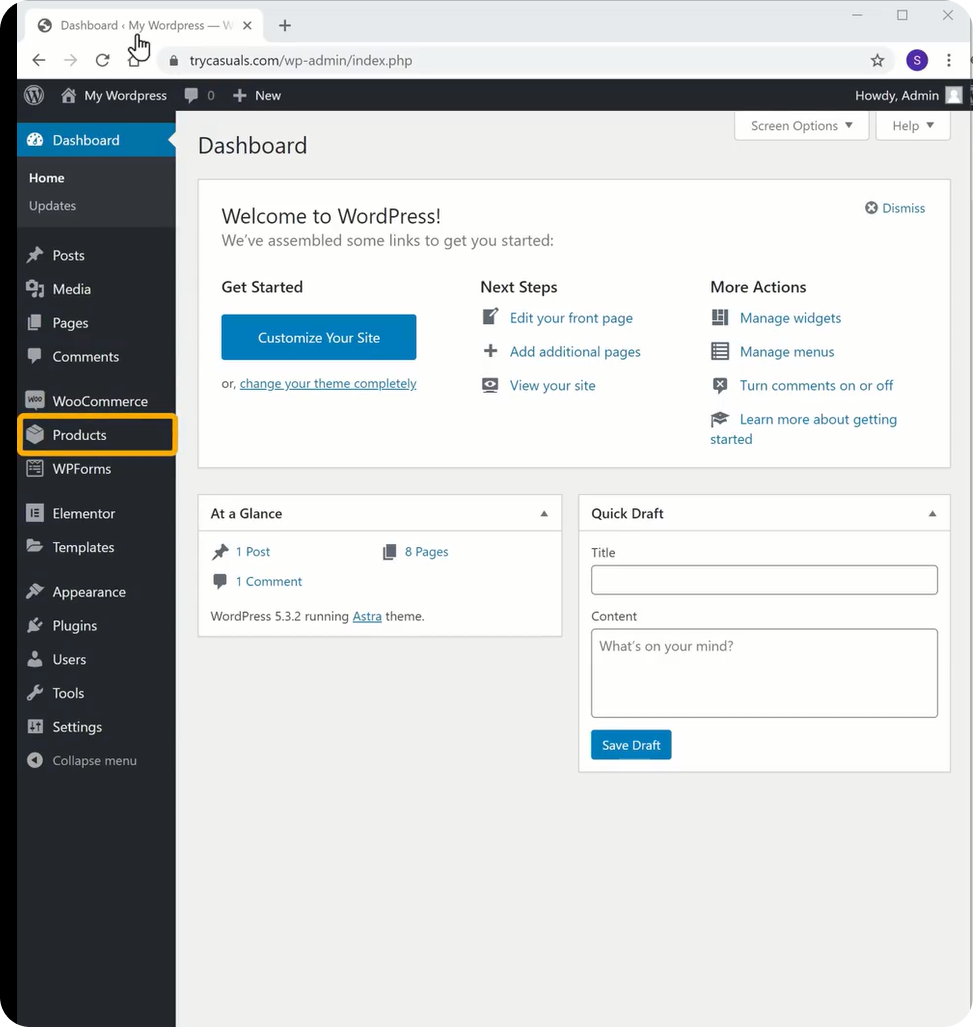
You will be taken to the WordPress admin dashboard. The dashboard is the control center of your website where you can customize your website.
After you’ve successfully logged in, proceed to the next step where we import and edit the sample sites.
A theme is a collection of files, templates & CSS style sheets that help in designing the front-end(looks) of our website. Simply, the theme helps you design your site without coding.
You need to install the Astra theme as it helps you to import the sample sites.
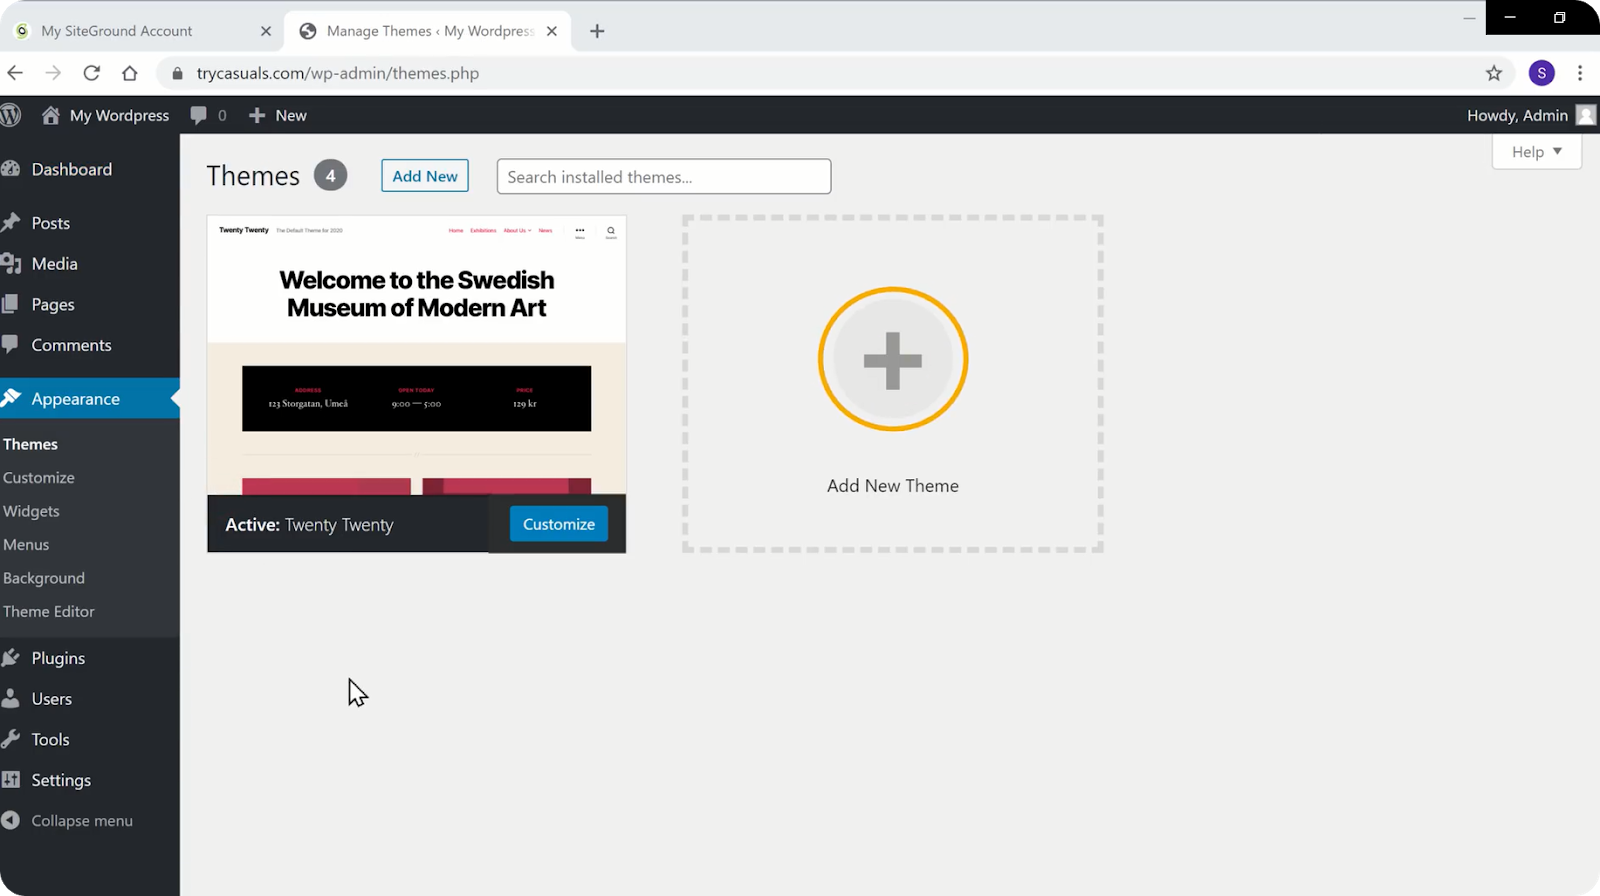
To install a theme, go to Appearance & click Themes.
Click Add New Theme.
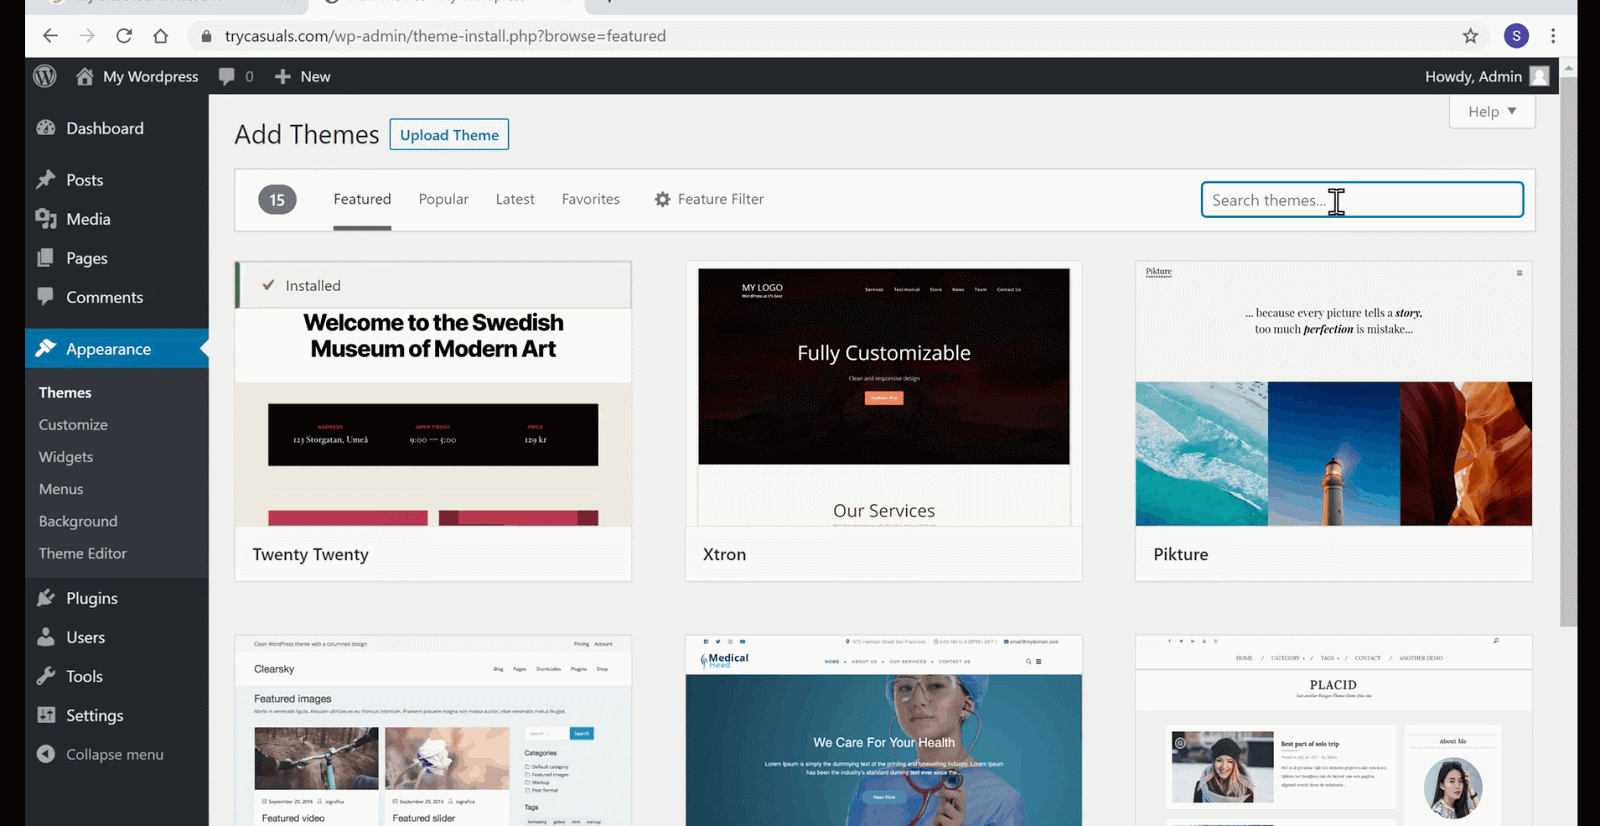
Search for Astra in the themes library. Once the Astra theme is displayed on the search results, click install & activate it.
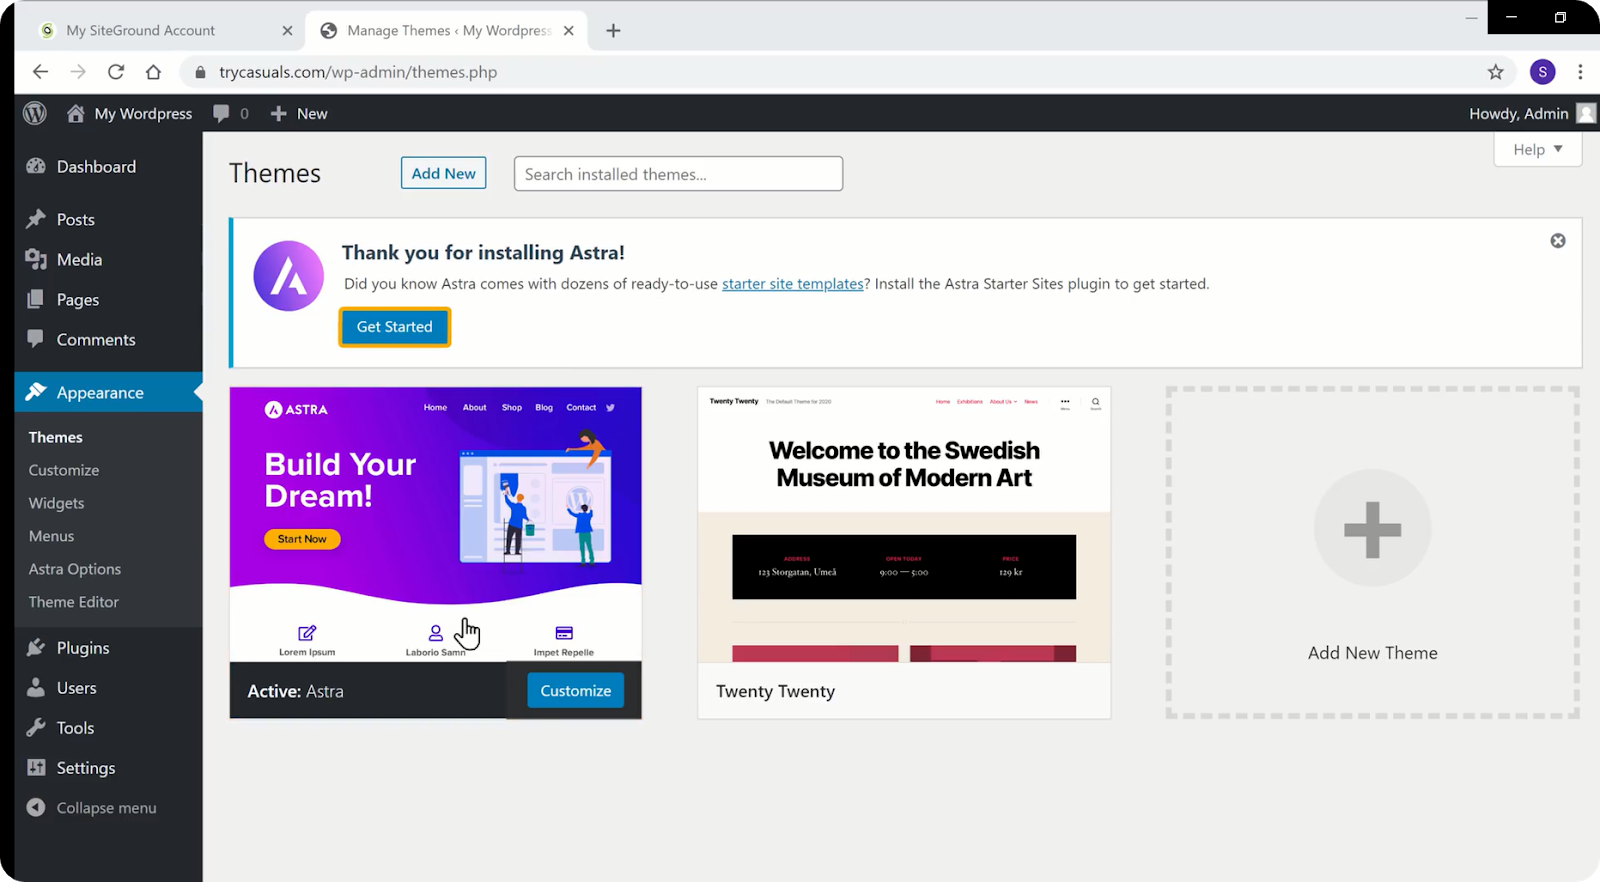
Now, click Get Started to choose a sample site from the sample sites library.
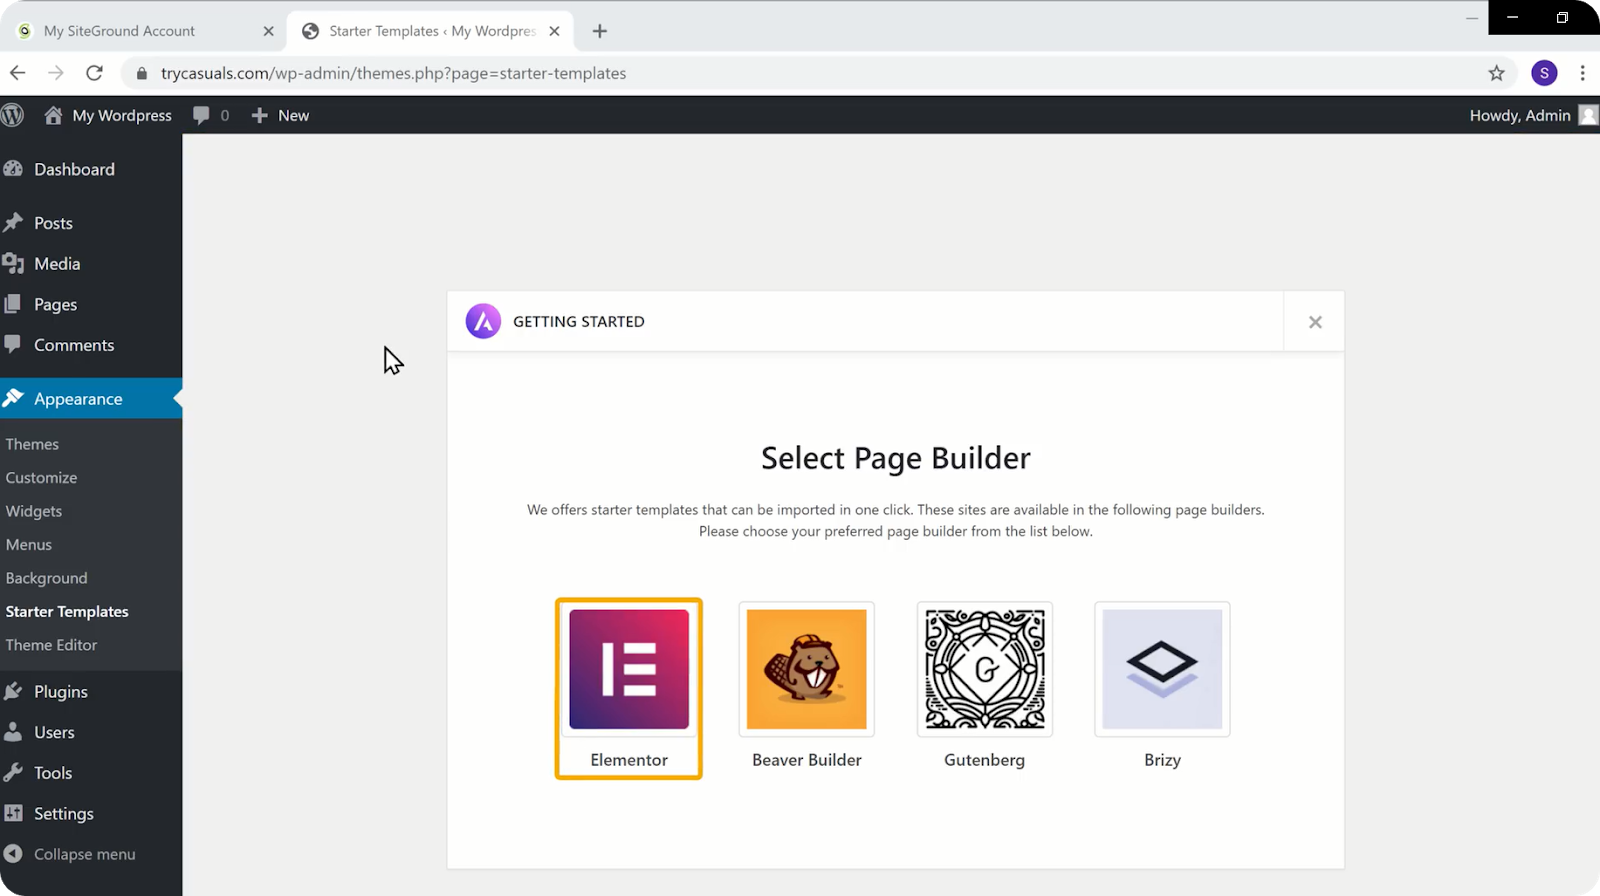
It will take you to the Select Page Builder page. Choose Elementor from the list. Elementor is a drag & drop page builder that helps you build your website’s pages easily.
You will be taken to the collection of sample sites page where you can find a variety of website designs. You can choose any website that you like to import for your website.
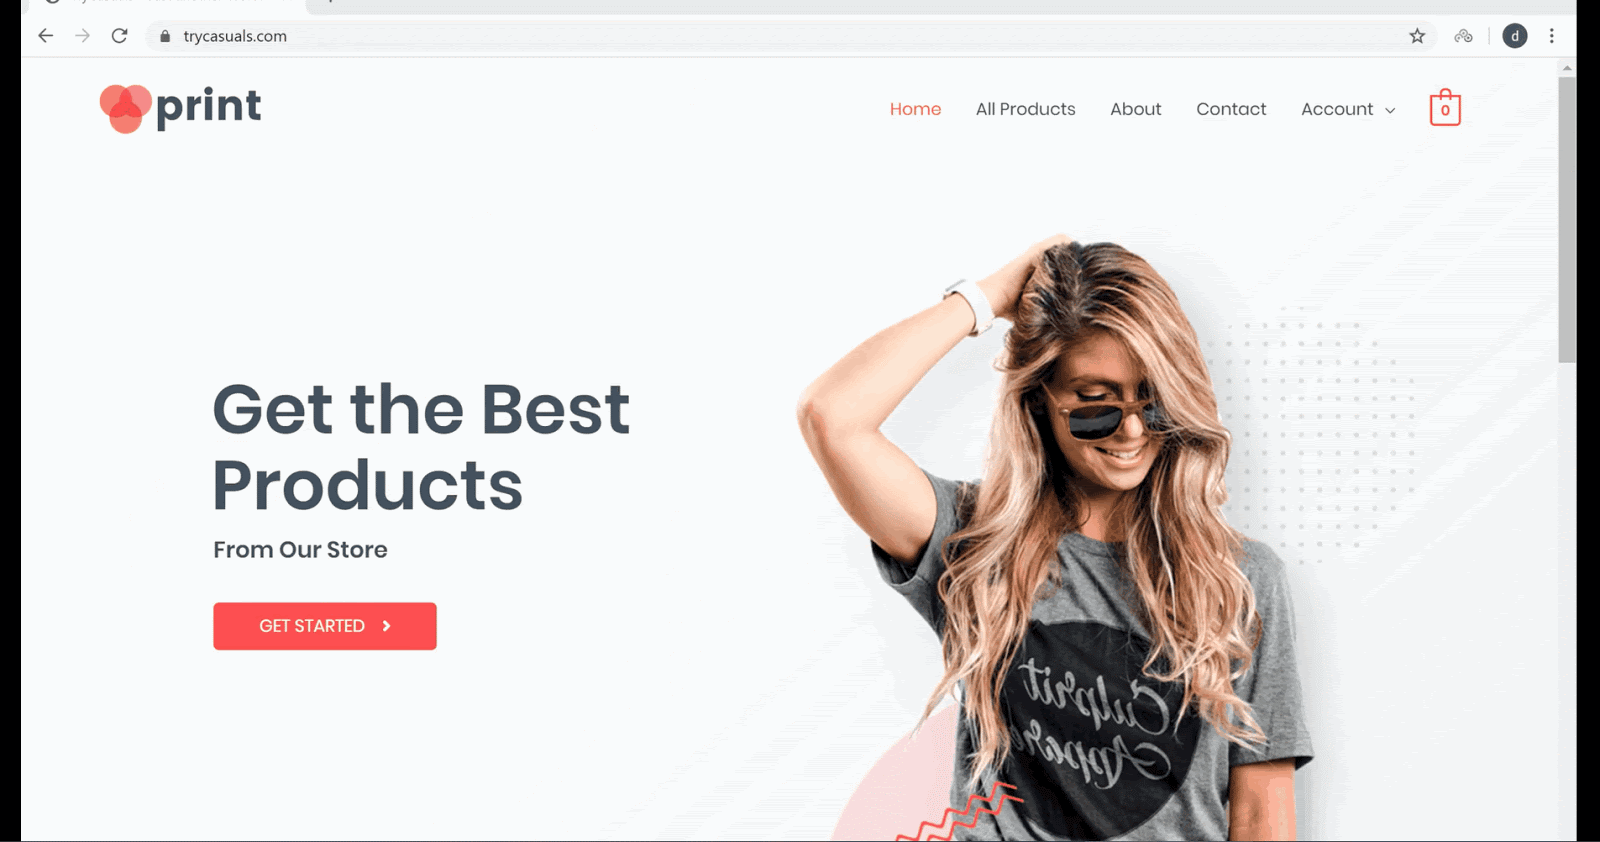
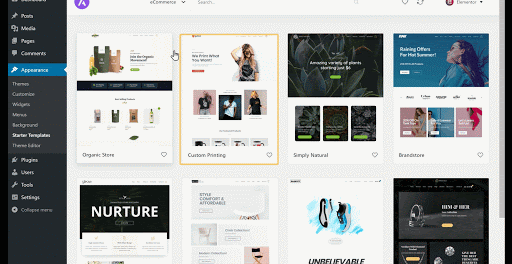
To import an eCommerce website click on All & choose eCommerce. This will help you choose only eCommerce website designs.
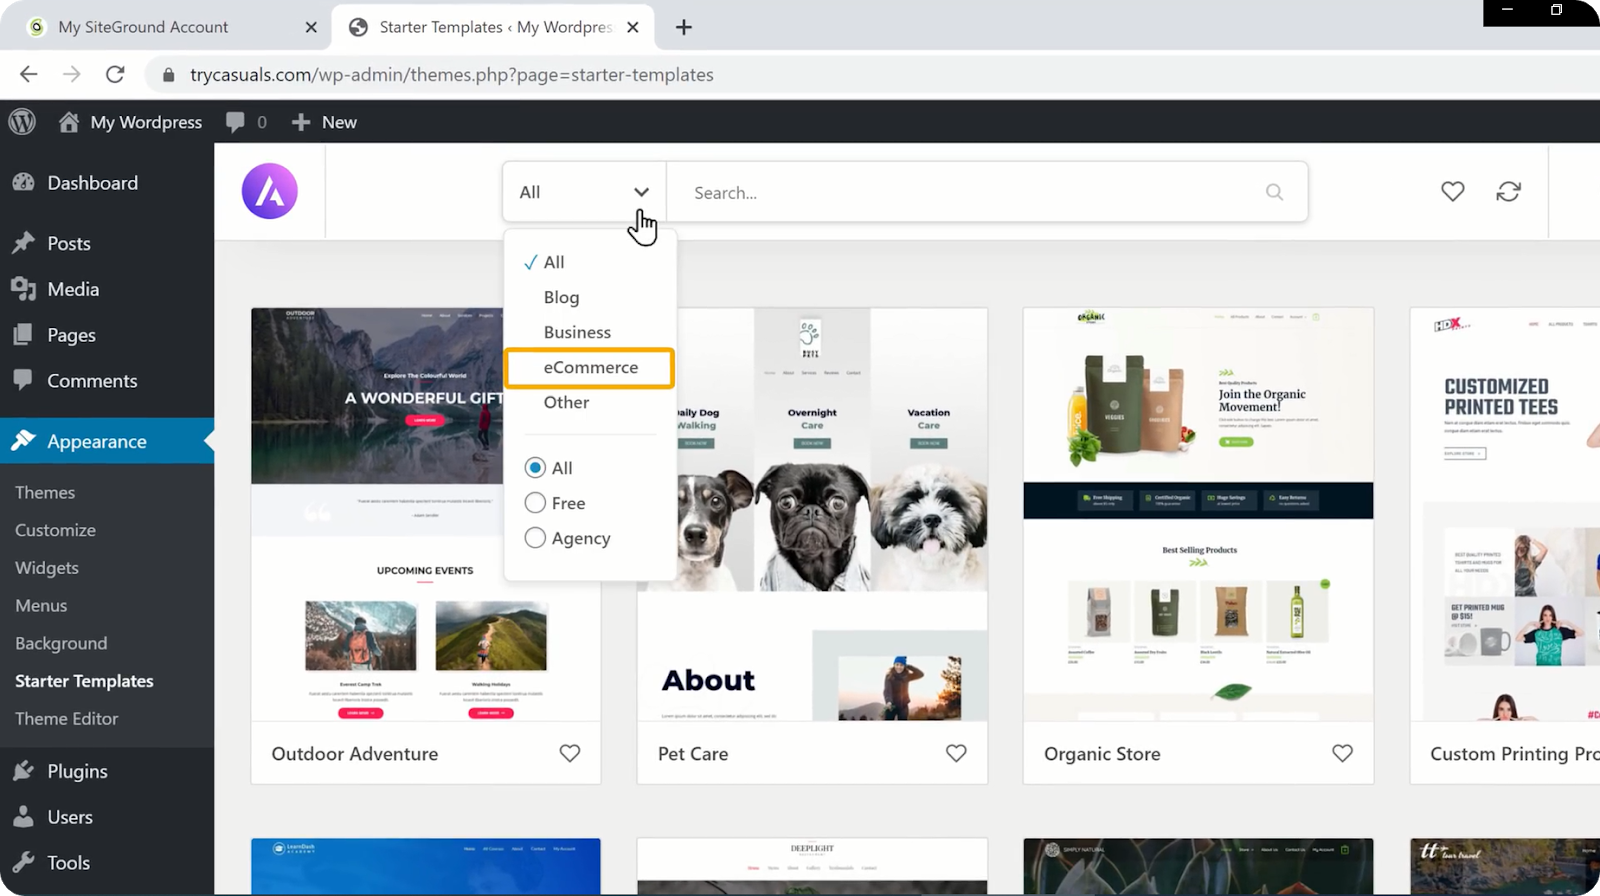
Click on a site that you like and it will give you a preview of how your site looks. Click on Import Complete Site to change your site like the sample site.
Now select all options and click import.
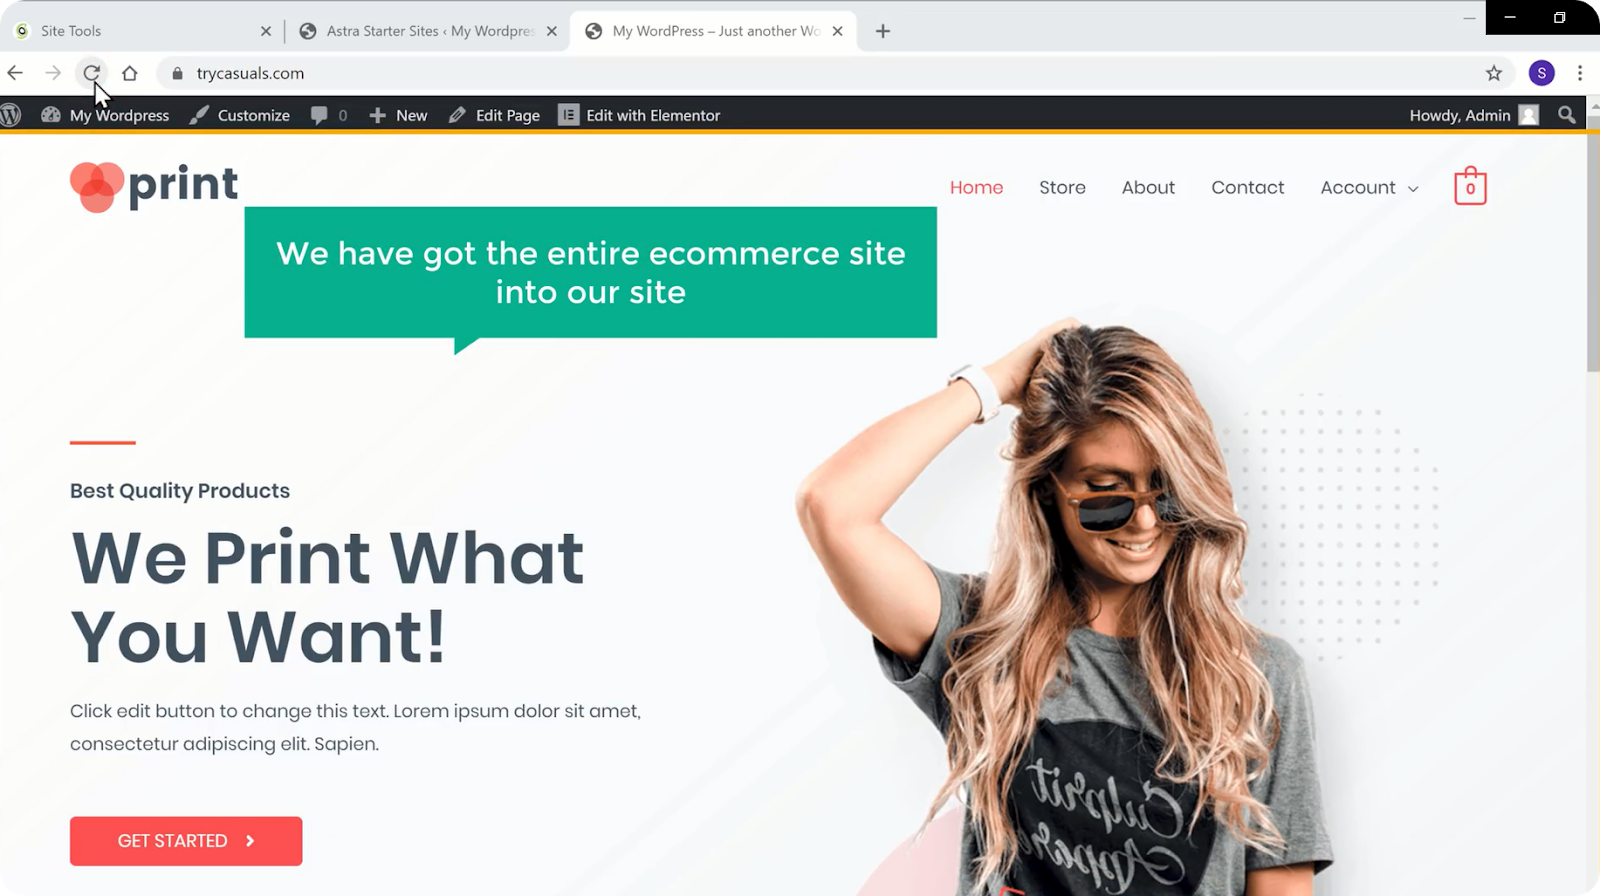
After the sample site is successfully imported click on view site to see your website’s new look.
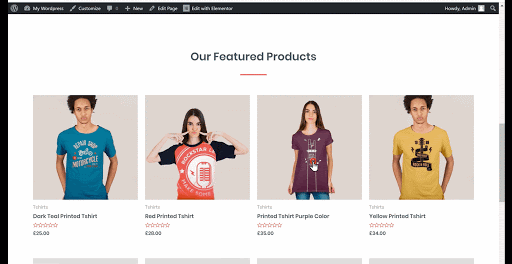
Now, let’s check how your site works. Click on a product & add it to the cart. Click on View Cart to see the items you’ve added & now you are able to proceed to checkout.
So, your site is a fully functional WordPress eCommerce website. Now, let’s go to the next part where you can develop your site’s functionality.
Have you seen your store? Is it full of sample products? And currency? Is it not like yours?
Don’t worry we will fix all these things in this part, in just 4 steps,
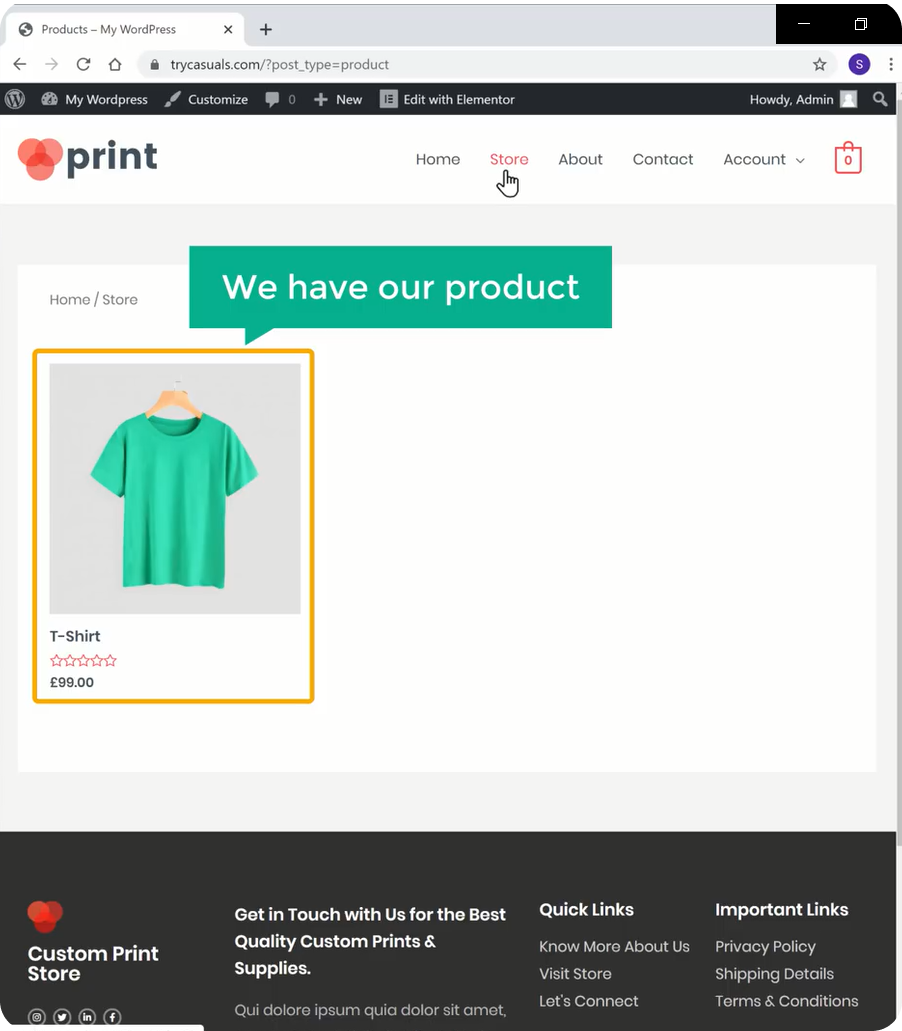
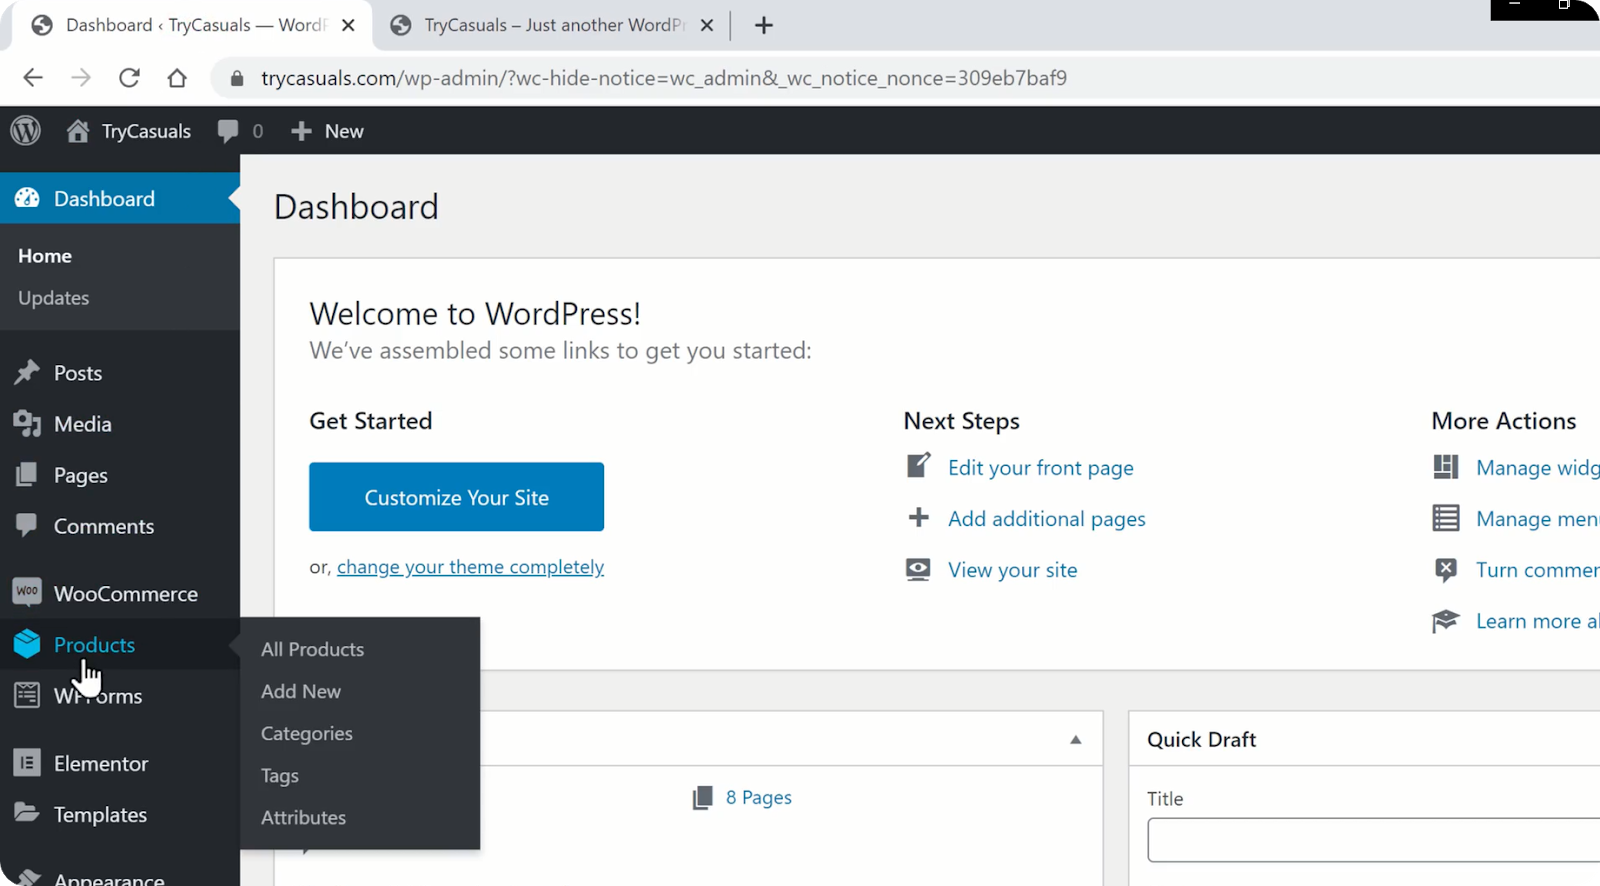
To delete the products, go to your dashboard & click on Products.
It will take you to the product section where you can see all the products that are listed in your store. If you want to delete all of them, select all & choose Move to Trash from the menu & then click apply.
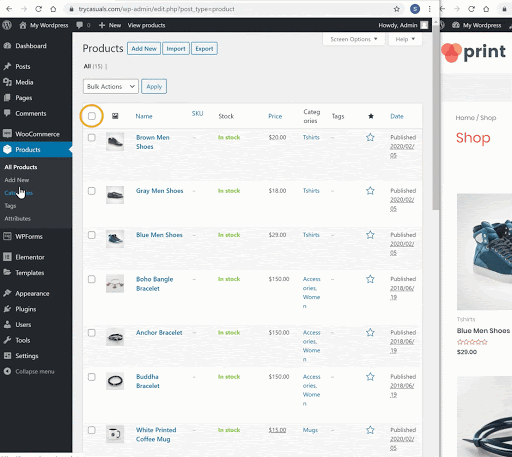
Once you’ve clicked apply, all your sample products get deleted. Check your store by refreshing it once.

Now, as you deleted the sample products, let’s see how you can add new products.
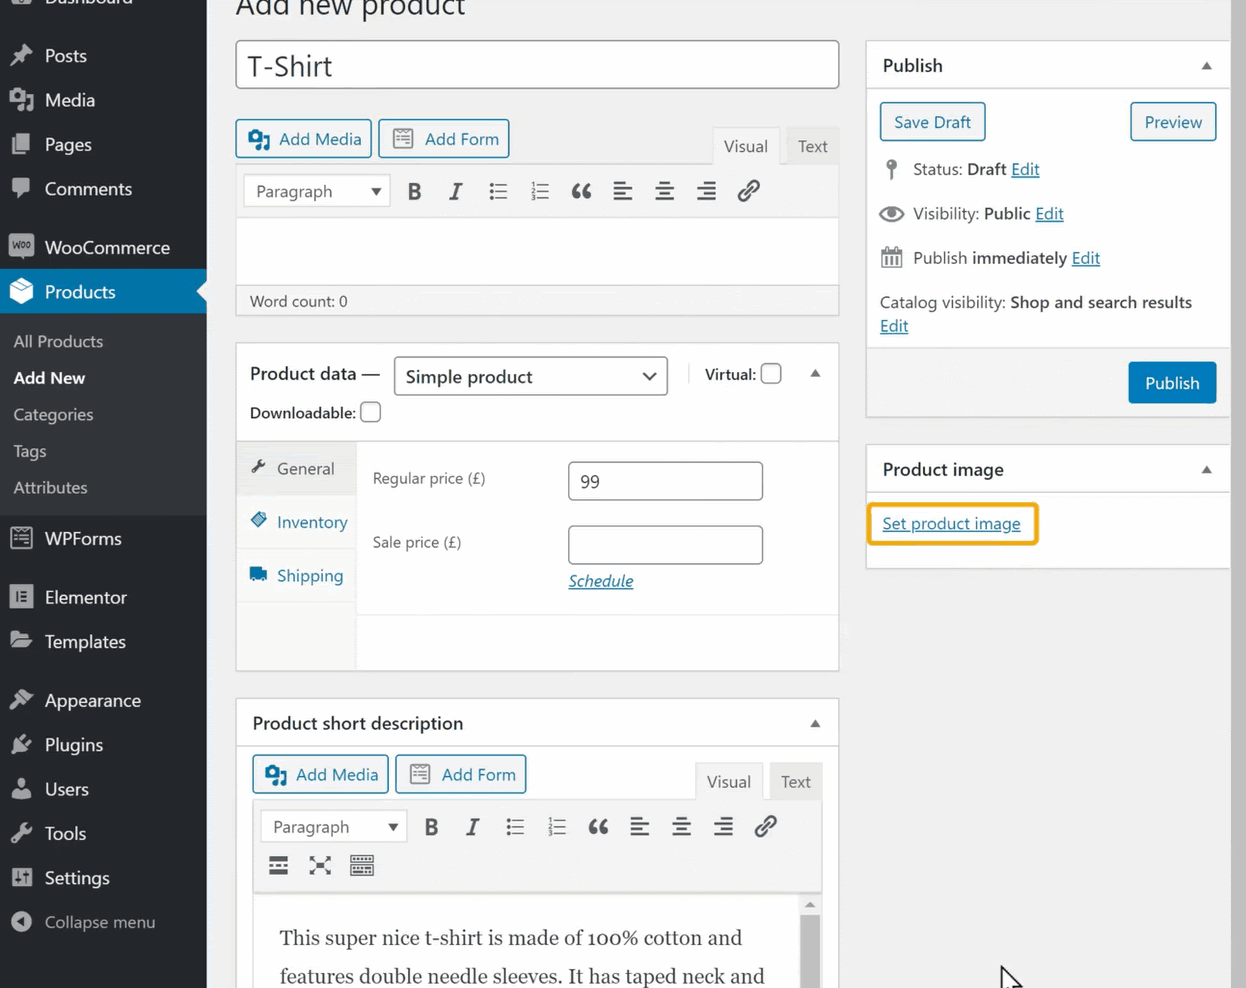
Adding a product to your website is a simple process. Click Add New in the products section.
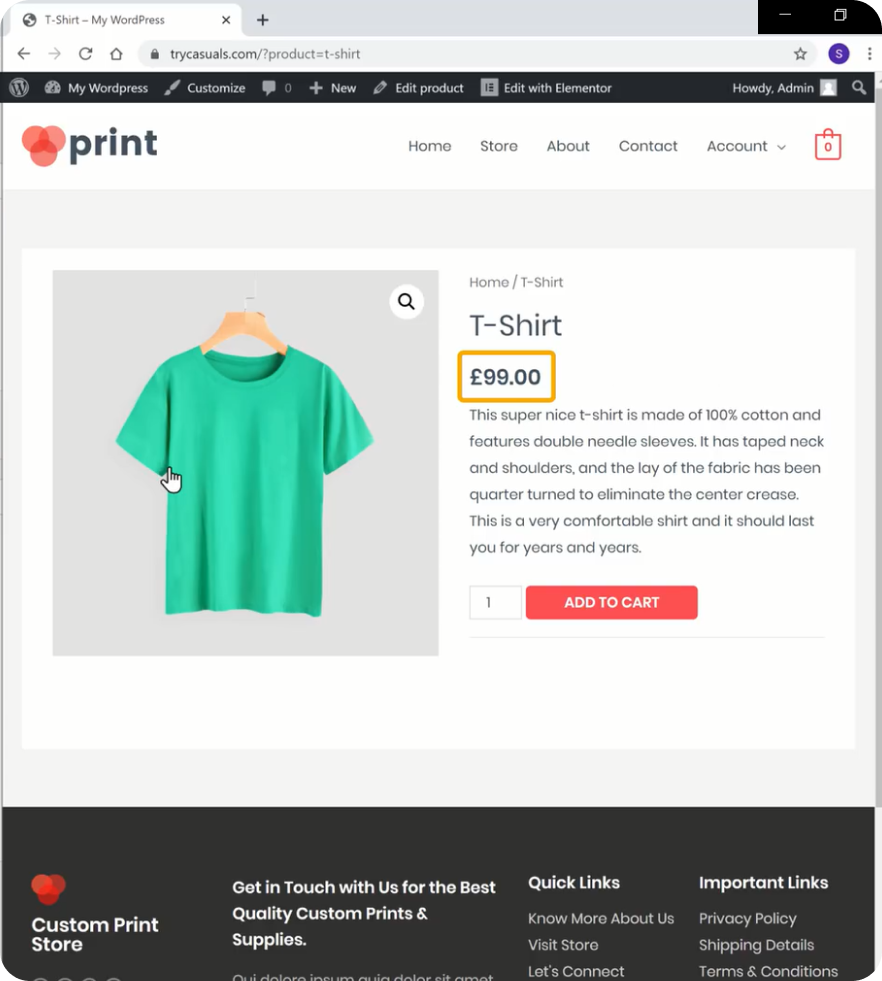
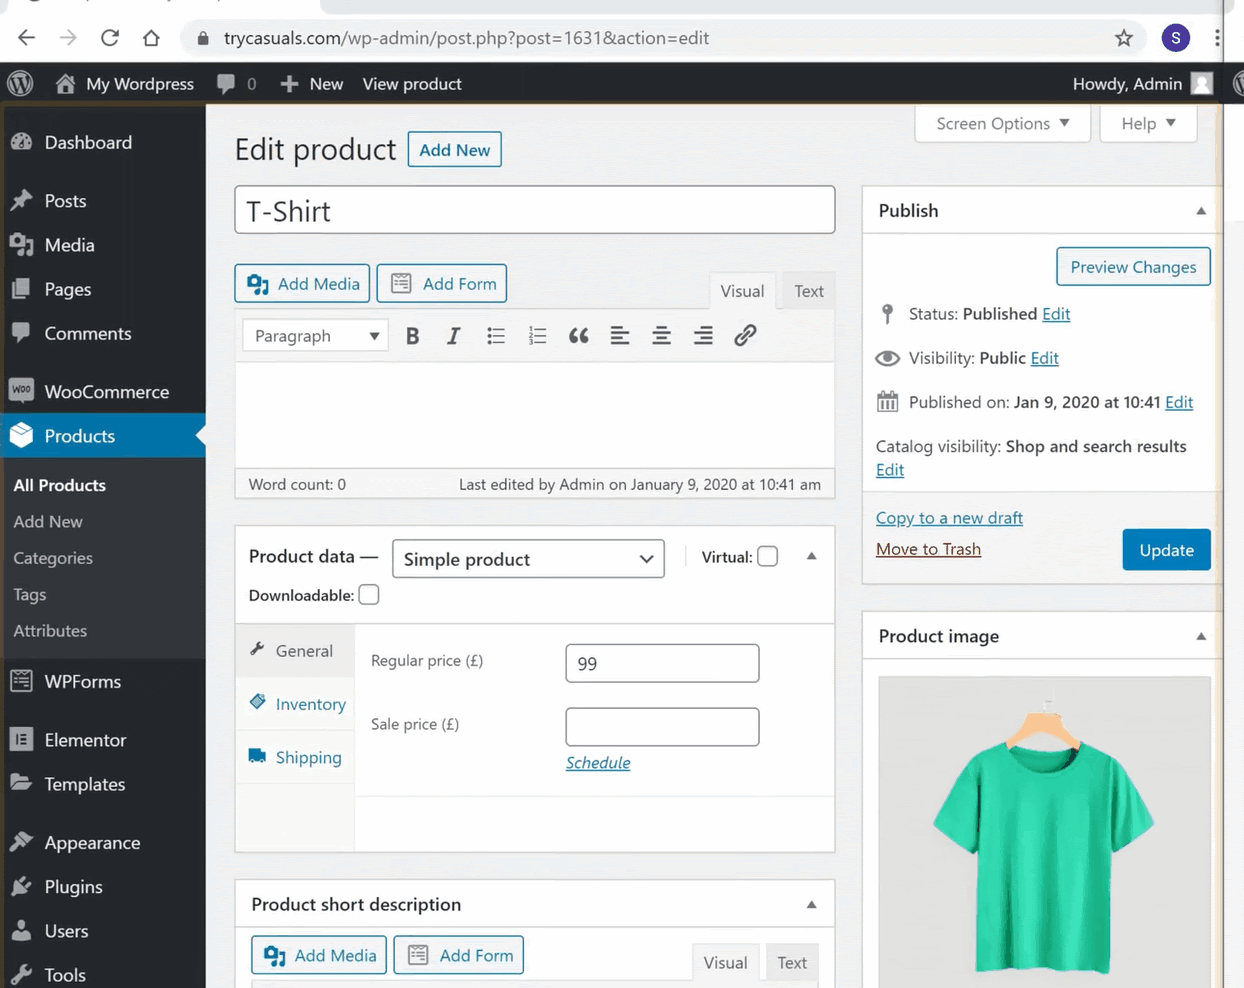
Here, you need to enter your product’s name, it’s price & a little description about the product.

Having an image for a product helps your customers see the product before purchasing it. So, you need to add a product image. To add an image for your product, click Set Product Image & drag your image here.
Once you’ve added all these details, click publish to add the product to your store.
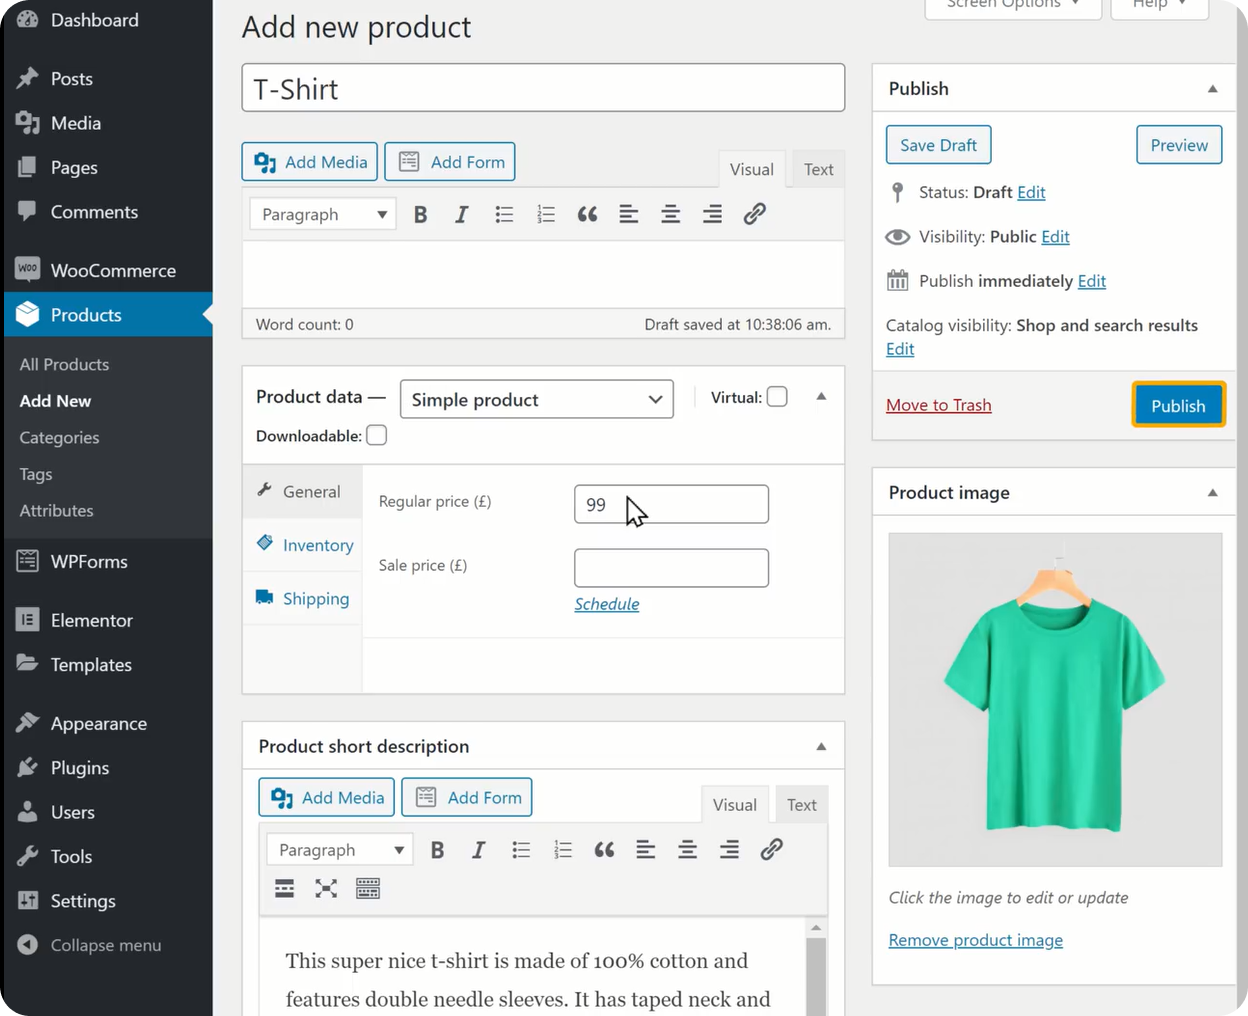
As you’ve added the product to your store, you can verify that by refreshing your store.
As you can see that the product had been added. If you want to add some other products, repeat the same process.
You can see the default currency on your product page. You can change your default currency to the preferred currency by changing currency options.
To change the currency go to your dashboard, and then go to Woocommerce & click on settings.
It will take you to the store’s settings page where you can change all your store’s settings.
Scroll down to the Currency options section & click on Currency & then select your currency. Once you’ve selected your currency click Save changes.
To verify whether your currency is changed or not, refresh your product page.
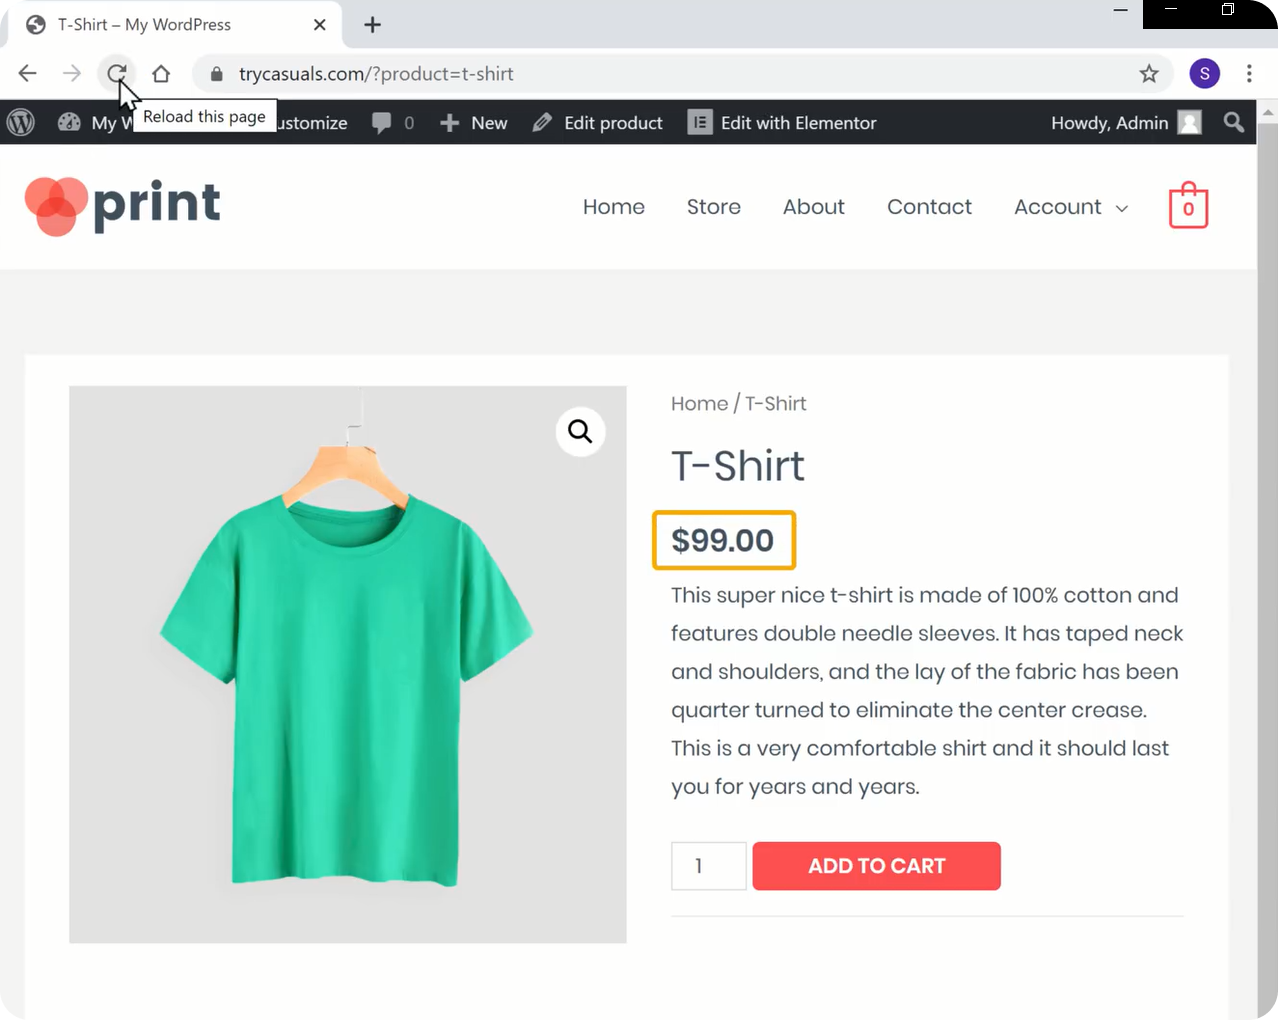
You can see that the currency has been changed.
Now let’s try to buy the product. To buy a product you need to add it to the cart, & click view cart & then click proceed to checkout.
You will be taken to the Payment page. Here, enter your billing details and select Place Order. You can see that it is showing that there are no payment methods available.
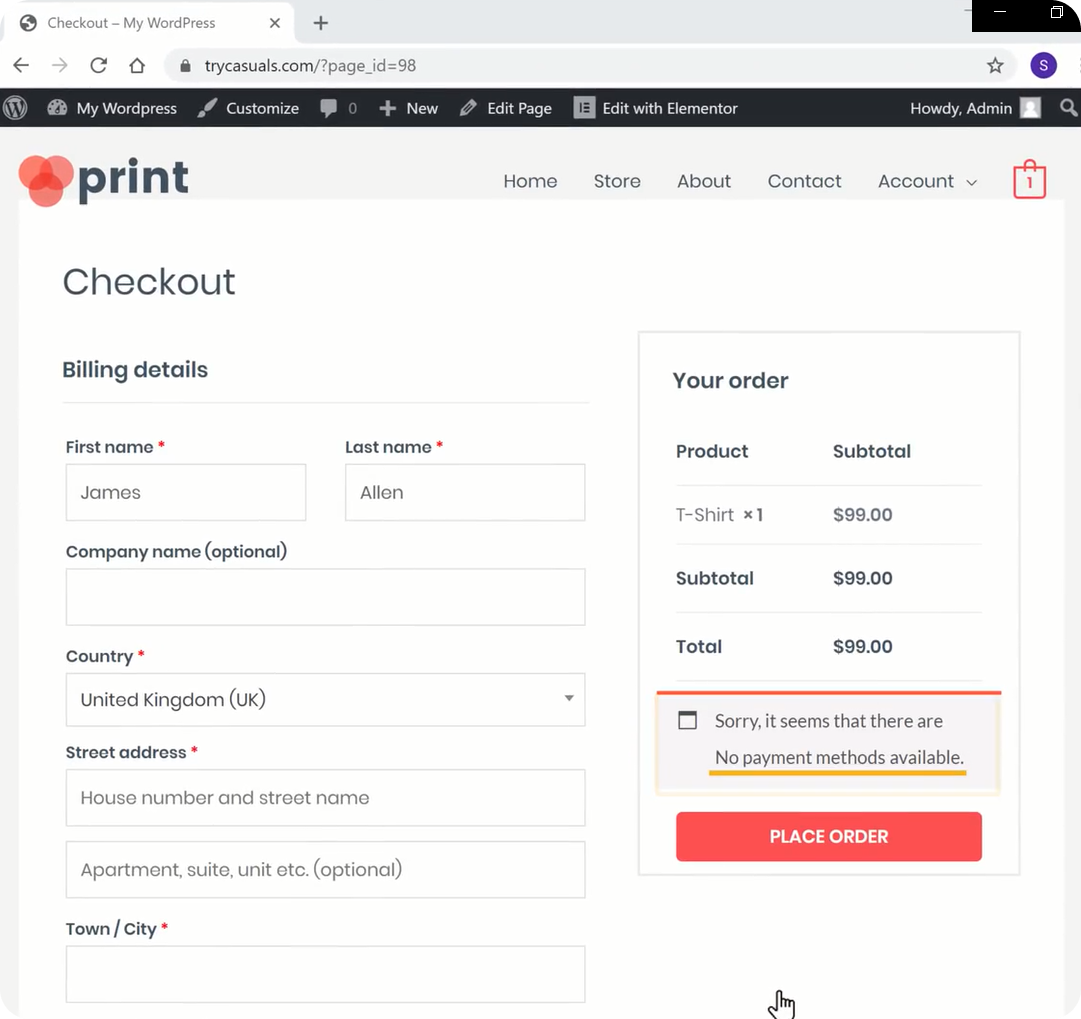
But, what is a payment method? Let us explain, the payment method is a way in which your visitors/customers pay for your products.
So let’s proceed to the next step where you can see how to add the payment method.
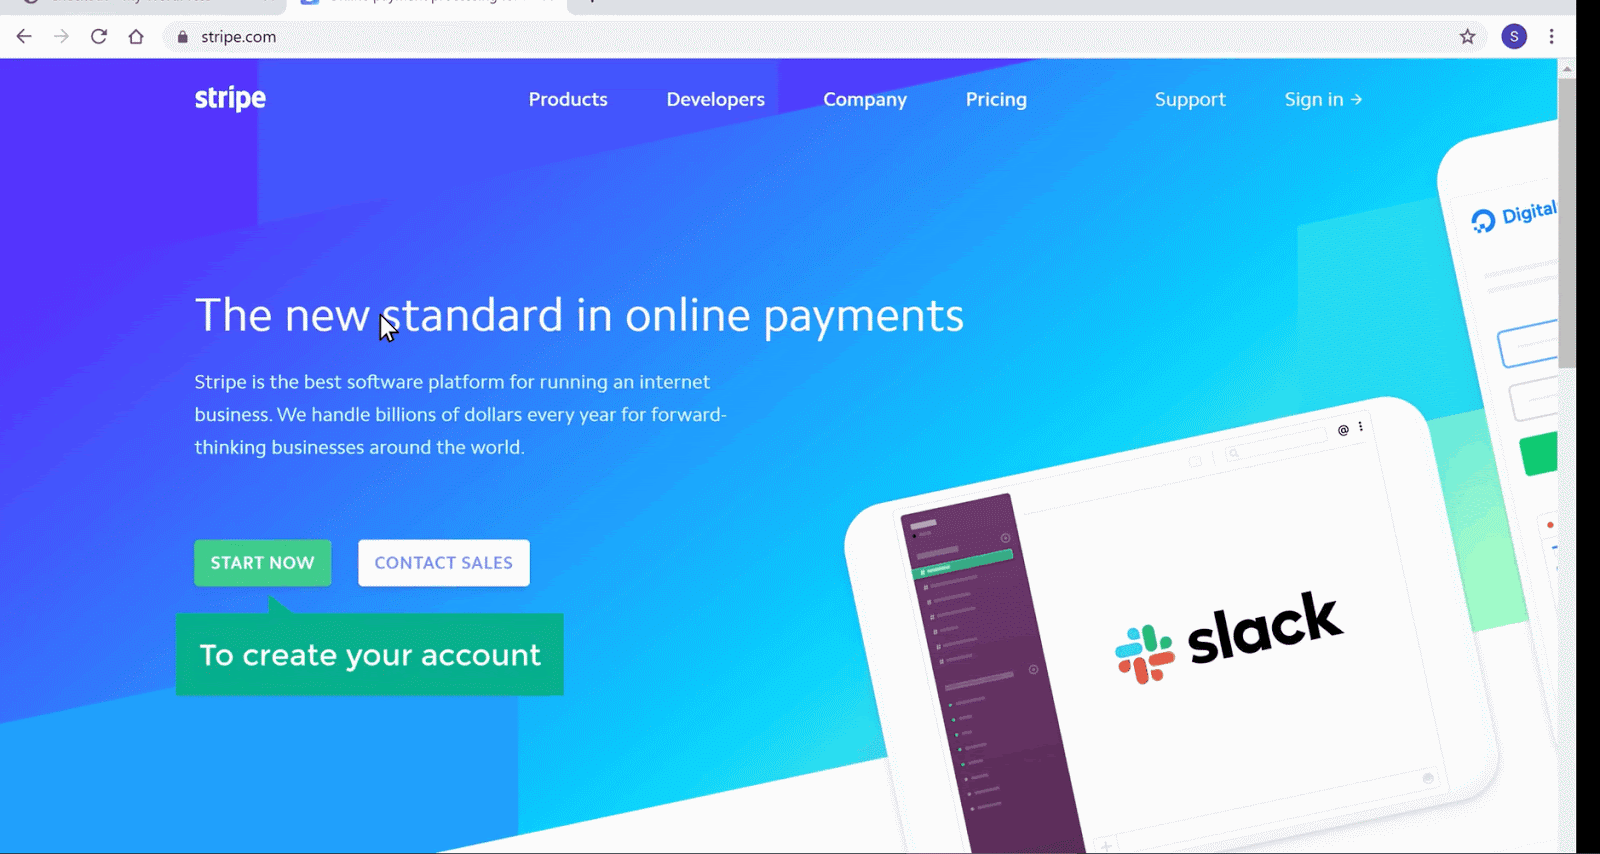
In order to set up your payment method, you need to create an account in Stripe. Stripe helps us to receive payments whenever your customer buys your products.
To create an account go to stripe.com & click start now.
Enter your details & click Create your Stripe account.
Once you’ve created your account, you need to activate your account to receive payments. Click on start to activate your account.
Here, enter your business details & then enter your bank details. Once you’ve entered all the details, your account is activated.
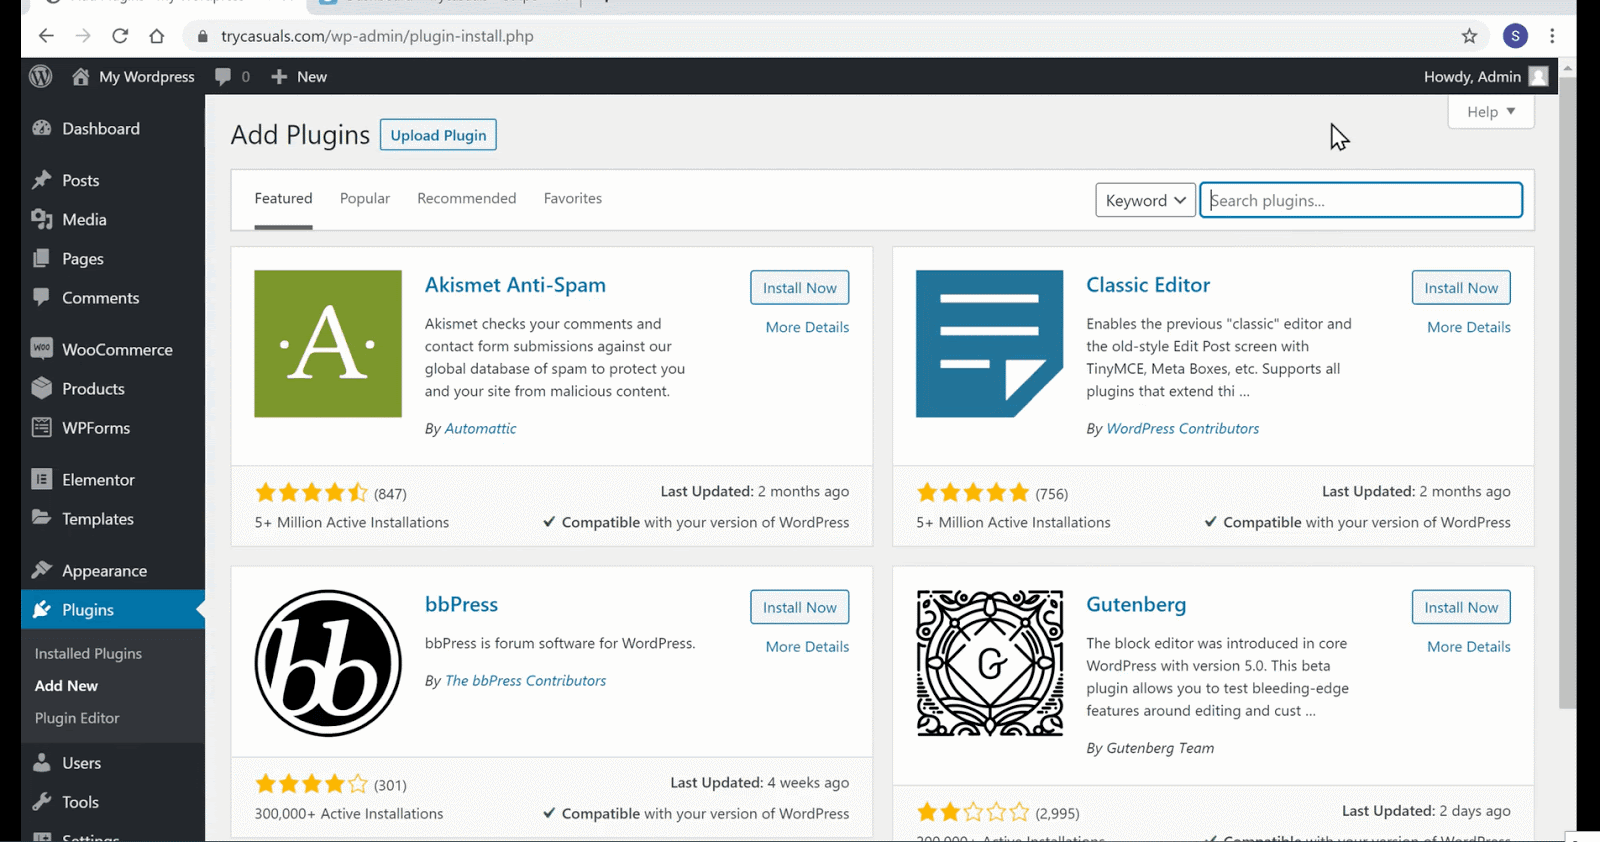
Now you need to connect your stripe to your website so that your customer/visitor can pay for your product. Now, you need to install Stripe for the WooCommerce plugin. To do that, go back to your admin dashboard. Go to plugins & click on add new.
You will be taken to the plugins page, search for Stripe For WooCommerce here. Once the plugin is displayed, click install & activate it.
Once you’ve activated it, click settings. Here, you need to paste the API keys from your stripe account.
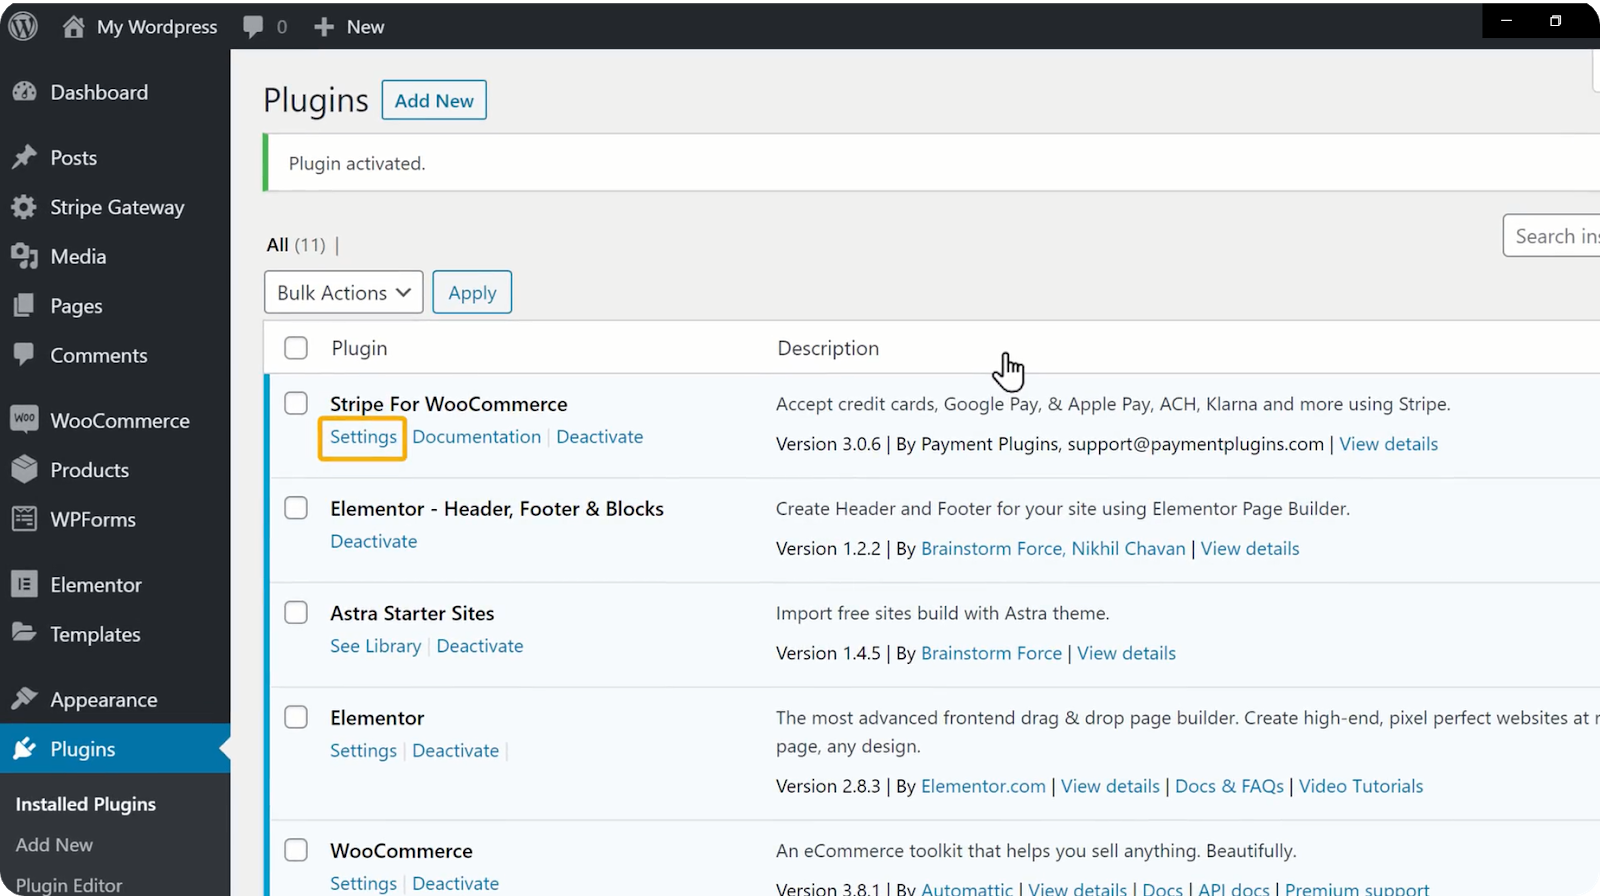
To copy the API keys, go back to your Stripe account & click on the API keys one by one. Once you’ve clicked the keys, it will be copied automatically. You can now paste the keys here & click save changes.
The moment when you click save changes, your stripe account gets connected to the website.
So all set for purchase. Now, try buying a product from your store just like your customer buys a product from your site.
Go to your store & click on the product that you want to buy. It will take you to the product page. Now click Add to cart & then click on View Cart to see the products that you’ve added to your cart.
Click on proceed to checkout. It will take you to the payments page. You have noticed something new, haven’t you? Yeah, your payment method is successfully connected to your website. Now, enter your address, card details & click place order.
Upon successful payment, your order is confirmed. This is how your customers buy products from your site.
Are you worried about how to know if someone places an order from your website? Don’t worry, Let’s see how we will know when someone places an order.
When someone places an order, you will receive two emails to your email(that you have used for creating this website) one from WordPress & the other from Stripe like this.
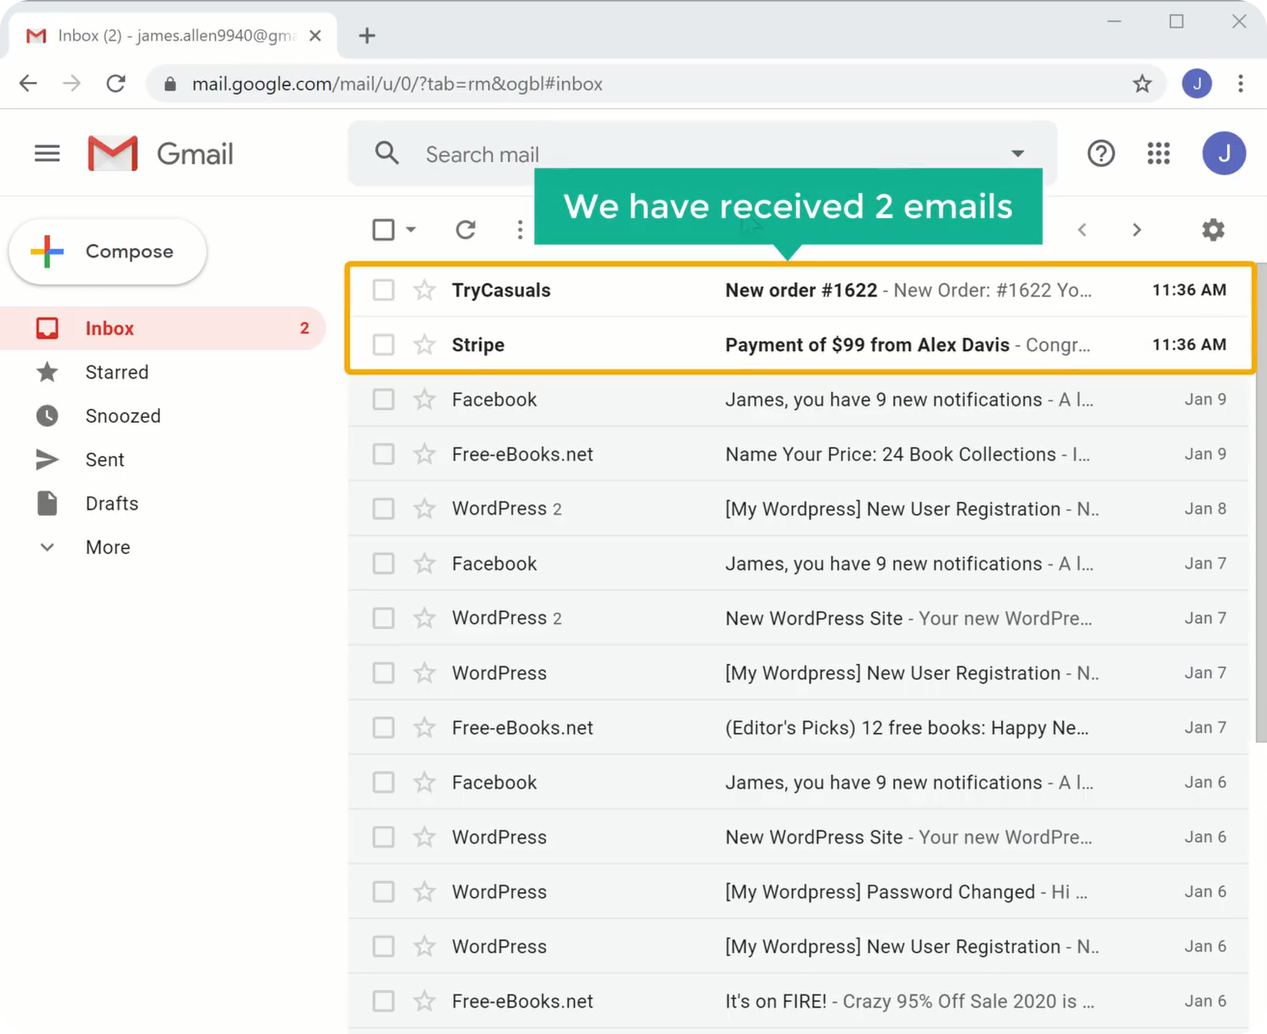
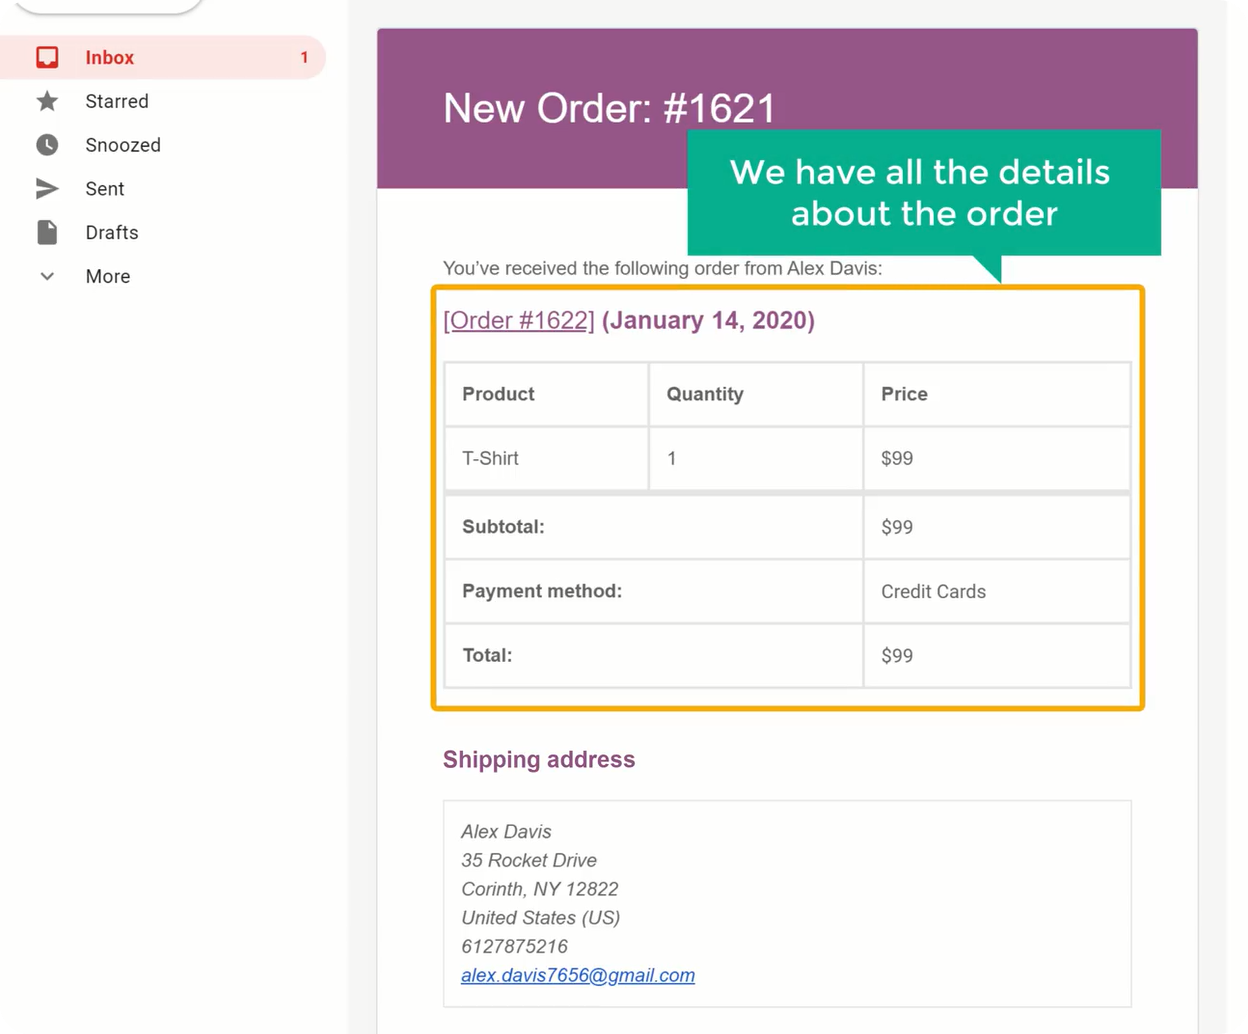
Now open your email inbox & open the email that you’ve received from WordPress. You can see that you’ve received all the details about the order.
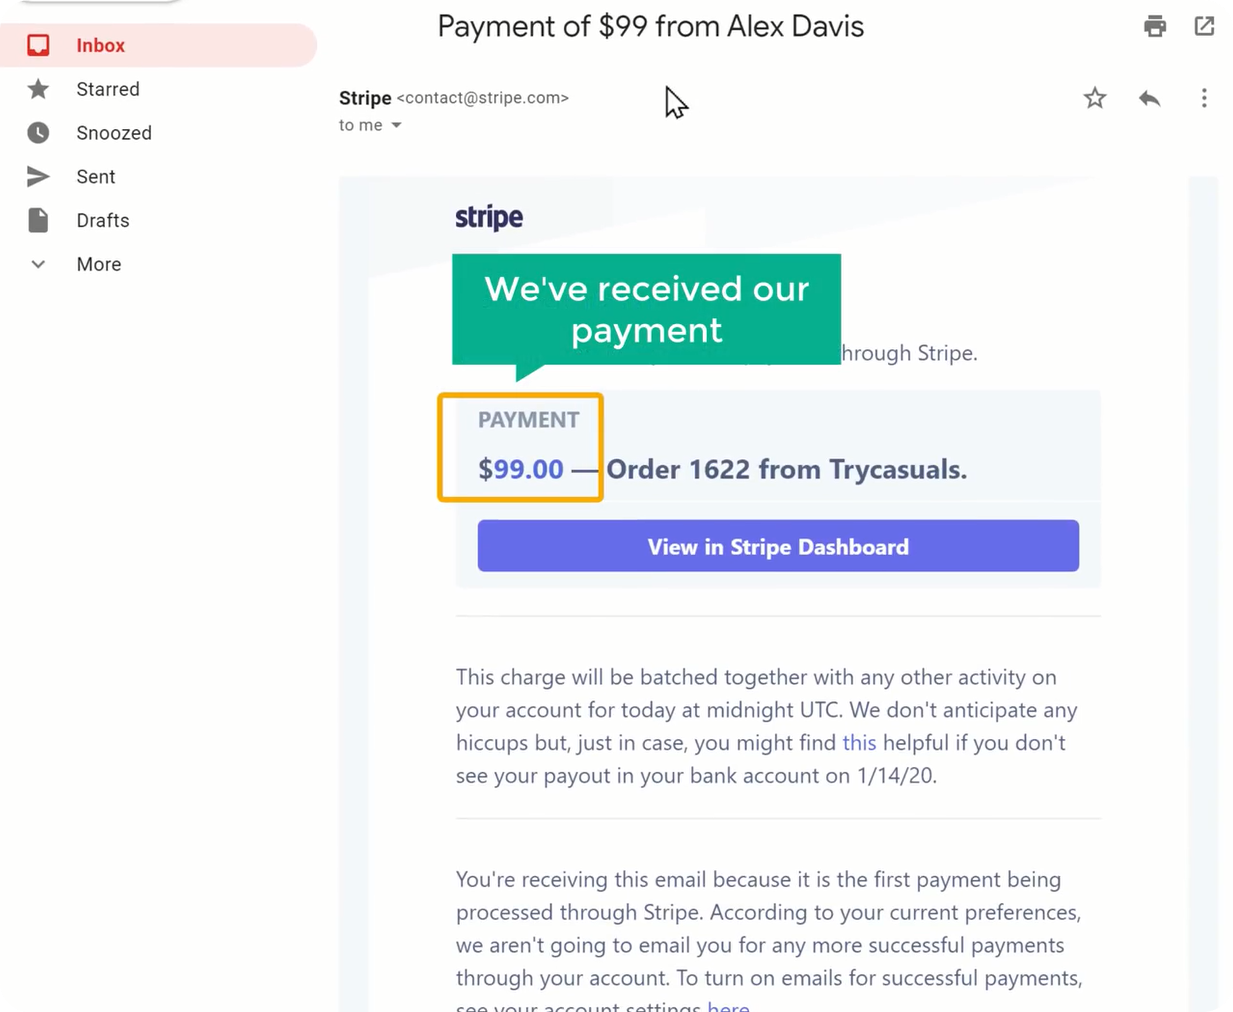
Now, open the other that you’ve received from Stripe. Here you can see the details about payment.
This is how you know when anyone purchases a product from your site. After receiving these two emails, you can start delivering your product.
Now you’ve seen how you know when a customer buys a product, but how your customers can track the product after they’ve purchased from you. So let’s see how your customers can track their products.
After they purchase a product, they’ll receive two emails to their email one with the order details & the other with their account details.
Now open your email inbox & open the first email that you’ve received from WordPress.
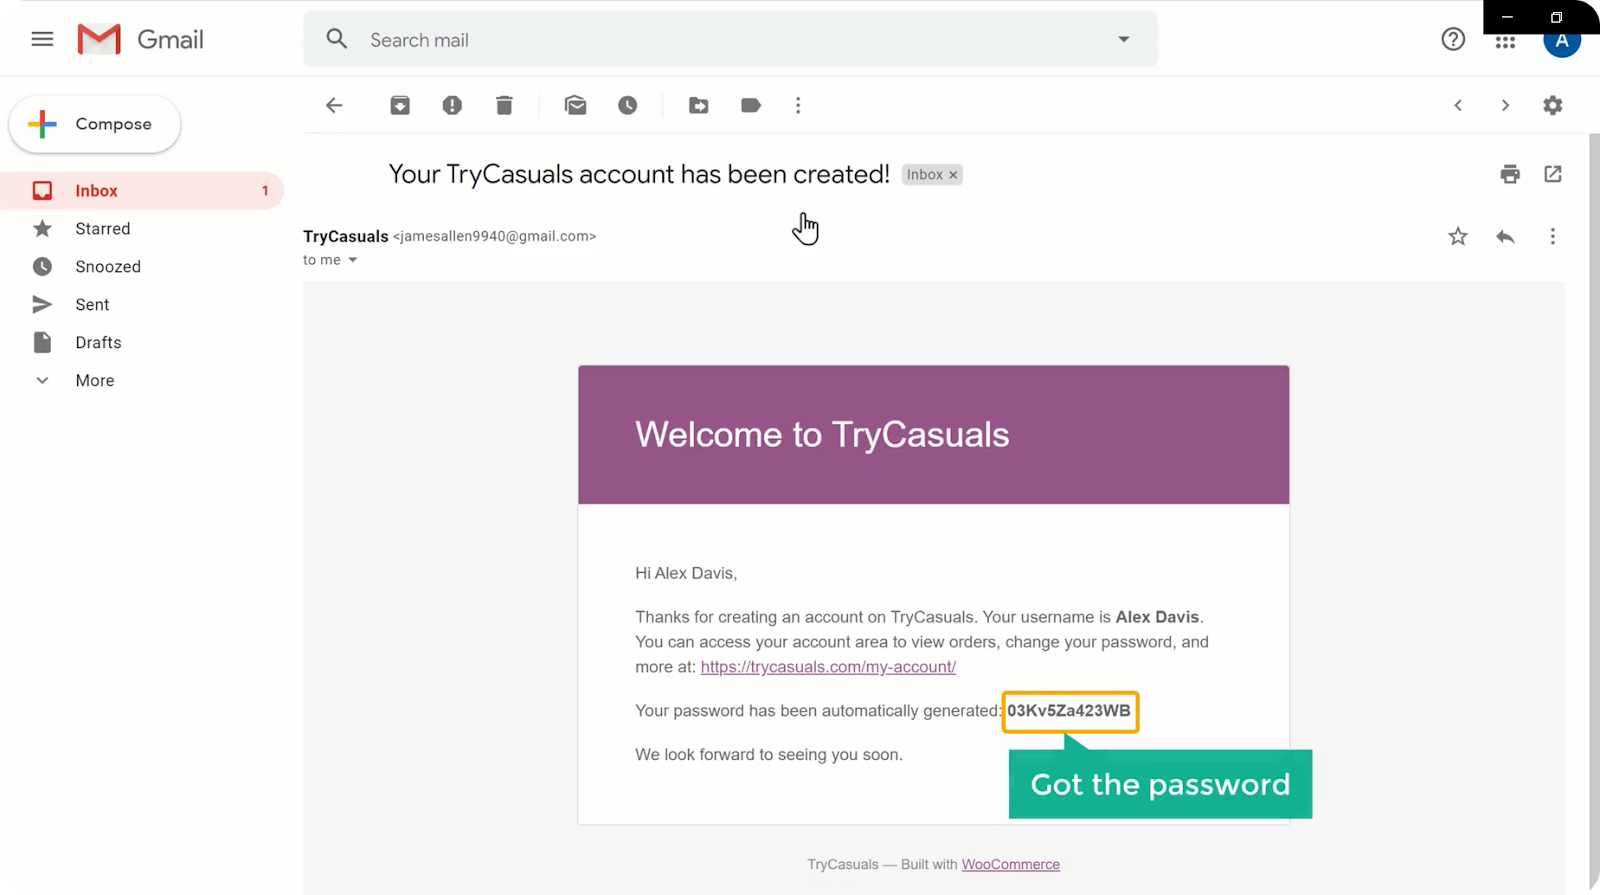
You can see that there is a password given to your customer. If your customer wants to login back to your website, they can go to your site & click my account. Now they need to enter their email address & the password that they’ve received through email.
It will take them to the orders page. This is the place where they can get tracking information about their orders.
If they want to add/edit their addresses, they can do that by going to the addresses option present on the left side.
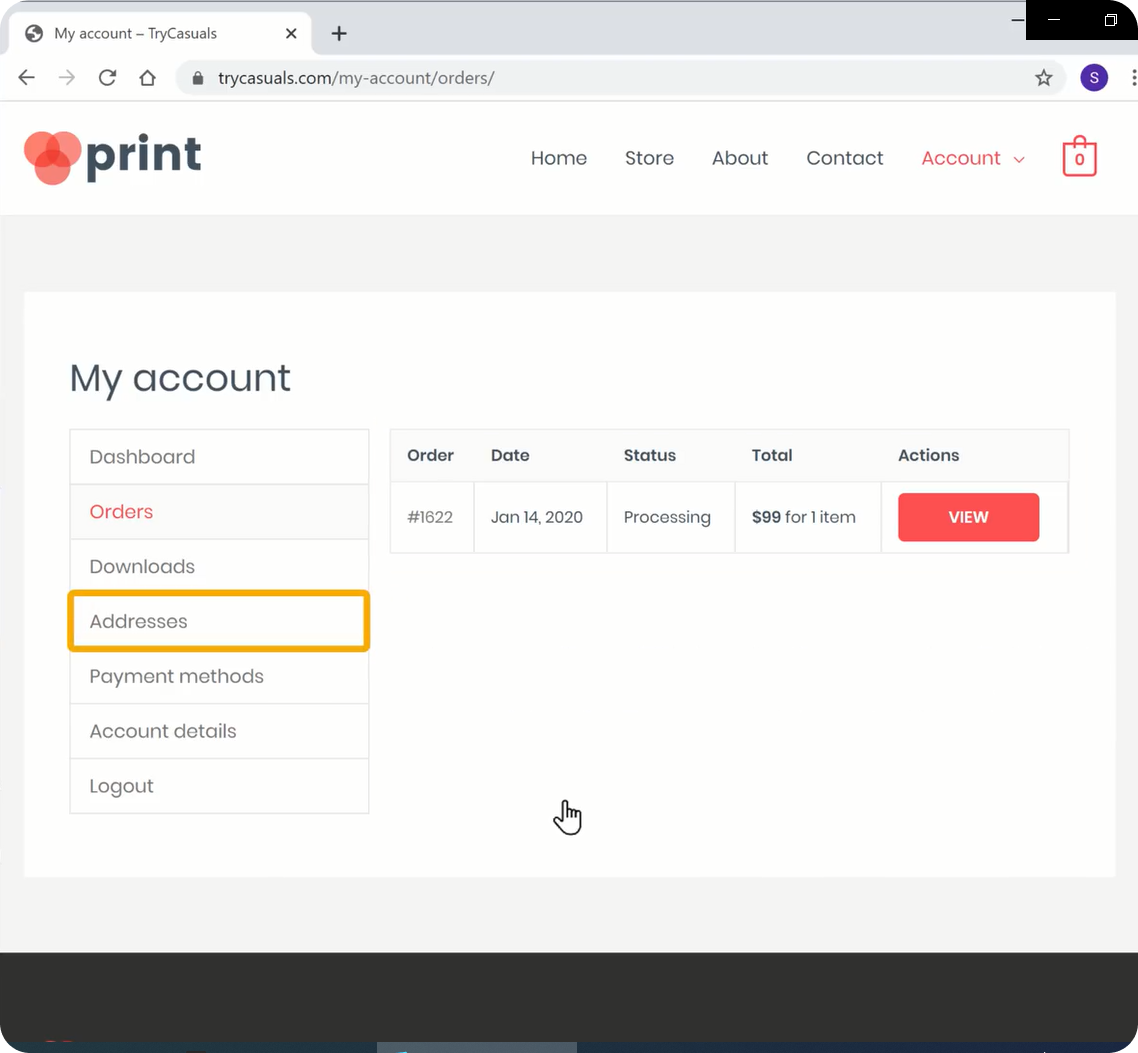
This is how your customers can track their orders & update their account details if they want.
Now you’ve successfully finished setting up your store with a payment method.
Do you feel that your website doesn’t look good? No worries, we can change the look of your website so easily.
So let’s go to the next part, where we change the look of your website.
As already said, Elementor is a drag-and-drop page builder that helps you build your website’s pages easily. So let’s change the look of your website using Elementor. In this part, we are going to,
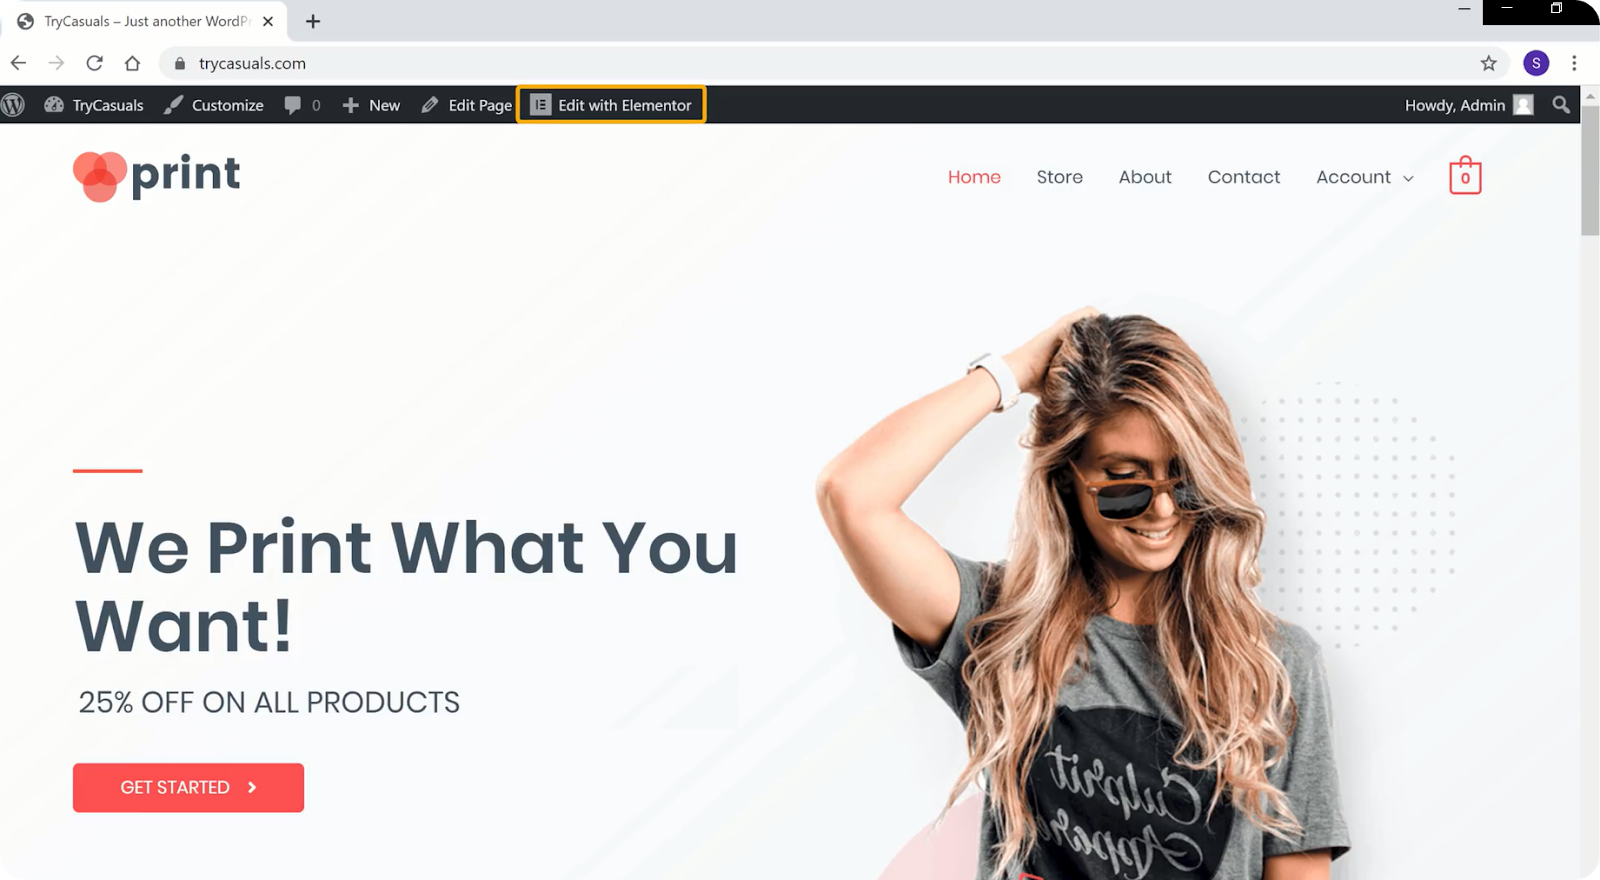
If you want to edit any page’s content using Elementor, just go to that page & click edit with Elementor.
You will be taken to the editing section where you can edit your page’s design. Now, if you want to edit the heading, you need to select the text. After selecting the text, start typing the text you want.

Similar to heading, if you want to change the text of the button, select the text & start typing. If you want to edit any text, repeat the same process.

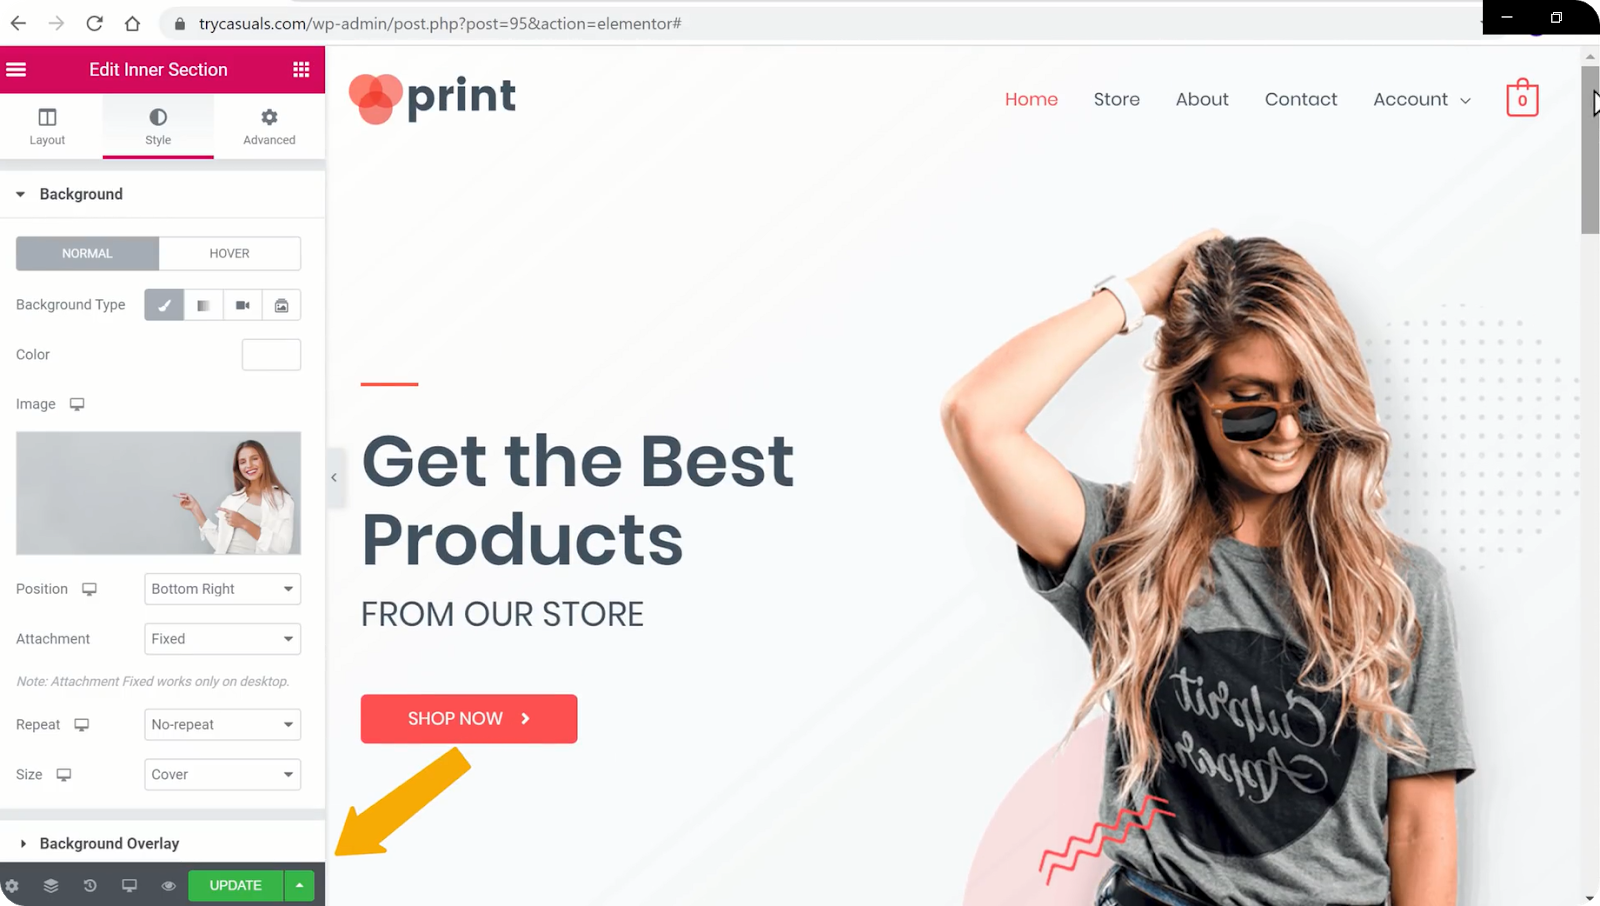
If you want to change any image, go to that image & click here. Now, click on the image in the left side panel & then drag & drop your image.
You can see that the image has been changed. Once you’ve made all the changes, click Update.
Now, let’s verify whether the changes have been updated or not? To do that, go to your site & refresh it.
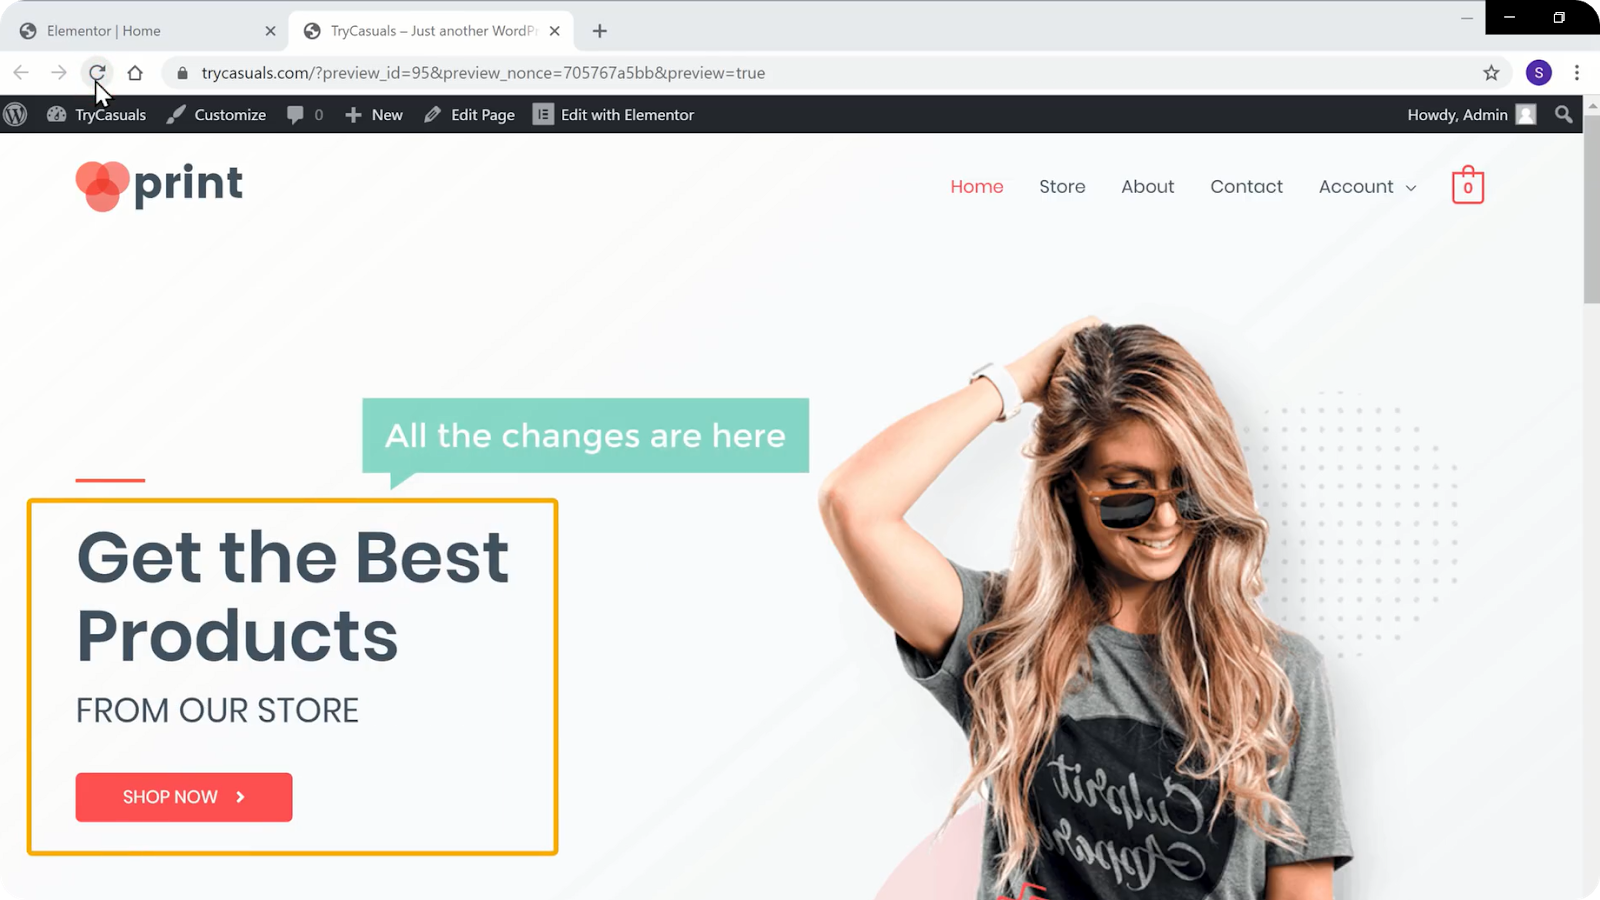
You can see that the changes have been updated. This is how you can edit any page’s content.
Now, if you scroll down your homepage, you can see that there are no products in the featured products section.
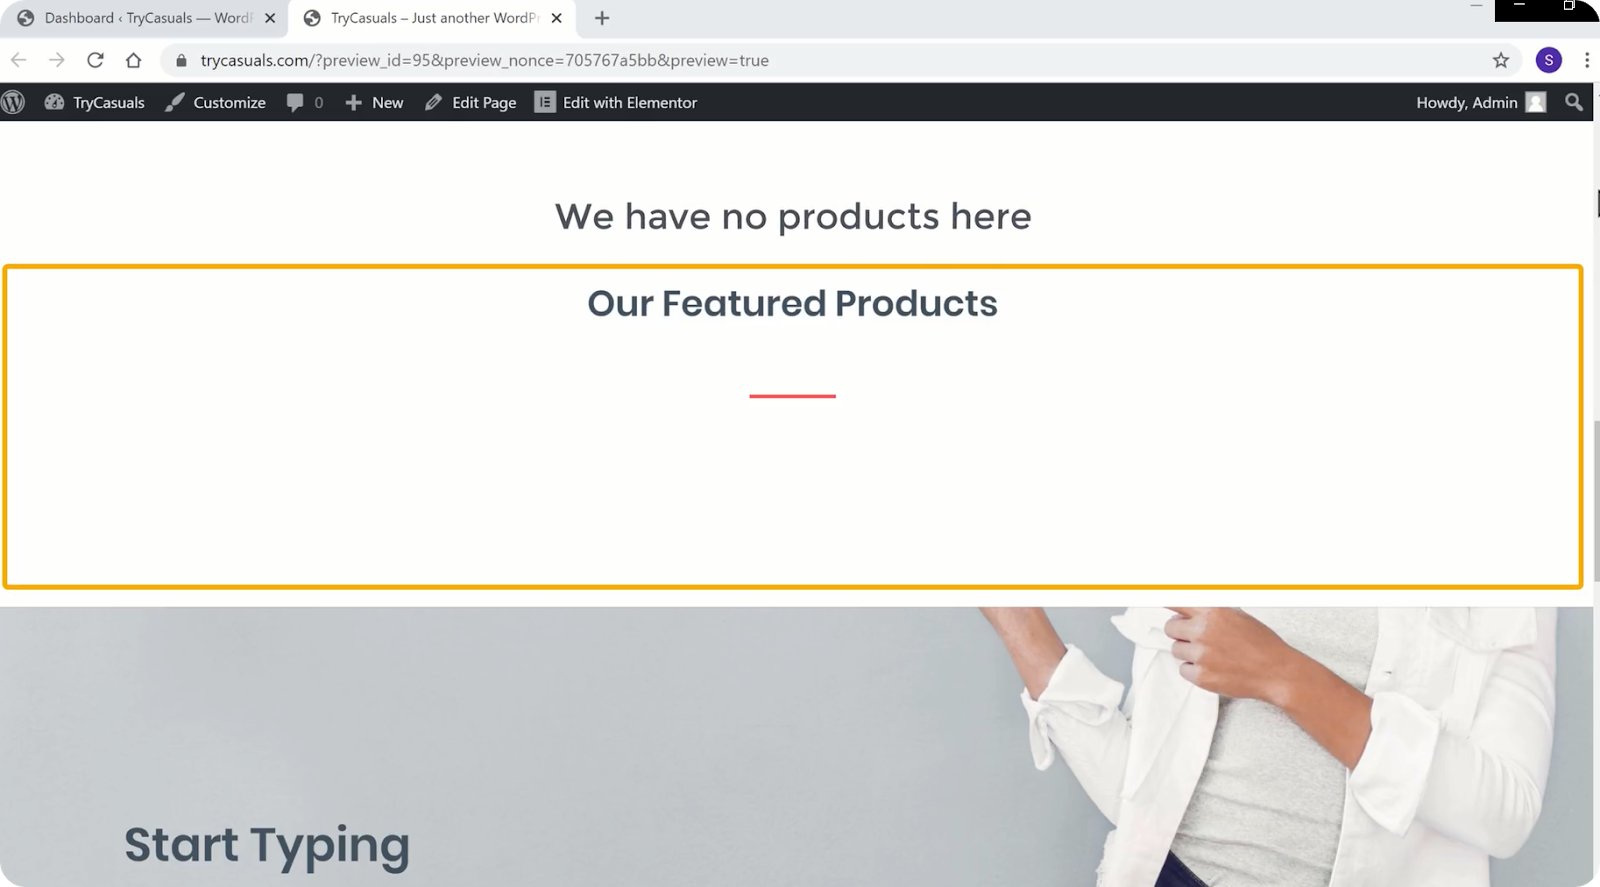
So, if you want to add products to your homepage, we can do that easily.
Let’s go into the next step where you can see how to add products to the homepage.
To add products to your homepage, go to the dashboard again & click products.
You will be taken to the products page where you can see the products that are present in your store. Here you can choose/select the products that you want to display on your homepage by clicking on the star icon next to it.
After clicking the star icon, the products will be automatically added to the homepage. To check that, go back to the site & click refresh.
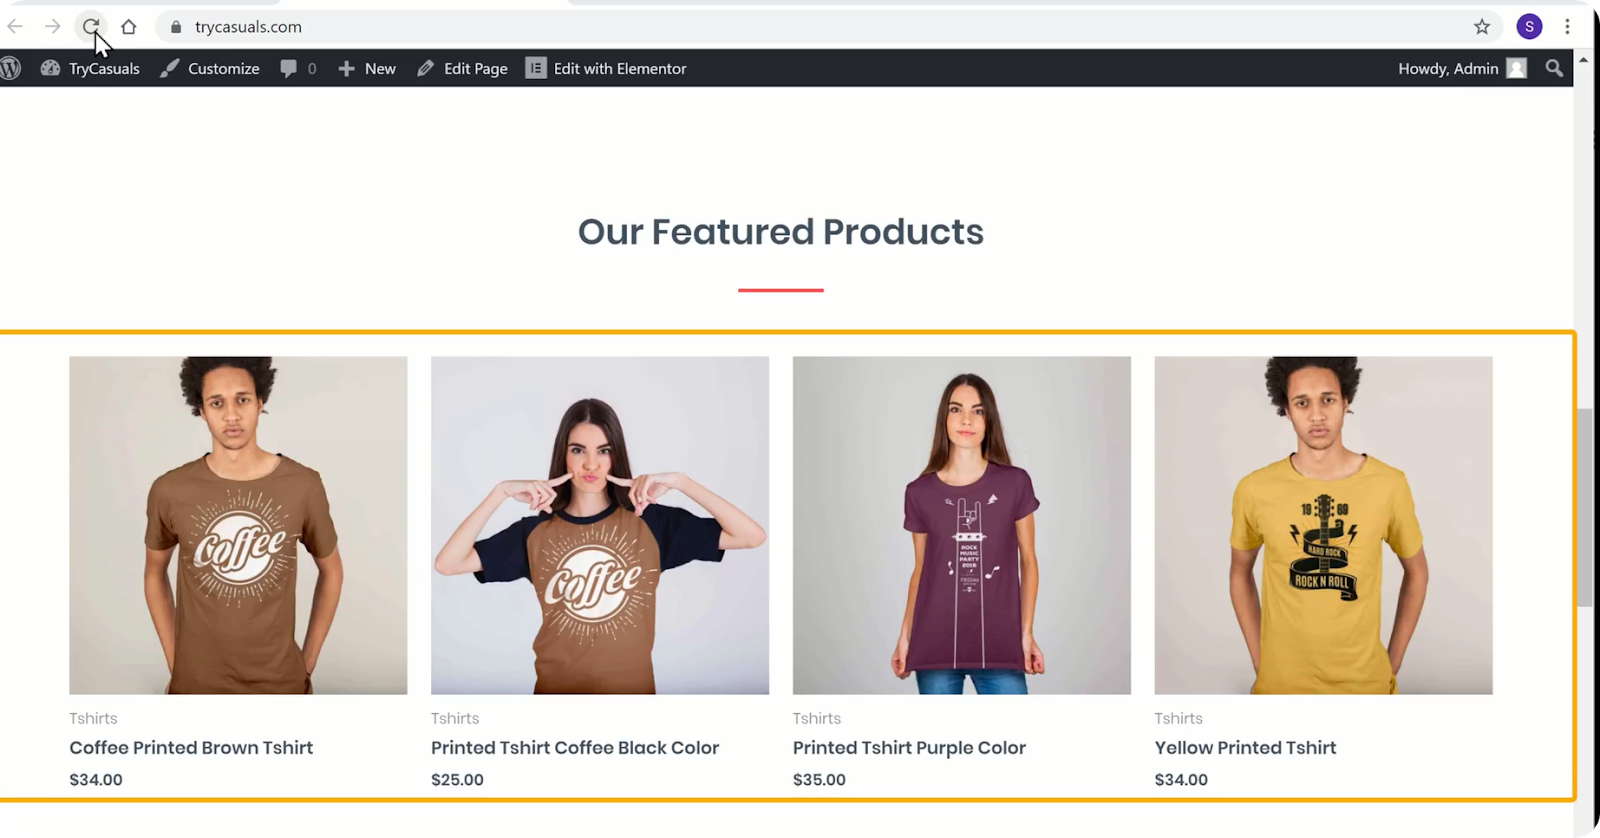
Now you can see that the products have been added to the homepage. This is how you can add products to the homepage.
Now that we have customized the website, we will now change your website’s logo.
To change the logo, you need to click customize.
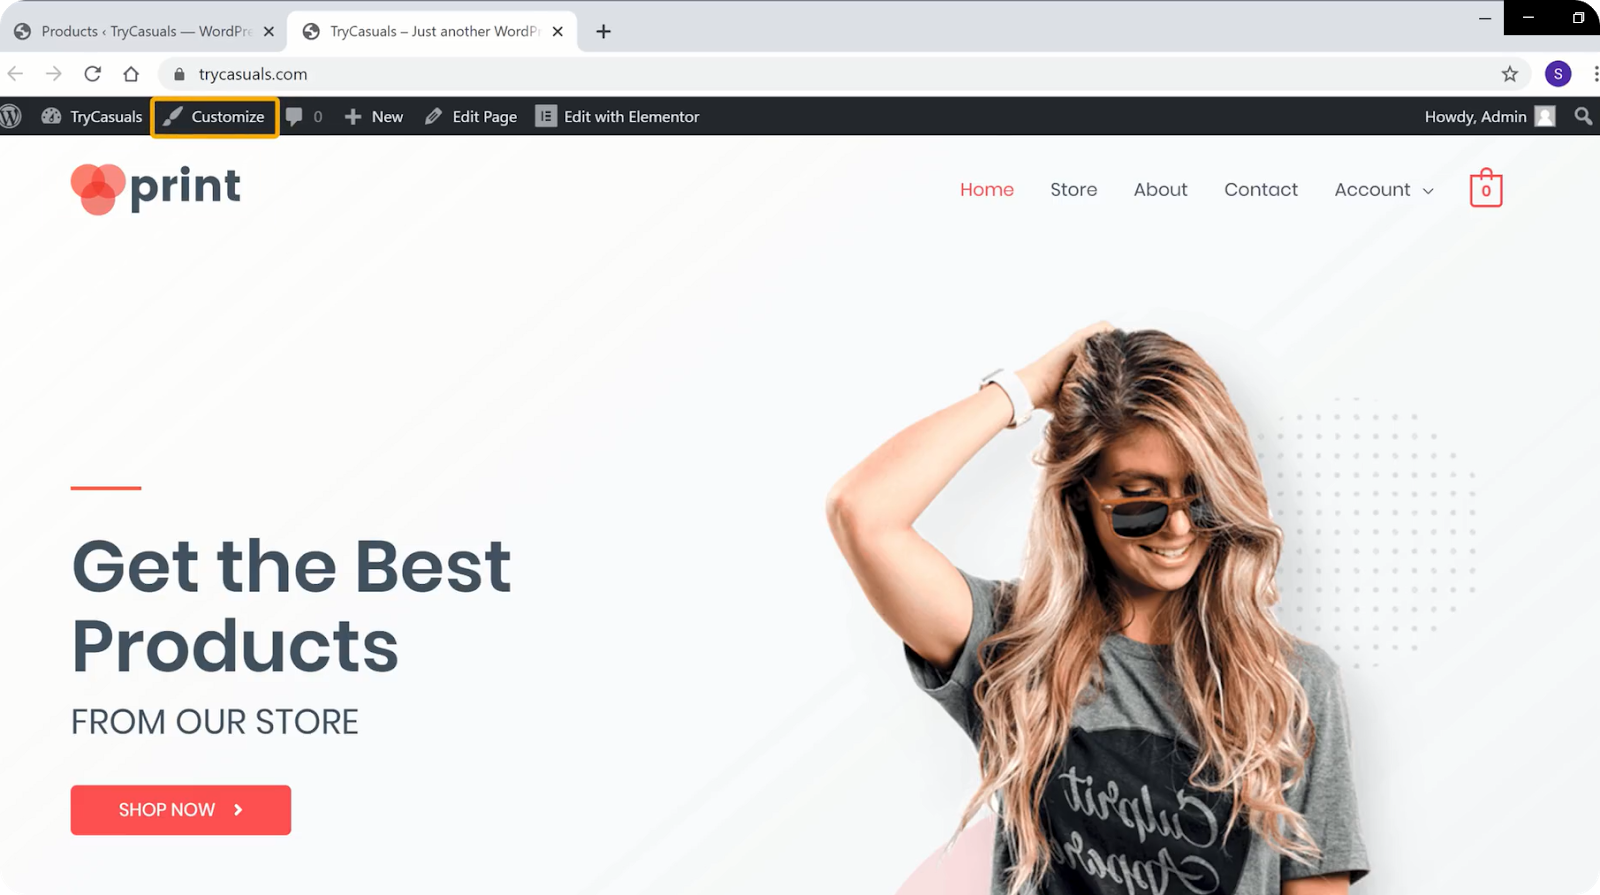
It will take you to the customizer section where you can edit your theme’s default settings.
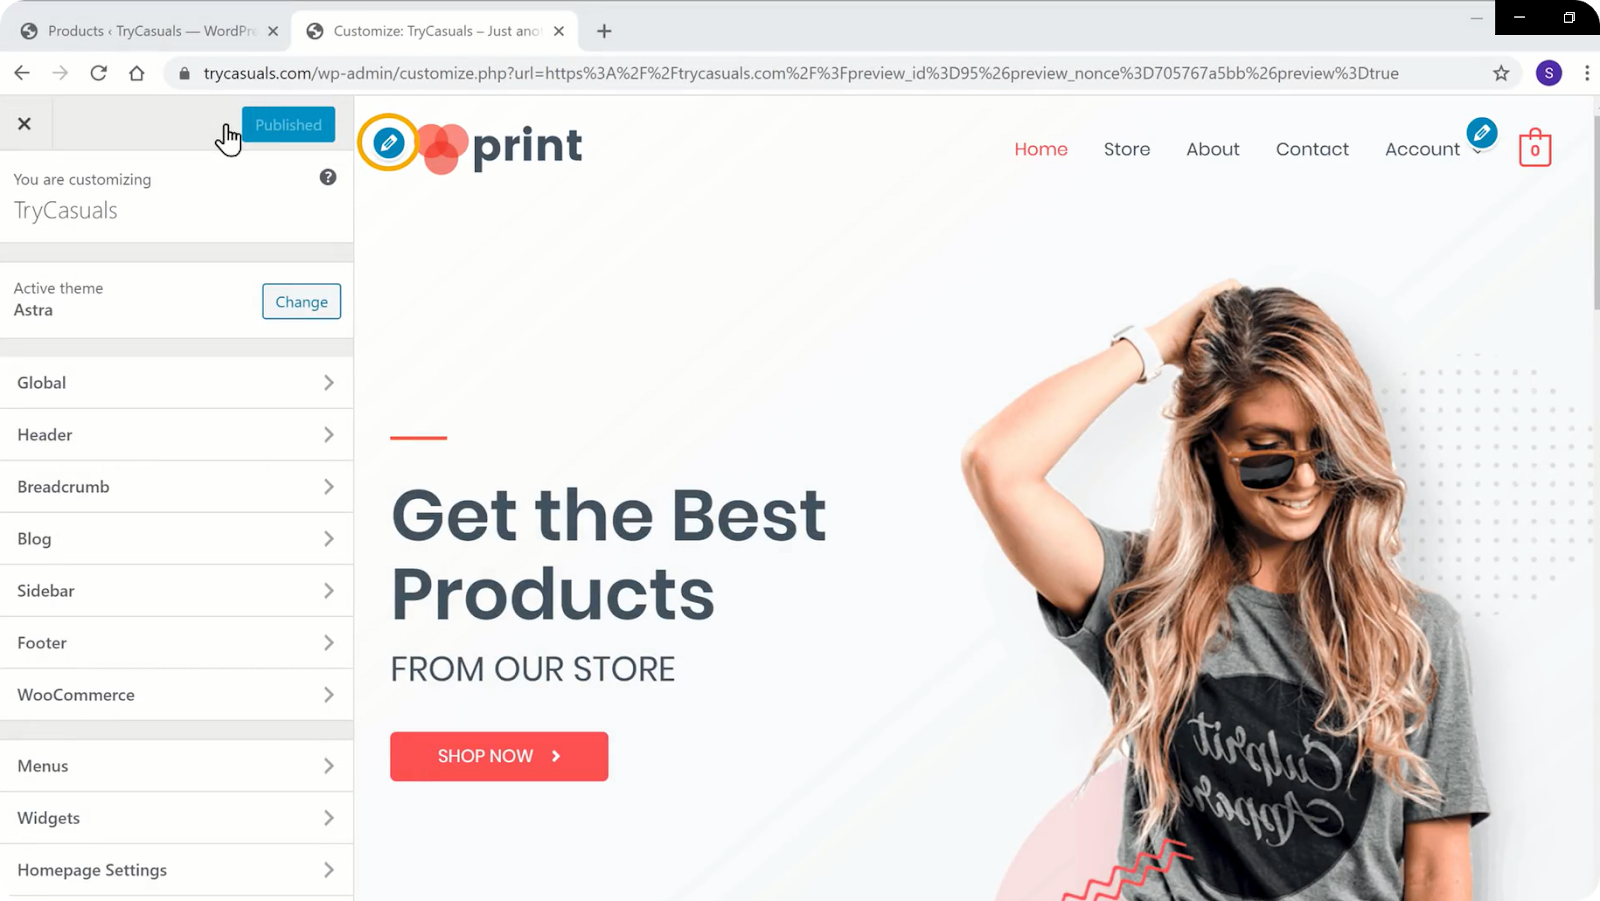
You can see that there are various blue icons on the screen. If you want to change anything, click on the blue icon that is lying next to it.
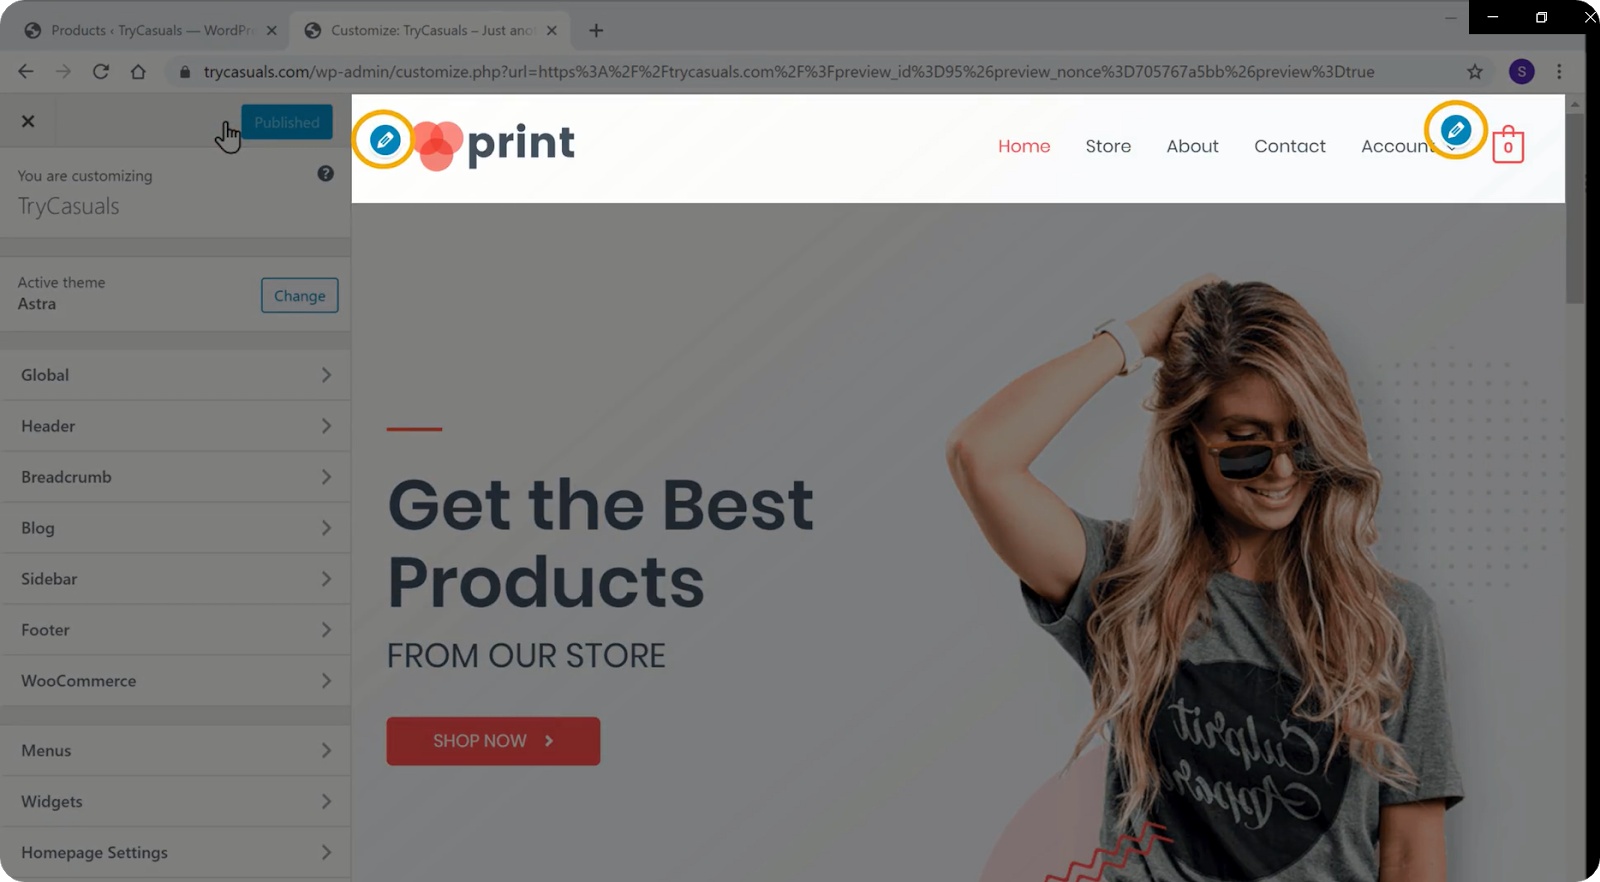
So, if you want to change the logo, click the blue icon next to it.
Now click the Change logo in the site identity section.
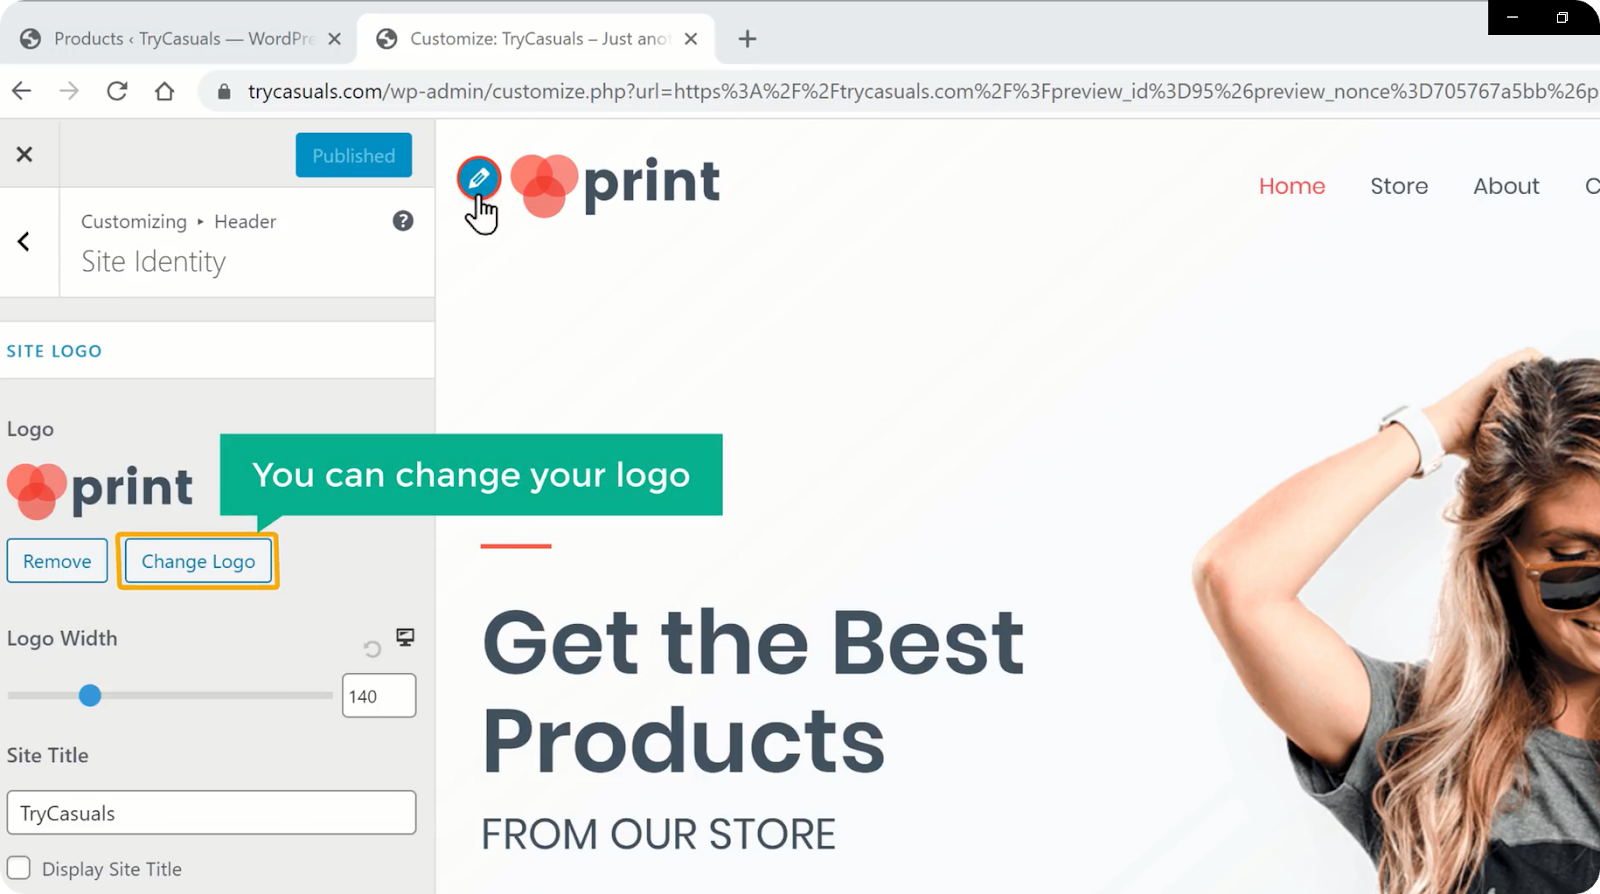
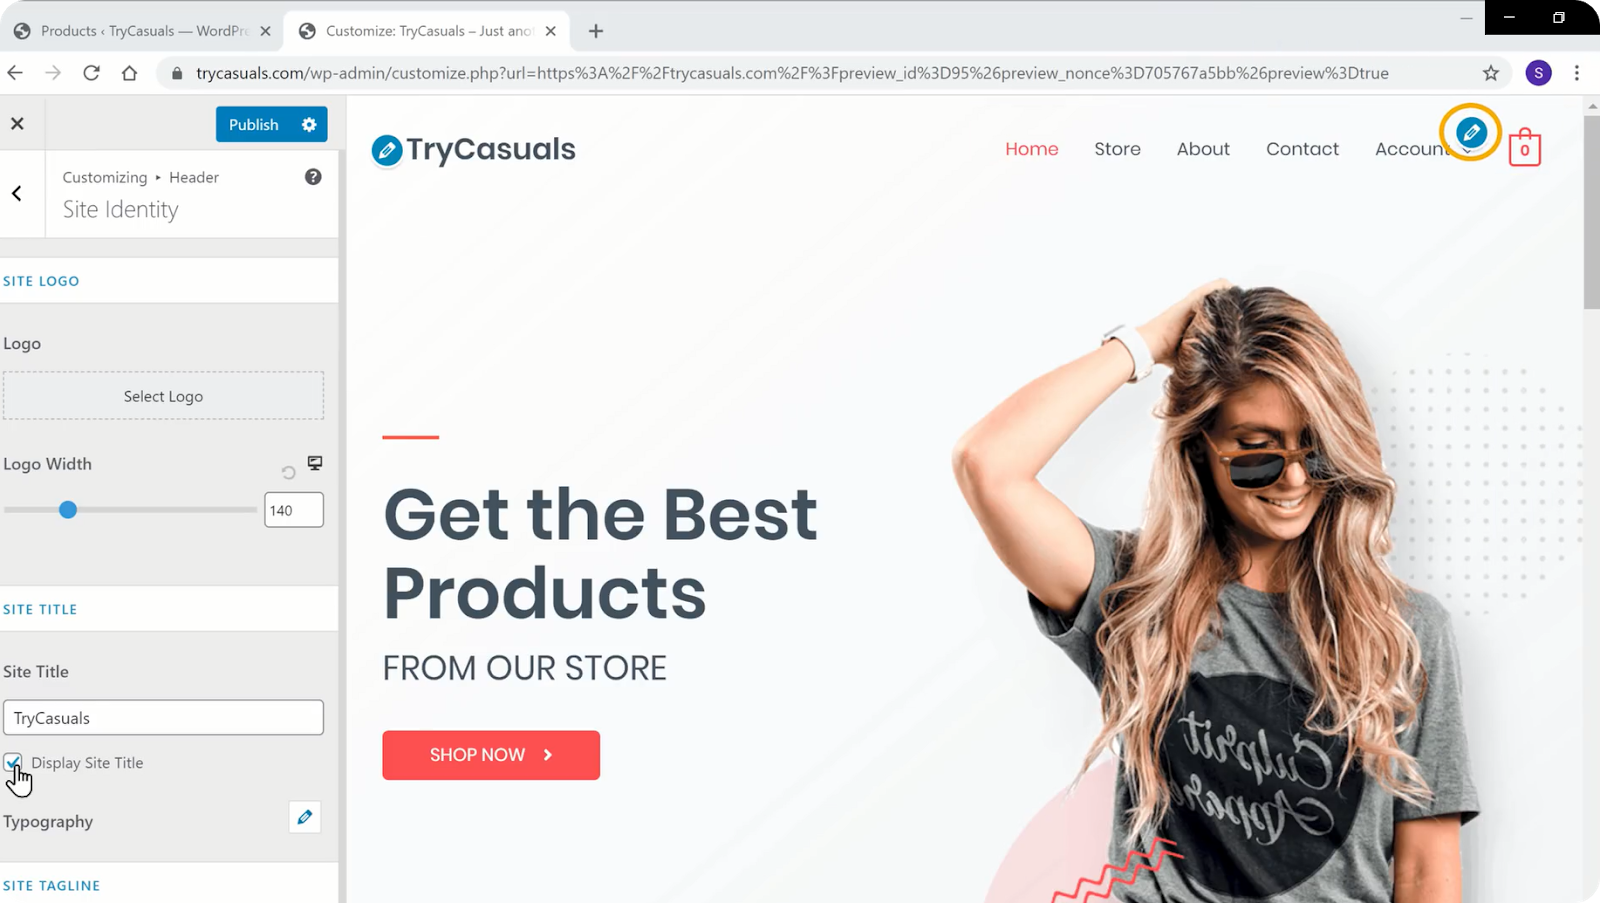
If you want to display your title as a logo, click on the remove logo. Now scroll down & select display title.
Once you’ve done with the changes, click publish.
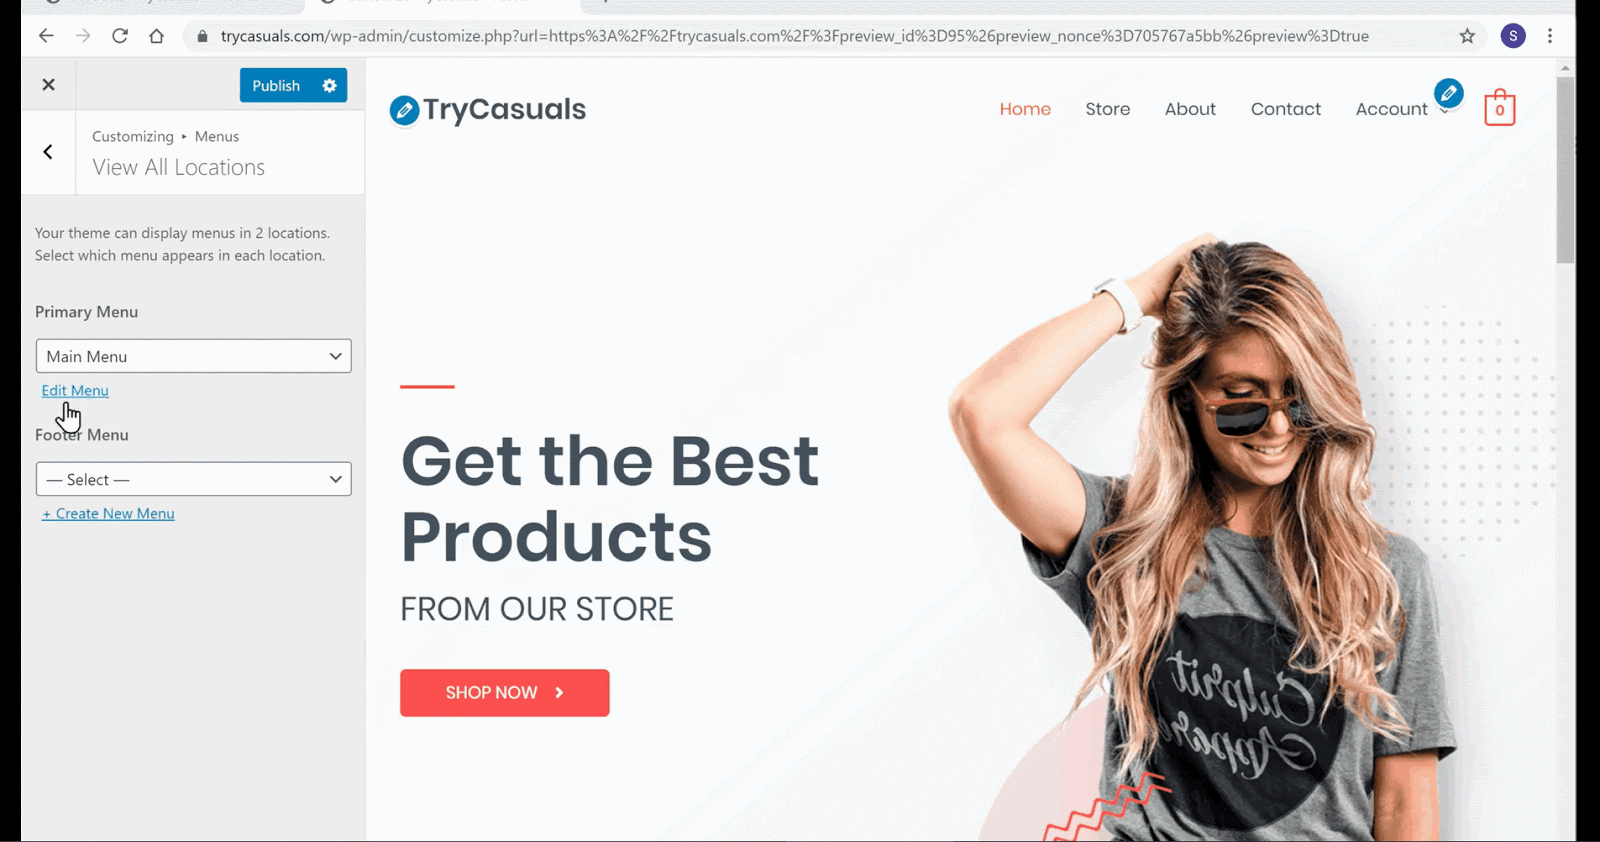
Do you want to change the menu? You can change it easily in the customizer section.
So let’s go into the next step where you can see how to change the menu.
To change the menu, click on the blue icon next to the menu.
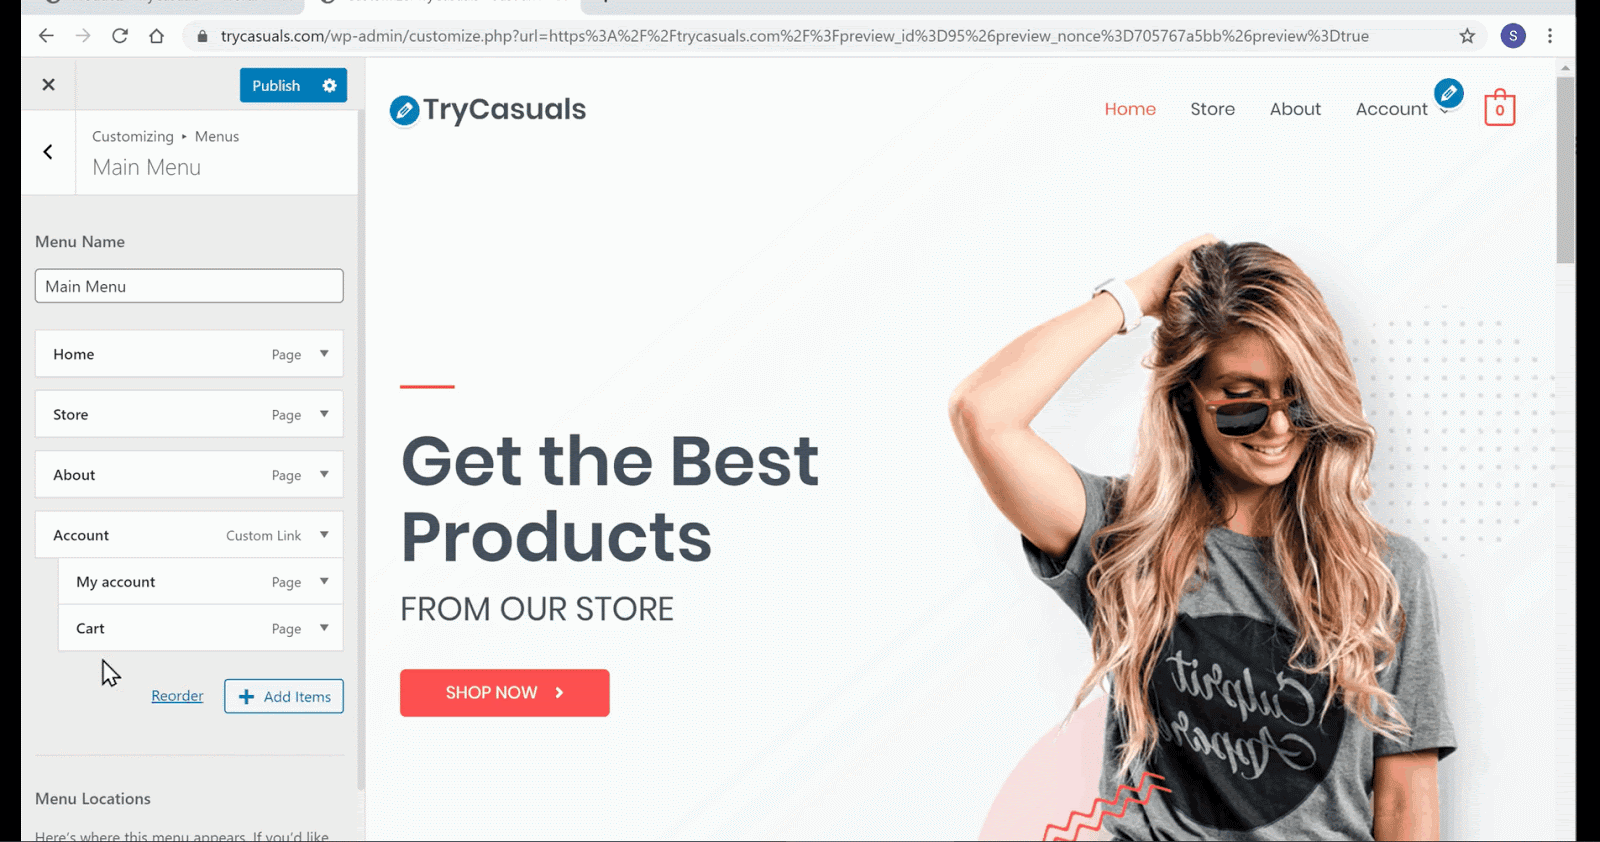
You will be taken to the menus’ section where you can edit the menus that are present on the website.
Click on the edit menu. You will be taken to the menu section where you can edit the items that are present on your menu. If you want to remove any page, click on the arrow & click remove.
You can see that the page is removed. Now if you want to rearrange the menu, you can do that by dragging the pages as you want.
You can see that the menu has been rearranged. Once you’ve done with the changes, click publish.
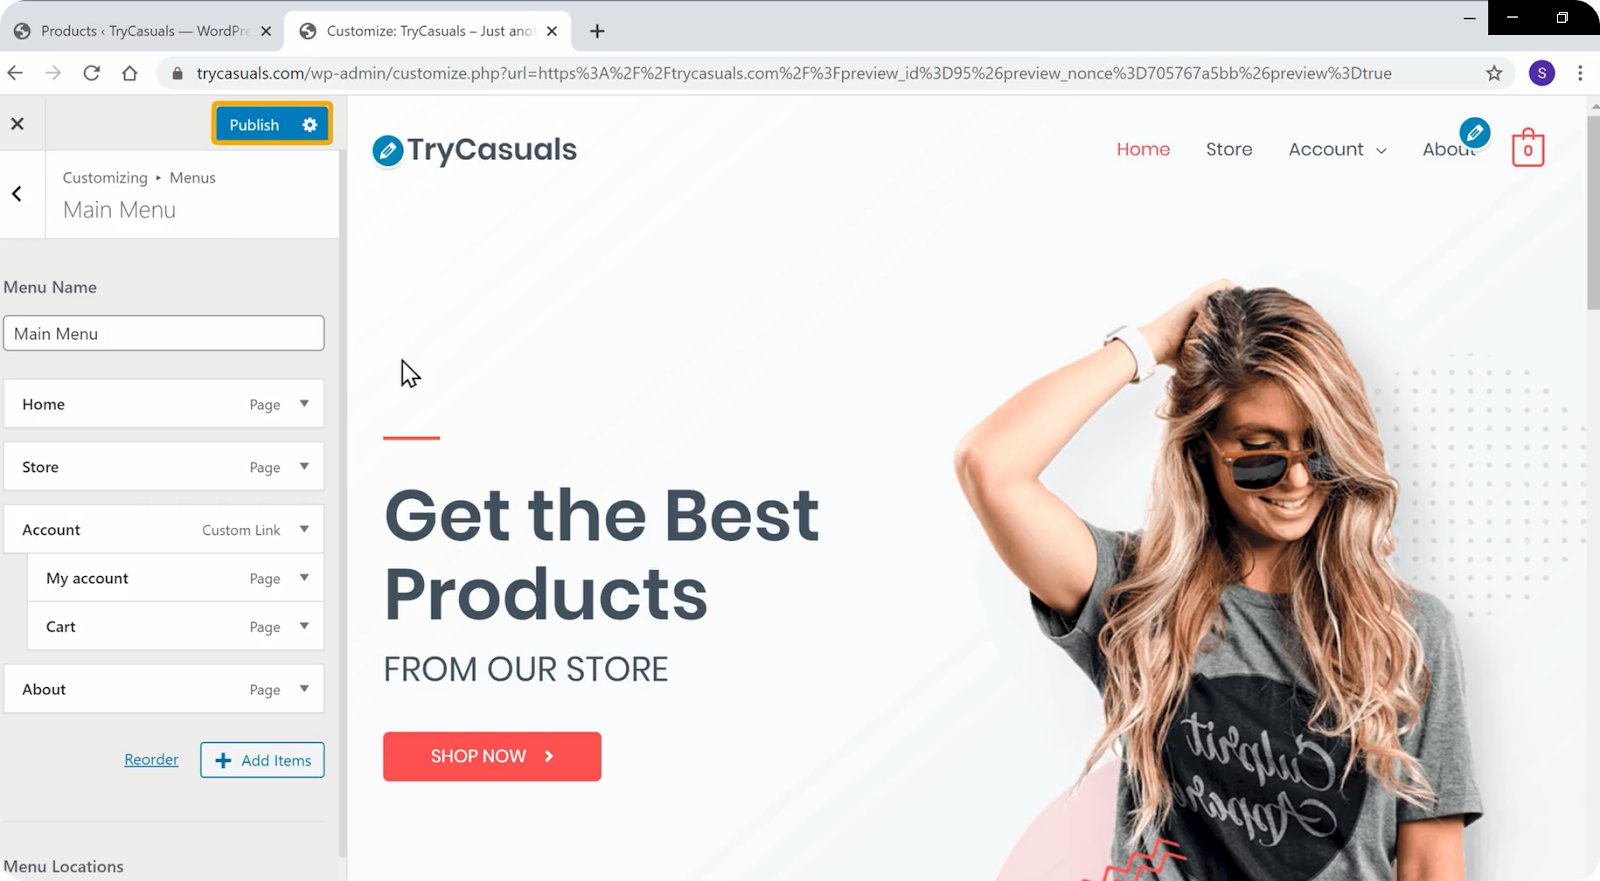
After you’ve clicked publish, the changes will be updated to your site. Refresh your website to see your website’s new menu & logo.
This is how you can change any menu on your website.
Now you have just created your own eCommerce website using WordPress for your business. With WordPress, there are thousands of features you can add to improve your website. And you can easily include these extra features with the help of plugins.
But there are thousands of plugins available in WordPress, and you may easily get confused with them. To make things easy for you, we have created a blog on the 15 Best E-Commerce Plugins to use on your WordPress website.
If you want to know how to add the coupon codes to your eCommerce website, please read our article here.
Over time, with increasing traffic, it is recommended to have an exclusive app for your eCommerce website. While it may sound complex to create a mobile app on your own, it’s quite easy and can be done even by absolute beginners.
Check our video tutorial on How to Create a Mobile app for your eCommerce website.
For more such video tutorials on customizing your WordPress website, subscribe to our YouTube channel.
Thanks to WordPress, you can create your own eCommerce website and start selling products in just 4 steps,
There are a lot of popular eCommerce-specific plugins like WooCommerce, Easy Digital Downloads that can make the entire process easier. However, with so many plugins, you need to be careful about the quality and number of plugins you are using on your eCommerce website.
You can use eCommerce-specific plugins for adding specific features like billing, and shipping to your website. To get started, check out our list of 15 Must Use WordPress eCommerce Plugins.
Over the years, more and more website traffic is coming from mobile phones. So, as an eCommerce owner, you can make use of this trend and create an exclusive mobile app for your eCommerce business. This way, your customers can easily access the products via an app, not having to visit your website every single time.
Also, creating a mobile app isn’t that hard as it used to be. Check our step-by-step tutorial on How to Create a Mobile App for your eCommerce website.
Do you want to learn WordPress to build any kind of website you want? Then this is the only course you need to take.
View CourseSEO isn't as difficult as you might think. Learn how to start growing organic traffic to your website with our easy to follow video .
Watch VideoSign up for our WordPress Course today!
Add a Comment
Leave a Comment